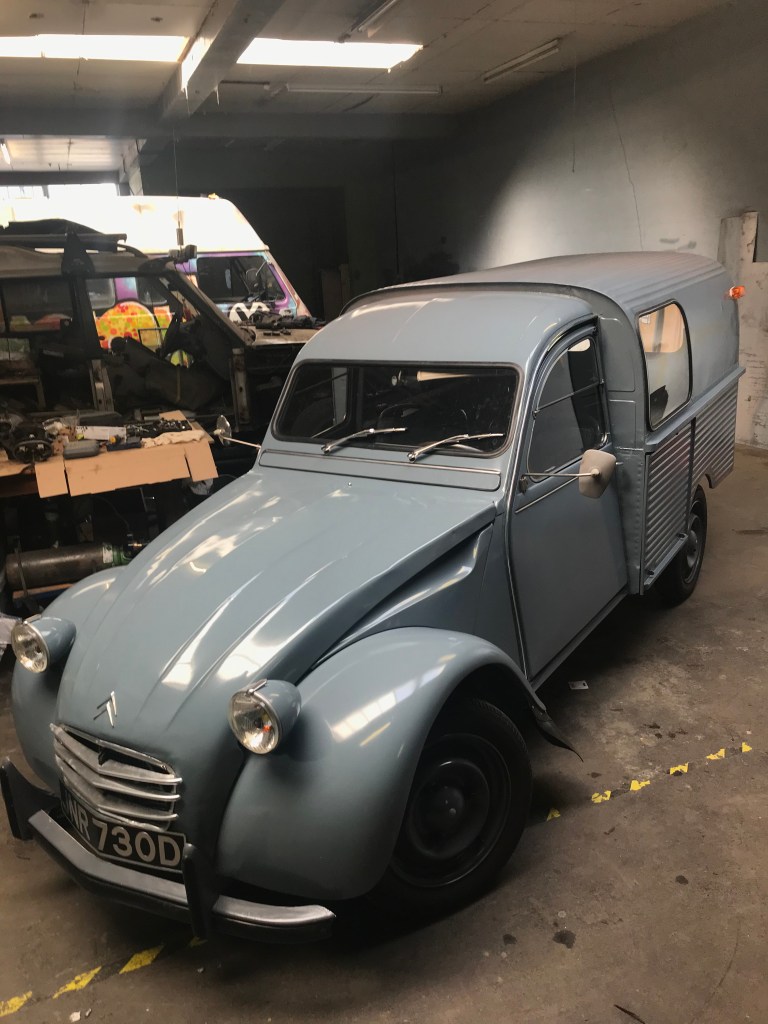
Done – well almost. There are still a few loose ends to tie up but I’m happy with the result and after a couple of test runs out, I can confirm that the van feels like it did before I started. The same rattles are still there (but none are new), the doors could fit better but on the plus side, it looks tidier and with so much new metal I feel a lot safer driving it than I did before all the restoration work.
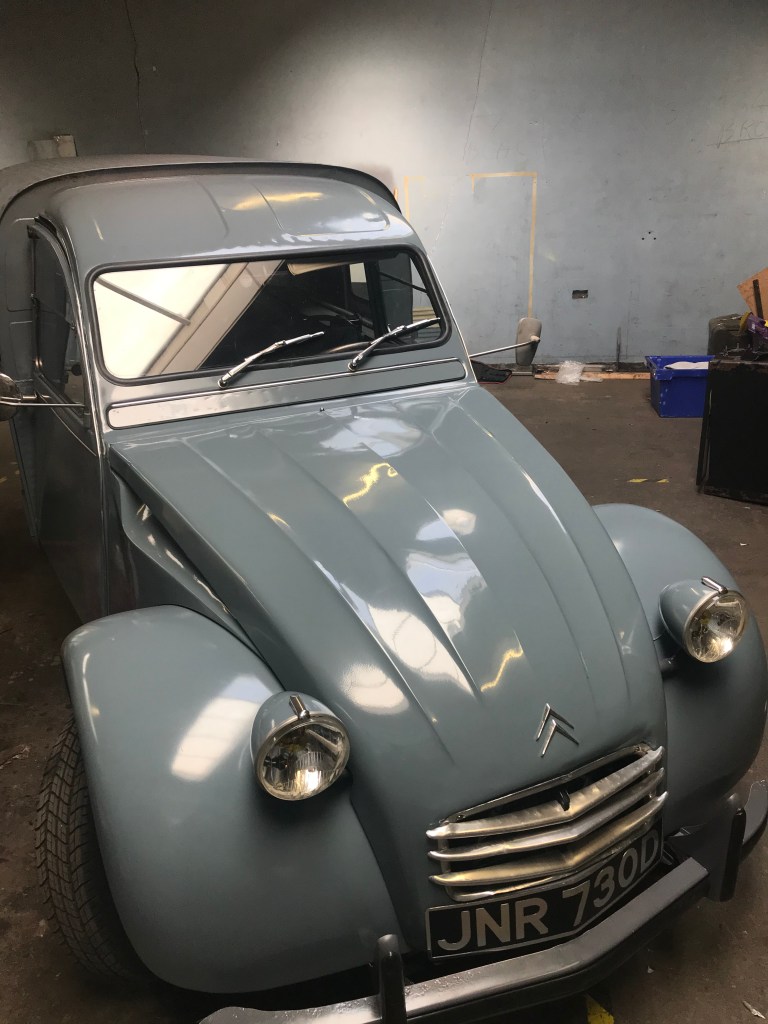
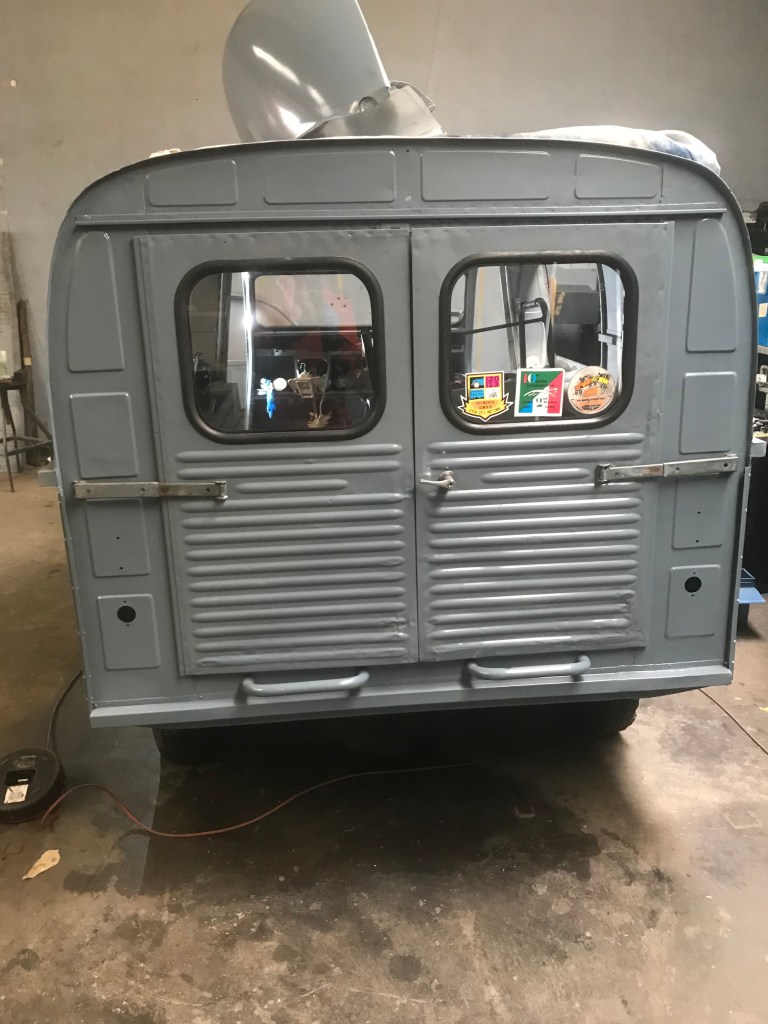
Outside – the paintwork will never win any prizes but it looks about right for an old van
Inside – There’s not much to it but it took a good deal of time to sort out, especially routing the cables and controls through the bulkhead.
I don’t know how the steering wheel boss got so battered – I might try and sort it out one day…
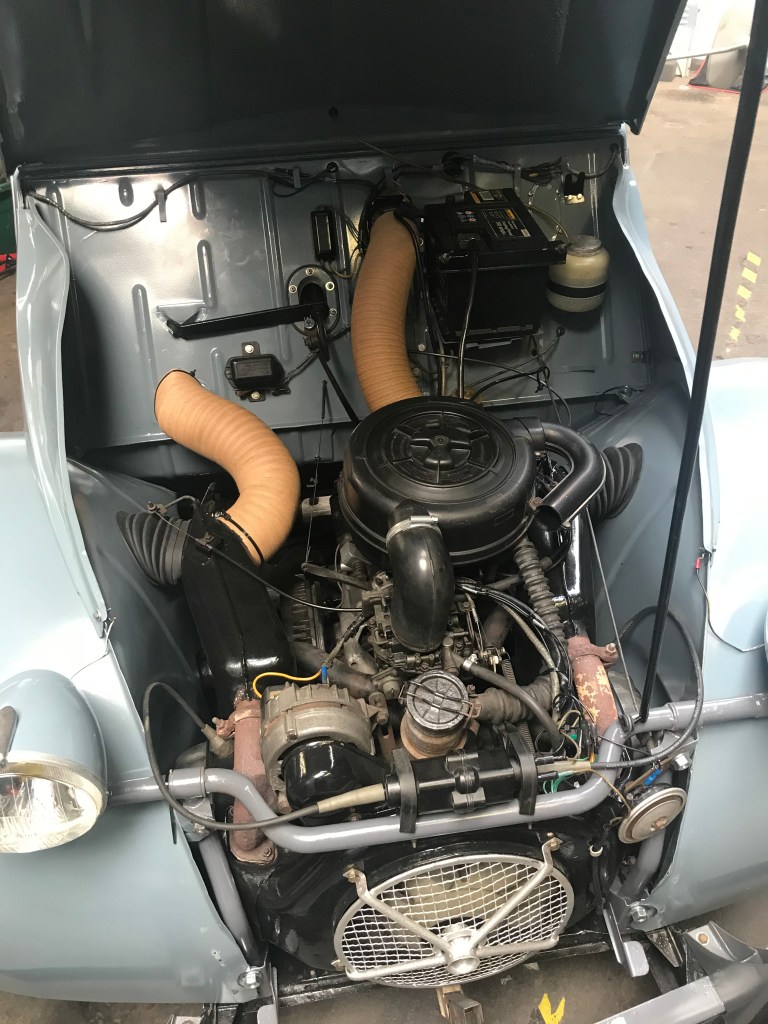
Under the bonnet – with so much new metal under the hood, it’s no surprise that it looks much better than when I first started – just in care you forgot, here’s a shot part way through the strip down.
And here’s one when I wondered if I’d ever get it finished
Looking back on the project, the top PITA jobs are as follows
Lights – I must have spent days working out what was wrong with the lights. I had parking lights – (these are the sidelights lit either left or right depending on which position the separate sidelight switch is on) , but no dipped beam. When I put the main beam on, both the dipped and main filaments were lighting up. Oddly, there was a scotch connector at the front which joined 2 of the 4 wires that connect to the lamp bar. These 2 wires were for each of the sidelights – one left and one right, so how they operated independently as parking lights is a mystery that will never be solved. 6 wires come out of the lamp bar. 3 of these had been snipped off and there were wires leading from one headlamp to the other which had been added at some point…
I just could not fathom out how any of it could possibly work, so I took the lamp bar off and sat at home with it, battery and multi-meter to try and work out what each wire was connected to. After a bit of investigation I deduced that there was a single wire for each sidelight – one for the left and one right. There were also separate wires for the main and dipped beam filaments to the headlight bulb. This was good news because I could splice each pair of dipped and main beam wires and do away with all the extraneous external wiring mods. I removed the scotchlock which joined the 2 sidelights together and I was good to go. I had 4 connectors at the headlamp bar (2 sides, 1 main, 1 dipped) and four connectors coming out of the front wiring loom, which meant that the switch gear could operate the lights properly. Or so I thought…. No combination of swapping connectors around would work. I moved further back along the loom into the dark recesses behind the battery box and speedometer. Inside is a birds nest of mostly green wires and a plethora of connectors, not all of which were used. There are more female connectors than males – anyway, these were put back together according to the labels I put on each connector when I removed the loom – with the same few spare wires floating about. To cut to the chase, it seems I’d wired the switch incorrectly. Eventually I got all the lighting functions I need, but not necessarily in the correct order. I can live with this.
Stripping old paint – I’ve banged on about this loads of times, stripping a brush painted car is just about the worst job in the world. If you embark on a restoration project for a car which has been brush painted then try and budget for soda blasting or expect to spend a lot of time and effort hand stripping. There’s no easy way to hand strip paintwork.
Welding thin metal – very, very tricky. More difficult when joining new metal to old, so try and avoid this where possible. It’s better to spend a bit more money on new panels than trying to patch up existing bodywork – unless of course you’re time rich and cash poor.
Bag, take pictures and label everything – even if it seems obvious what it is and where it goes – I spent countless hours looking at things I’d taken apart, trying to fathom out what they were and where they came from.
Know your limits – you can’t spend enough time preparing for paint, but when you do it yourself there comes a point when you have to accept what you are capable of – and what you have the time to do. If you want your project to look better than when it left the factory, take it to a professional body shop – BUT, it will cost you. It is very, very labour intensive.
Anyway- there we are. If you are reading this and are considering doing your own 2CV or one of it’s derivatives, then I’m sure you’ll enjoy the experience.
In my last blog I may have mentioned the oversight of not fitting a new clutch whilst I had most of the van in small and easily manageable pieces. I discovered the need for a new clutch when I tried to re-fit the clutch cable – and noticed that there’s was less that half an inch of movement in the clutch fork. Clearly this vital piece of detail was overlooked when I took the van apart – or if I did register it at the time, I immediately forgot it or filed the memory way in the place where I keep all the tools I have since replaced with new purchases.
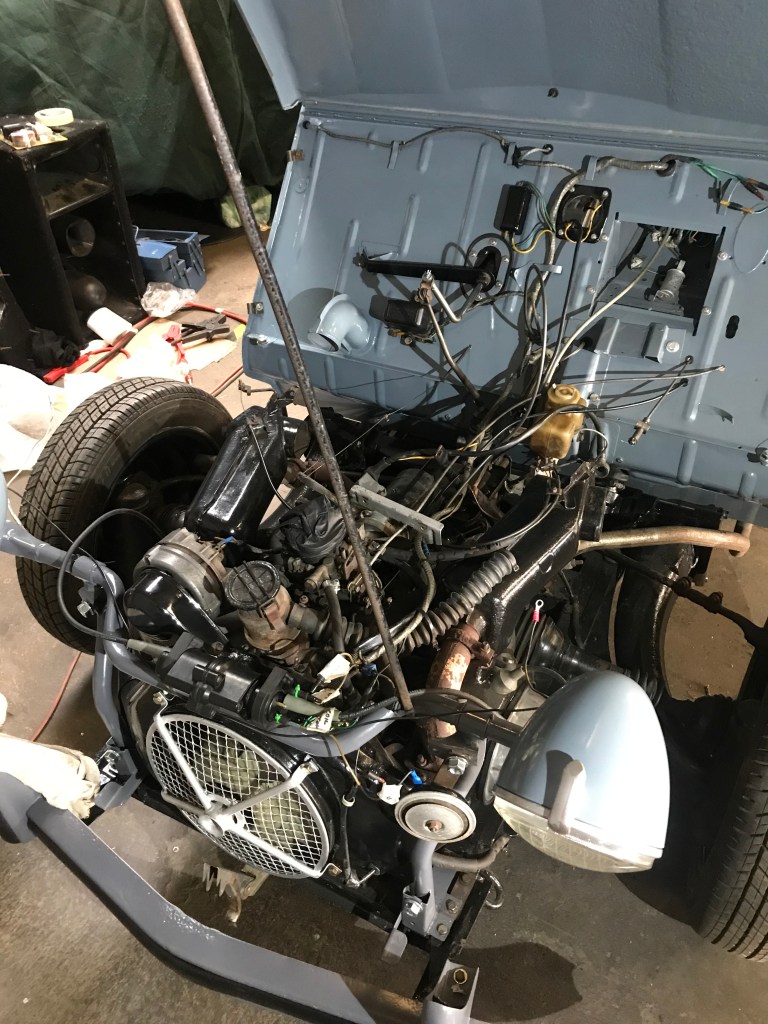
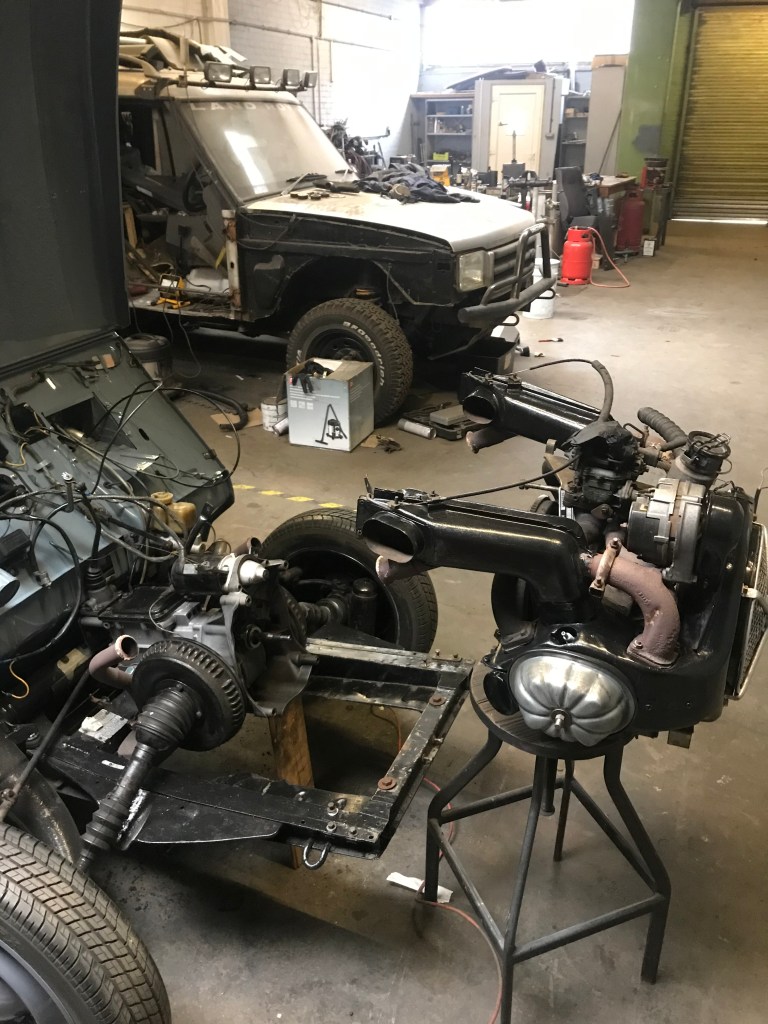
So – out with the engine then…
First a few bits need to be removed
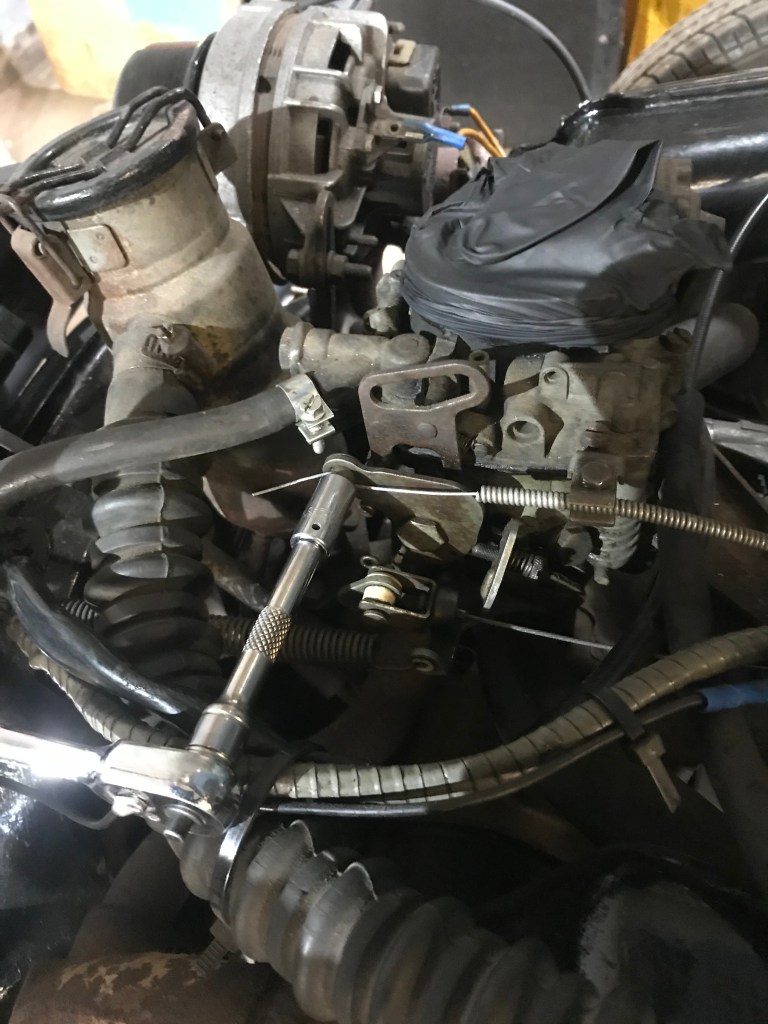
Air filter – only 3 bolts, two underneath the airbox and one which secures the assembly to the gearbox via a strip of metal
Wiring loom – unplug the connections from the lamp bar, remove the horn wire, take off the two connections to the alternator and move the loom back toward the bulkhead – out of the way of the engine
Remove the lamp bar. If it feels really heavy it’s because you haven’t first removed the bonnet stay and either removed the bonnet or tied it back. I didn’t do either of these things, so was left struggling with a lamp bar that felt like it was (a) made out of lead and (b) had designs on making it’s way across the workshop under its own propulsion.
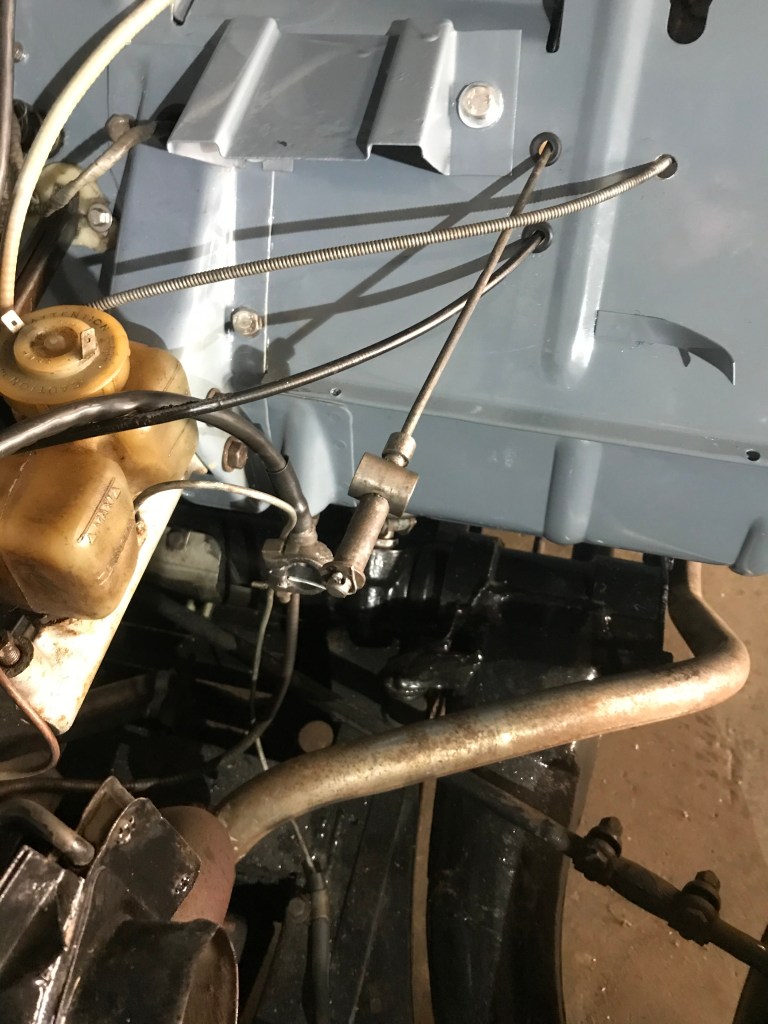
Remove the split pin and uncscrew the headlamp adjuster rod – then push it back through the hole in the bulkhead – collect the washer, small tube and threaded insert piece from the greasy pit at the bottom of the engine
Remove accelerator, choke and heater cables and tuck them out of the way
Headlamp adjusterChoke cable – the throttle cable is just below it
Undo the fuel pipe where it’s fixed to the chassis – under the front of the engine and plug both ends, using a suitable ‘plug’ – I used a couple of drill bits.
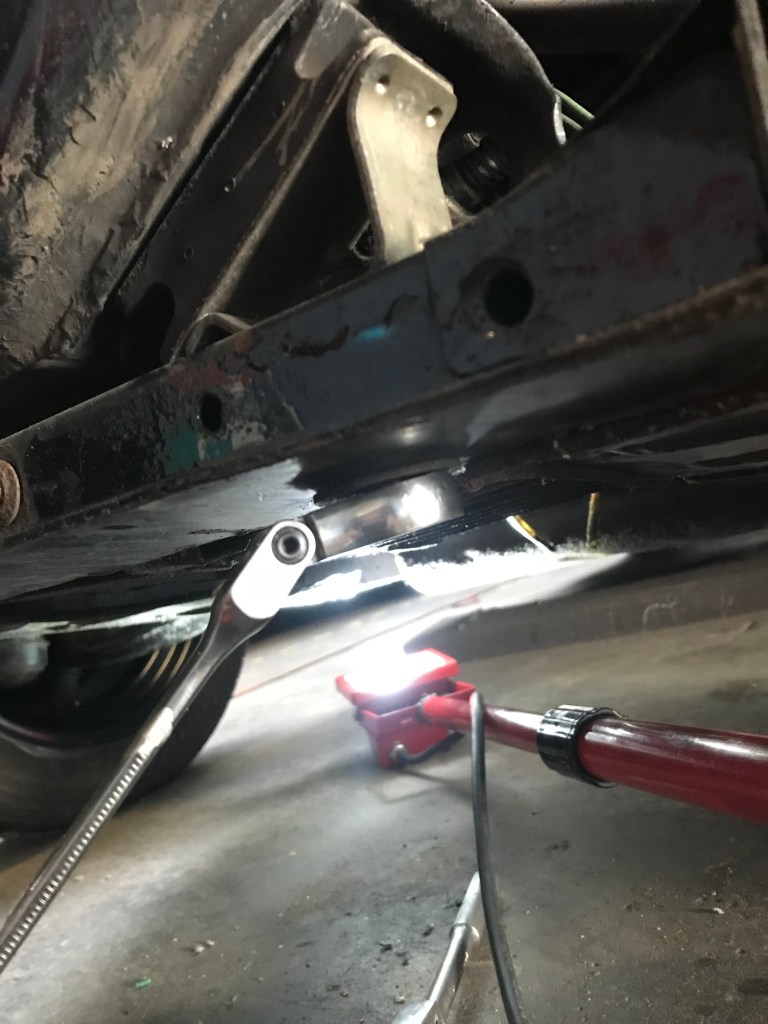
Undo the 4 nuts/bolts which secure the engine to the gearbox. 2 at the top of the engine and 2 at the bottom. Undo the 2 large bolts which go through the engine mounting at the front of the chassis
Front engine mount nut
Undo the 2 clamps which mate the heat exchanger pipes to the cross box – one on each side. If you are lucky these will come undone, if not the nuts might just snap off. No matter, these clamps are as cheap as chips from any motor factors – just don’t tell them they are for a Citroen 2CV (or a CV2 as Norfolk people like to call them)
Jack up the gearbox so that the front of the engine can slide forward without catching on the chassis rail at the front and prop up the gearbox with a bit of wood.
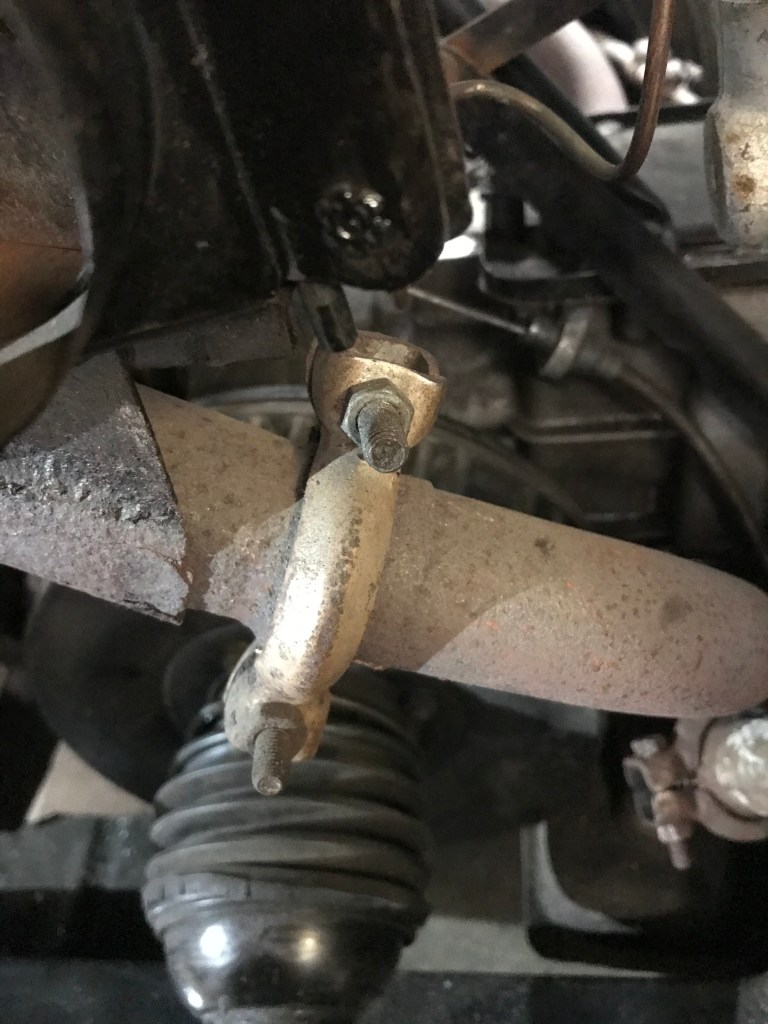
Looks like I’m going to need a new driveshaft gaiter.. or two
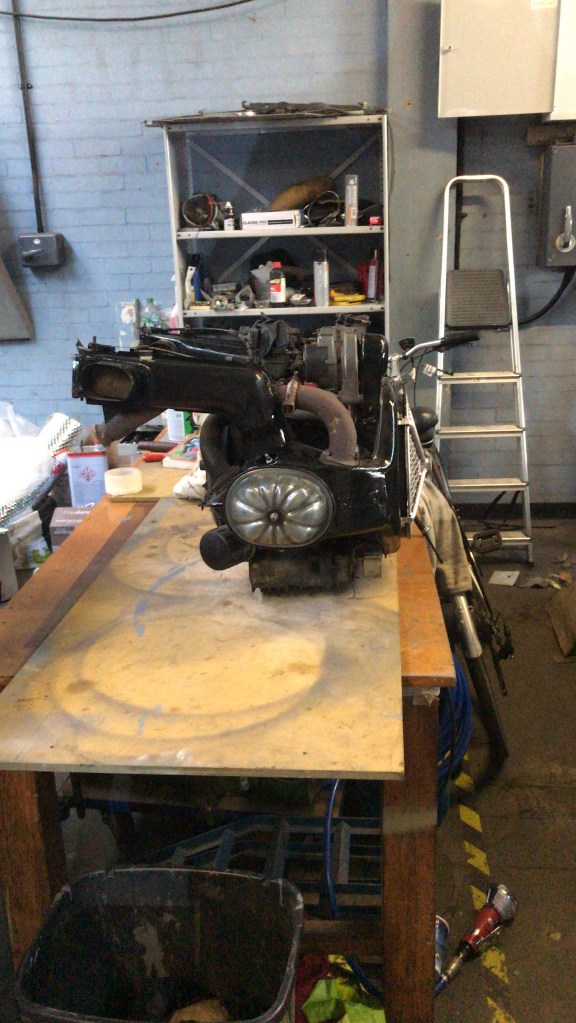
Heave out the engine and place on the bench. I’m making this bit sound easy because it is. The engine is quite heavy but easily lifted by 2 people. I had to move it on my own, which was a bit of a struggle but doable.
Time to take a look at the clutch
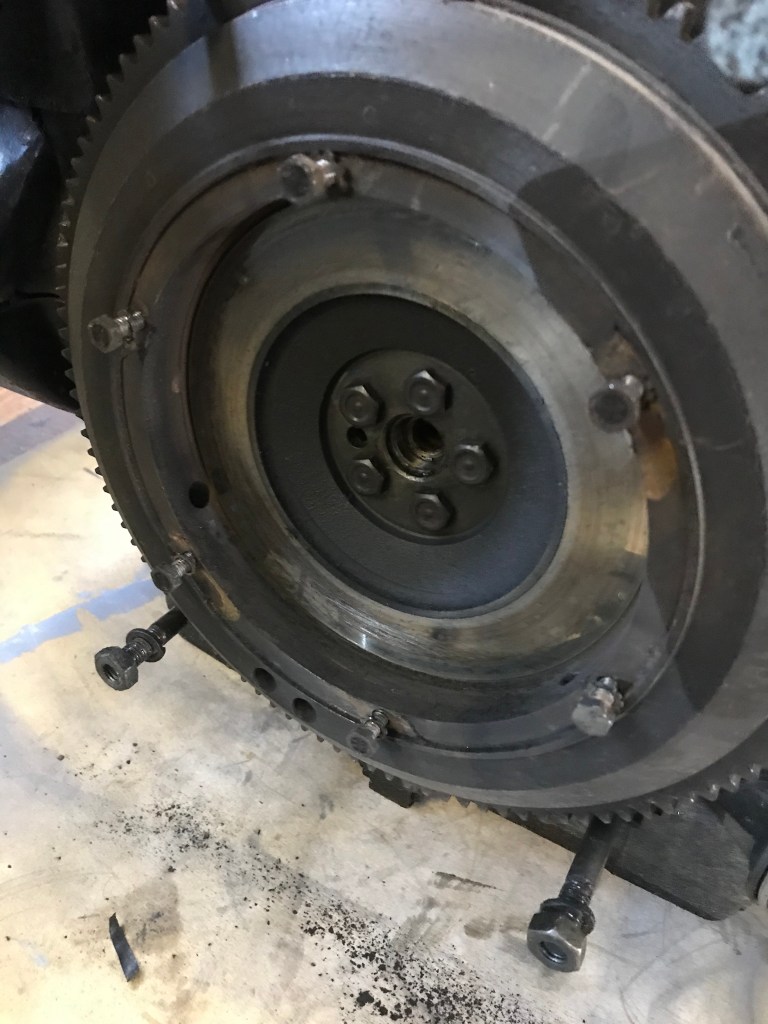
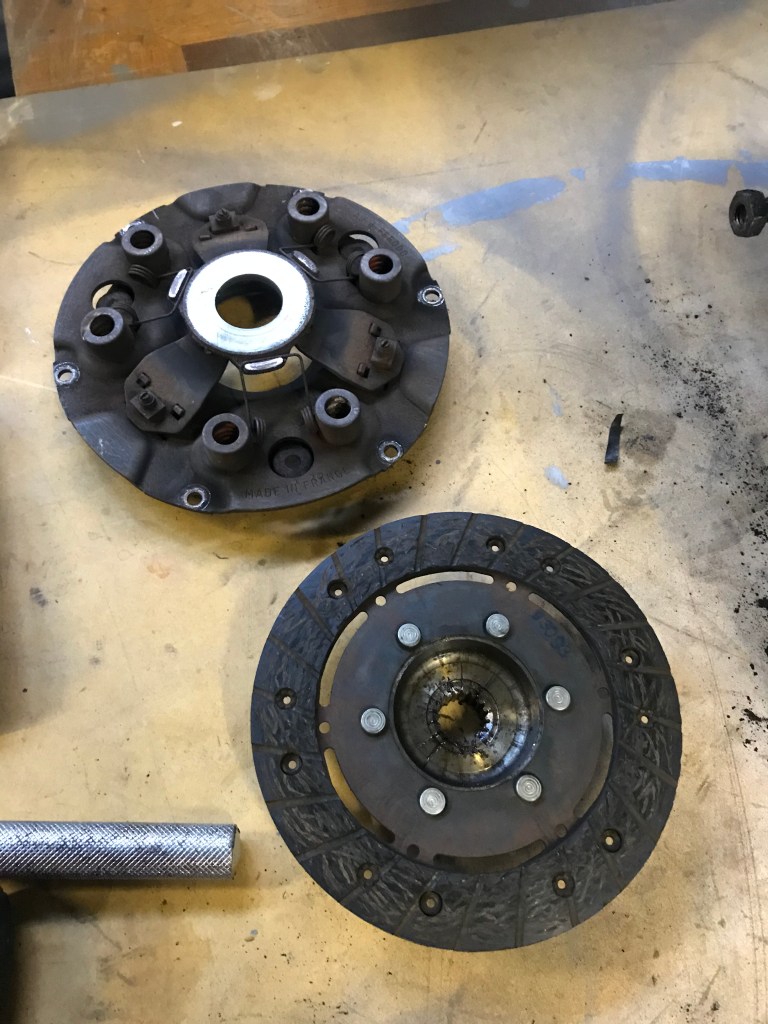
Unscrew the bolts that hold the cover onto the flywheel and remove the clutch cover and friction disc
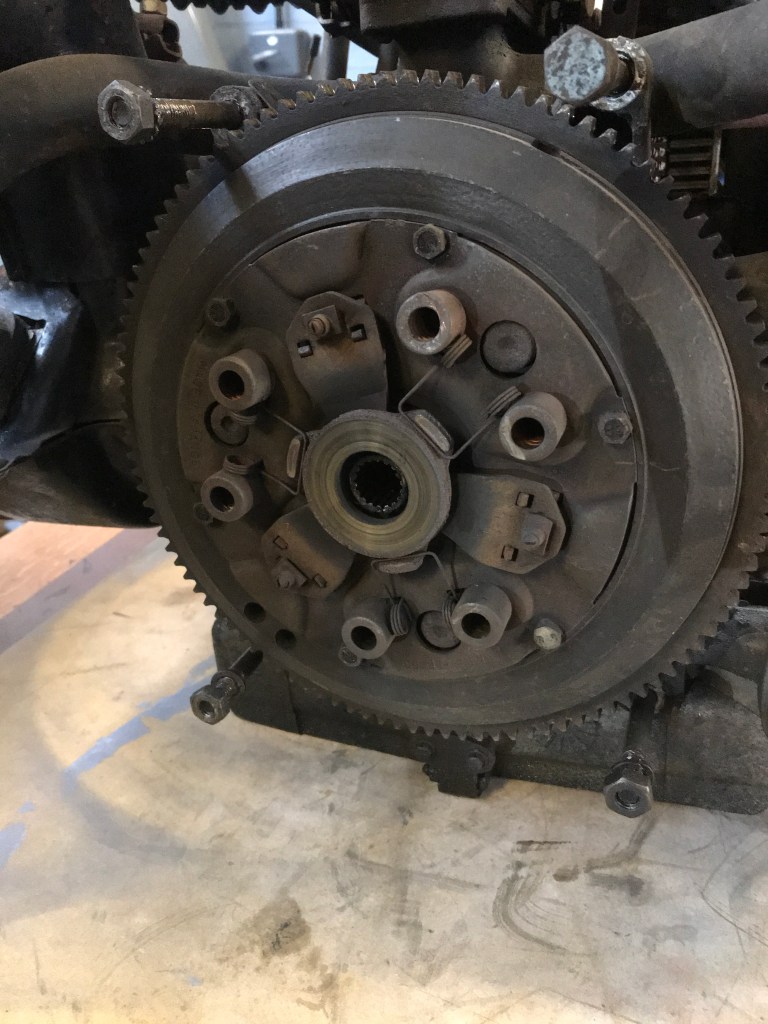
Flywheel – looks a tad non-standard to me!
Here’s where it gets interesting. This looks to me like a ‘Trafficlutch’ flywheel – with the gubbins removed that make the semi automatic clutch work. A trafficlutch enables the car to be left in gear when the engine is idling – it engages as soon as the revs pick up and is ideal for creeping along in traffic as one doesn’t need to use the clutch pedal. Anyway, the vital parts of this ingenious system are missing (crown and friction wheel etc.). I do have some parts I could use to fit the trafficlutch but I’m not going to bother with it this time. I really need to get the van on the road and retro fitting the trafficlutch parts isn’t going to be straightforward.
Here’s the friction disc and clutch plate. It doesn’t look it but the disc is very worn – almost down to the rivets, so I’ve caught this just in time
New parts on order – I’m going to replace the cover, friction disc and the graphite clutch release bearing, which is also looking very worn
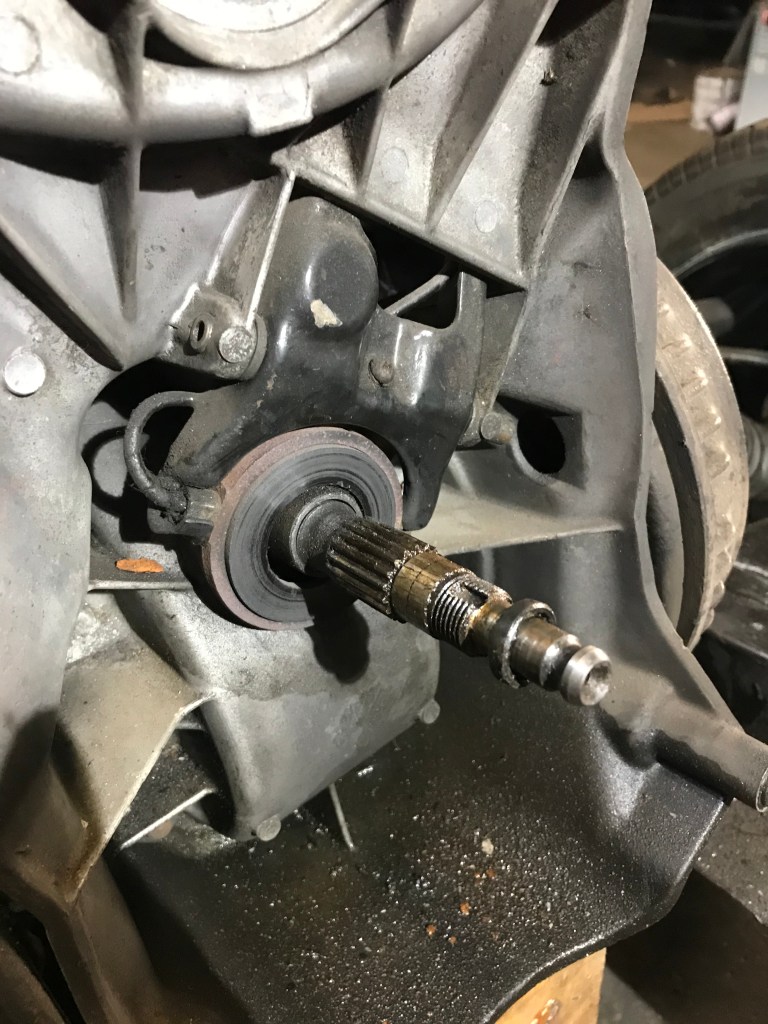
Release bearing. There’s a bit of oily mist at the bottom of the bell housing, but no obvious leaks so I’m just going to clean it up a bit. That notch in the gearbox shaft is for a woodruff key, part of the trafficlutch – it must still be stored in a jam jar somewhere…
Now that I have the engine out, I’m tempted to take off the tinware and do a proper strip down and paint job on all the parts. I’ll have to see how I’m fixed for time – maybe I’ll leave it for another time.
New parts arrived today from ECAS. Like many old 2CV’s I have a odd gearbox / engine configuration – older gearbox and later engine, so I decided to keep the same clutch type as the old one on the basis that it worked before I pulled it all apart so it should work when I put it back together again.
I bolted in the new clutch and aligned it by eye. I don’t have a clutch alignment tool – nor do I have a spare gearbox output shaft I can use to line up the clutch, so I made do with a socket set bar, some tape and my eagle eye. If it’s not properly centralised, then the engine won’t fit back onto the gearbox and I’ll have to heave it out again and adjust it. Fingers crossed, if not there will be more on this later.
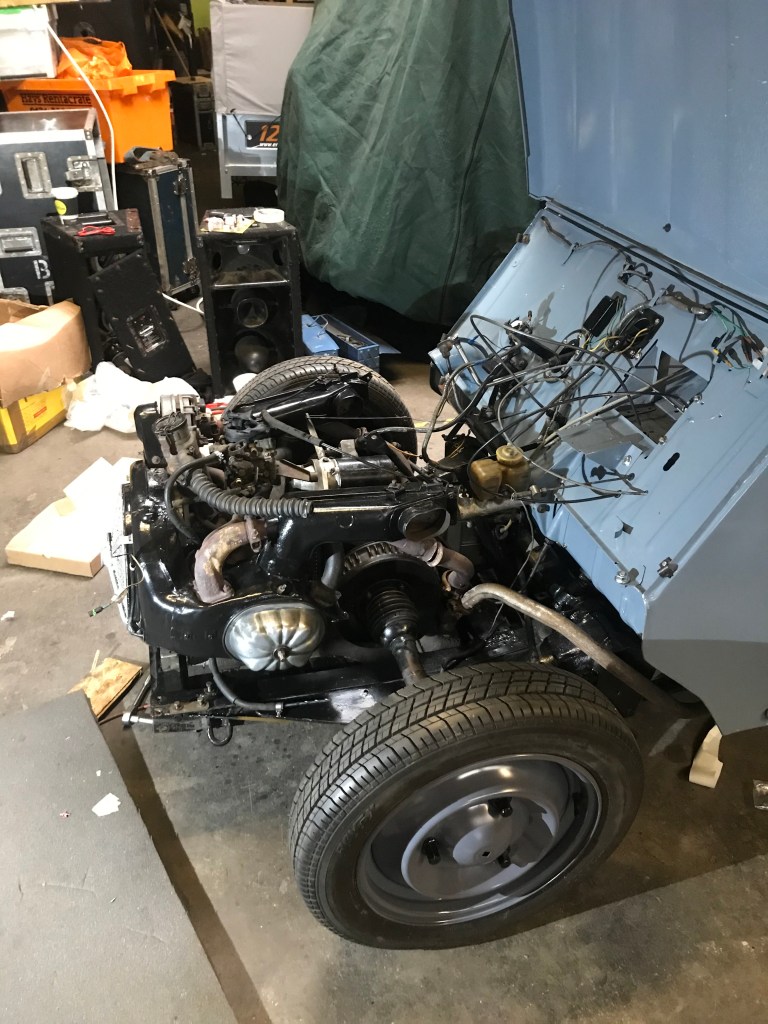
Ready to go back inDone!
I managed to get the engine back in on my own but it’s not a task I’d like to repeat without help. It took some wiggling about before it went fully home onto the gearbox. I then spent the next few hours connecting everything back up again, re-fitting the lamp bar, bumper, cables, exhaust, electrics etc. The good news is that it works! Clutch feels much better now. I could probably do the whole job again in half a day now.
Other news. The man shed part of the workshop have recently acquired a plasma cutter. It needs a 3 phase supply, which we have, so as soon as someone wires it up I can have a play with it. I can’t wait to see what havoc I can reek with this dangerously powerful electric metal light sabre
We were in a sober mood at the Old Mans Memory Club this week. One of our old friends Bill Wilson passed away a couple of weeks ago and we are steeling ourselves for what will surely be an emotional funeral. RIP Bill, we miss you.
It’s a long old job putting a 2CV back together.. much longer than I originally thought and much, much longer than it took to take is apart. I put some of this down to memory degradation – every time I pick up a bag of bits and pieces to work on, I have to first identify what they are and and they try and recall in what order they were removed. More often than not I have to resort to trial and error. Still – it feels like I’m on the home straight. I’ve no idea how many man hours I’ve spent on this project, all I do know is that I couldn’t possibly do this for a living – I’d never make any money. Also, the inner perfectionist in me has had to be suppressed as I have made compromises – particularly with the paintwork. It’s just not possible to get a perfect paint job on a DIY project.
So, where am I up to on the list of things to do?
Body bolted onto chassis and all the nuts and bolts done up – well, nearly all of them..
Master cylinder fitted to the brake pedal assembly and fitted to the bulkhead. This job should have taken about 10 minutes but of course I had some glitches to sort out. The new bulkhead and toe board panels were not a matched pair. The bulkhead was for a LHD suspended pedal box 2CV and the toe board was for a LHD chassis mounted pedal box 2CV, so I had to cut a hole in the toe board through which the master cylinder could be fed through and then the pedal box could be bolted to the bracket which is fixed to the bulkhead. I had to drill 6 holes for the bracket and cut out a square section to make room for the master cylinder. Anyway – it took a couple of hours to sort it all out – another hour or so to bleed the brakes (not easy single handed) but I do now have a firm brake pedal and brakes. I think.
Exhaust – this went on really easily – except that I had to drill a couple of holes in my nice new floor so that there would be something to secure the first exhaust bracket to. Easy job though.
Rear doors – fitted and adjusted. Then I spent an hour looking for the rear door handle – could not find it anywhere, so gave up. I’m sure it will turn up eventually (it did…). No door seals fitted yet as the old seals are covered with paint from the PO’s attempt at brush painting the van – without the aid of masking tape, so I will need to tidy them up before fitting or get hold of some new rubber.
Glass in! – one of the panes is upside down, but it will have to stay like that
Rear door glass x 2 – fitted these using the ‘string’ method. Basically one fits the window rubber to the glass first. Then slip a bit of lubricated cord (3ml nylon cord is about the right size, use Waxoyl as a lubricant) into the slot that sits either side of the door aperture. Offer up your rubber and glass combo and whilst pressing it into the aperture, pull the string so that the lip of the rubber seal is neatly pulled over the rim of the aperture. Rim, Rubber, Lube, Slot, Push, Pull…. rinse and repeat. I got them both in eventually. Not a job I ever want to do again.
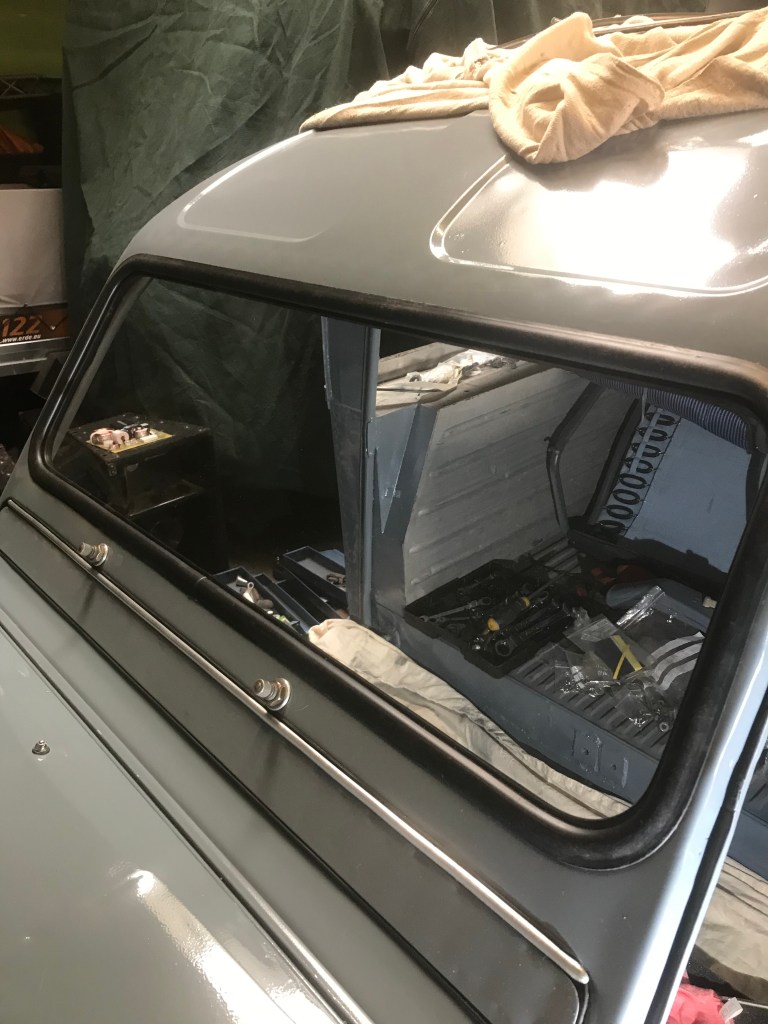
Brian turned up with my old front bumper which he’s taken to his friend who blasted and powder coated it. It looks great, still some visible pitting but the rust has gone and I’m sure it will look the part when I paint it grey to match the wheels and the lamp bar. ‘Let’s fit the windscreen’ said Brian – err ok then… More string, lube and manipulation and we had the screen nicely fitted within half an hour or so. There’s no way I could have done this on my own, so thanks Brian, you’re a star!
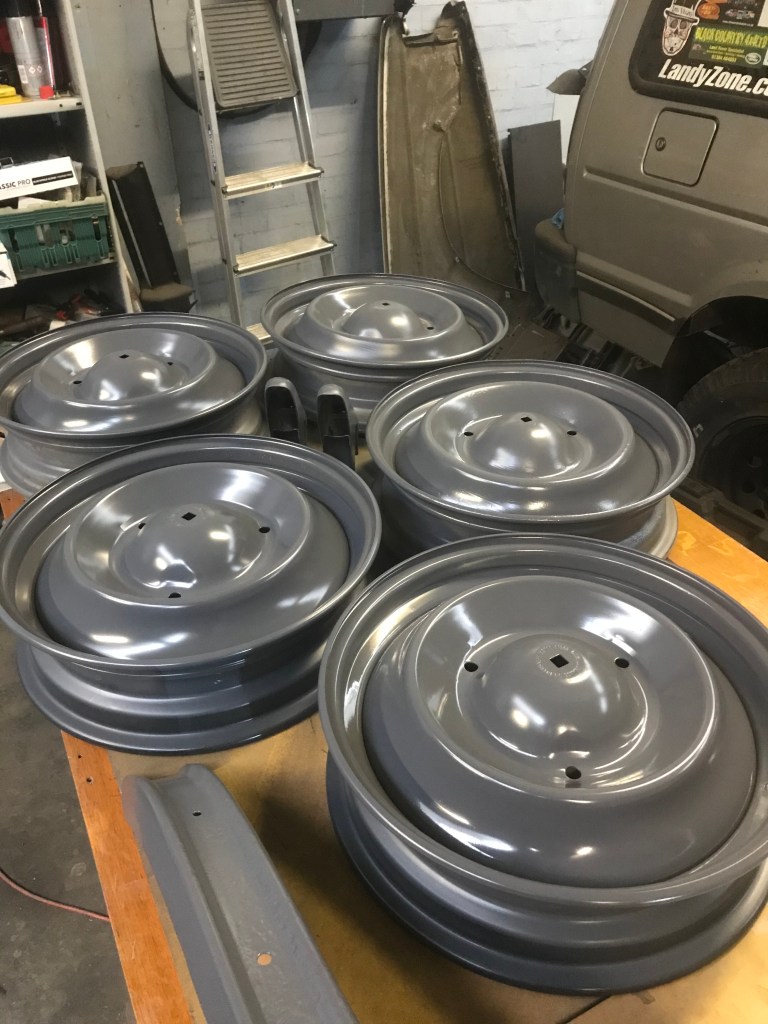
I had a proper rummage about and tidy up before I painted the wheels and the bumper and found the rear door handle – in a bag labelled ‘handle’. Brilliant. Wheels and bumper have been sprayed with a couple of coats of AC140 Gris. I should have got Gris Rose but according to my paint supplier, this grey is the correct colour for 1966. Anyway, I’m sure it will irritate the purists, but in the end they are my wheels and bumper, so grey they are and grey they will stay.
Chocolate button anyone?
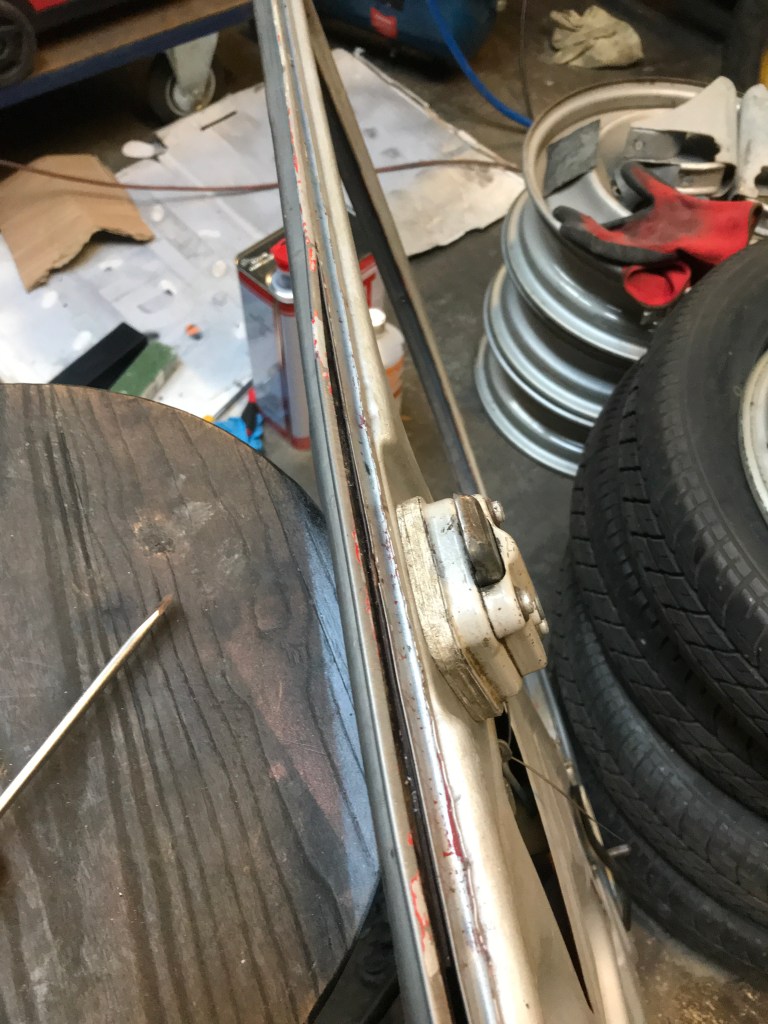
Next on the list was the side windows. These are fitted with a chrome strip which sits in the middle of the seal and expands it slightly holding it in place. With the fixing strip removed, I fitted the seal to the window aperture and then squeezed the glass in. After an hour of swearing and cursing, I finally managed to get them in place. The ‘chrome’ fixing strip has broken into many small pieces, so I’ll need to get some more. It looks as if it’s the same profile as an old Mini windscreen, so that’s what I’ll get.
Wiring – well, lets’ just say that this is going to be a mission. I’m going to see if I can get the engine running before I connect up the rest of the loom – more on this later but first I will need to fit the cables and route them through the firewall, which will mean drilling a few more holes. The fuel tank will have to be drained and re-installed – talking if which, where does one dispose of 15 litres of stale petrol?
I still need to buy some more parts.
A rubber mat for the front floor is top of the must have items. I haven’t done a leak test yet, but I’m expecting all of the rubber seals to let water in – a tube of sealant will also be added to the list. I also need the gasket which fits between the master cylinder and the bulkhead, but this means I’ll have to take the whole thing out again to fit it, then, which entails draining the brake fluid and bleeding the brakes again.
Five blanking plugs for the wheel centres – not essential but I will get them because they will be easy to fit and will finish the wheels off nicely.
A set of black / silver number plates
A pair of unobtanium clips to hold the chevrons onto the bonnet – I have no idea where I’m going to find these
Other news – I tried to get a parking permit for my Van from the City Council but apparently it doesn’t exist according to their records. This can only be a good thing as they won’t be able to issue a penalty ticket, because if they do, I will ask them for proof that my non-existent van was parked where it should not be. Watch this space!
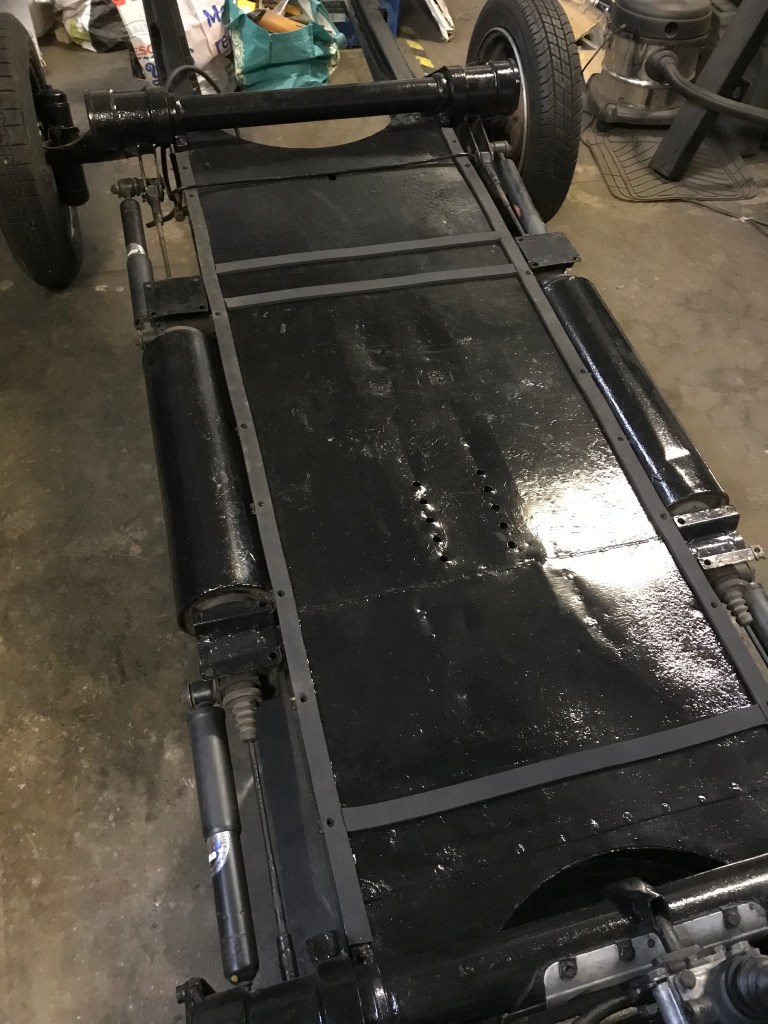
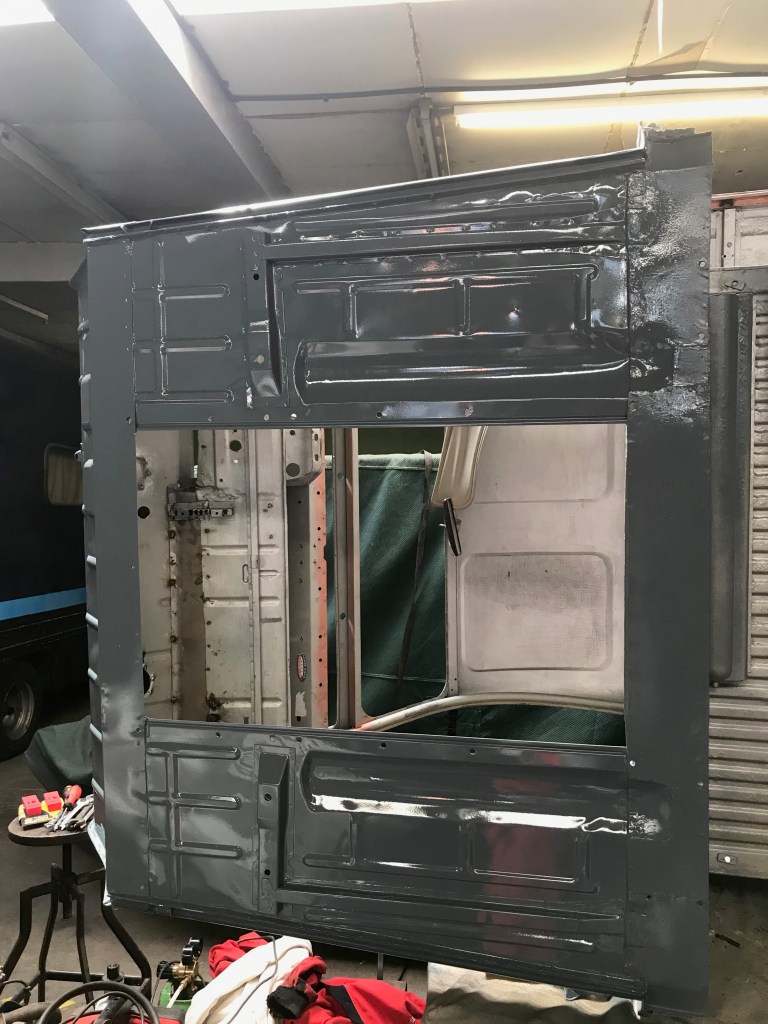
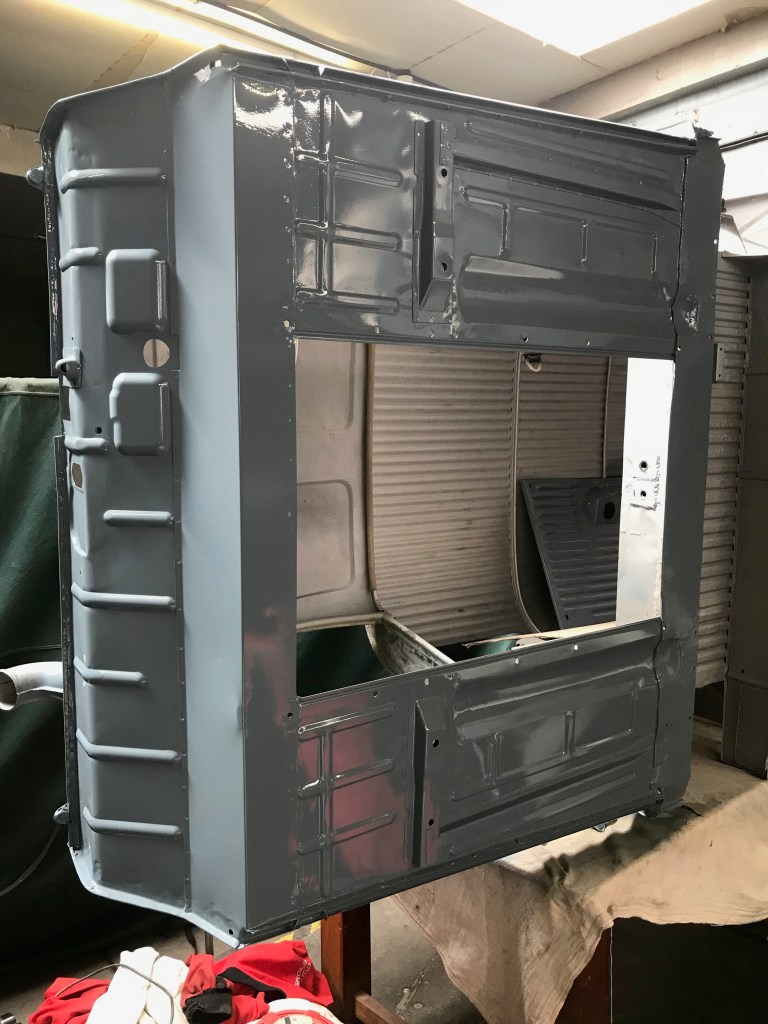
The reassembly has started. The first and most important job is to re-unite the new replied and painted body to the platform chassis – the underbelly of the 2Cv. Most cars these days are of monocoque construction and so have no chassis as such. All the running gear is either fixed directly to the body shell or to subframes, which are then bolted to the body. The 2CV is ‘old school’ and therefore has a separate chassis, to which all the running gear is installed. It is perfectly feasible to get the chassis, without body into a state where it can be driven about. It will be cold and uncomfortable and is not recommended.
The body is bolted to the chassis by a number (20 or so) M7 set screws (bolts) which are fastened to nuts or threaded J-clips. M7 is not a size that your normal nut and bolt merchant will have in stock. Mostly, the chap on the other side of the counter will tell you there’s no such thing. ‘They are not available, they don’t exist’ is a common response. When you produce an example for him/her to inspect, they will produce a tape measure and try and convince you and themselves that the size is M8. This is what happened to me when I went to Lamberts in Norwich (Specialist automotive Fixings shop). When shopping in these places, once should always take the trade counter entrance. This will set you aside from a normal ‘punter’ who’s likely to be troublesome, needy or both but will guarantee you a long wait at a counter. Behind the counter, there will be lots of staff who are all busy doing nothing. No-one will come forward to serve you because (a) you are a stranger in their domain, (b) you are holding something like a nut or a bolt which means they will be required to engage with you in a way that is alien to them, (c) you don’t have an account, which means that even though you are paying cash, they will need to produce a ‘ticket’ for you, which will be printed out on an old dot matrix printer in triplicate – you will get the yellow copy, the other two copies, white and blue will be posted through a slot in the counter, never to be seen again, (d) the person serving you will answer the phone and start a conversation about football, after which they will have no knowledge of you or what you are in their domain for, (e) you will be triaged by a set of rules which have no basis of logic and cannot be circumvented by any means, (f) someone will eventually try and help you but it is their first day and in order to do anything other than say ‘can I help you’ or ‘Who’s next’, will need to involve another member of staff who is otherwise engaged – on the phone talking about football or busy doing nothing. I’m sure you get the picture.
Never mind, the things you want are available from your friendly Citroen 2CV specialist, so if you are in need, then you will just have to order some in advance, which means you need to know that you need them before it becomes apparent that you actually do need them.
Anyway – that’s enough ranting for this episode. I stuck some closed cell foam tape around the chassis, punched holes in the foam to correspond with the holes in the chassis and popped on the M7 J-clips that I’d previously stored in a plastic bag labelled ‘Chassis Bits’ along with a lot of other parts, who’s location (I hope) will become evident at some point in the future.
I also out some tape in place where the cross members sit on the chassis – honest!
Pete, Steve and I lifted the body back onto the chassis and with a bit of shuffling around, managed to get a couple of bolts in place to keep the 2 halves of the 2CV sandwich together. I had a look down each side and at the rear where the chassis runs under the back of the van and all of the other bolt holes are lined up nicely. A huge relief, given how much re-work was done on the front of the van – thank god for the chassis jig – I would have been in a right pickle without that. Here it it is then, starting to come together
‘Lets put the wings and bonnet on before we go for a beer’ – said I, enthusiastically. The wings would not fit at the front, no matter what we did, the studs in the lamp bar were about 10 ml higher than the corresponding lugs in the front wings. What to do…. ? By this time, Brian had turned up in the workshop, so were 4 chaps who have all been tinkering with cars since we were teenagers, so we were sure that we’d be able to figure out a solution. Suggestions were as follows:
Remove the lugs from the wings and re-weld them a bit higher up – tricky because the bottom lug is sandwiched between the 2 skins that make up the wings. I’d also have to repaint them again afterwards – not ideal
Pack the underneath of the lamp bar mounting points where they meet the chassis with a 10 ml lump of steel – ‘Ah but if you do that, the bonnet with hit the lamp bar and won’t close properly’ said Brian, helpfully. How about if we cut the lamp bar above the top mounting point, remove 10 ml of metal and then weld it back on again, that will allow the bonnet to sit a bit lower..
Ok – lets leave it for now and just slide the bonnet on before we go to the pub. That didn’t go well either, the new hinge on the windscreen repair panel is not the right profile to allow the bonnet to slide in easily – when we did eventually get it in place, it we couldn’t get it much further than half way closed before the hinge started to bend – it looked like it was about to peel away from the panel, so we took it off again and went to the pub.
The next day I went down the workshop and had another go at it. After an hour or so of fiddling it dawned on me that the bumper brackets were stopping the wings from going as low as required, so I took the brackets off.
My guess was that the bumper brackets were incompatible with the new ‘old style’ wings I have on the van now – or the lamp bar is not right. Perhaps I need to get a different bumper or a different set of brackets or modify what I have in order to make it all fit together. I’m tempted to just get a new tubular ‘PO’ bumper – I don’t think the bumper brackets are needed for this type of bumper. If they are not, then the problem might be easily solved. I will seek advice from the expert Roy at ECAS before I do anything rash and start cutting things about.
at least the wings fit at the sides, sort of..
I went back to the workshop the next day, took the bumper brackets off, removed the lamp bar, put the wings on and then realised that if I raised the lamp bar by a few ml, the wings would fit just behind the bumper brackets. All I needed was a couple of spacers. I found them in the bag marked ‘Chassis Bits’…. brilliant. I popped the upper wing panels on and had to fiddle about with the lamp bar spacers again to get all the gaps right. What I should have done, was to have sorted all of the panel fitting out before I painted everything. Oh well, we live and learn..
Wonky grill! – actually it’s the bonnet that’s bent – I’ll have to see if I can massage it a bit more
Another flurry of painting sees the doors finished, along with the vent flap (3rd time lucky) and the door hinges also got a coat of blue.
Not a great finish but the paint is still wet and not fully flashed off – the strip lights don’t help as they magnify every small imperfection. It should look better when the doors are on the van
The doors will as be the last thing to go back on, there’s an outside chance that they will be properly dry in a couple of weeks time. There are plenty of other jobs to be done before that can happen, so I will need a list:
Finish bolting the body back onto the chassis
Prep and paint road wheels, get tyres put back on
Paint the inside of the van (rear floor, sides and roof)
Fit the rear doors
Fit the windscreen, side and rear windows
Fit the brake master cylender back on, bleed and adjust brakes
Fit steering column and switch gear
Install, wiper motor, vent flap, windscreen de-mist vent, speedo, handbrake mechanism and gearchange gubbins back onto the dashboard.
Attach the Clutch, accelerator, choke, heater, speedo and starter ‘pull’ cables
Fit windscreen, side windows and rear door glass
Fit rear doors
Fit lights and indicators back on
Re-install all wiring and test
refit Petrol tank
I’m under no illusion that all of the above tasks are going to take a lot of time to complete. I’m still having uneasy feelings about the wiring but the rest of it is just nuts and bolts – I remember that it took no time at all to take the van apart, but it will take much more effort to put it back together again. It ain’t going to be perfect but honestly, that’s not what I was aiming for. When I started this mission, I thought I just needed a quick tidy up of some of the bodywork and a re-spray but once I started poking about – well, you get the picture..
I’ve been lucky in that all the mechanical bit’s and bobs are all ok – that’s down to the chap who restored in 2010 it before I bought it, so thanks to Pete from Ashby De La Zouch. If anyone know’s Pete, send him my regards and thanks for all his hard work.
Footnote: from the Old Mans Memory club weekly pub outing. Pete Fish continues to lose weight, so we are pretty sure he will soon be no longer visible from sideways viewing. Pete F has been messing about with his daughters car (Honda Jazz) and had successfully diagnosed and replaced with a second hand part, the throttle actuator, so it now runs as sweet as a nut, which is nice. Steve didn’t have much to report, except that he hadn’t heard from Chris.
It’s cold in the workshop, so a hot wheel or two would be very handy. There’s no heating whatsoever, so when it’s 4 degrees outside it’s the same inside – sometimes I think it’s actually colder than it is outside. This is not an ideal working environment because paint won’t dry, filler takes ages to go off and well, as you can imagine, the thought of working in a fridge is frankly quite off putting. Nonetheless, I will persevere. I have some time off work as my contract finished at the end of November and there’s little prospect of getting a new tranche of IT work until the new year, so the workshop has become my new office and the van has taken over from sitting at a desk in a nice warm office, peering at spreadsheets and tooling around with SQL data queries.
I’m nearly ready to put the body back on the chassis, which should happen on Thursday or Friday when I press gang my fellow members of the ‘Old man’s memory club’ to help me lift it back onto the chassis, before we adjourn to the pub. I’m expecting to see both Pete’s and Steve but not Chris, who has been spotted in town (by Steve) but has been too busy with family issues to come down to the pub and chew the cud with the rest of us. This is a shame because last week we had an impromptu music quiz about which sequels were better than the original releases. Pete Fish, armed with Spotify, judged my suggestion; Fun Boy Three’s version of My Lips Are Sealed’ is better than the original version by the ‘Go-Go’s’. But – as Pete was keen to point out, Jane Wiedlin (Go-Go’s) and Terry Hall (Fun Boy Three) were an item at the time both versions were co-written and released, therefore he decreed that my contribution was null and void on account that they were intimately intertwined and therefore were incapable of any independent creativity. Pete then went on to tell us what we should have known about pop sequels and prequels ad-infinitum with many many examples backed up by short clips played on his mobile phone. I’m sure you get the picture.
Back to the real subject of this blog – the mating of chassis and body. In preparation for this milestone, I have fitted some tape to the chassis – for the body to rest on and have punched a load of holes in it where the bolts go through. I popped the dozen or so M7 speed clips in place, so it’s all ready for the big lift.
How hard can it be? As my son George would say; ‘no drama’s’ – except that he is apostrophally challenged so it would have read ‘dramas’, which would me more at home on a Greek restaurant menu.
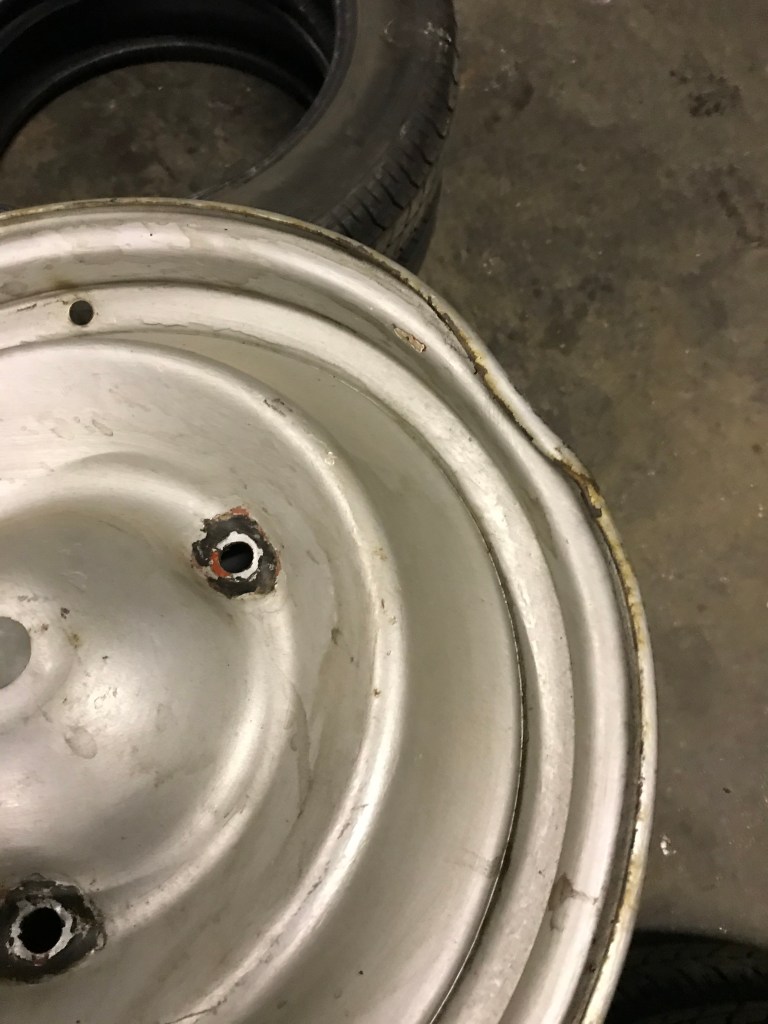
Wheels – luckily for me, the chap in the unit next door to the workshop is a tyre fitter, so I wheeled the wheels round to him and upon offering some pecuniary enticement, he took the tyres off so that I could prep and paint the wheels. However, whilst driving without due care and attention last year, I clouted a traffic island on my way out of a roundabout and dented both offside wheels rather badly.
I did try and pull out the edge of the rim with some mole grips, hammer and cold chisel but to no avail. These wheels are a lot tougher than they look and frankly I made a total hash of it, so it’s going in the scrap metal skip along with the other one. I did (briefly) think about cutting out a section of rim from the other damaged wheel and welding it it in. However, as I can get brand new Michelin wheels for about £65 each, I might as well just get a new pair and be done with it.
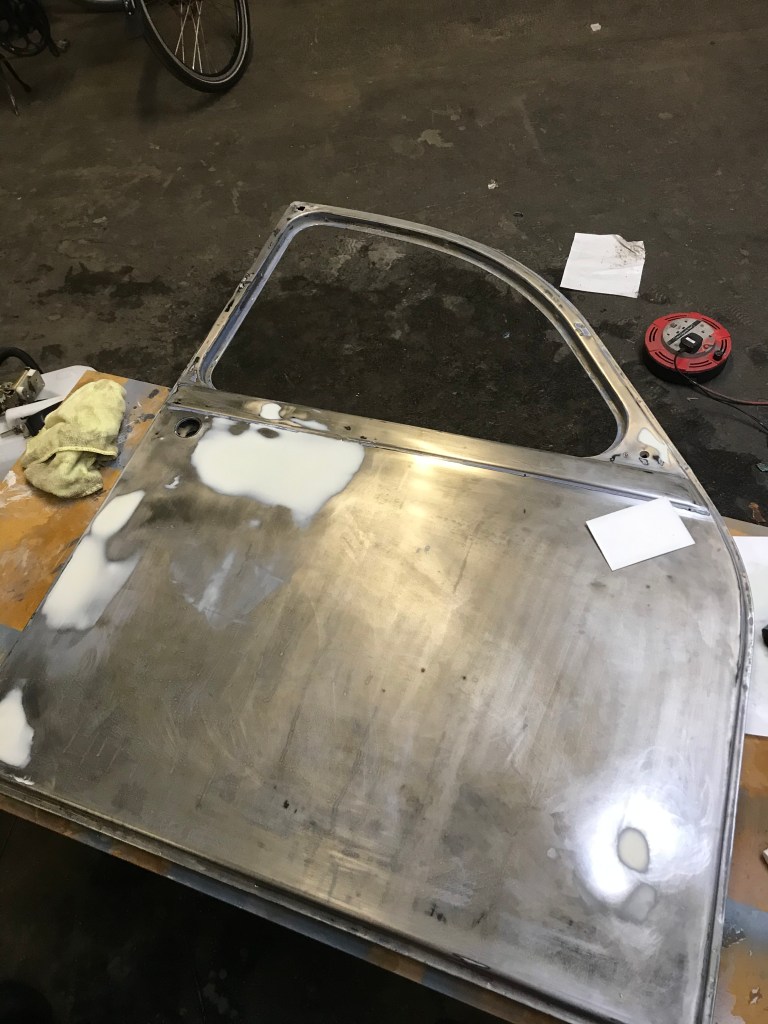
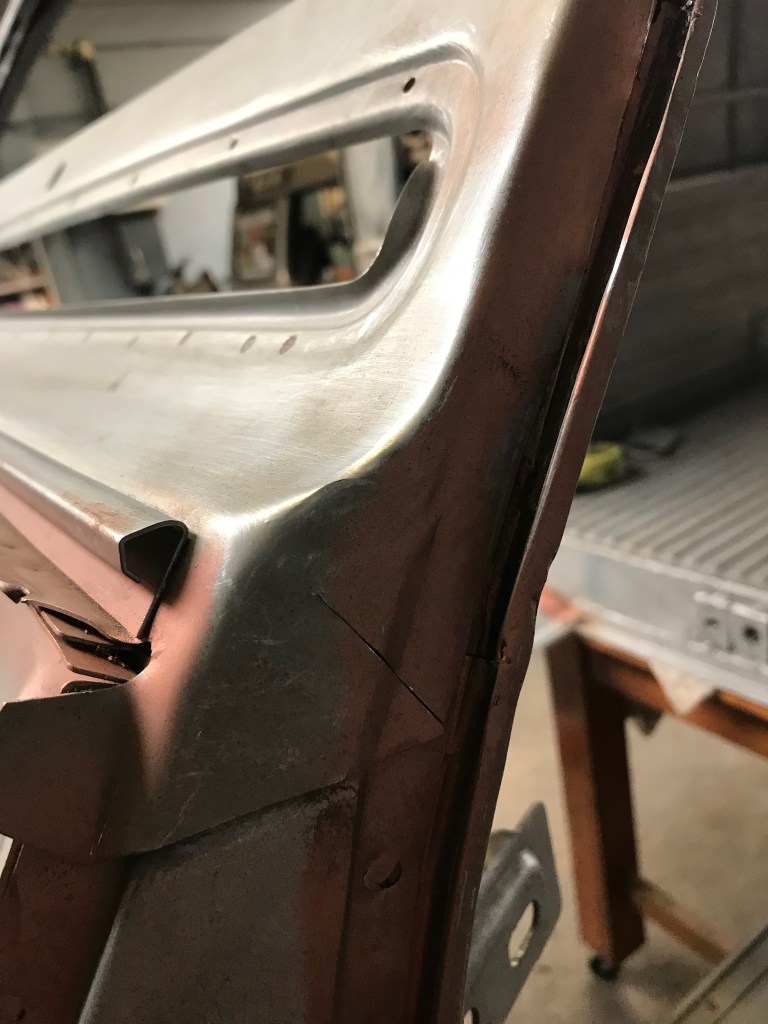
Drivers door – I changed my mind yet again and have decided to use the ‘new’ door I picked up a few months ago on eBay. The outer skin on the old door has parted company from the inner part of the frame. See below
I did manage to get it back in place and gave it a good dressing with the hammer and dolly, but I don’t think it will be long before it pops back off again. There’s only a few millimetres of steel to grip. I suppose I could put a few tacks of weld along it, but this door also needs a repair to the bottom edge – the bit that grips the door seal – and has a very large shallow dent under the door handle. It makes me wonder if all 2CV’s have dented doors, just under the handle and if this is the case, then perhaps it has something to do with the design of the doors…. As it happens, the ‘new’ door also has a dent in the same place, but not so deep, so all in all it’s a better candidate. Here it is with a few skims of filler over the dents, prior to flattening it off. It’s so cold in the workshop (did I mention that it’s cold?) that the filler would not go off, so I had to use the hair dryer to encourage the chemical reaction between the filler and the hardener. It’s not my hair dryer – I don’t have enough hair to warrant owning a hair dryer. I found it in the workshop so there must be someone more hirsute than me using the space – or possibly the workshop used to be a hairdressing salon in a previous life.
The Door Dingers have been busy with this one
Another hour of flatting off with a block and 400 grit wet and dry paper and some more tinkering with filler and I was ready to spray on some primer. This is what they look like now – I expect they will be dry by January…
Not entirely ‘ding’ free but at least they won’t look out of place compared to the rest of the bodywork
It remains to be seen whether the doors will fit into their respective apertures. They didn’t fit properly before I totally rebuilt the front half of the body shell so I’m not expecting it to be an easy job. I’m not looking forward to faffing around with them to be brutally honest but I suppose I’d better try and make them fit before I put the top coat on.
Back to the doors. I had another look at the drivers door today, which to be honest I’d written off as not worth doing for 2 reasons:- Firstly the outer panel is dented, not badly but there are 2 large areas of shallow dents which looked like they would be difficult to sort out and secondly, the lower edge where the door seal locates is rusted out in places. I do have another pair of doors which are not rusted at the bottom but which have lots of dents and rusty scabs on them. So – it’s a question of how much work it will take to sort out the old doors compared with what I need to to with the replacements. As I’ve already stripped the old doors down to bare metal, which was a mission that I’d rather not repeat and – and because the replacement door need the same treatment and also need to be repaired, I going to stick with what I started with. Old doors it is then.
There’s a big shallow dent just under the door handle where someone (erm.. me..) used their knee to close the door on account of the fact that the somehow the door had become larger than the aperture it was designed to fit into. I can’t planish out the dent and I’m not confident that I can heat shrink the metal to get it straight again, so I decided to fill it with a skim of filler. Not my favourite method of repair but needs must.
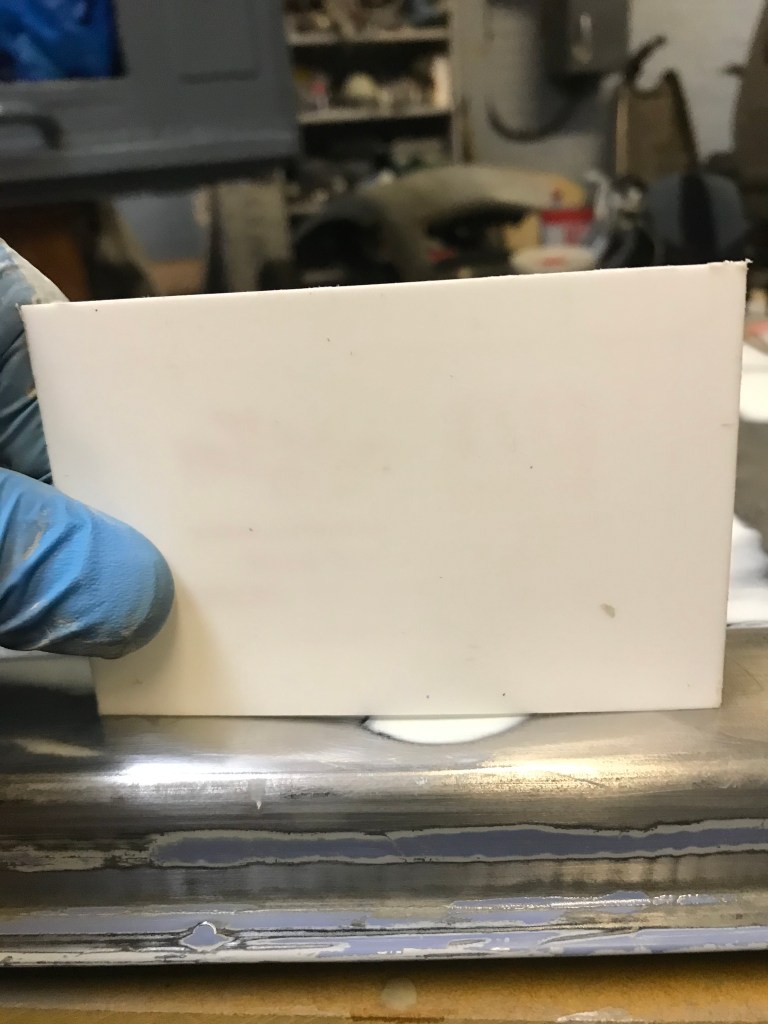
the white patches are where I’ve applied filler to rectify dents
For the uninitiated, a here’s a bit of filler about filler. Body filler is a resin based 2 part product, the filler which comes in a tub or tin and a tube of hardener. Mix the 2 parts in the prescribed ratio – a golf ball sized lump of filler to a pea sized piece of hardener. Mix well – until all the streaks of hardener have blended in with the filler and apply. I use an ‘onion skin’ pad to mix the filler on, but anything clean and smooth will do and then apply it with a plastic spreader. It’s not easy to get the right amount on first time, you need to put just a bit more on than is needed and you need to get it as flat as possible, without streaks and lines and you need to do all this before it goes off, which means you have about 3 or 4 minutes to spread it out. Once it’s on, leave it to dry. Don’t be tempted to keep fiddling with it, you will make a hash of it and get annoyed.
When it has gone off – after about 5 or 10 mins depending on temperature, you can flatten it off with some wet and dry paper. I use 240 grit paper lubricated with water and I wrap the paper around a sanding block. It’s important to keep the paper flat across the surface of the filler, otherwise you risk following the profile of the original dent – in which case you’ll have spent a load of time and energy and will have made little improvement.
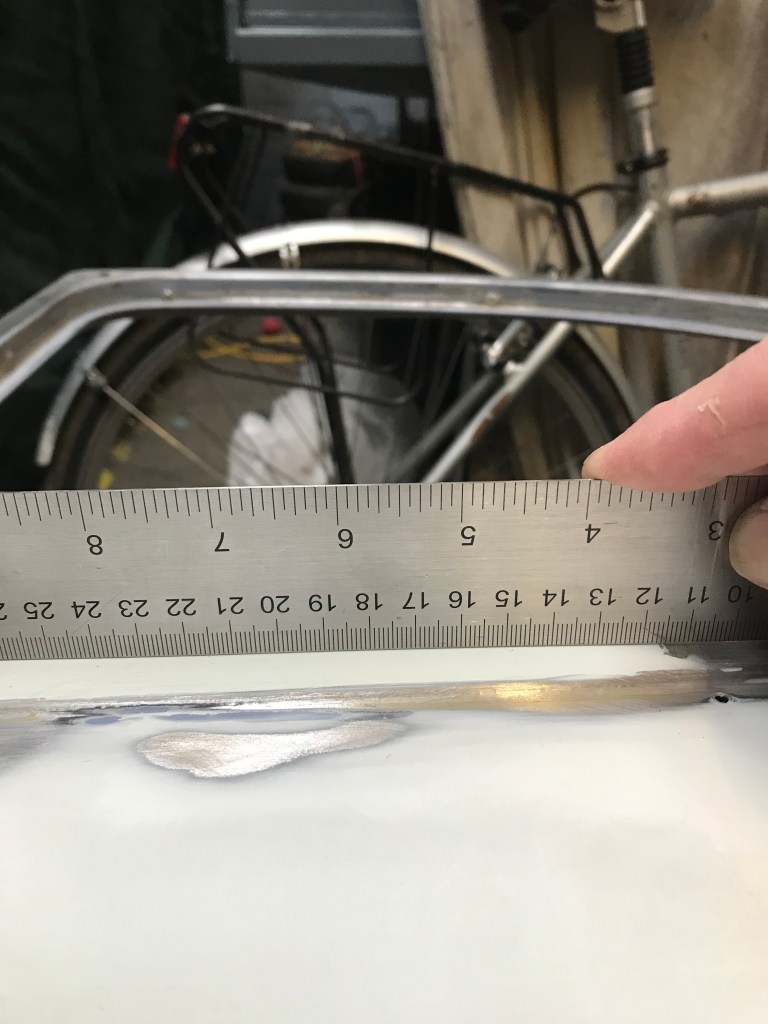
There’s a good example of this in the picture below. I’d filled the dent and then set about sanding it flat but didn’t have enough filler, so the sanding block and paper just followed the contours of the dent. You can see the gap under the straight edge.
Mind the gap!
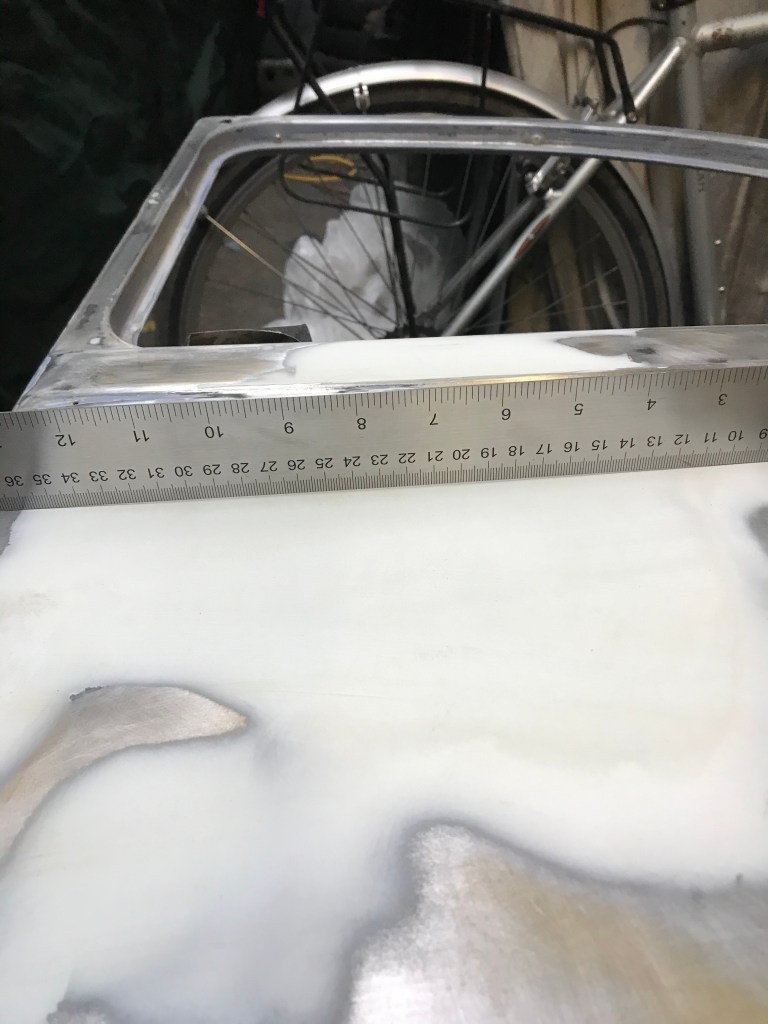
More filler was applied, flattened off and now it looks much better
mmm…. flat…looking good!
Don’t expect to get away with just one application of filler – it usually takes 2 or 3 skims, flattening it off in between each coat to get it right. Other issues with using filler are:
The edges must be feathered in so that there’s no discernible ‘edge’ when you run your finger over it. If you can feel something, no matter how smooth it looks to the naked eye, it will look shoddy when it’s painted.
You can’t put filler on top of paint – actually you can but you won’t be able to blend the edge in. This is because paint is softer than filler and will sand down faster, leaving a ragged edge which will really show up when painted.
So – you have to apply filler to bare metal and then spend however long it takes to get it flat, smooth and feathered in at the edges. This is one one reason why it’s not my favoured method of repairing panels – much better to try and planish out dents with a hammer and dolly if you can. Another issue with filler is that it ‘sinks’ as it dries out, which can take a week or two – long after you think you have got it right and have already painted your repair – and it can crack and drop out if the panel gets dented again.
There are a few brands and types of filler available. Isopon P38 is a good all rounder, P40 is usually used to bridge holes (the unscrupulous will use it to fill rust holes) as it has more fibreglass strands in it. I use Evercoat ‘easy sand’ – it’s quite runny and seems to settle quite flat before it dries.
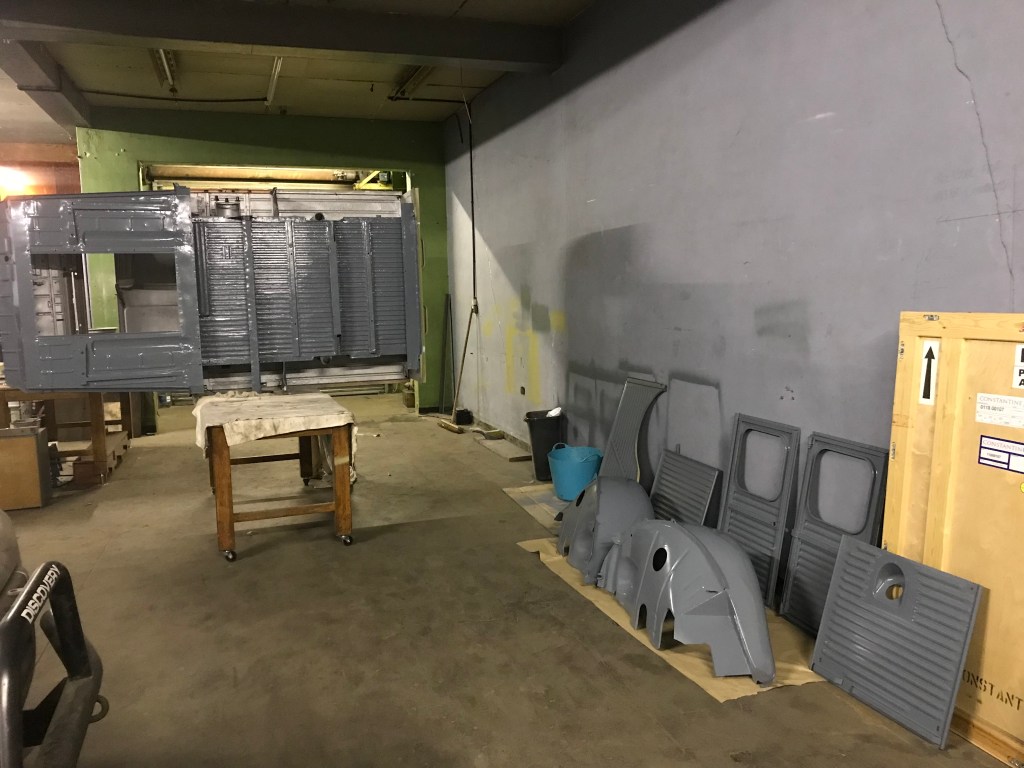
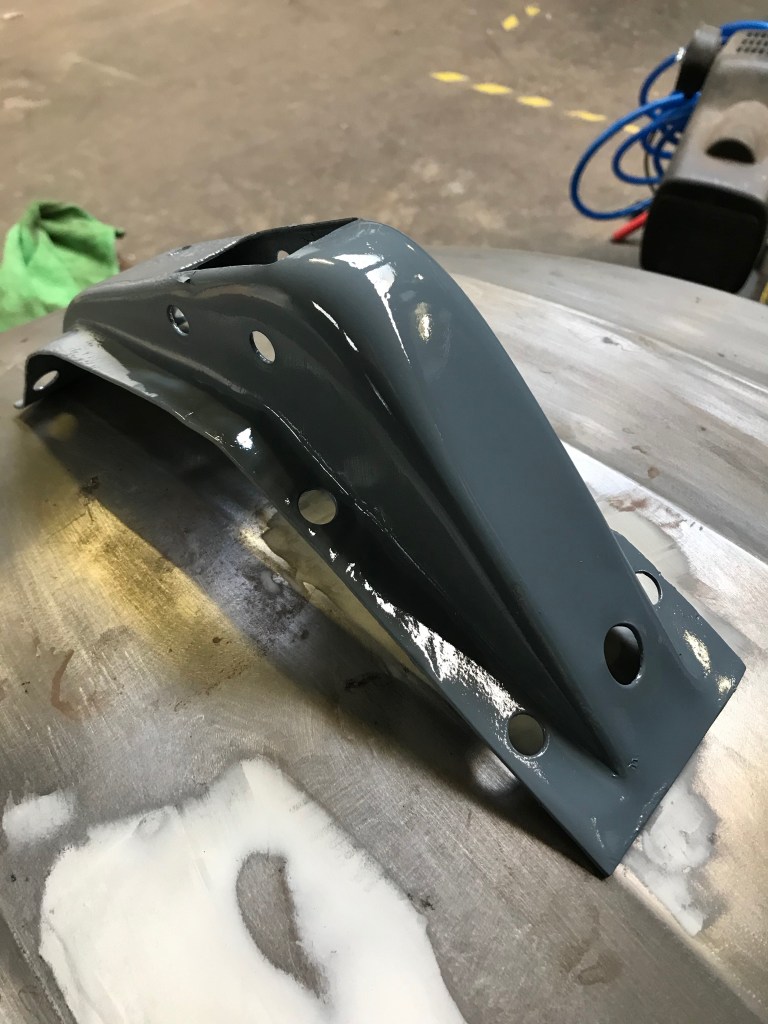
Other news: I did a bit of work on the chassis and engine today. All the tinware has been sanded down and painted and is looking much better. I sanded and then cleaned the chassis with some panel wipe, before painting a coat of red oxide over the bare metal bits – most of the floor as it turned out. It will get a coat of black paint in the next day or two.
I’ll sort out the jelly moulds next, they will be stripped and painted – or I might just lacquer the bare steel. Oh – and see that dented bonnet in the background? It has a very good hinge on it – no rust at all and is free to anyone who’s willing to collect it from Norwich – just send me a PM and we’ll make the necessary arrangements.
I also removed the 2 rear batteurs – they will be cleaned and re-painted – and I’ll do the same with the two on the front wheels. I think the front wheels need to be removed to get them off, so that will be a job for another day. I have 4 shock absorbers which were retro-fitted to the van a few years ago, so I could leave the batteurs off, but I’ll keep them – they must do something – right?
a brace of batteau
My space in the workshop is starting to look messy, so I’ll have a good tidy up next. It won’t be long before I can put the body back on the chassis which will free up a bit of space but there’s still tons of work to do before that. Will it ever end?
A few more jobs have been completed since the last blog update, although progress has been slower than anticipated because of other commitments, general laziness, dithering and procrastination.
However, documenting the restoration process via this blog is one way of ensuring that I keep on going with the work. After all, there may be some of you out there in the etherweb that might otherwise feel cheated if I were not committed to completing the restoration, or more likely: committed to doing the work but without proof of the journey and no outcome to show for it. This is all sounding like a political party manifesto, which it isn’t but I’m sure you get the point….
Anyway, it’s starting to get cold, damp and generally autumnal, therefore spending long hours in the unheated workshop is losing its appeal when compared with sitting at home in front of the woodburner with a glass of wine and the rest of the Internet to finish off. Carry on I must though, so here we are – in no particular order:
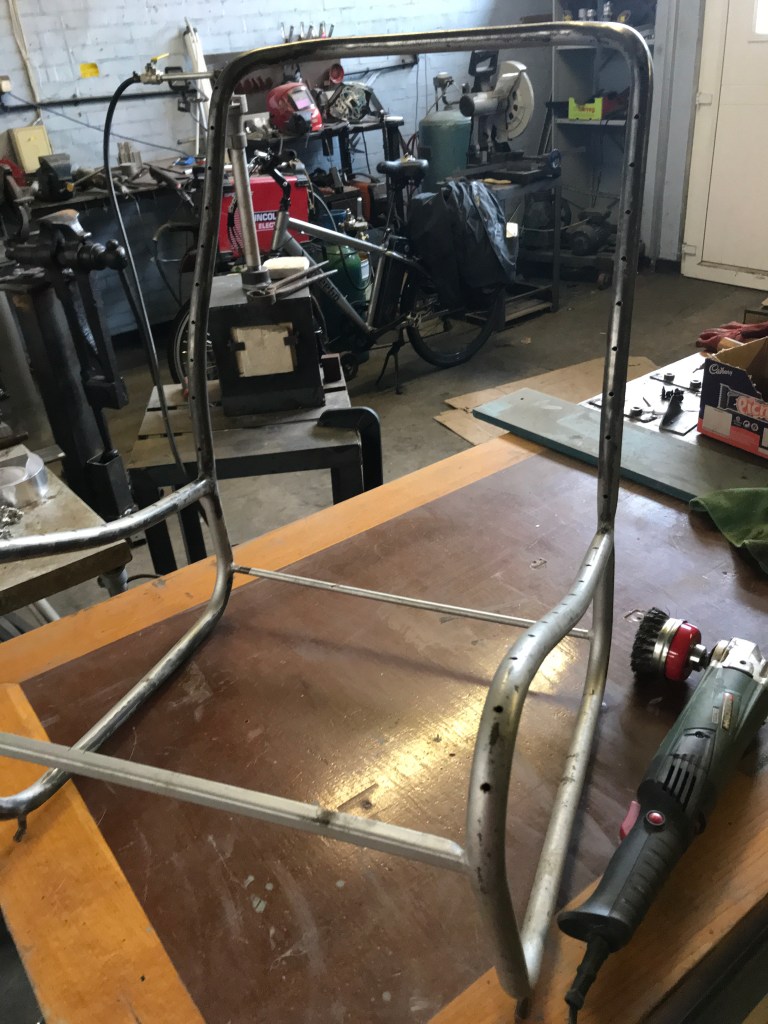
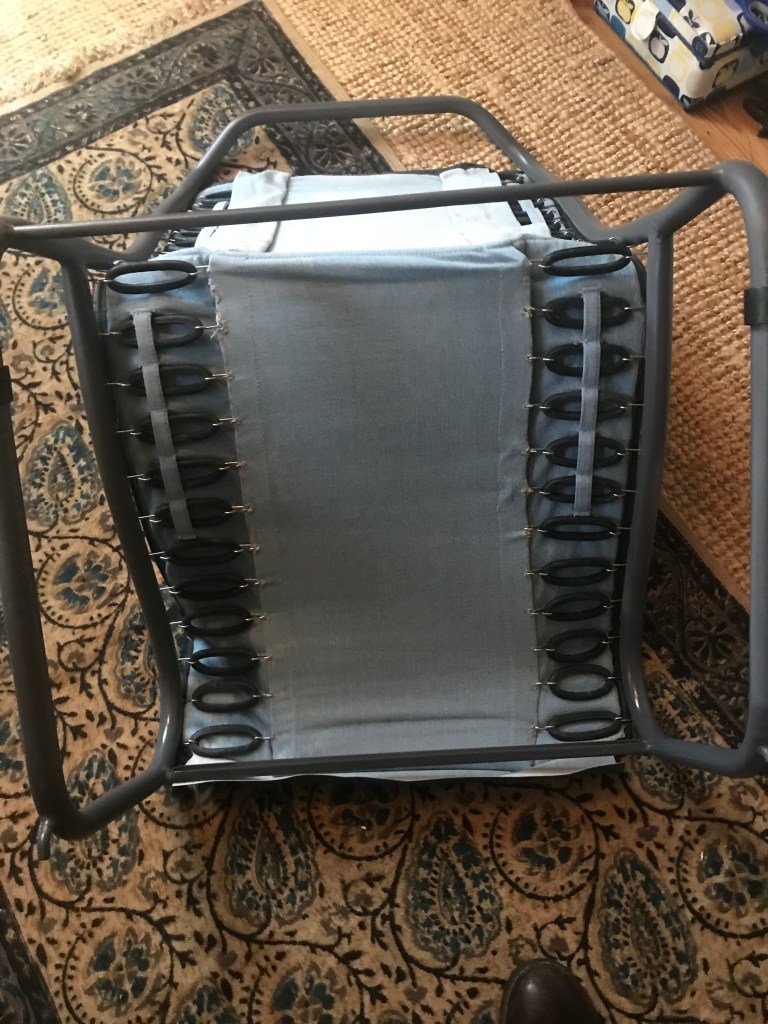
Seats – luckily there are only 2 of these in the Van. Both have had new covers in the not too distant past (6 or 7 years ago at a guess) and although grubby, looked like they might clean up ok. Once I’d undone and removed the 44 rubber bands that attach the cover to the frame on each seat, I decided that a quick 20 minutes in the washing machine might bring them up nicely. First I had to remove the 4 wires in each seat which the rubber bands hook on to. They were a bit rusty so I gave them a quick coat of paint before re-inserting them into the newly laundered covers. The rubber bands had not fared as well, they are quite perished and stretch more than they should. This makes the seat baggy, unsupportive and uncomfortable (not unlike the Government), so a new set of bands was ordered for each seat. They come in sets of 50, so I’ll have a few spares. No doubt I will lose these immediately by putting them ‘somewhere safe’. When I do eventually need them (assuming I manage to find them again) , they will be perished and useless, so I might as well throw them away now. As well as the spares, I have 88 perished rubber bands that I can’t quite bring myself to throw away, so perhaps I should put all of them in a plastic bag, throw them in the garage and forget about them.
I also stripped and painted the seat frames with the correct AC140 Grey paint that I intend to use for the wheels and front bumper. Overall this was a satisfying job to get completed, although it all took much longer than I thought it would.
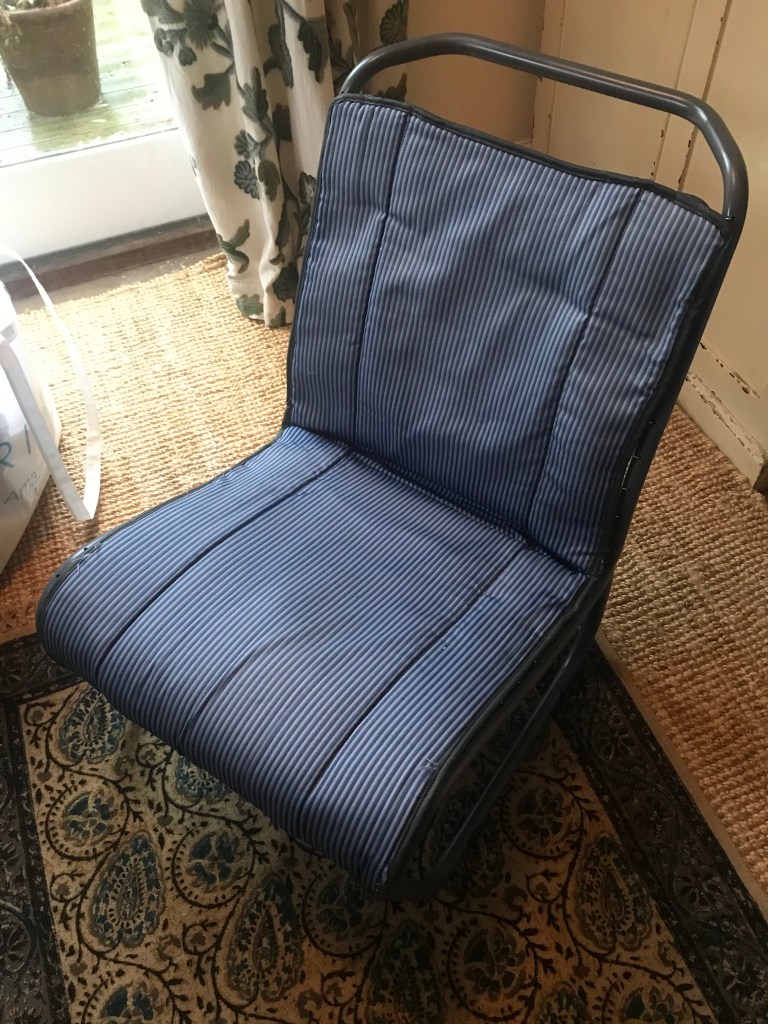
A naked seat frame – not much to it is there…? New rubber bands and laundered coversThe finished article – splendid
The front bumper is in a much worse state that I thought – there’s lots of corrosion and deep pitting. Also, it looks like the previous owner has chopped off the 2 ‘fillets’ of metal that the front edge of the bonnet sits on, so now I think I might just as well get a new bumper. £60 or so will get me a period 2CV bumper to which I can fit my existing over-riders and rubber inserts. £130 will get me a nice new PO tubular bumper with integrated over-riders. I think the PO bumper will suit the van better than the standard one, so maybe that’s what I’ll get, although at twice the cost of the standard offering, I’m wondering if its worth it.
Lamp bar – cleaned and sanded as best I can. There was lots of thick brush coated paint to flatten off. I did think about getting it back to bare metal with the wire bush and angle grinder, but there are wires poking out of its various orifices (orifi?) and it’s altogether an awkward shape to deal with, so will take an age to strip and since most of it is hidden when the bonnet is down, I’m taking the less onerous option. This will also get a coat of the grey AC140 paint before re-fitting. No picture of this as it’s still a work in progress
More paintwork – I painted the outside of the bonnet but again had issues with the paint gun. It as if the ‘tractor’ paint I’m using has a very short ‘use by’ time once mixed with the thinner. More than 5 mins or so and it starts to clog up the gun internals. Anyway it looked horrible so I grabbed another spray gun with a much larger 1.7ml nozzle and blasted a lot more paint on the bonnet. It levelled out nicely, so much so that it’s much better than the rest of the shell and wings which I’ve already sprayed. I might have to flatten it all off and spray it again but then it could be that I’m the only person that will either notice or care.
of course all that shiny paint means that every dent, pimple and tiny defect is now visible
I also painted the triangular panels that sit between the front wings and the bonnet – for the 3rd time. The first time I did them they came out dry and dusty (wrong gun setting), The second time, I laid a very thin sheet of plastic over them a day after they were painted – to keep the dust off. Unfortunately they were still in the process of drying and the plastic sheet melted itself into the paint and made a right royal mess of it. Third time lucky – this is what they look like now
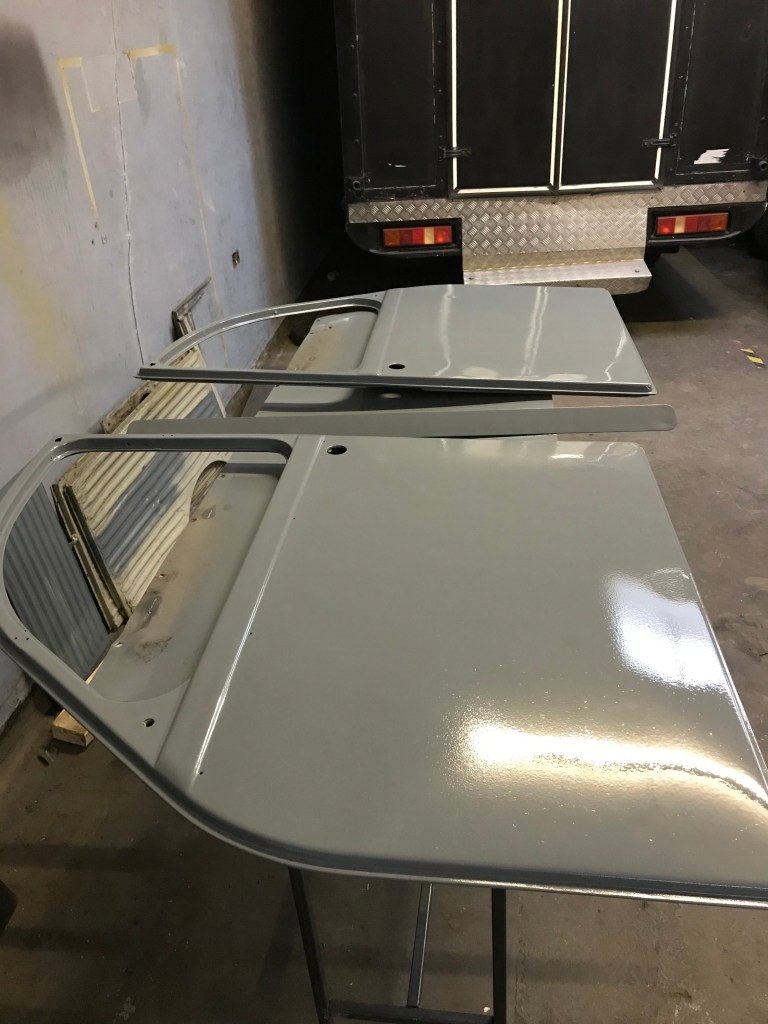
Rear doors – painted and looking ok. The lower edge of each is a bit shabby but they are not too bad overall and will do until such time as I can replace them
Vent flap – I sprayed far too much paint on this, which left it looking very wrinkly. This was after I’d already painted it and then dropped it on the gritty workshop floor in my haste to put it somewhere safe while the paint dried properly. It wrinkled mostly in the dimples where the inner and outer panels are spot welded together, so I have flattened it off with some 800 grit wet and dry paper, ready to be painted again. I’ll do this along with the driver and passenger doors, both of which need quite a bit of work before they will be ready for paint.
Chassis and running gear – Whilst literally waiting for the paint to dry, I’ve started the thankless job of cleaning up the engine, gearbox and chassis parts. As with the rest of the van, these have all been attended to in the previous restoration, so cleaning and repainting where necessary seems to be the way to go. I’ve toyed with the idea of using a pressure washer to get the dirt and grease off but I don’t want to get water into places where it should not go (ie electrics mainly), so I’ve resorted to using a bucket load of isopropyl alcohol wipes. The wipes work ok on dust and light grease but are not so good for shifting the really grimy stuff. I’m going to try with some ‘Gunk’ on the really greasy bits, but instead of using a pressure washer to rinse off the Gunk, I’ll use a wallpaper steam stripper (without the ‘pad’ at the end of the hose) and see if it will work as a makeshift ‘steam cleaner’ – more on this later if it’s a success. If it doesn’t work as anticipated I’ll try the jet wash. The other problem with using a jet wash is that there is no water in the workshop, so I’ll have to hook it up to a container, which will need to be elevated at least a couple of metres above ground level, otherwise there will be no water pressure and the jet wash won’t work. First world problems…
Just a short update from the workshop as I haven’t spent much time on the van for the last couple of weeks. I did have a bit of a tidy up, which mostly consisted of putting tools away and sifting through the dozens of plastic bags which comprise most of the vans entrails. Anyone who works in IT and databases will recognise this as having reduced a load of stuff to third normal form, now you need to create rows and tuples to store them. I have bags of nuts, bolts, bits of plastic and components which came off together and are organised – well labelled at least with names such as Wiper stuff, Rusty Flap fittings, Speedo, Misc… you get the idea.
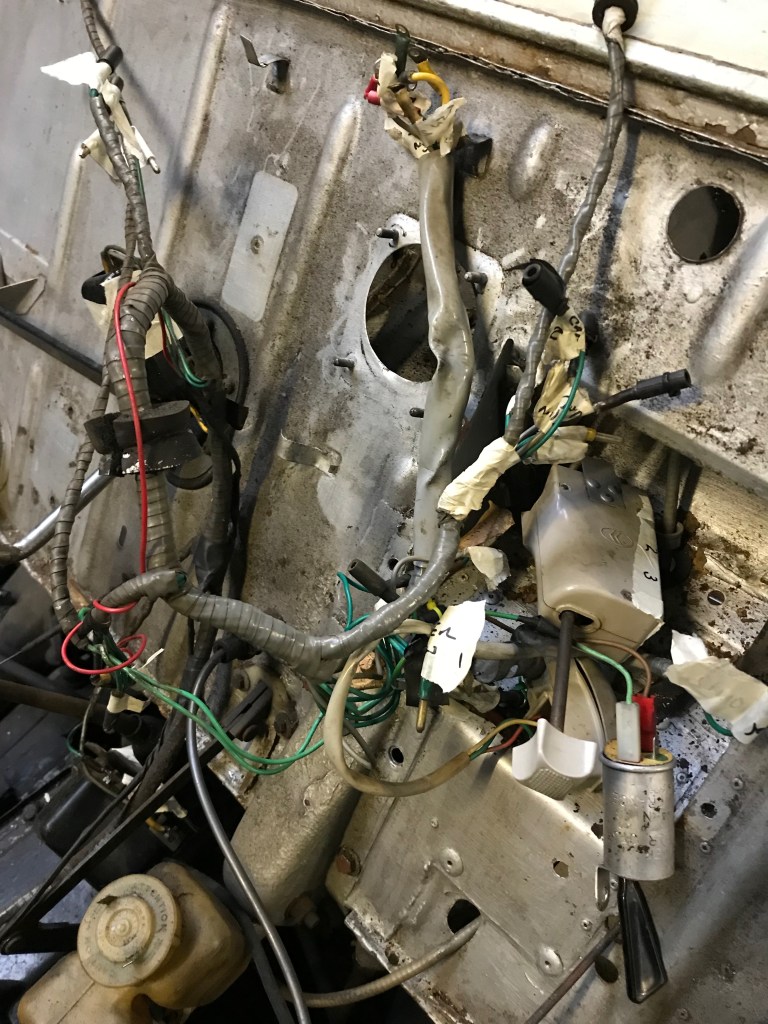
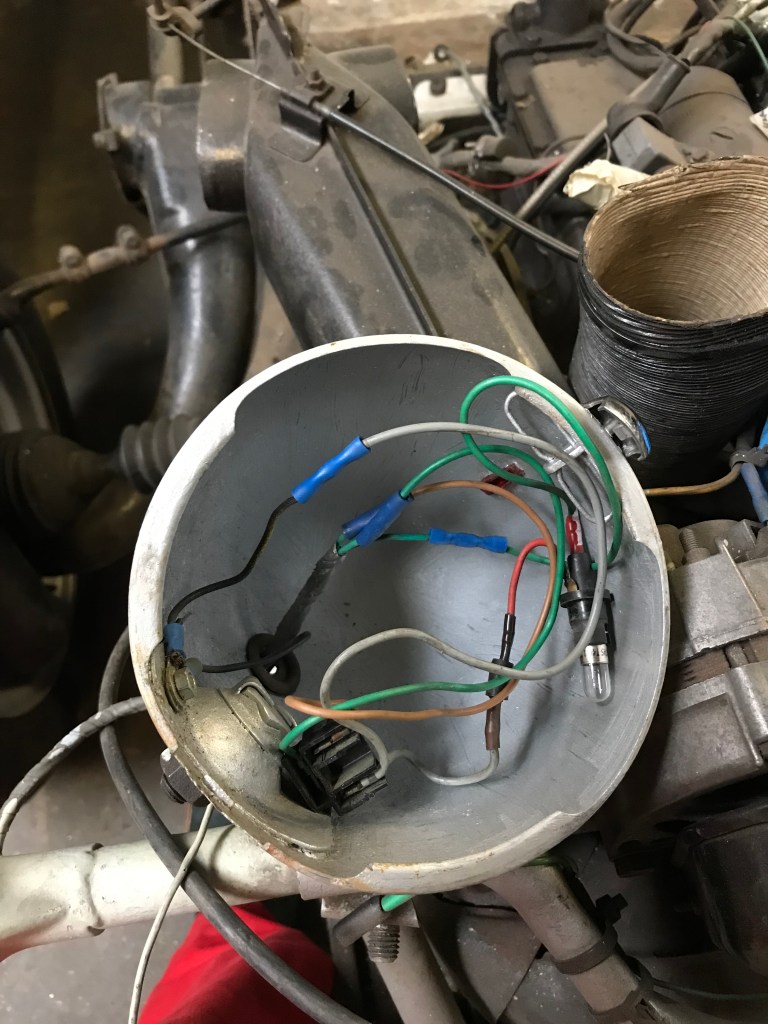
Still, it feels like I have turned a corner with the work on the van by getting the shell finished off in top coat – ok, it’s not perfect but it is much better than it was when I started. I still have reservations, for example, whether the driver and passenger doors will fit their respective apertures, will I be able to get the wiring loom back together given that all the careful labelling I did has long since faded away or dropped off altogether, plus a host of other small anxieties that keep popping into my head. Of these, the electrics are a real concern. It seems like I have a number of spare wires, some have connectors on, others do not. There are 2 wires which come out of the engine. One of these goes to the coil and the other has not obvious home – the other wire from the coil disappears into the loom and (I think) reappears at the ignition switch end at the other end. To add to the confusion, lots of new bits of wire have been added to the loom, crimped on with those horrible blue plastic connectors which look like they have been left on a railway line and run over by a train.
Nothing to see here… WTF?
Anyway, there are other things I can sort out before I tackle the wiring rats nest, such as the rest of the panels which need to be painted.
Rear doors – these are in a friable state to say the least. The bottom inch or so has suffered from rust and previous repairs, which although valiant have not stood up well to years of UK weather. I’d like to repair them properly but repair sections are not available and I don’t have the tools to make my own. So, it will be a bit of welding and filler work so that I can put them back on while I look around for some replacements. Rear doors are available for the AK400 (large ripple, square window) and the AK250 (small ripple but oval window) but not the AK350 which has small ripple steel and a square window. If they were available new, they would not be cheap and are as rare as hens teeth second hand. If you are reading this and you have a spare pair of rear doors for an AK350, drop me a line.
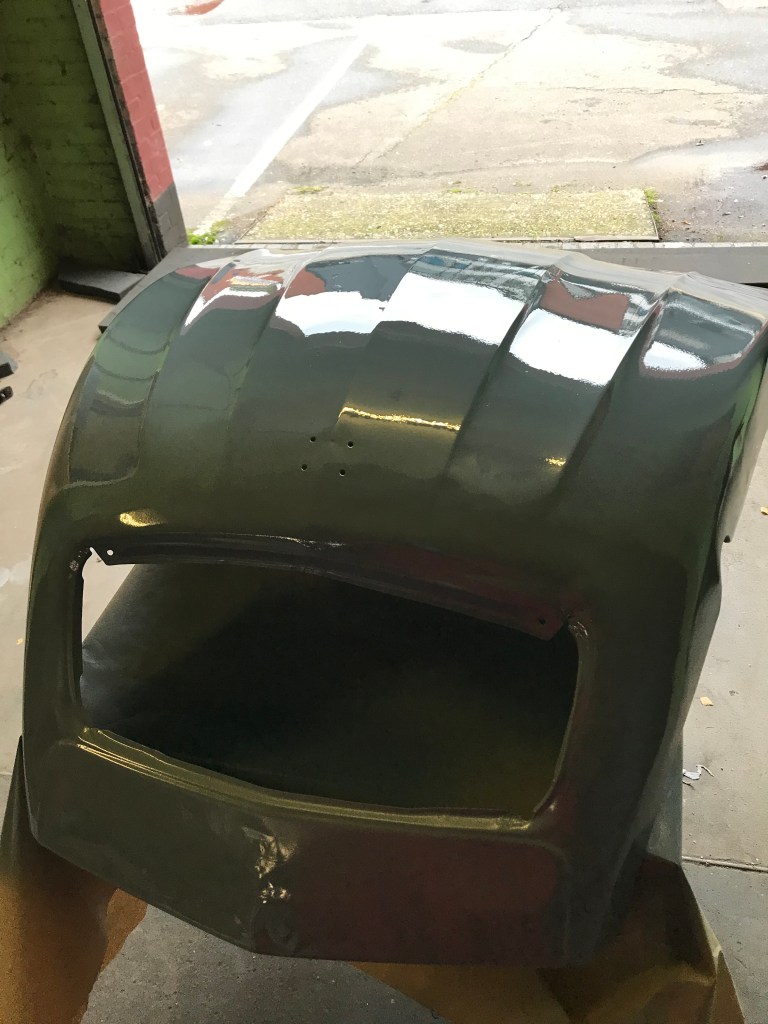
Bonnet – I painted the inside of the bonnet – just for completeness really, as most of the underside will be covered by the soundproofing. Soundproofing which looks like a bit of old carpet underfelt and probably does nothing to dampen any noise, but will be re-instated. The bonnet had previously been brush painted silver, so was just flattened off with some 250 grit wet and dry before painting with top coat. You can see a bobbly bit where the battery sits close to the underside of the bonnet. This looked like black tar and has been part of the bonnet for a long time. I wonder if it’s a factory finish – put on to protect the paint from battery fumes? Someone may know…
The bobbly bit in all it’s crusty glory A more flattering angle of the beasts underbelly
Vent flap – aka ‘the rusty flap’. I don’t have a ‘before’ picture but after stripping off the many layers of household and silver paint, I found some evidence of Bleu Neve, so it could be that this is the original 1966 panel. It’s certainly well made and no-where near as corroded as I though it would be. A dose of phosphoric acid, and a coat of etch primer will see it last a good few more years hopefully. I will have to make a small repair to one end of the strip which holds the captive screws as the one at the end has sheered off but the rest is sound. Oh – I and can confirm that paint stripper can be used to remove paint from the rubber seal as well. Why people don’t use masking tape is beyond me.
Rear door check straps – I stripped off the paint from these by leaving them in the plastic bag with paint stripper in it. I’m going to leave them bare metal as there is still enough zinc plating on them to prevent them going rusty and they just won’t look right if I paint them.
I’ll have to paint the upper wing to bonnet panels again because of the poor paint finish and water issues I had in the last painting frenzy. I’m still in two minds about giving the body another going over. I have lots of paint but there’s every chance that I’ll have some other paint related problem and could just end up making it look worse. I guess at some point I’m just going to have to walk away and accept it for what it is.
Chassis and other bits. The lamp bar is ok, but has many wires cable tied to the outside of it as well as those that are neatly tucked away inside. I’m not sure what all the extra wires as for but I found at least one which just runs from one headlamp shell to the other on the earth point of each. Quite why it is there is a mystery. I will remove it when I take off the lamp bar for stripping and painting.
Front bumper – I spend a good hour or so removing the bumper, quite why it took so long is a mystery – I might have had a brain shut down part way through or perhaps I just fell asleep. Anyway- although badly pitted in places, looks as if it can be rescued. The over-riders are good, the rubber strip is in a sorry state but I think I’ll just tidy it up by sanding it down with some fine wet and dry paper. The main bumper bar will get the full angle grinder wire brush treatment on all sides, etch, primer and paint. The bumper, lamp bar and wheels are all currently painted silver but AC140 Gris Rose is, I believe the correct colour. I think I prefer silver, so there will be some procrastination before I make a decision.
The chassis will need some attention. It is thankfully very sound with just a little surface rust on the top sheet of steel. Because this bit is visible when the body is put back in place, I want to get a durable and reasonable finish on it. I expect these two requirements are mutually exclusive, so there will be more dithering over what products to use and how best to apply them. Brush paint or spray? Chassis paint or something similar to what I’m using on the body?
Wheels – two are damaged, one badly and probably beyond repair, the other has a kink in the rim, which I might be able to sort out with the hammer and dolly. All the wheels will need sanding down before I can repaint them. So, I’ll have to buy one new wheel, perhaps two. They come ready finished in Gris Rose, so perhaps I’ll paint the other 3 or 4 the same colour, or I could get 4 new wheels, have 3 spares and scrap the damaged pair – what to do…?
Another weeks worth of hard graft in the workshop, tidying up all the bare metalwork ready for painting. There were so many little bits of the old paint left on the shell, hiding in the dents and rust scabs which took ages to sort out, bits of welding to finish off – things I’d forgotten to do and things I just thought I’d not do on the assumption that nobody would notice or care about – except perhaps me.
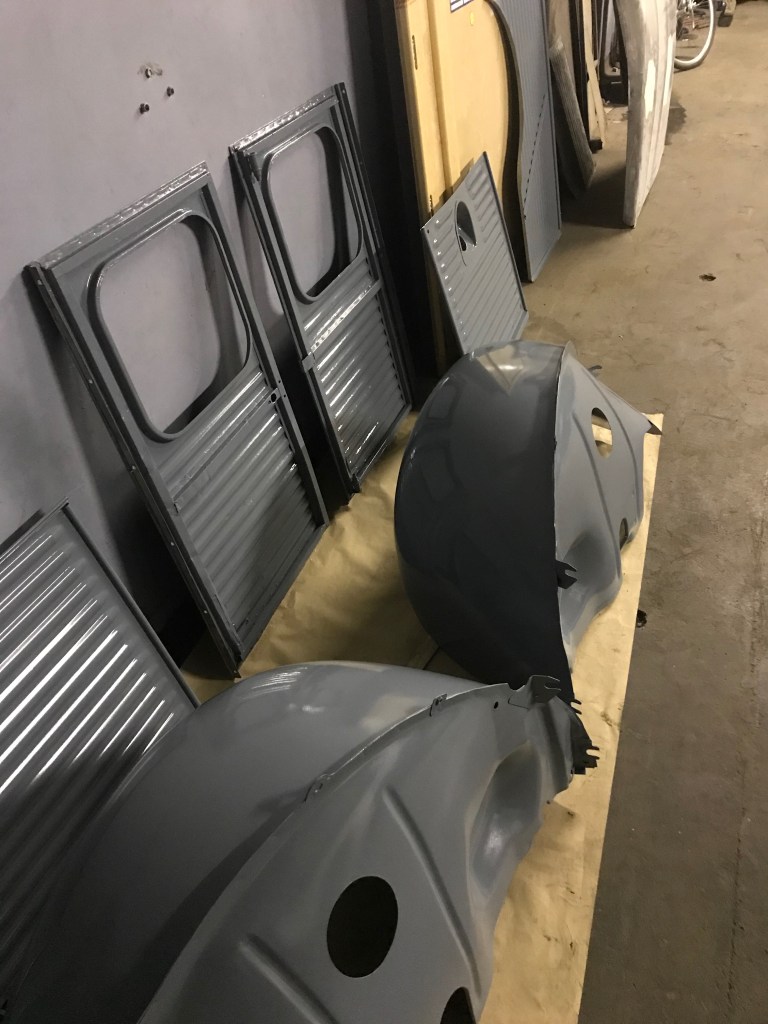
I did manage to get the wings, headlamp pods, petrol tank, spare wheel cover and inside the rear doors painted in top coat, plus the underside of the shell, which despite having made an earlier declaration that I wasn’t going to bother doing it, I did anyway. This all went very well and cheered me up no end.
2 coats of top coat
I primed all these panels first and then spent a good couple of hours running some seal sealer around where the inner and outer wings are joined together and any other bits that looked like they might be susceptible to water creeping in between the numerous spot welded panels. Seam sealer is wonderful stuff (I used UPol Tiger Seal) as it’s overpaintable and does exactly what it says on the tube. What it doesn’t say on the tube is that you get one shot at using it because if you don’t do what you need to do in one hit and try and use the tube the next day, it will have set solid overnight and no amount of poking and squeezing will release anything useful thereafter.
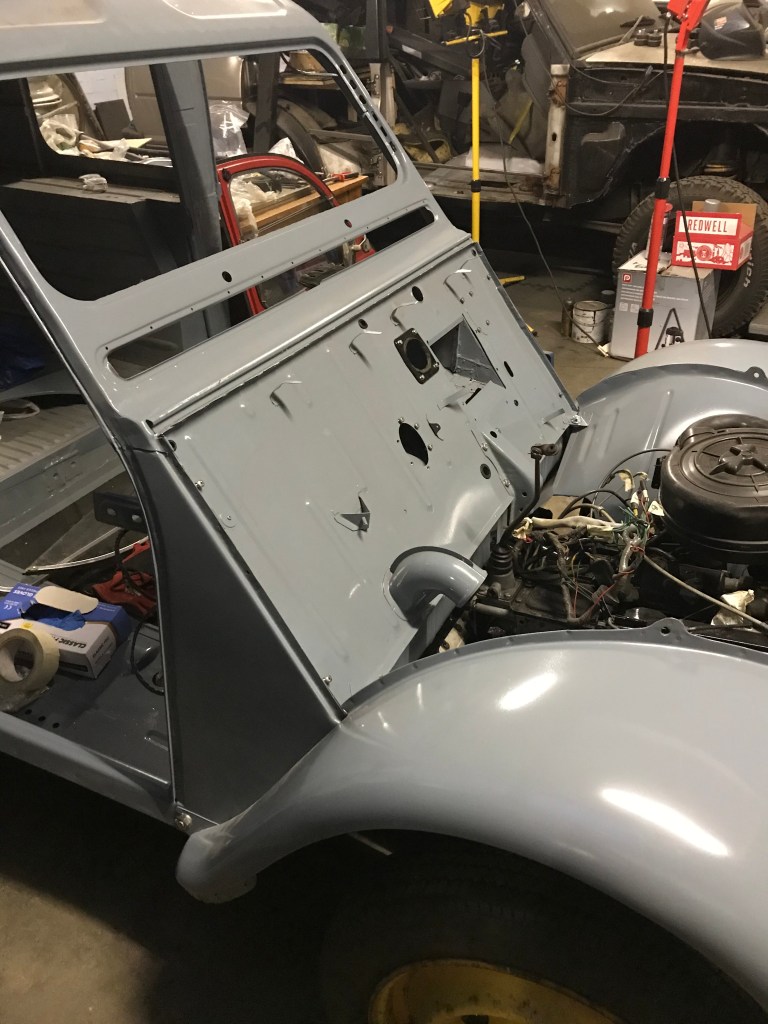
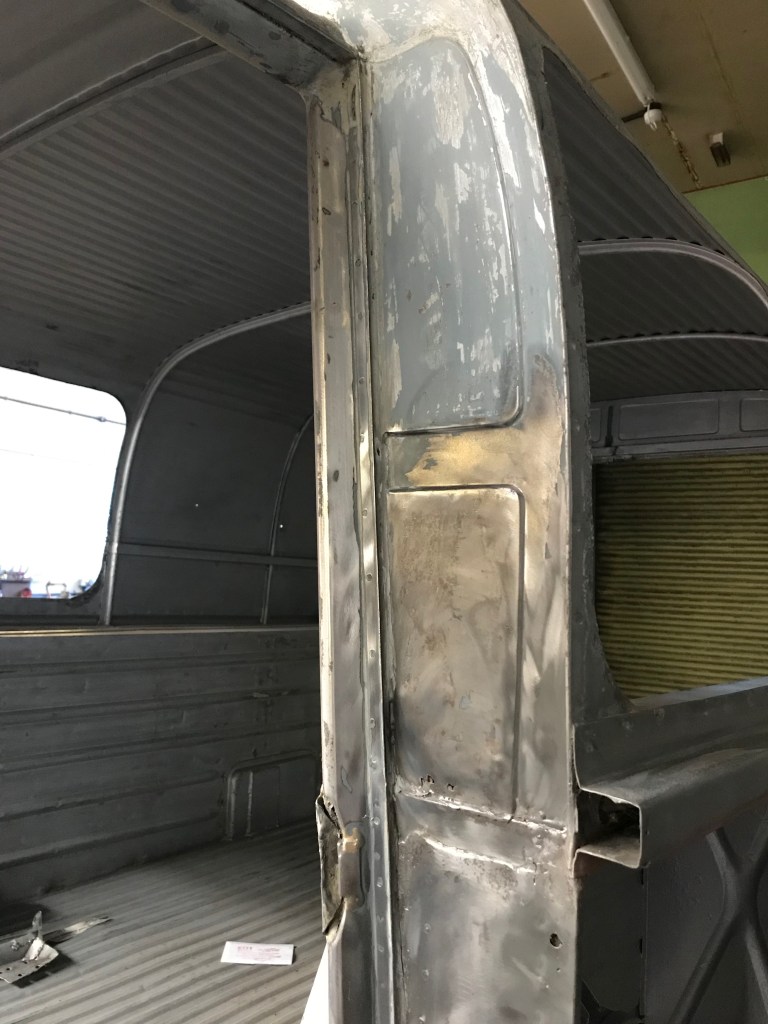
So – back to those little jobs I’d been putting off. Below is the windscreen repair panel with the strange slot cut into it. I’ve no idea why it is like this, perhaps it’s to allow braze to run under where it joins the A panel. I just zipped it up with with a few careful dabs with the mig welder and used a smear of filler to make good the join. And – there’s a little tab which I was going to cut off but decided in the end to fold it over the firewall join.
Note the crease at the top of the ‘repair’ panel – a poor quality pressing
I noticed a small hole in the gutter than runs down the side of the A post – after a bit of poking about with the wire brush, I ended up with a very large hole…
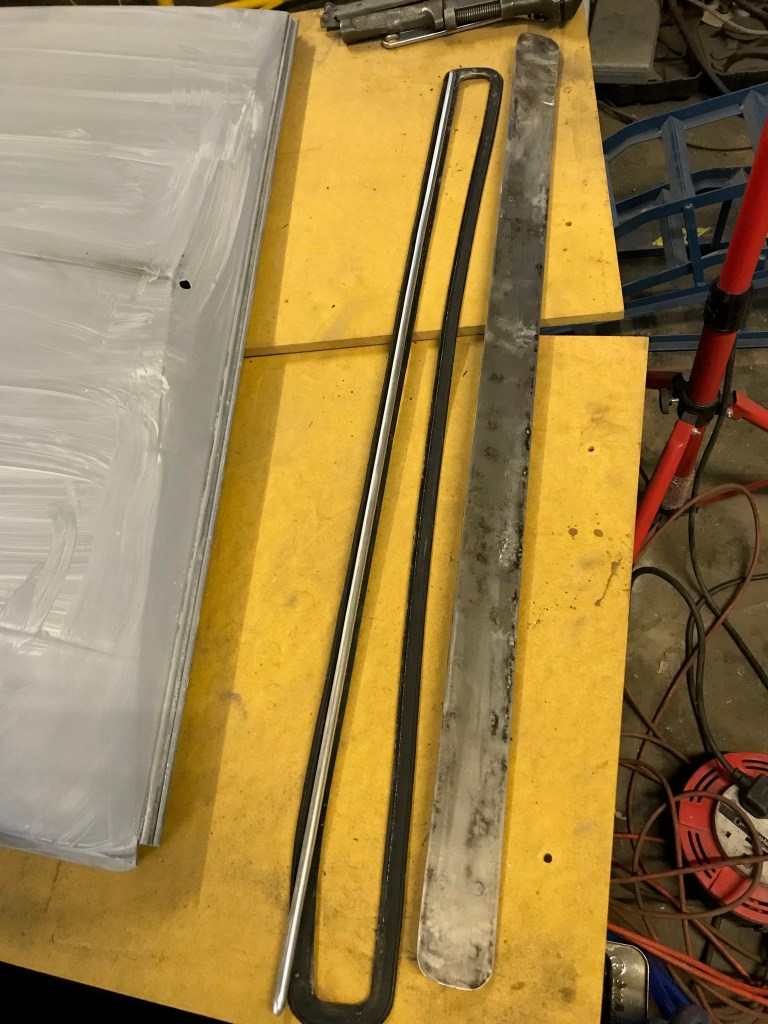
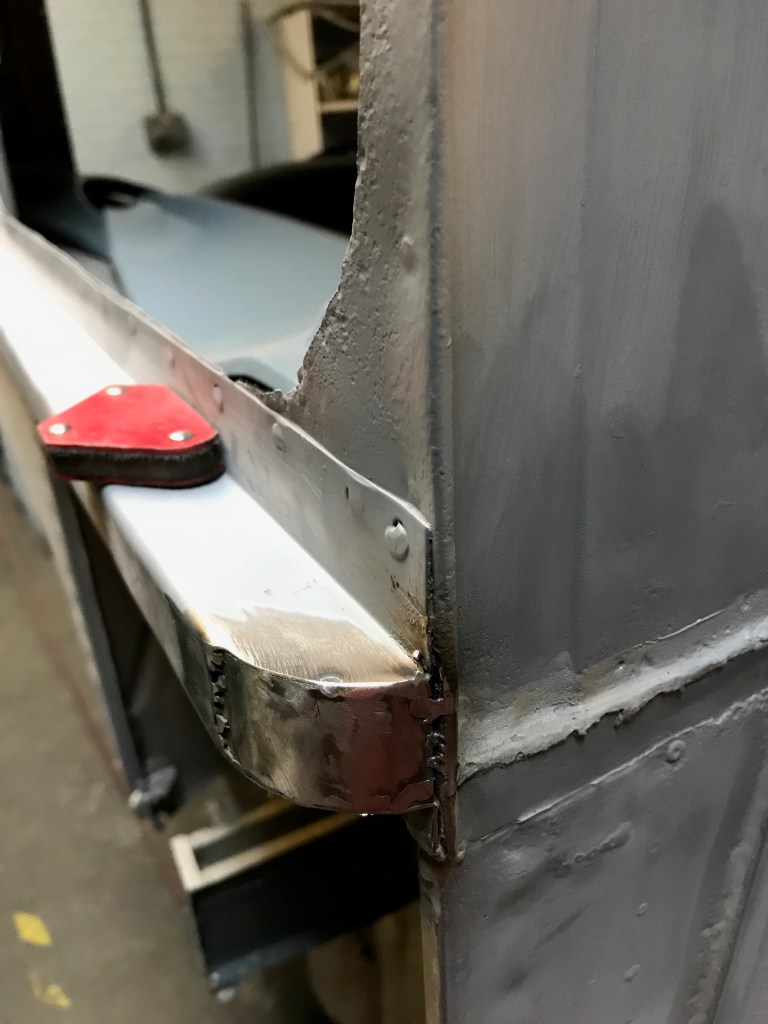
I also had to make a new piece of drip channel to replace a rusted out section
I fitted both rear wings on using bolts. I know I said I’d weld these on in an earlier post but with them bolted along all 3 edges, if I need to get underneath for maintenance, I can easily take them off. I pretty sure I’ll never need to take them off but perhaps someone will in feel the need to do so in 10 or 15 years time when the van undergoes its third restoration – who knows.
I had to close off the end of the rail on both sides as well. A small square of new steel was but and welded in – not ‘after’ pictures yet
I also realised that I’d need to close off the front end of the ‘top hat’ side rail below, but not until after I’d applied the primer, which was annoying
tricky bit of welding…
Looking closely at the van bodywork, none of it is going to win any shows but at least it’s honest, it’s a bit of a cop out really because I could spend another 6 months perfecting every little blemish and fault – and then where would I be? I’d be happy, however polishing this particular turd would never have be the right thing to do. It’s a 53 year old van and it needs a few battle scars. I can’t create patina – the best I can do is what I’ve done and roll in it a bit of glitter.
So – on with the top coat. This didn’t go quite as well as I hoped. My paint gun got gummed up and the spray pattern went haywire, I had water droplets spattering over the roof and the paint came out drier than I wanted. But – it doesn’t look too bad and when it’s fully hardened off in a few weeks time, I will probably flatten it off and shoot another coat on it.
Next steps? I need to paint the bonnet (Inside and outside), paint the inside of the rear of the body, sort out the driver and passenger doors and then paint them (which will be a mission), fit the rear doors, paint the chassis, pop the body back on and start re-assembly. Lots more to do. hmm….
Keen to find out more about the French and their shades of blue, I pinched this from a decorating website:
‘This is a beautiful smokey, grey blue. It is the colour I associate with the cloth used for the uniforms of French infantrymen in the 19th century. It would have been based on indigo the highly prized organic dye. It has a good tonality – rich and warm – a great foil for lighter colours used with it and a good compliment for stone and marble surfaces.’
Right – so I’ll need to line the inside of my van with marble or stone in order to complete the look. Good job I have that spare engine…
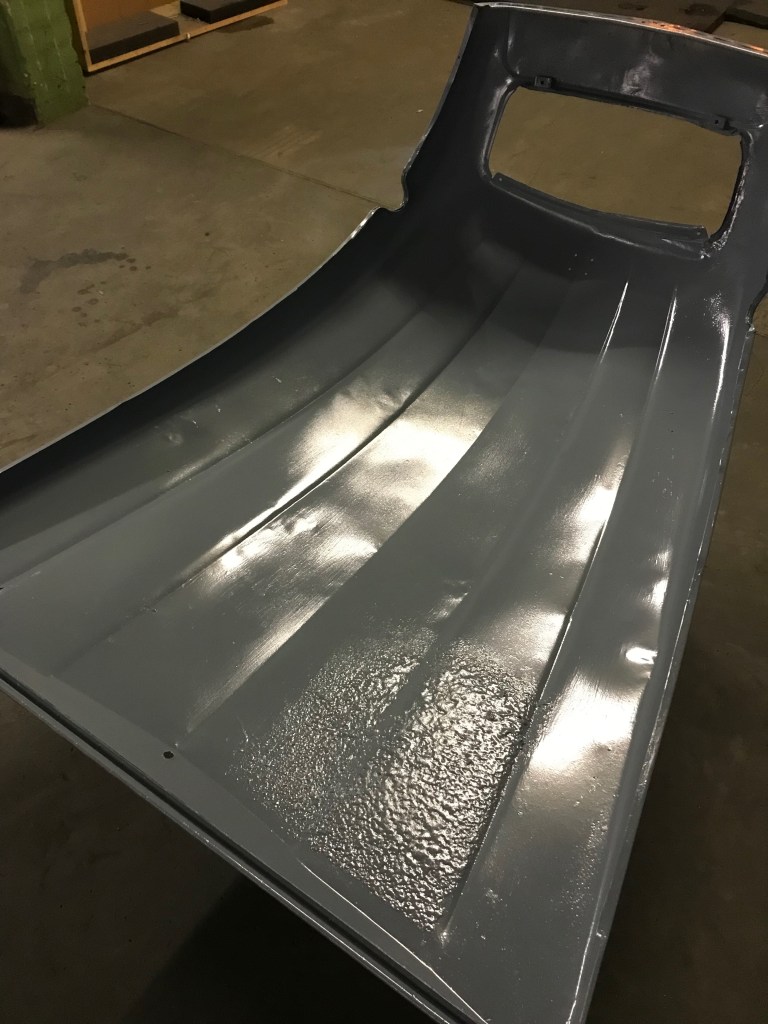
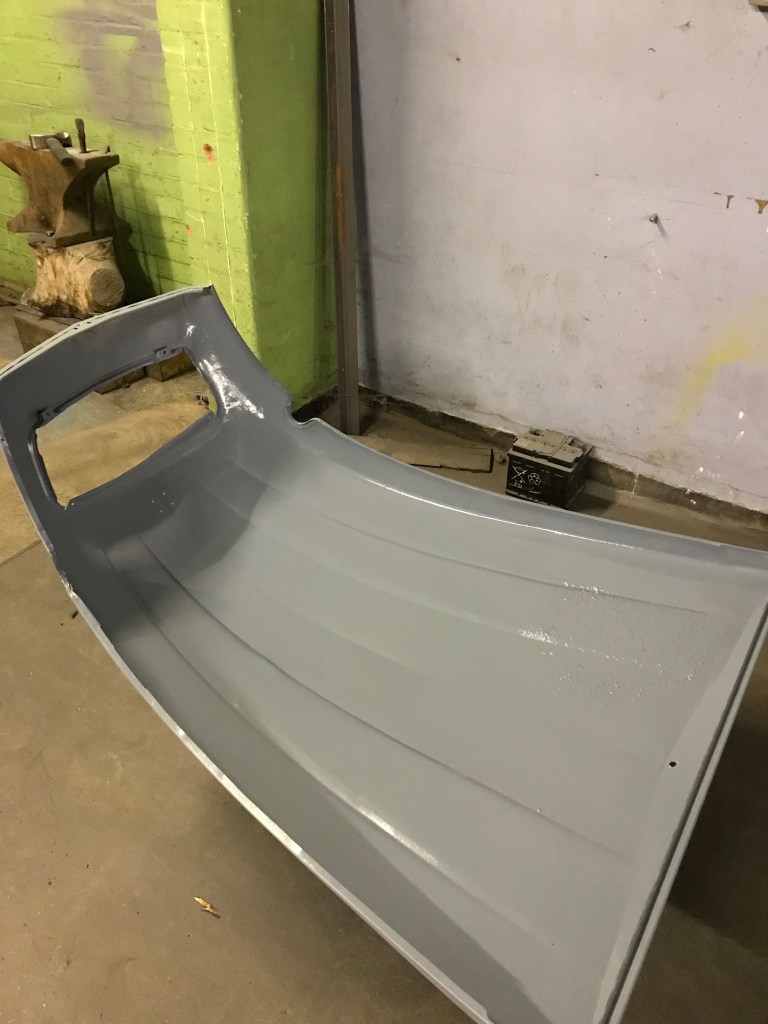
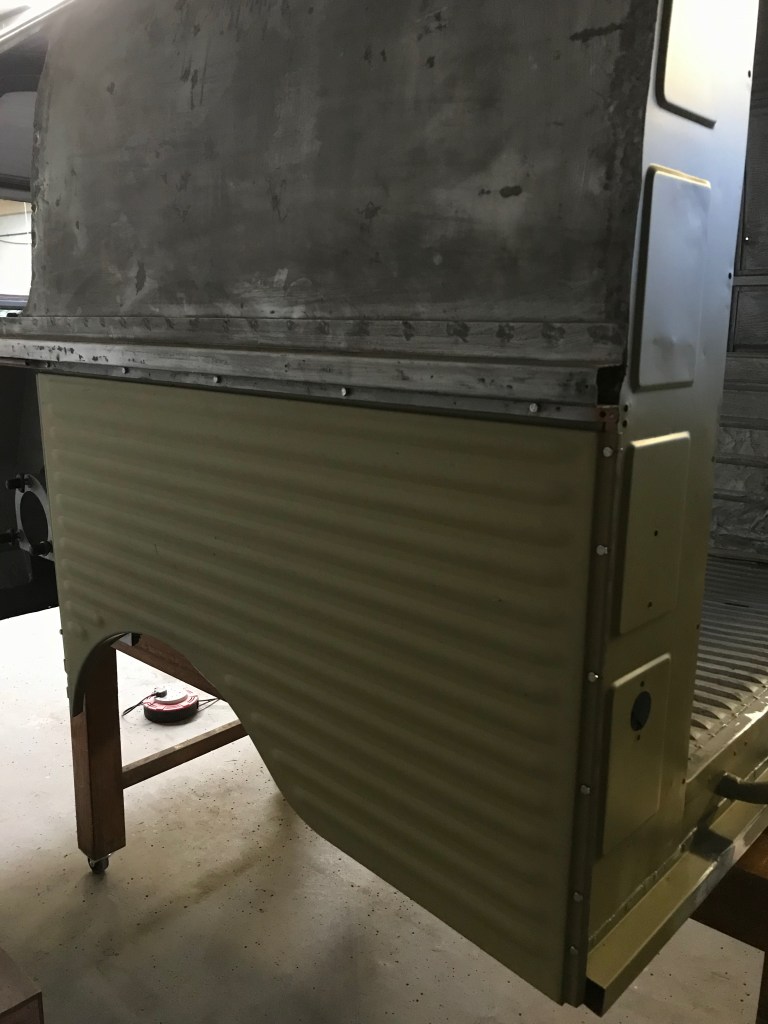
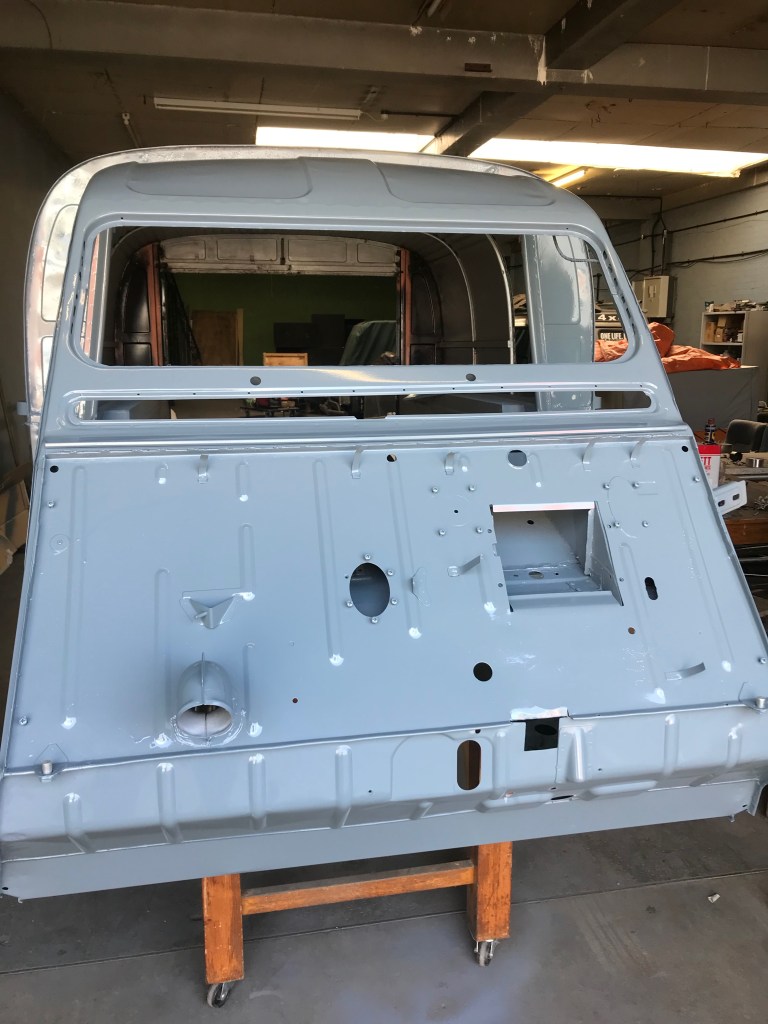
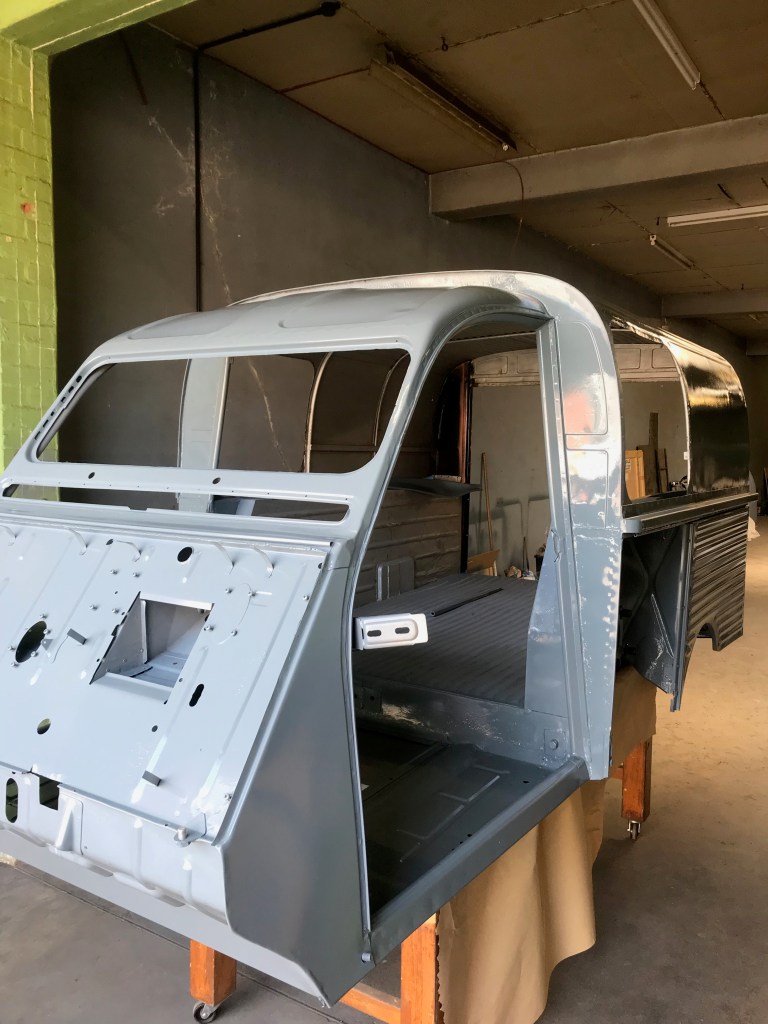
Cheered on by this, I sprayed the undersides of the floors and toe board with the top coat of Bleu Neve (AC-609). It is indeed a lovely grey blue and I’m guessing that the French Navy blue is a take on battleship grey that we Brits use to paint our old tractors, school corridors, prisons and of course our ships.
I seam sealed the joins with some Upol Tiger Seal before painting on the top coat, hopefully it will stop moisture creating in between the joins and rusting the metal.
Nonetheless, I am really pleased with the result, especially the semi gloss finish which looks about right for the period look I’m aiming for. By time I’m done the van will look like it was either a rush job at the factory or that it has been repainted by an enthusiastic amateur (which it has) – as opposed to a professional paint job. ‘It’s all in the preparation’ they say, but it’s also very easy to get carried away when laying on the paint – thinking that a bit more of a squirt here will just cover that blemish – or as inevitably happens, it will turn into a run. Spraying the rest of the van (and by this, I mean the bits that will be on show) will test my mettle to the full. I’m sure that this is going to be the hardest bit of the whole restoration and I can understand why resprays are so expensive. It takes forever to get a car ready to paint, no time at all to actually put the paint on and plenty of time to look back and wish you’d spent more time on the preparation.
Weirdness
An odd reaction has taken place where I overpainted the silver Hammerite that I brush painted onto the underside of the body, in that the new paint has fisheyed, just before it flashed off fully – a bit like what happens when you try and paint over silicone polish or sealant. This is probably due to the Hammerite not being fully cured – I seem to remember being caught out by this before when spaying a moped with a new coat of Hammerite over an old coat, which had been left too long to overpaint (ie more than an hour or so) but not long enough for it to have properly dried out (a week or two). It’s not really a problem, but it is something I need to watch out for when I paint the inside of the van, which already has a liberal coat of some sort of silver paint applied to it with a brush. My plan is to flatten this off as best as I can, and try a few test areas with and without primer, so that I can see how it reacts – and then decide how to deal with it.
I think I’ll paint the inside before I do the outside – it might not get much more than a dusting, except for the new metal areas (floors, sills, toeboard, bulkhead and inner screen panels, which I will do properly, but at least this way I won’t be risking getting overspray on the outside. I’ll paint the inside and then mask off the windows and door apertures – and then have a go at the outside. I’ve already primed the inner side of the rear wings, headlight bowls, petrol tank and spare wheel covers. These will also be top coated on the inside and then fitted, ready for the big paintathon.
Here are a few tips for mixing and applying paint:
The data sheet that your friendly paint supplier gave you when you bought the product, will give you the mixing ratio for paint to thinner, the flash off time between coats and some other useful pre-requisites, such as safety precautions, so that you don’t end up poisoning yourself when spraying the stuff about. The good news is that the paint I have is not horribly toxic (no isocyanates), I have a good quality mask and as I don’t spray paint for a living, the risks to health are minimal and therefore I have deemed it acceptable. Also, with the body shell on its new mobile table, I can place as good as outside the workshop by the roller shutter, so I won’t be filling up the whole workshop with paint mist.
Also, by using a High Volume, Low Pressure (HVLP) spay gun and a weedy little compressor, I won’t be atomising the stuff too much. This type of spay gun is gravity fed as opposed to the old school type which sucks the paint up from the pot. You need less pressure with a HVLP gun but you do need a reasonable volume of air from your compressor to create the correct spray pattern fan out of the gun. Too much air and the paint will dry before it settles, too little air and it will spatter out in blobs and drips.
It’s important to keep a wet edge (not a euphemism) when spraying – this is to allow the paint in pass you are making to blend it seamlessly with the stuff that has already been laid down before it dries or starts to flash off. This is all very well, except that there’s a huge expanse of roof to cover and I’ll have to get around both sides of the van, whilst maintaining the wet edge. There’s only one of me, so this will be a challenge.
Anyway – back to the data sheets. On the primer and top coat datasheet the ratios for mixing are 10-15% thinner by volume or weight to paint. This all sounds a bit vague to me. Paint has solids in it and therefore weighs more than the thinner, so the volume method would be out by some margin. I decided to go with the weight ratio and chose a number in between – 12% by weight of thinner to paint. This is easily achieved by using a set of cheap electronic scales and some plastic 3/4 litre cups. Place your cup on the scale, zero the weight, add 500 grams of paint and 60 grams of thinner, mix, pour into the paint gun and apply..
Even when thinned, the paint is still quite viscous, much more so than the 50:50 mix I’ve used in the past when spraying cellulose or the etch primer that I’ll use first over the bare metal. Having said all of that, I don’t think it matters that much – as long as there is enough thinner in the paint to make it flash off and dry in a reasonable timeframe then all should be well.
This is the bit that holds the pedal hanger box in place, where the master brake cylinder passes through. It was painted a few days ago and still smells of wet paint and is still soft enough to mark with a fingernail. I guess the paint will take a few weeks to harden off fully and in the meantime I will need to be careful moving stuff around so that I don’t damage it. I’m pretty sure I will make many marks and scratches when I put the jigsaw back together, so expect a ‘paint repair’ feature sometime in the near future.
This picture is a better representation of the colour – more blue, less grey than the other shots
I’ll close with a quick update from the Thursday pub night – aka The Old Man’s Memory club.
Our local has been upgraded in that it now has a band playing in the spot where we usually sit. This is inconvenient as (a) we’re much older than both the band and their audience – we are the same age as their grandparents, so they will tolerate and pity us and (b) We can’t hear ourselves think. We moved to another pub which was a relief but it didn’t sell old man’s ale so we had to drink craft lager instead.
To cap it all, we were only three and therefore not quorate. Pete F is on holiday in Greece, having first spent a few days soaking up some culture in Venice. We took advantage of his absence by pondering how long it will be before he starts on his project car – a Gilbern Invader. Bets have not been placed as it we all know it would be rude to do so. Also it will be so far into the future that none of us will be around to collect, so we just agreed that it would be later…sometime..
Pete R (Fishy) has now lost 2 stone in weight. A milestone for him and
we congratulated him on his achievement.
Lastly, Steve had an update from Chris. ‘He’s not coming out tonight but says hello’.