It’s a long old job putting a 2CV back together.. much longer than I originally thought and much, much longer than it took to take is apart. I put some of this down to memory degradation – every time I pick up a bag of bits and pieces to work on, I have to first identify what they are and and they try and recall in what order they were removed. More often than not I have to resort to trial and error. Still – it feels like I’m on the home straight. I’ve no idea how many man hours I’ve spent on this project, all I do know is that I couldn’t possibly do this for a living – I’d never make any money. Also, the inner perfectionist in me has had to be suppressed as I have made compromises – particularly with the paintwork. It’s just not possible to get a perfect paint job on a DIY project.
So, where am I up to on the list of things to do?
Body bolted onto chassis and all the nuts and bolts done up – well, nearly all of them..
Master cylinder fitted to the brake pedal assembly and fitted to the bulkhead. This job should have taken about 10 minutes but of course I had some glitches to sort out. The new bulkhead and toe board panels were not a matched pair. The bulkhead was for a LHD suspended pedal box 2CV and the toe board was for a LHD chassis mounted pedal box 2CV, so I had to cut a hole in the toe board through which the master cylinder could be fed through and then the pedal box could be bolted to the bracket which is fixed to the bulkhead. I had to drill 6 holes for the bracket and cut out a square section to make room for the master cylinder. Anyway – it took a couple of hours to sort it all out – another hour or so to bleed the brakes (not easy single handed) but I do now have a firm brake pedal and brakes. I think.
Exhaust – this went on really easily – except that I had to drill a couple of holes in my nice new floor so that there would be something to secure the first exhaust bracket to. Easy job though.
Rear doors – fitted and adjusted. Then I spent an hour looking for the rear door handle – could not find it anywhere, so gave up. I’m sure it will turn up eventually (it did…). No door seals fitted yet as the old seals are covered with paint from the PO’s attempt at brush painting the van – without the aid of masking tape, so I will need to tidy them up before fitting or get hold of some new rubber.
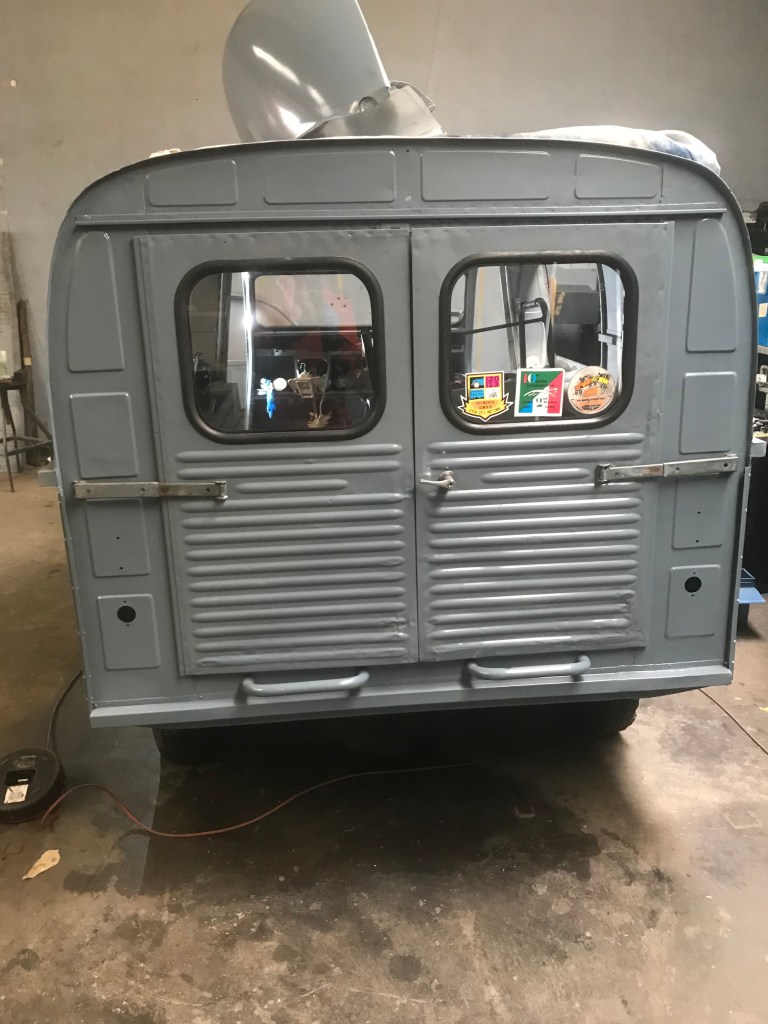
Rear door glass x 2 – fitted these using the ‘string’ method. Basically one fits the window rubber to the glass first. Then slip a bit of lubricated cord (3ml nylon cord is about the right size, use Waxoyl as a lubricant) into the slot that sits either side of the door aperture. Offer up your rubber and glass combo and whilst pressing it into the aperture, pull the string so that the lip of the rubber seal is neatly pulled over the rim of the aperture. Rim, Rubber, Lube, Slot, Push, Pull…. rinse and repeat. I got them both in eventually. Not a job I ever want to do again.
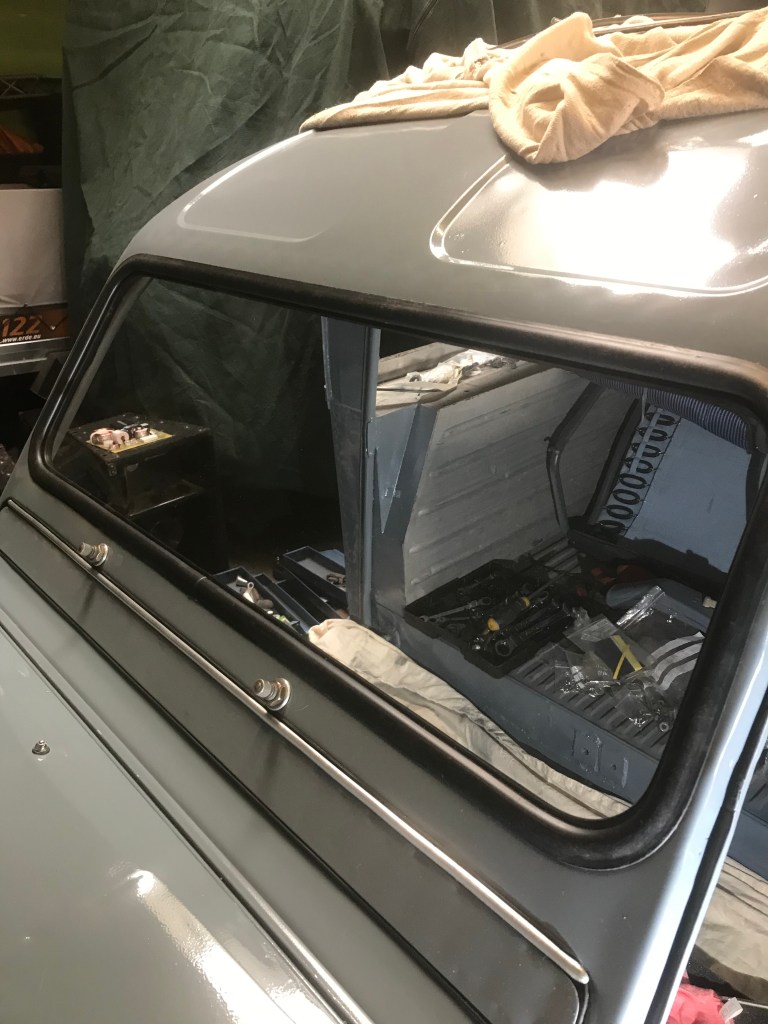
Brian turned up with my old front bumper which he’s taken to his friend who blasted and powder coated it. It looks great, still some visible pitting but the rust has gone and I’m sure it will look the part when I paint it grey to match the wheels and the lamp bar. ‘Let’s fit the windscreen’ said Brian – err ok then… More string, lube and manipulation and we had the screen nicely fitted within half an hour or so. There’s no way I could have done this on my own, so thanks Brian, you’re a star!
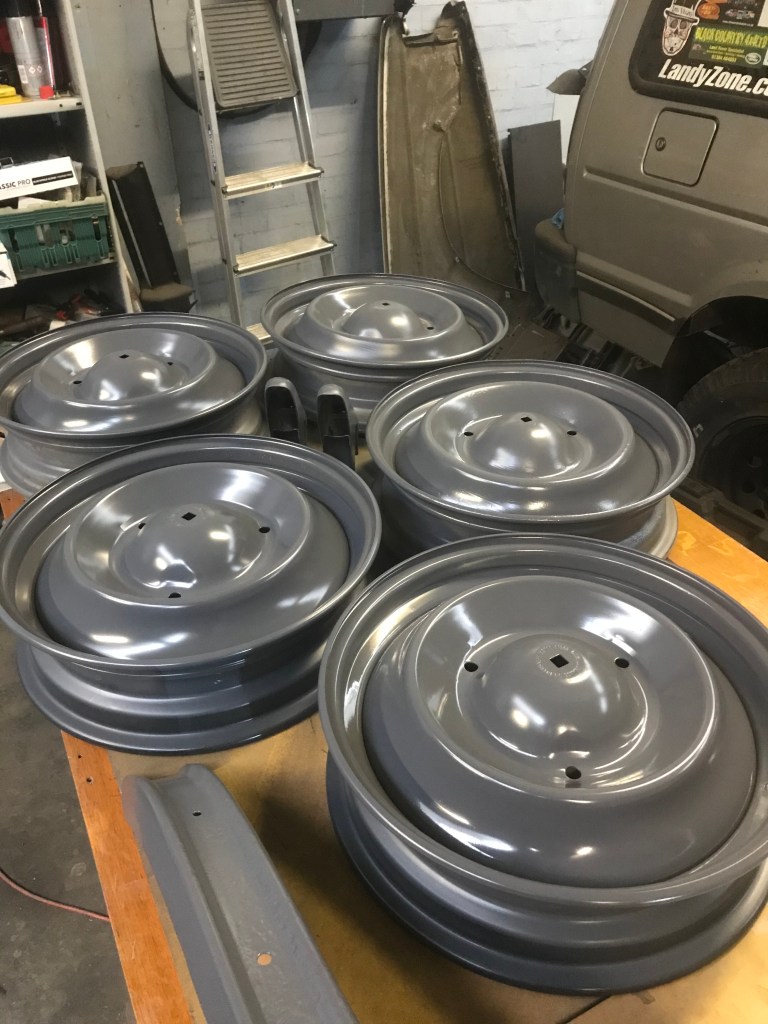
I had a proper rummage about and tidy up before I painted the wheels and the bumper and found the rear door handle – in a bag labelled ‘handle’. Brilliant. Wheels and bumper have been sprayed with a couple of coats of AC140 Gris. I should have got Gris Rose but according to my paint supplier, this grey is the correct colour for 1966. Anyway, I’m sure it will irritate the purists, but in the end they are my wheels and bumper, so grey they are and grey they will stay.
Next on the list was the side windows. These are fitted with a chrome strip which sits in the middle of the seal and expands it slightly holding it in place. With the fixing strip removed, I fitted the seal to the window aperture and then squeezed the glass in. After an hour of swearing and cursing, I finally managed to get them in place. The ‘chrome’ fixing strip has broken into many small pieces, so I’ll need to get some more. It looks as if it’s the same profile as an old Mini windscreen, so that’s what I’ll get.

Wiring – well, lets’ just say that this is going to be a mission. I’m going to see if I can get the engine running before I connect up the rest of the loom – more on this later but first I will need to fit the cables and route them through the firewall, which will mean drilling a few more holes. The fuel tank will have to be drained and re-installed – talking if which, where does one dispose of 15 litres of stale petrol?
I still need to buy some more parts.
A rubber mat for the front floor is top of the must have items. I haven’t done a leak test yet, but I’m expecting all of the rubber seals to let water in – a tube of sealant will also be added to the list. I also need the gasket which fits between the master cylinder and the bulkhead, but this means I’ll have to take the whole thing out again to fit it, then, which entails draining the brake fluid and bleeding the brakes again.
Five blanking plugs for the wheel centres – not essential but I will get them because they will be easy to fit and will finish the wheels off nicely.
A set of black / silver number plates
A pair of unobtanium clips to hold the chevrons onto the bonnet – I have no idea where I’m going to find these
Other news – I tried to get a parking permit for my Van from the City Council but apparently it doesn’t exist according to their records. This can only be a good thing as they won’t be able to issue a penalty ticket, because if they do, I will ask them for proof that my non-existent van was parked where it should not be. Watch this space!

I think it would be easier running a marathon! Lol 😆 well done. Looking good already!
LikeLike