The reassembly has started. The first and most important job is to re-unite the new replied and painted body to the platform chassis – the underbelly of the 2Cv. Most cars these days are of monocoque construction and so have no chassis as such. All the running gear is either fixed directly to the body shell or to subframes, which are then bolted to the body. The 2CV is ‘old school’ and therefore has a separate chassis, to which all the running gear is installed. It is perfectly feasible to get the chassis, without body into a state where it can be driven about. It will be cold and uncomfortable and is not recommended.
The body is bolted to the chassis by a number (20 or so) M7 set screws (bolts) which are fastened to nuts or threaded J-clips. M7 is not a size that your normal nut and bolt merchant will have in stock. Mostly, the chap on the other side of the counter will tell you there’s no such thing. ‘They are not available, they don’t exist’ is a common response. When you produce an example for him/her to inspect, they will produce a tape measure and try and convince you and themselves that the size is M8. This is what happened to me when I went to Lamberts in Norwich (Specialist automotive Fixings shop). When shopping in these places, once should always take the trade counter entrance. This will set you aside from a normal ‘punter’ who’s likely to be troublesome, needy or both but will guarantee you a long wait at a counter. Behind the counter, there will be lots of staff who are all busy doing nothing. No-one will come forward to serve you because (a) you are a stranger in their domain, (b) you are holding something like a nut or a bolt which means they will be required to engage with you in a way that is alien to them, (c) you don’t have an account, which means that even though you are paying cash, they will need to produce a ‘ticket’ for you, which will be printed out on an old dot matrix printer in triplicate – you will get the yellow copy, the other two copies, white and blue will be posted through a slot in the counter, never to be seen again, (d) the person serving you will answer the phone and start a conversation about football, after which they will have no knowledge of you or what you are in their domain for, (e) you will be triaged by a set of rules which have no basis of logic and cannot be circumvented by any means, (f) someone will eventually try and help you but it is their first day and in order to do anything other than say ‘can I help you’ or ‘Who’s next’, will need to involve another member of staff who is otherwise engaged – on the phone talking about football or busy doing nothing. I’m sure you get the picture.
Never mind, the things you want are available from your friendly Citroen 2CV specialist, so if you are in need, then you will just have to order some in advance, which means you need to know that you need them before it becomes apparent that you actually do need them.
Anyway – that’s enough ranting for this episode. I stuck some closed cell foam tape around the chassis, punched holes in the foam to correspond with the holes in the chassis and popped on the M7 J-clips that I’d previously stored in a plastic bag labelled ‘Chassis Bits’ along with a lot of other parts, who’s location (I hope) will become evident at some point in the future.
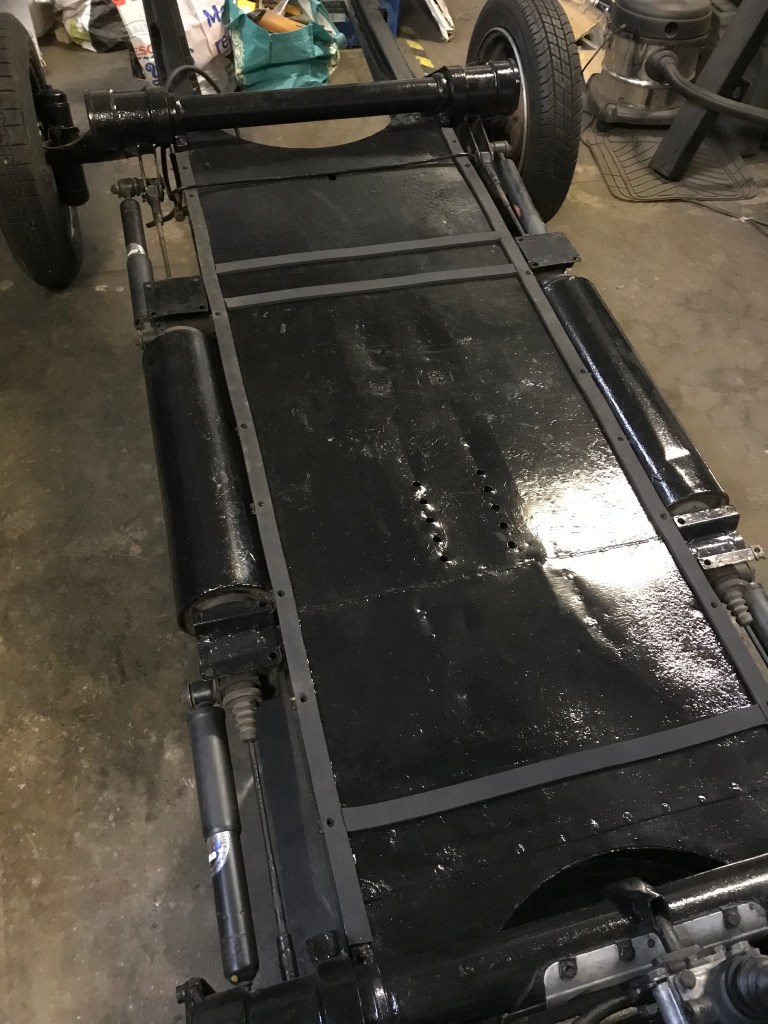
Pete, Steve and I lifted the body back onto the chassis and with a bit of shuffling around, managed to get a couple of bolts in place to keep the 2 halves of the 2CV sandwich together. I had a look down each side and at the rear where the chassis runs under the back of the van and all of the other bolt holes are lined up nicely. A huge relief, given how much re-work was done on the front of the van – thank god for the chassis jig – I would have been in a right pickle without that. Here it it is then, starting to come together

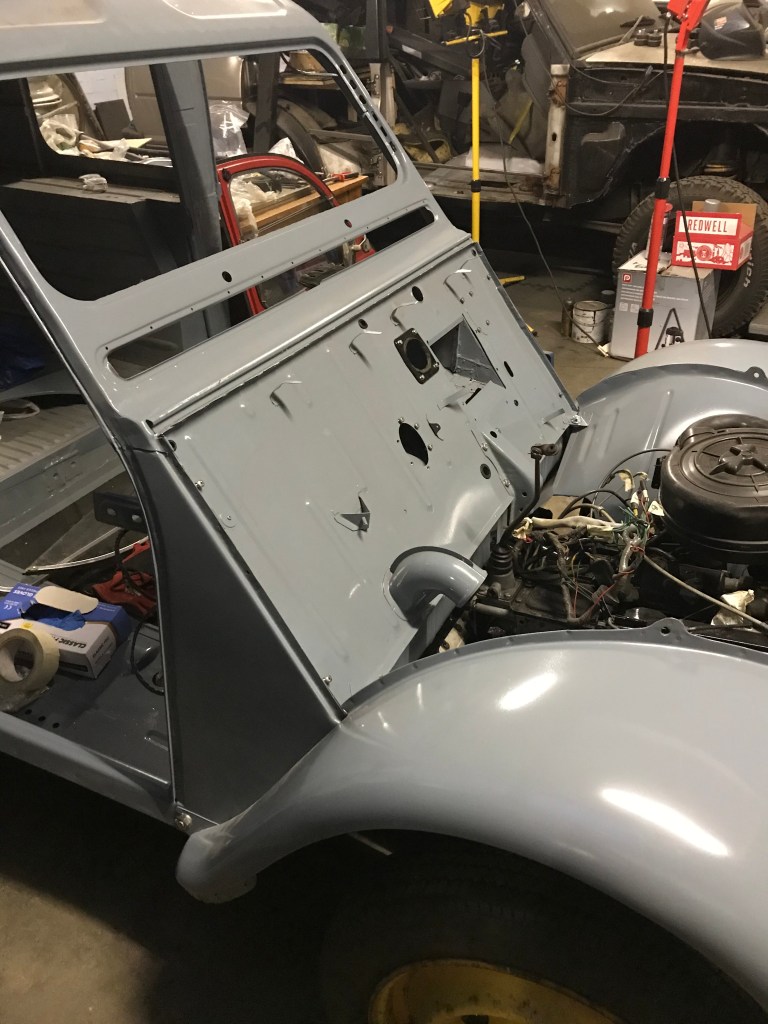
‘Lets put the wings and bonnet on before we go for a beer’ – said I, enthusiastically. The wings would not fit at the front, no matter what we did, the studs in the lamp bar were about 10 ml higher than the corresponding lugs in the front wings. What to do…. ? By this time, Brian had turned up in the workshop, so were 4 chaps who have all been tinkering with cars since we were teenagers, so we were sure that we’d be able to figure out a solution. Suggestions were as follows:
Remove the lugs from the wings and re-weld them a bit higher up – tricky because the bottom lug is sandwiched between the 2 skins that make up the wings. I’d also have to repaint them again afterwards – not ideal
Pack the underneath of the lamp bar mounting points where they meet the chassis with a 10 ml lump of steel – ‘Ah but if you do that, the bonnet with hit the lamp bar and won’t close properly’ said Brian, helpfully. How about if we cut the lamp bar above the top mounting point, remove 10 ml of metal and then weld it back on again, that will allow the bonnet to sit a bit lower..
Ok – lets leave it for now and just slide the bonnet on before we go to the pub. That didn’t go well either, the new hinge on the windscreen repair panel is not the right profile to allow the bonnet to slide in easily – when we did eventually get it in place, it we couldn’t get it much further than half way closed before the hinge started to bend – it looked like it was about to peel away from the panel, so we took it off again and went to the pub.
The next day I went down the workshop and had another go at it. After an hour or so of fiddling it dawned on me that the bumper brackets were stopping the wings from going as low as required, so I took the brackets off.

My guess was that the bumper brackets were incompatible with the new ‘old style’ wings I have on the van now – or the lamp bar is not right. Perhaps I need to get a different bumper or a different set of brackets or modify what I have in order to make it all fit together. I’m tempted to just get a new tubular ‘PO’ bumper – I don’t think the bumper brackets are needed for this type of bumper. If they are not, then the problem might be easily solved. I will seek advice from the expert Roy at ECAS before I do anything rash and start cutting things about.
I went back to the workshop the next day, took the bumper brackets off, removed the lamp bar, put the wings on and then realised that if I raised the lamp bar by a few ml, the wings would fit just behind the bumper brackets. All I needed was a couple of spacers. I found them in the bag marked ‘Chassis Bits’…. brilliant. I popped the upper wing panels on and had to fiddle about with the lamp bar spacers again to get all the gaps right. What I should have done, was to have sorted all of the panel fitting out before I painted everything. Oh well, we live and learn..

Another flurry of painting sees the doors finished, along with the vent flap (3rd time lucky) and the door hinges also got a coat of blue.
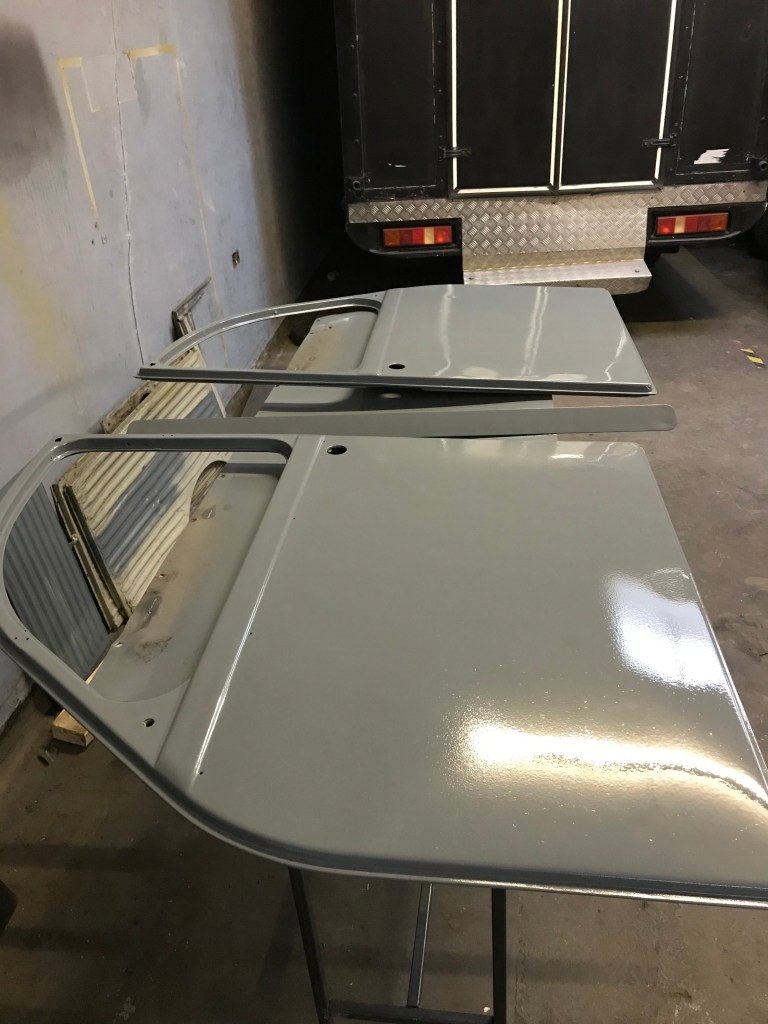
The doors will as be the last thing to go back on, there’s an outside chance that they will be properly dry in a couple of weeks time. There are plenty of other jobs to be done before that can happen, so I will need a list:
Finish bolting the body back onto the chassis
Prep and paint road wheels, get tyres put back on
Paint the inside of the van (rear floor, sides and roof)
Fit the rear doors
Fit the windscreen, side and rear windows
Fit the brake master cylender back on, bleed and adjust brakes
Fit steering column and switch gear
Install, wiper motor, vent flap, windscreen de-mist vent, speedo, handbrake mechanism and gearchange gubbins back onto the dashboard.
Attach the Clutch, accelerator, choke, heater, speedo and starter ‘pull’ cables
Fit windscreen, side windows and rear door glass
Fit rear doors
Fit lights and indicators back on
Re-install all wiring and test
refit Petrol tank
I’m under no illusion that all of the above tasks are going to take a lot of time to complete. I’m still having uneasy feelings about the wiring but the rest of it is just nuts and bolts – I remember that it took no time at all to take the van apart, but it will take much more effort to put it back together again. It ain’t going to be perfect but honestly, that’s not what I was aiming for. When I started this mission, I thought I just needed a quick tidy up of some of the bodywork and a re-spray but once I started poking about – well, you get the picture..
I’ve been lucky in that all the mechanical bit’s and bobs are all ok – that’s down to the chap who restored in 2010 it before I bought it, so thanks to Pete from Ashby De La Zouch. If anyone know’s Pete, send him my regards and thanks for all his hard work.
Footnote: from the Old Mans Memory club weekly pub outing. Pete Fish continues to lose weight, so we are pretty sure he will soon be no longer visible from sideways viewing. Pete F has been messing about with his daughters car (Honda Jazz) and had successfully diagnosed and replaced with a second hand part, the throttle actuator, so it now runs as sweet as a nut, which is nice. Steve didn’t have much to report, except that he hadn’t heard from Chris.

It’s progress! Vey much the story of most restorations, never goes back the same!
LikeLike