We’ve all been on a Summer Holiday

As the title suggests, I’m back from my holiday in Crete with renewed enthusiasm to get on with the work on the van.  Starting with what has now become a ritual sweep and tidy up in the workshop, I tackled a few of the smaller jobs on the ever growing list of things to do. Quite why the list is growing and not shrinking must be down to poor planning on my part or it’s someone else’s fault.

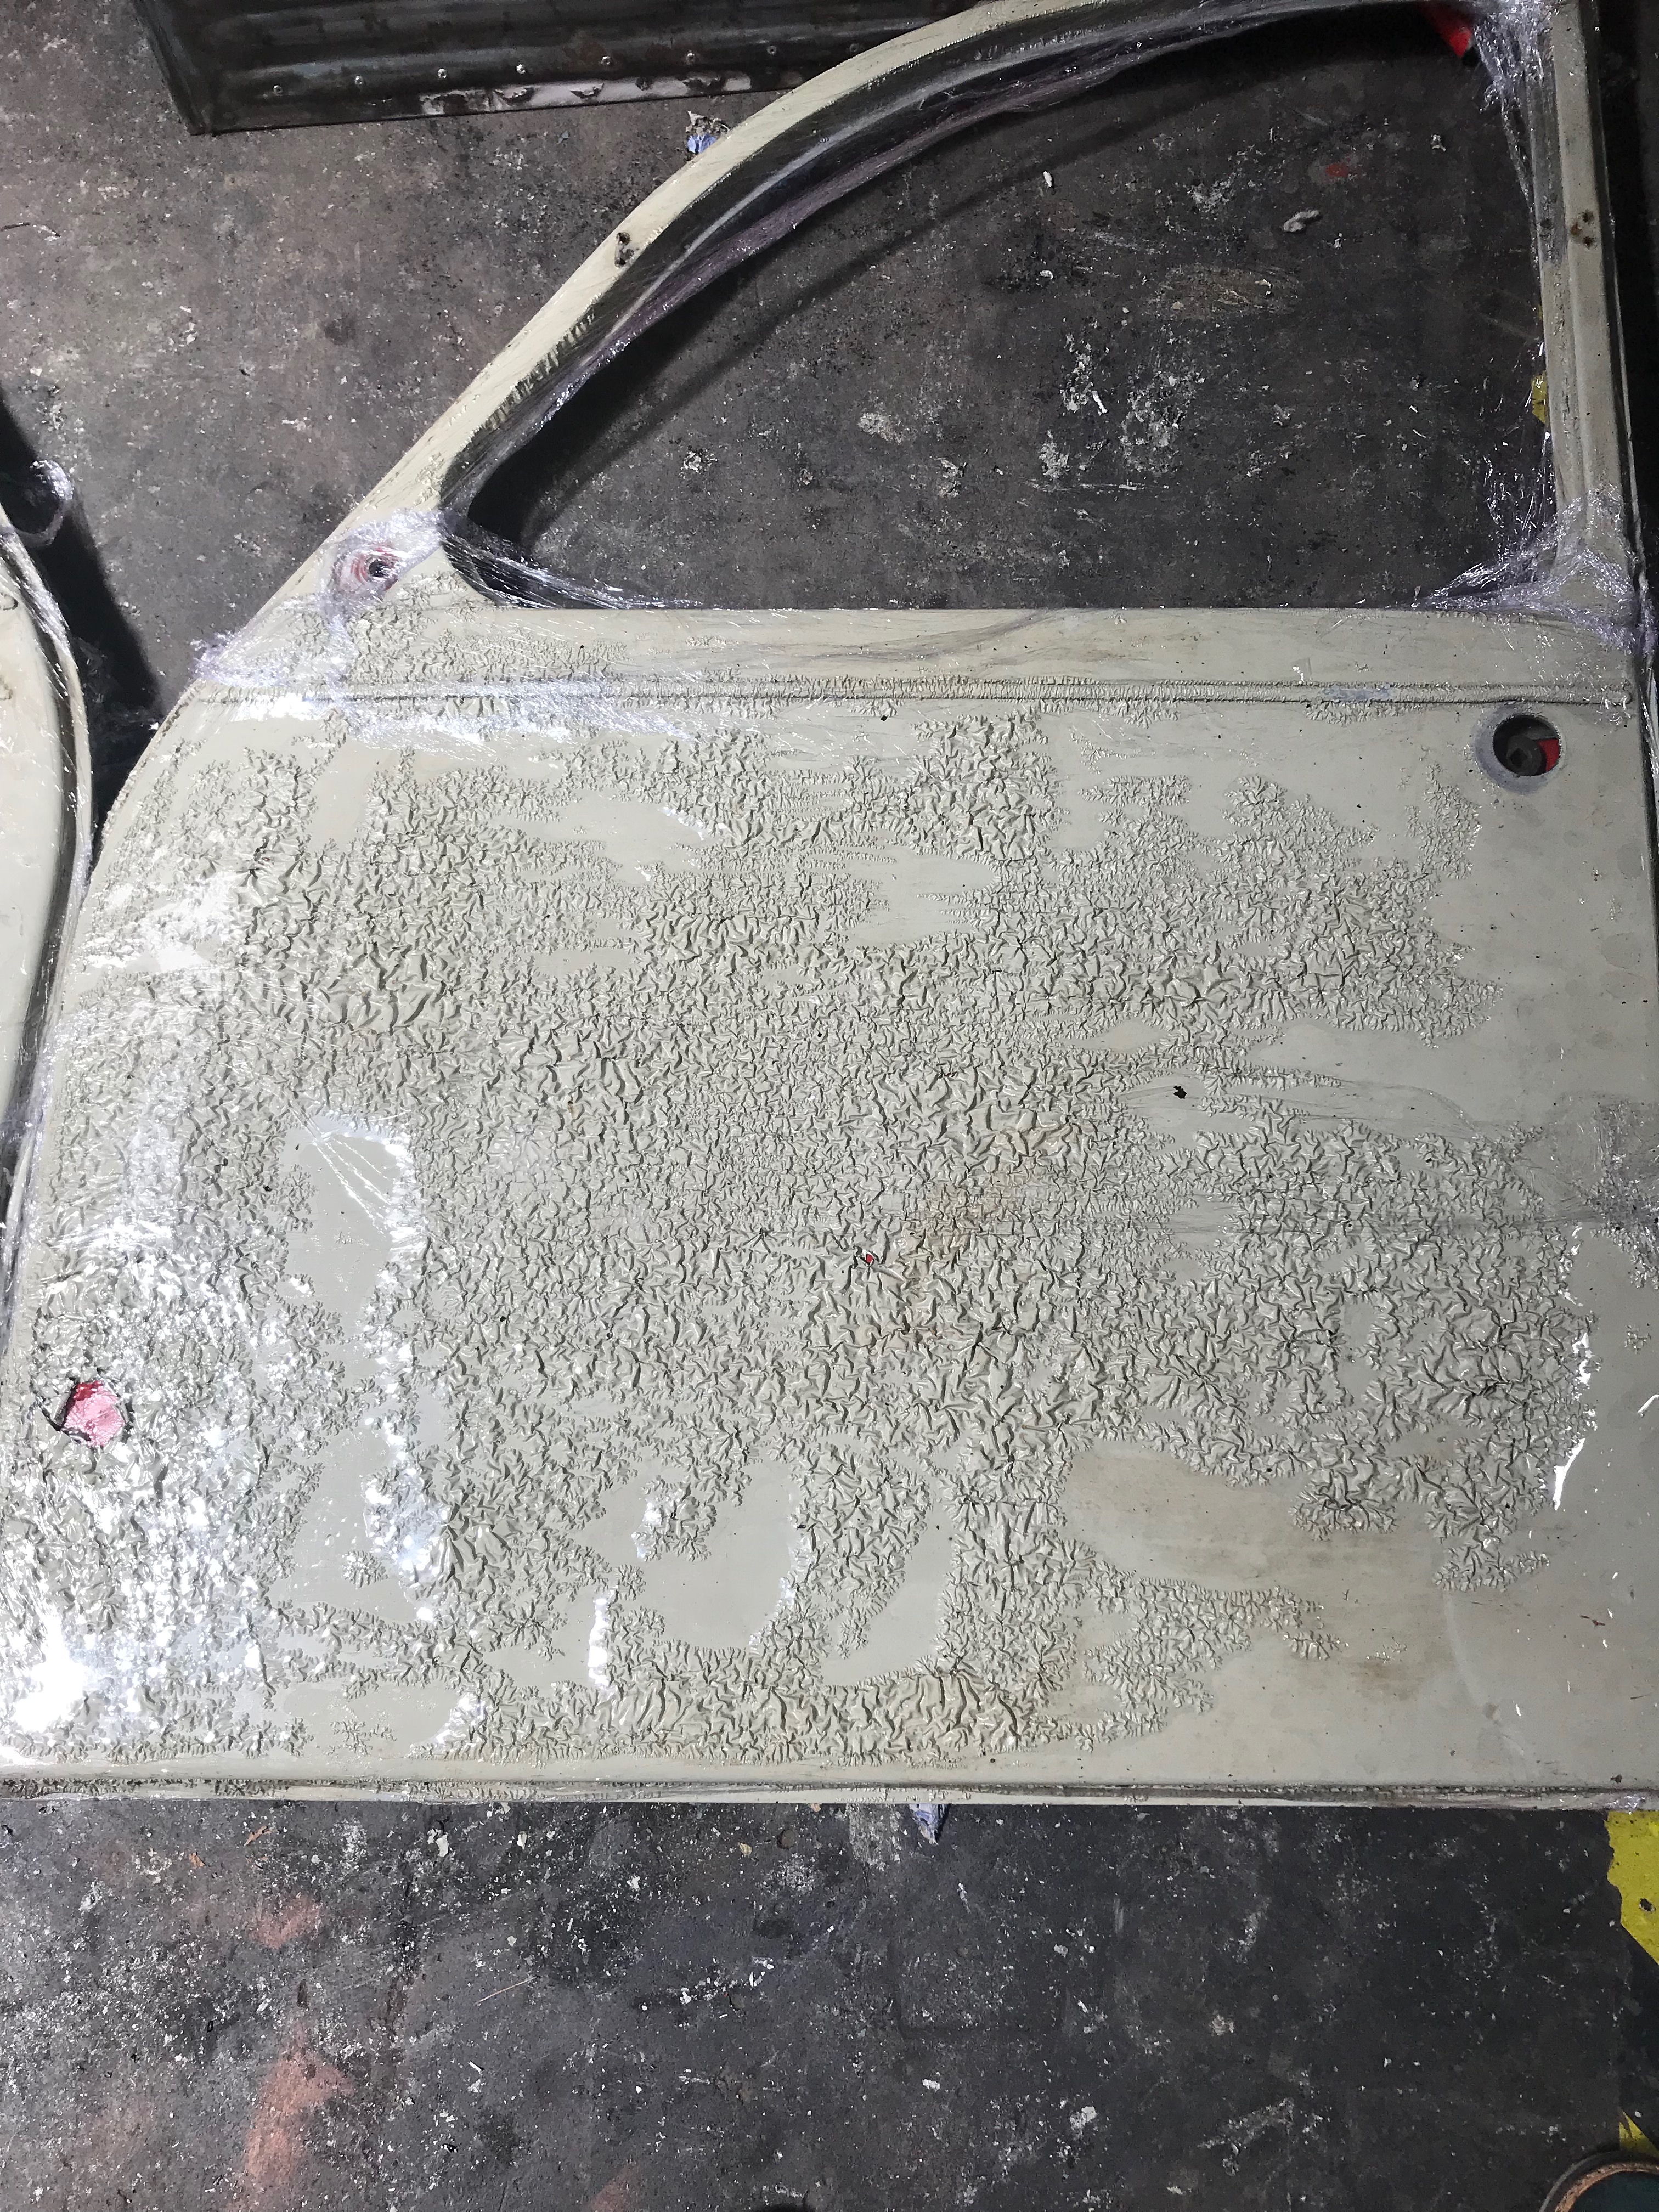
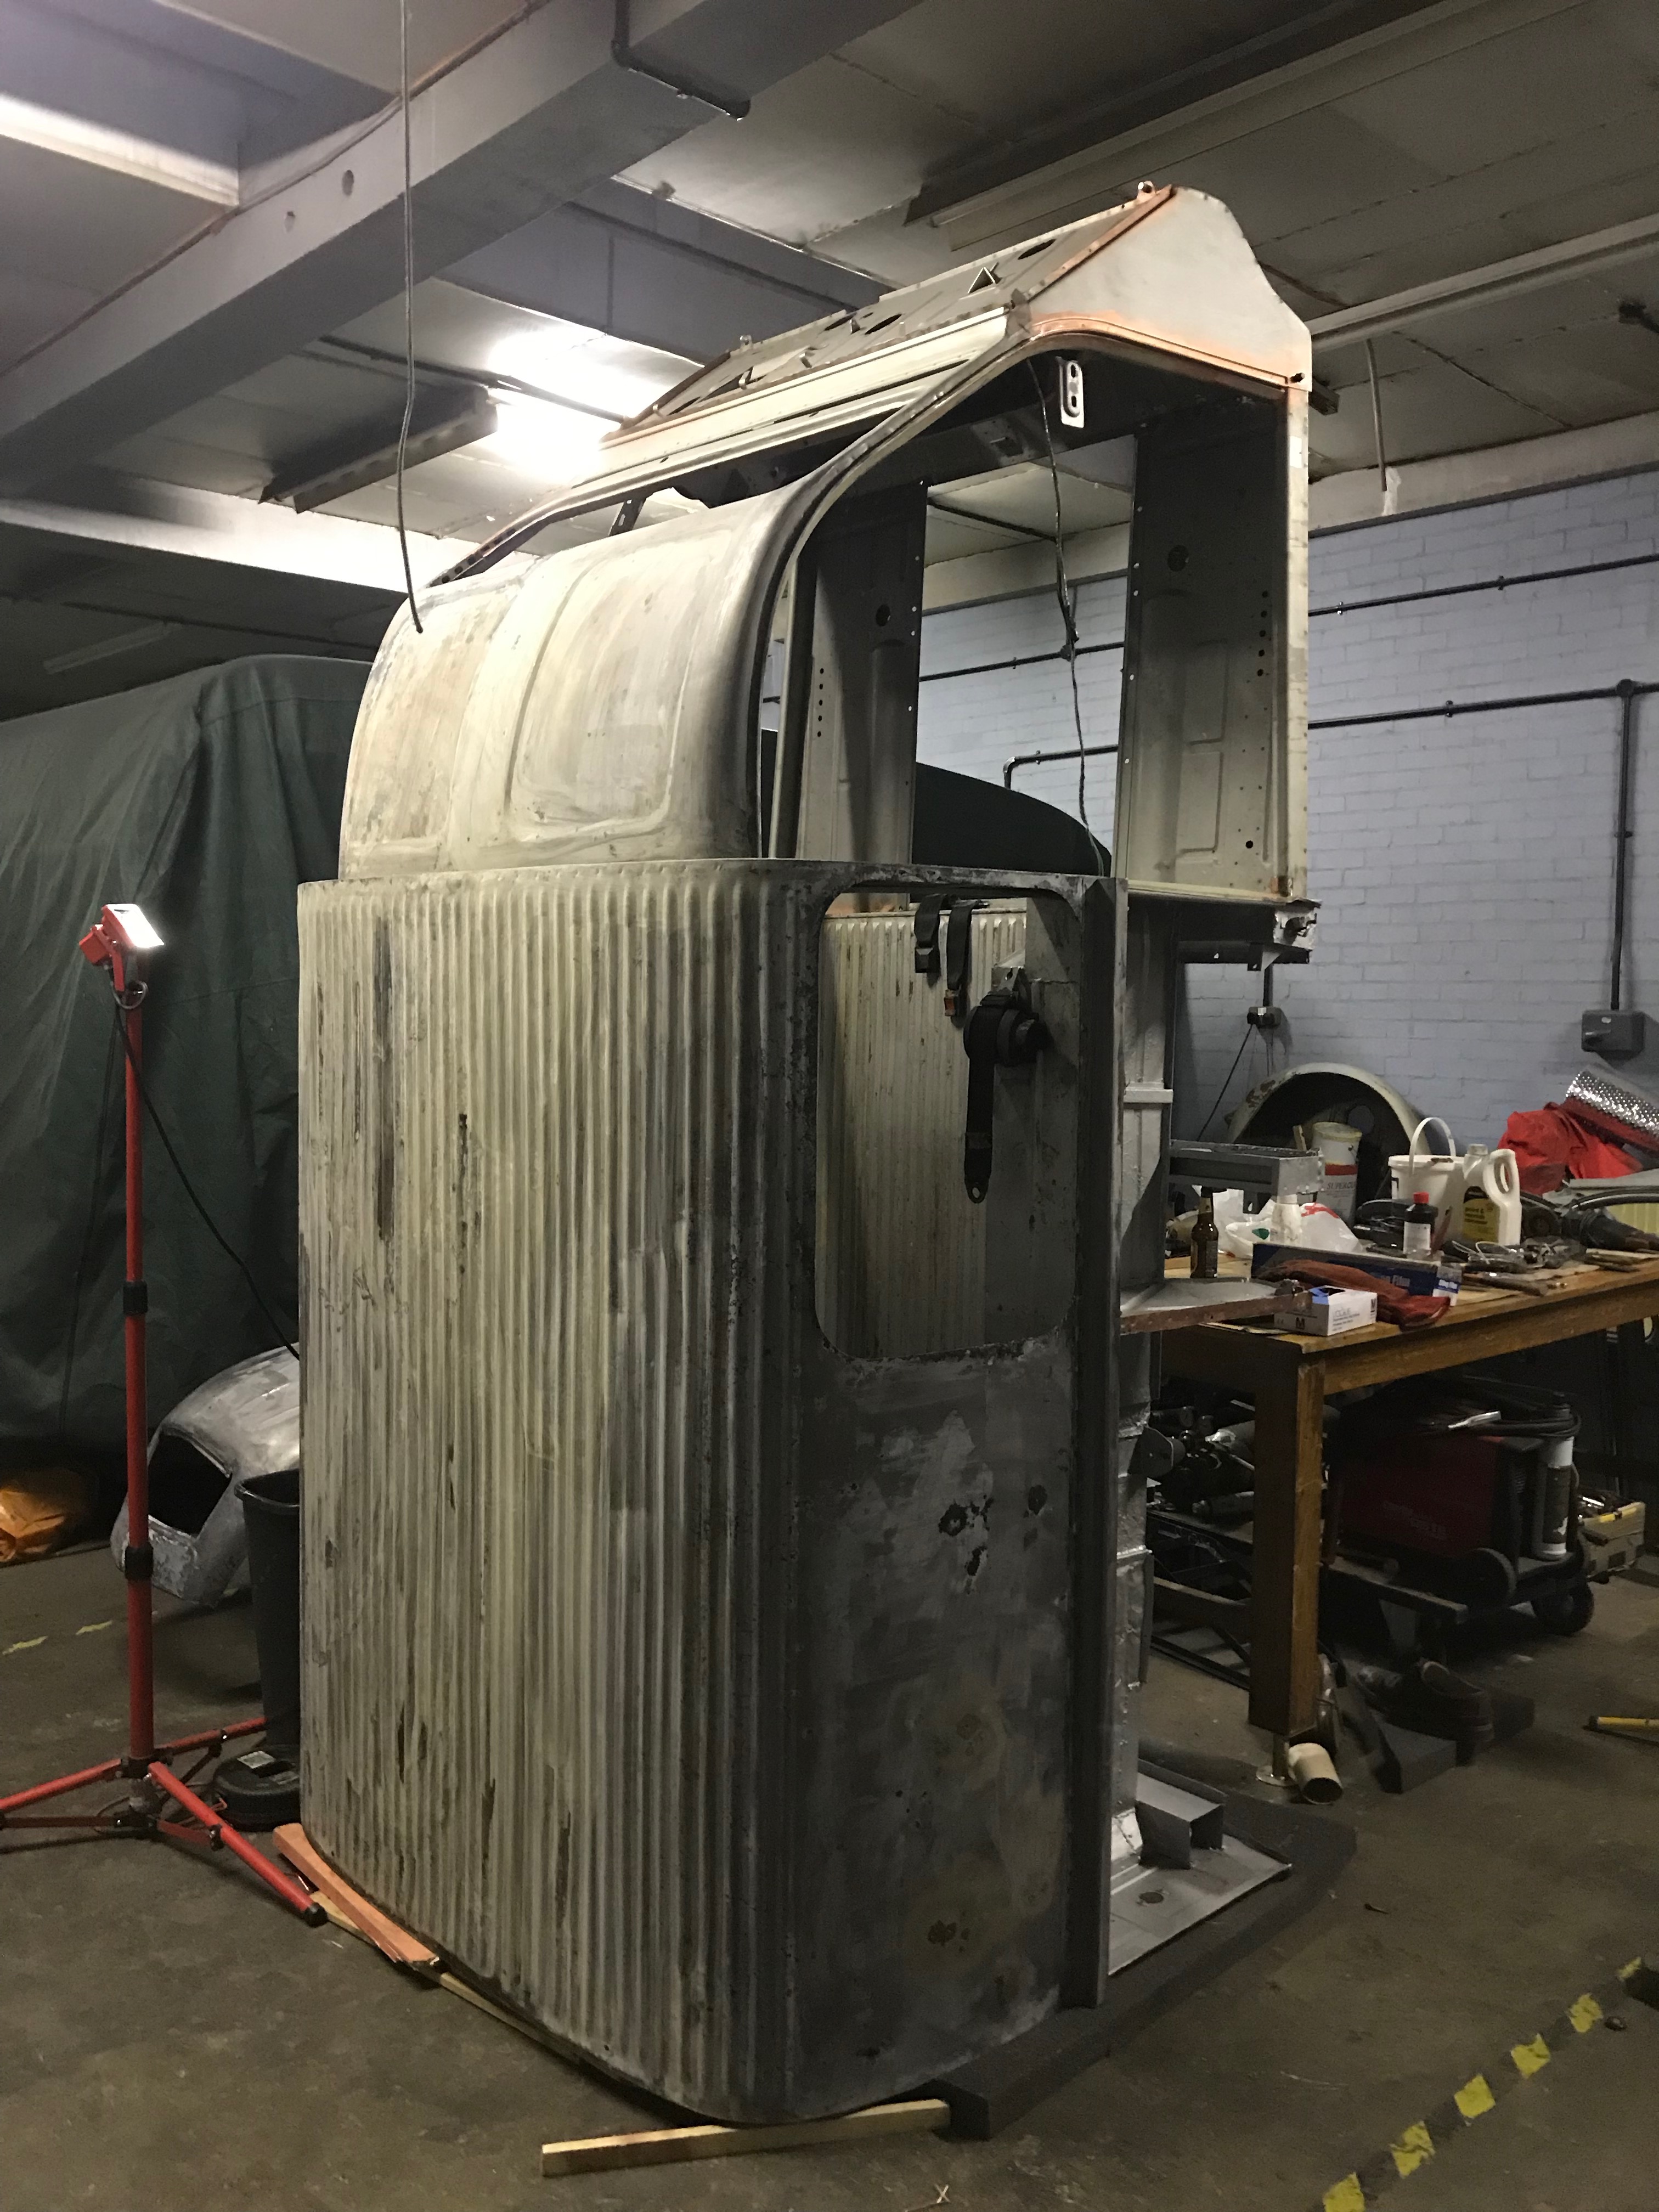
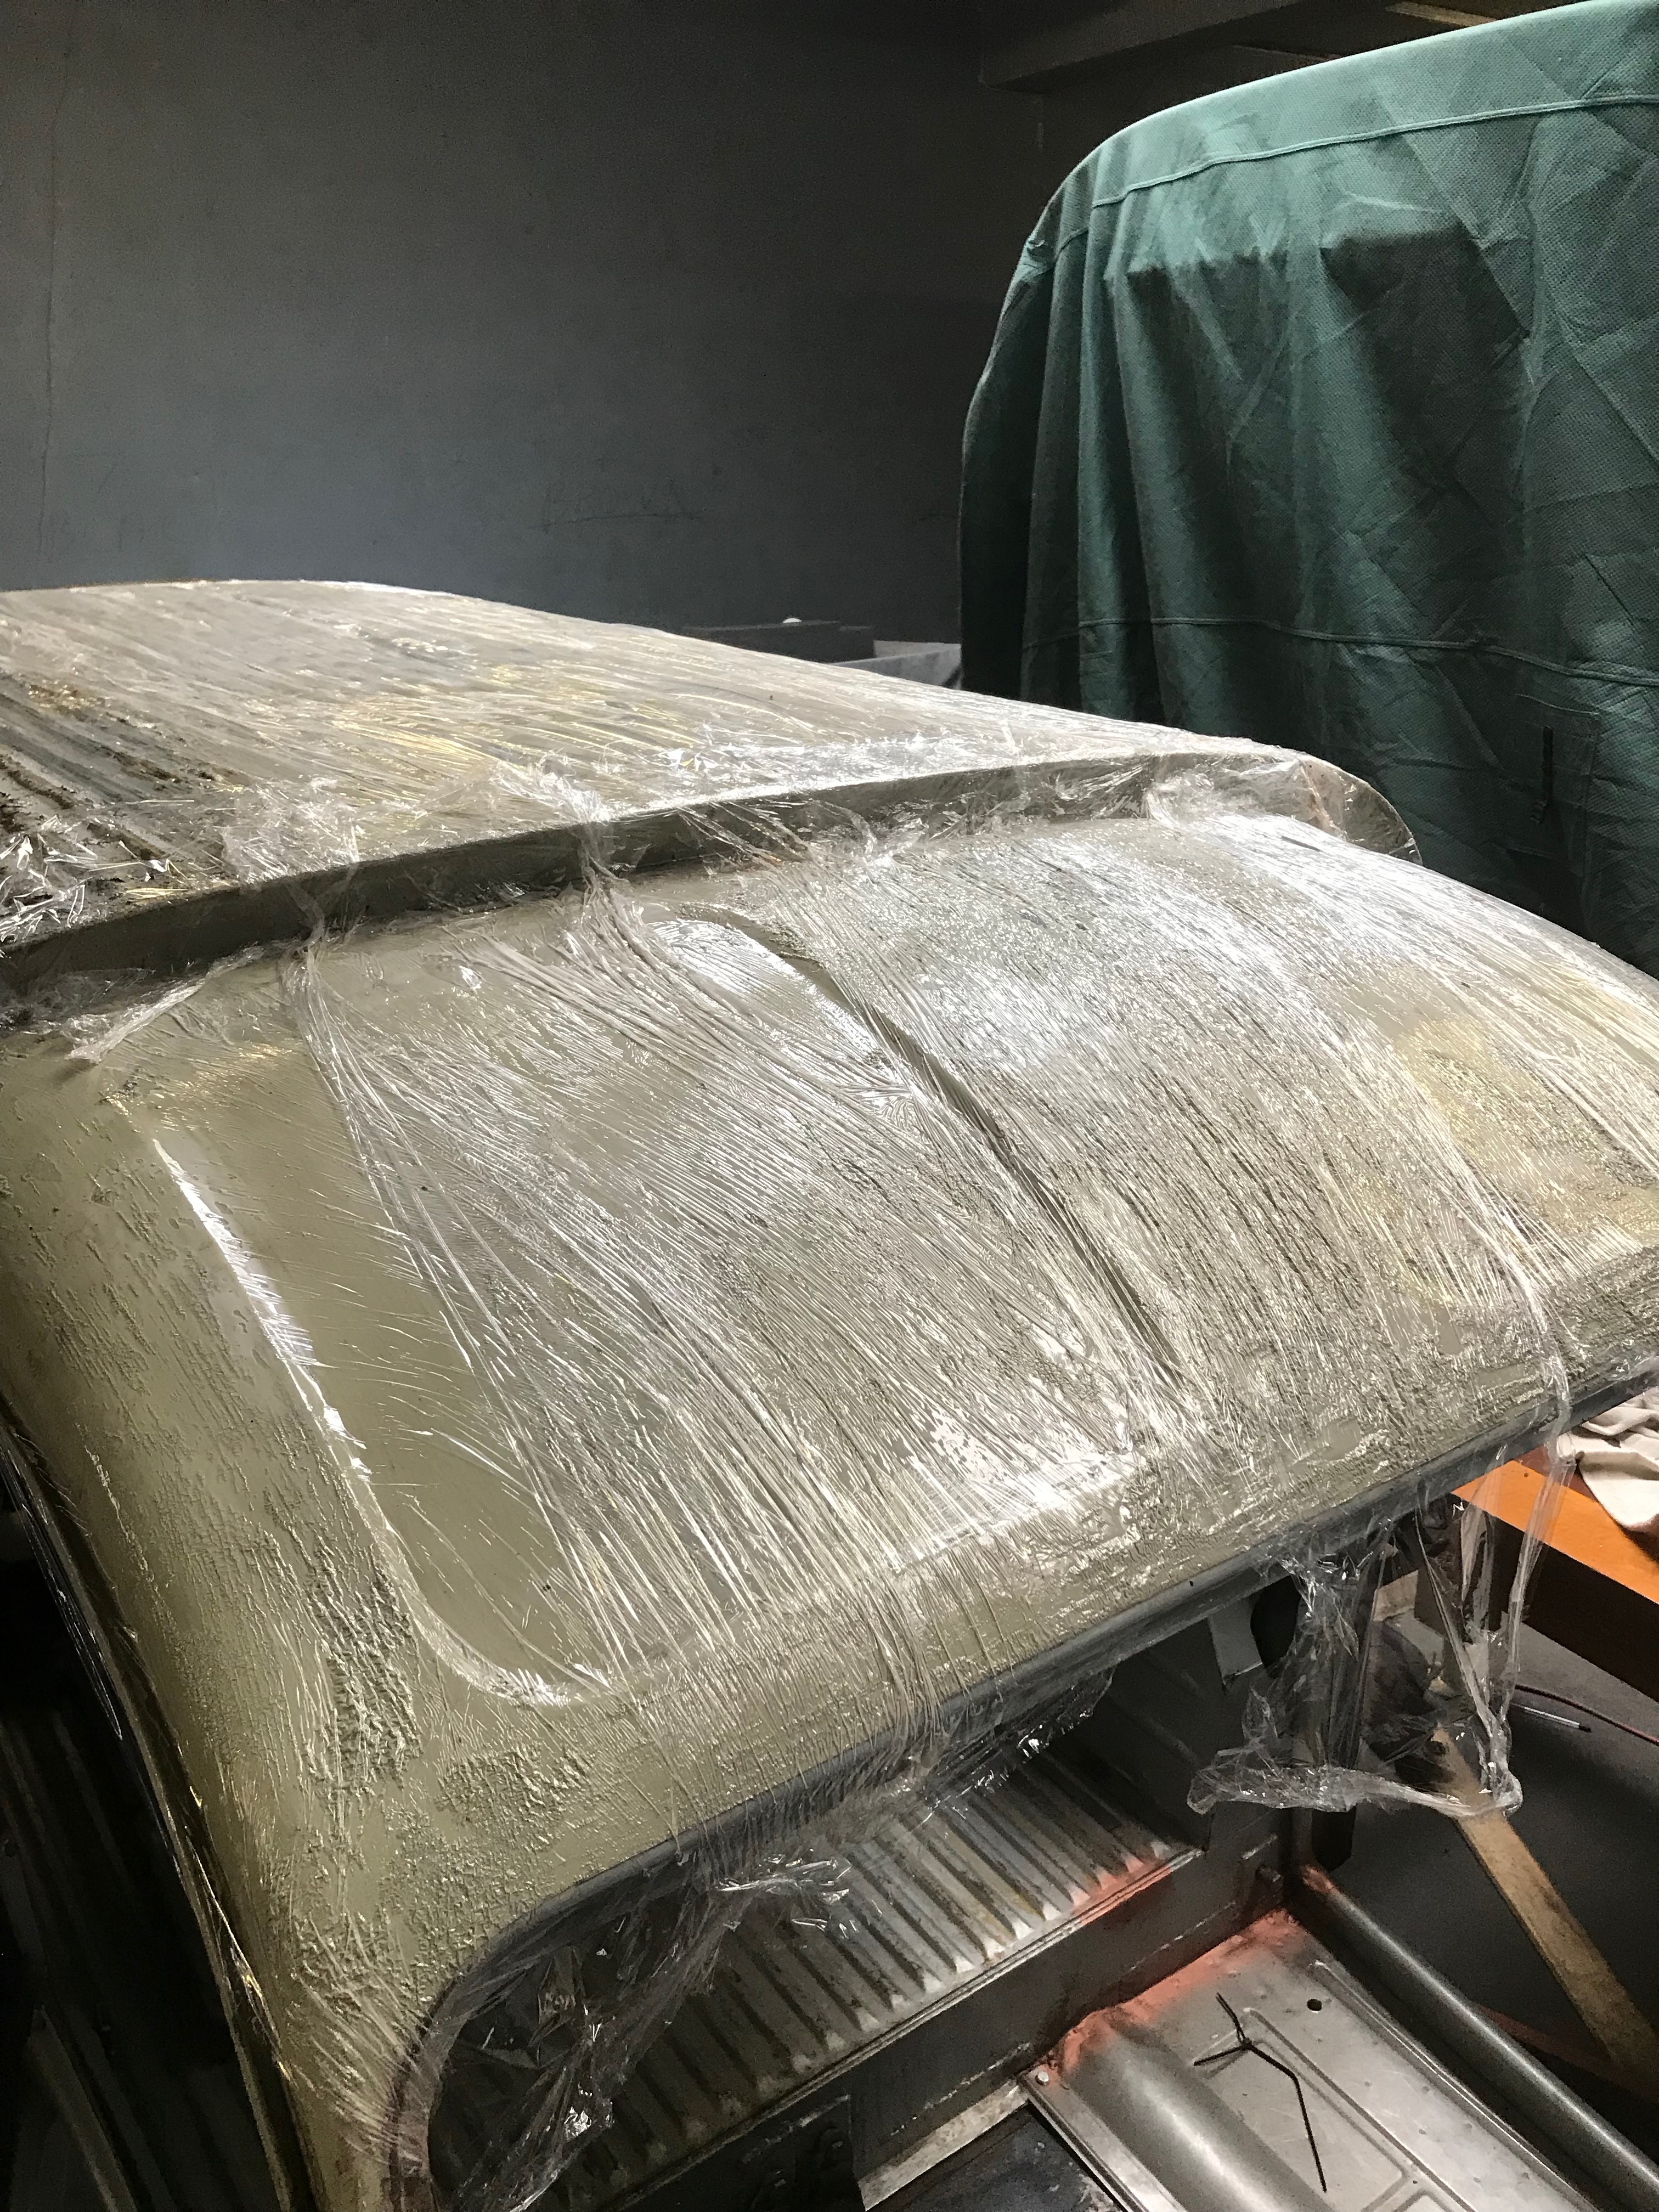
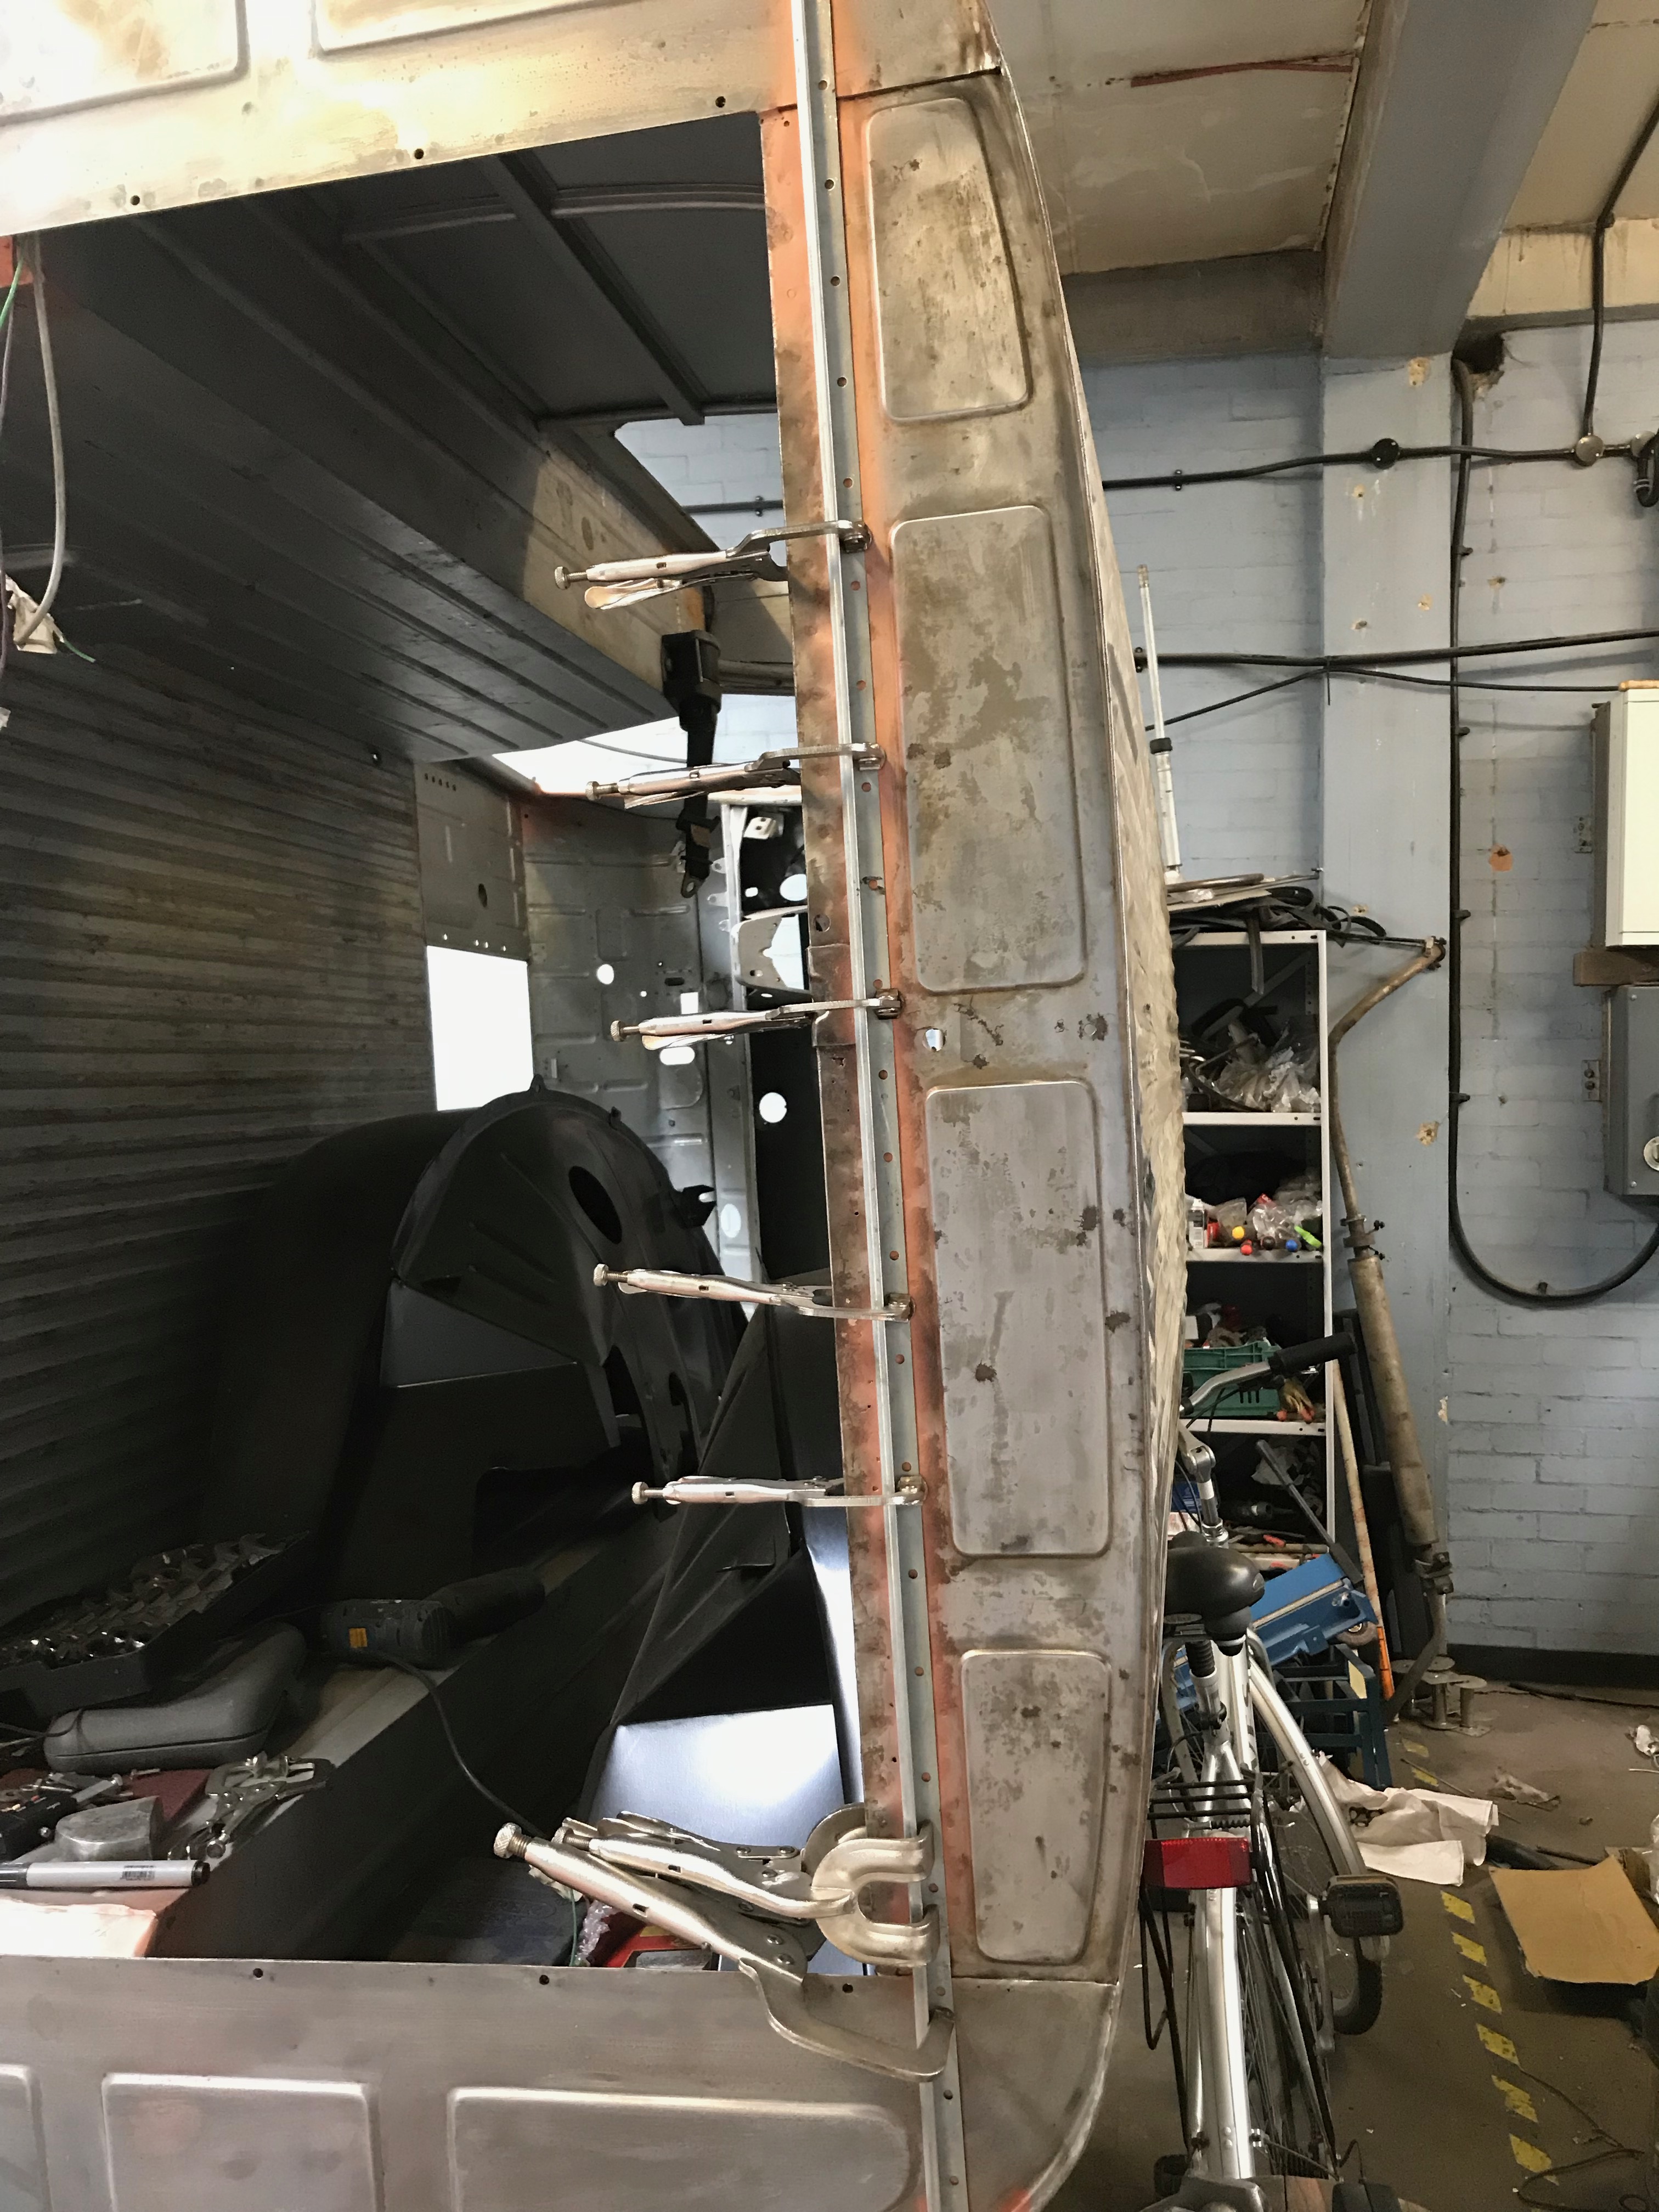
I screwed some wheels onto the table that I’ve been using to store the body on while it’s off the chassis.  I only wish I’d done it sooner because now that it’s mobile, I can wheel the table with body and all,  around the workshop and work on different parts of it without having to move a million things out of the way first.  To celebrate this new found freedom,  I wheeled the table + body combo to the shutter door of the workshop, so it was as good as outside in the open air and then etch primed both sides of the new rear wings, petrol tank and spare wheel covers and the underside of the floors and toe board.    Due to a problem with the workshop compressor, which became apparent when the motor just kept running and running and running… until the tank safety valve blew off with an almighty bang, whoosh and hissing noise, I  had to use my small compressor and an equally small HVLP (high volume, low pressure) paint gun, which had about as much oomph as a rattle can and only holds about a wine glass full of paint, so took ages.  At least the overspray was minimal and I didn’t fill up the whole workshop with paint fumes, which was nice..  If the workshop compressor is toast, I’ll have to think about procuring another one from somewhere. My tiny 2hp 25 litre ‘Aldi’ special is not going to be able to pump enough air for me to be able to paint the whole van.

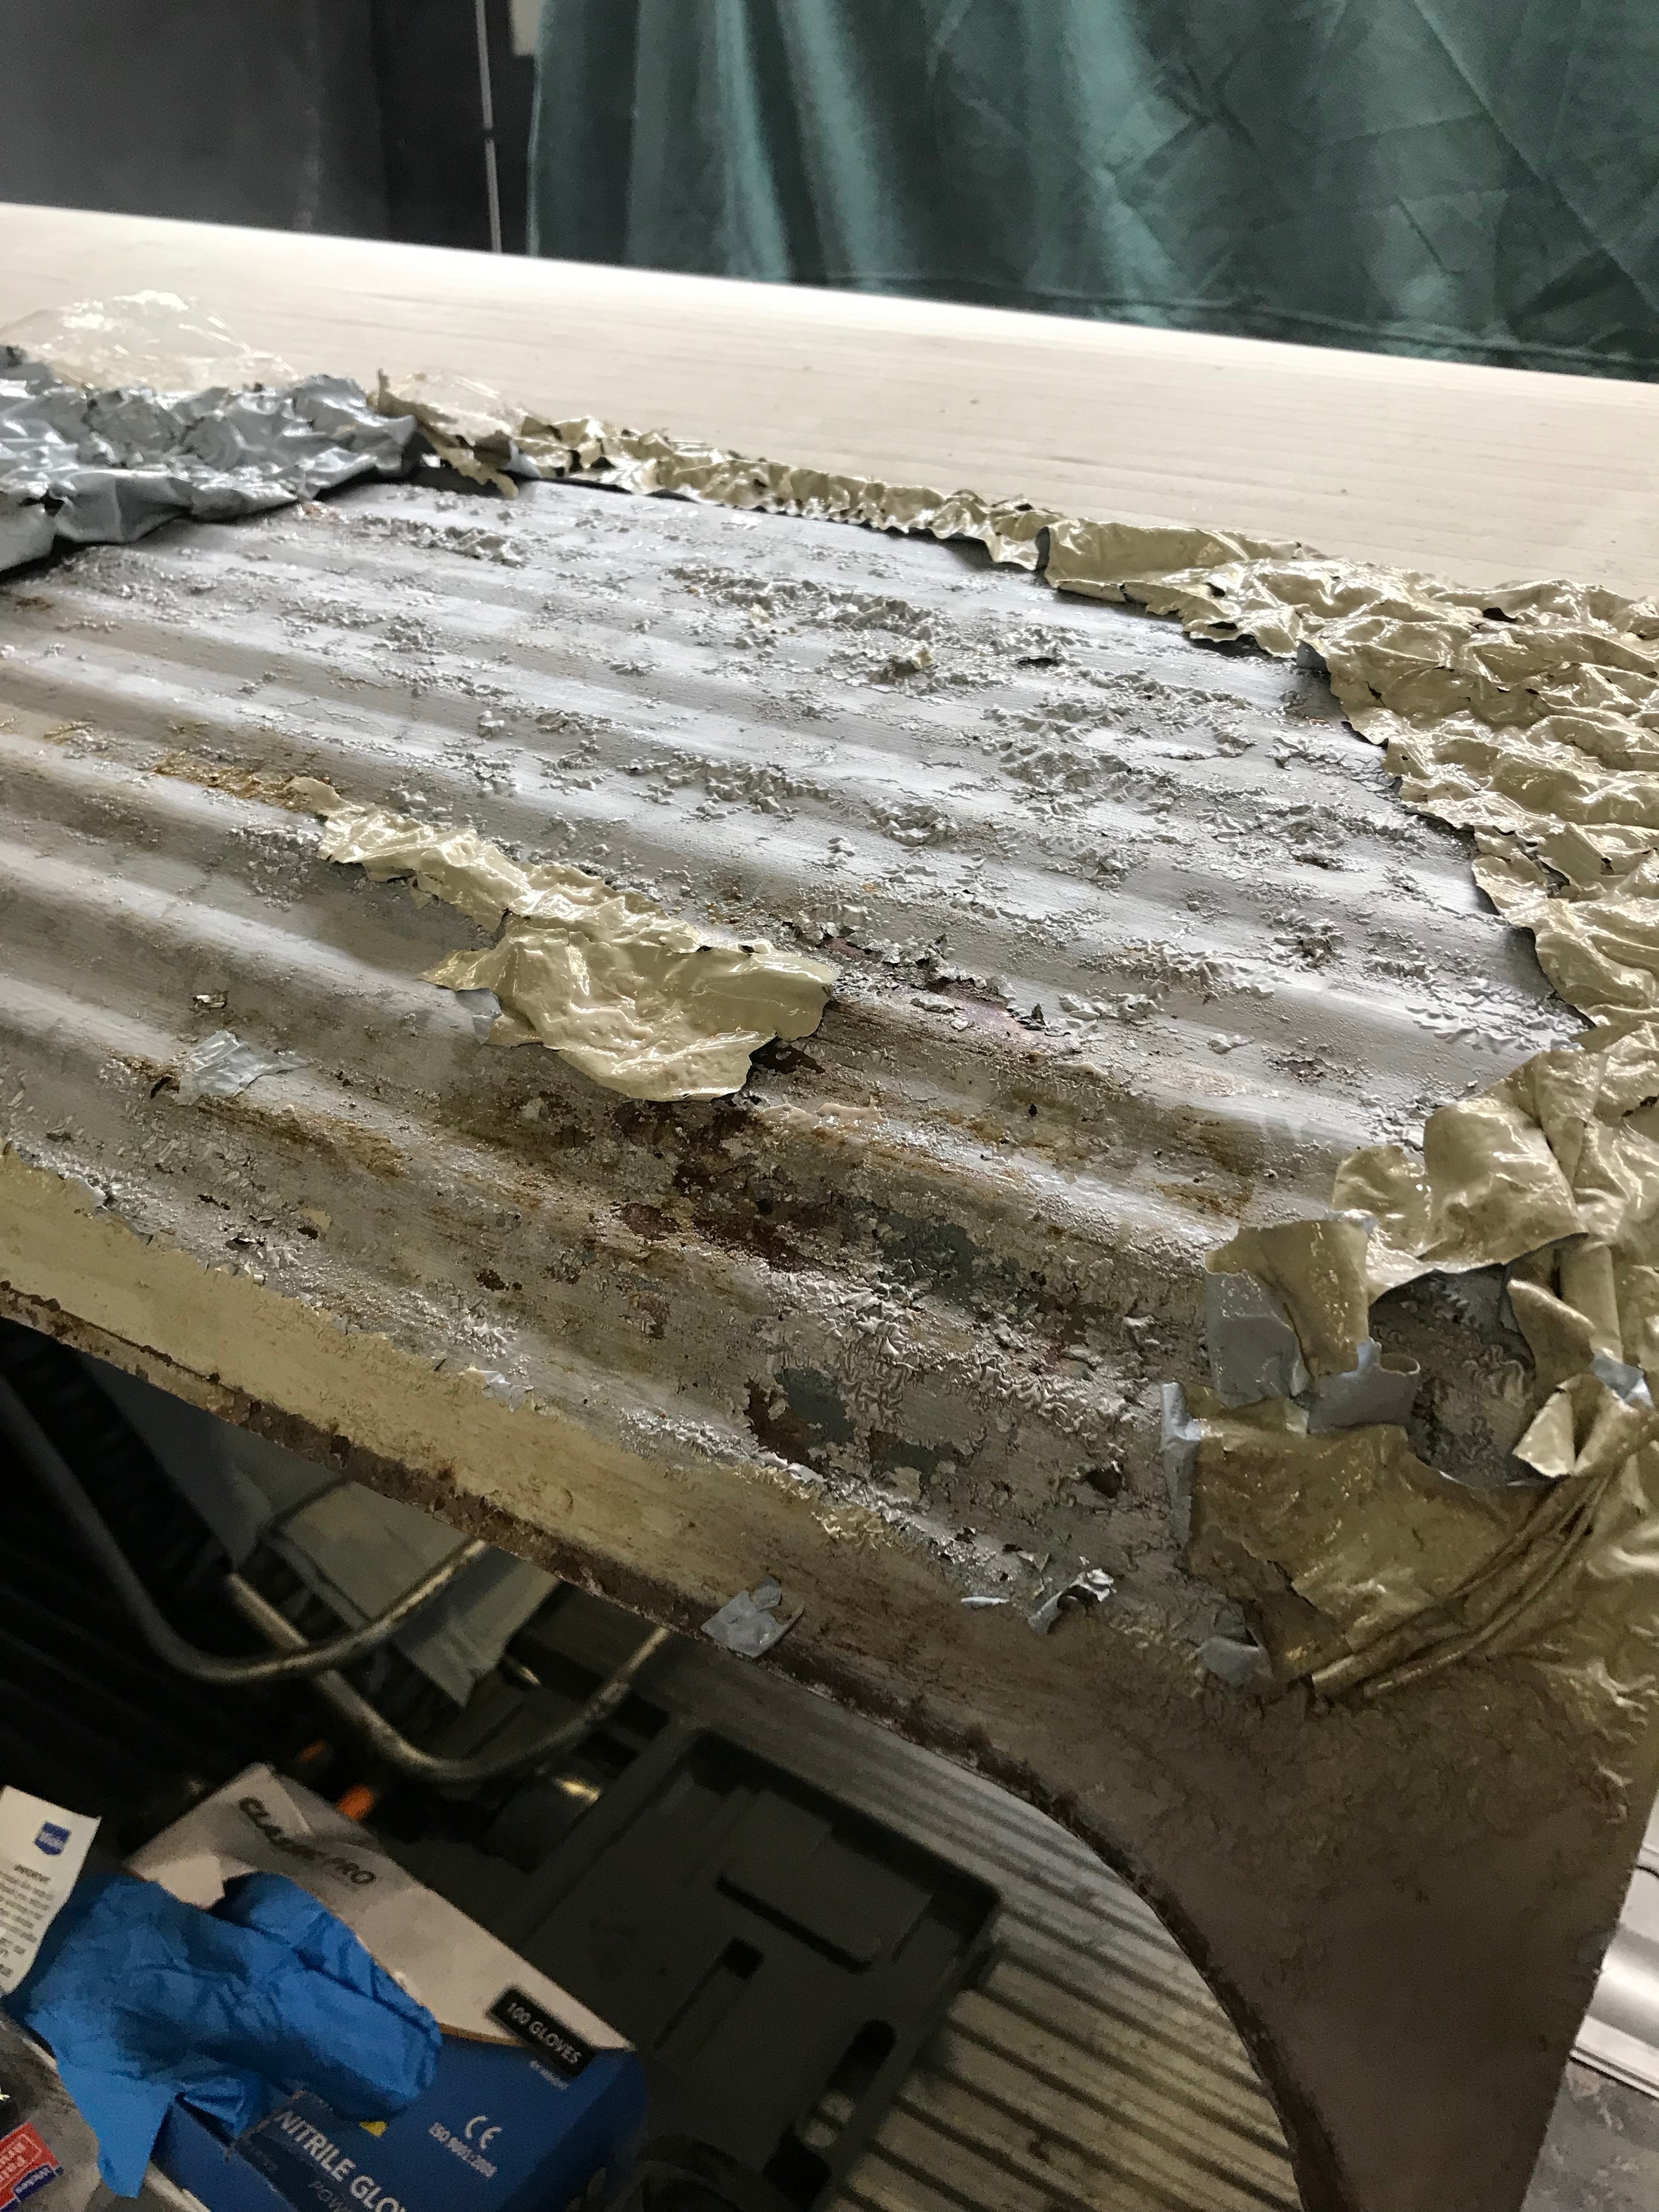
While I had the van on its side , I finished brush  painting the rest of the underside with Hammerite.   Short of stripping the underneath of what looks like a few coats of POR 15 and god know what else, I concluded that  Hammerite over the top of it what is already there is the only viable option.  I don’t think it will do any harm and it will tidy up most of which will remain unseen when the body is back on the chassis.

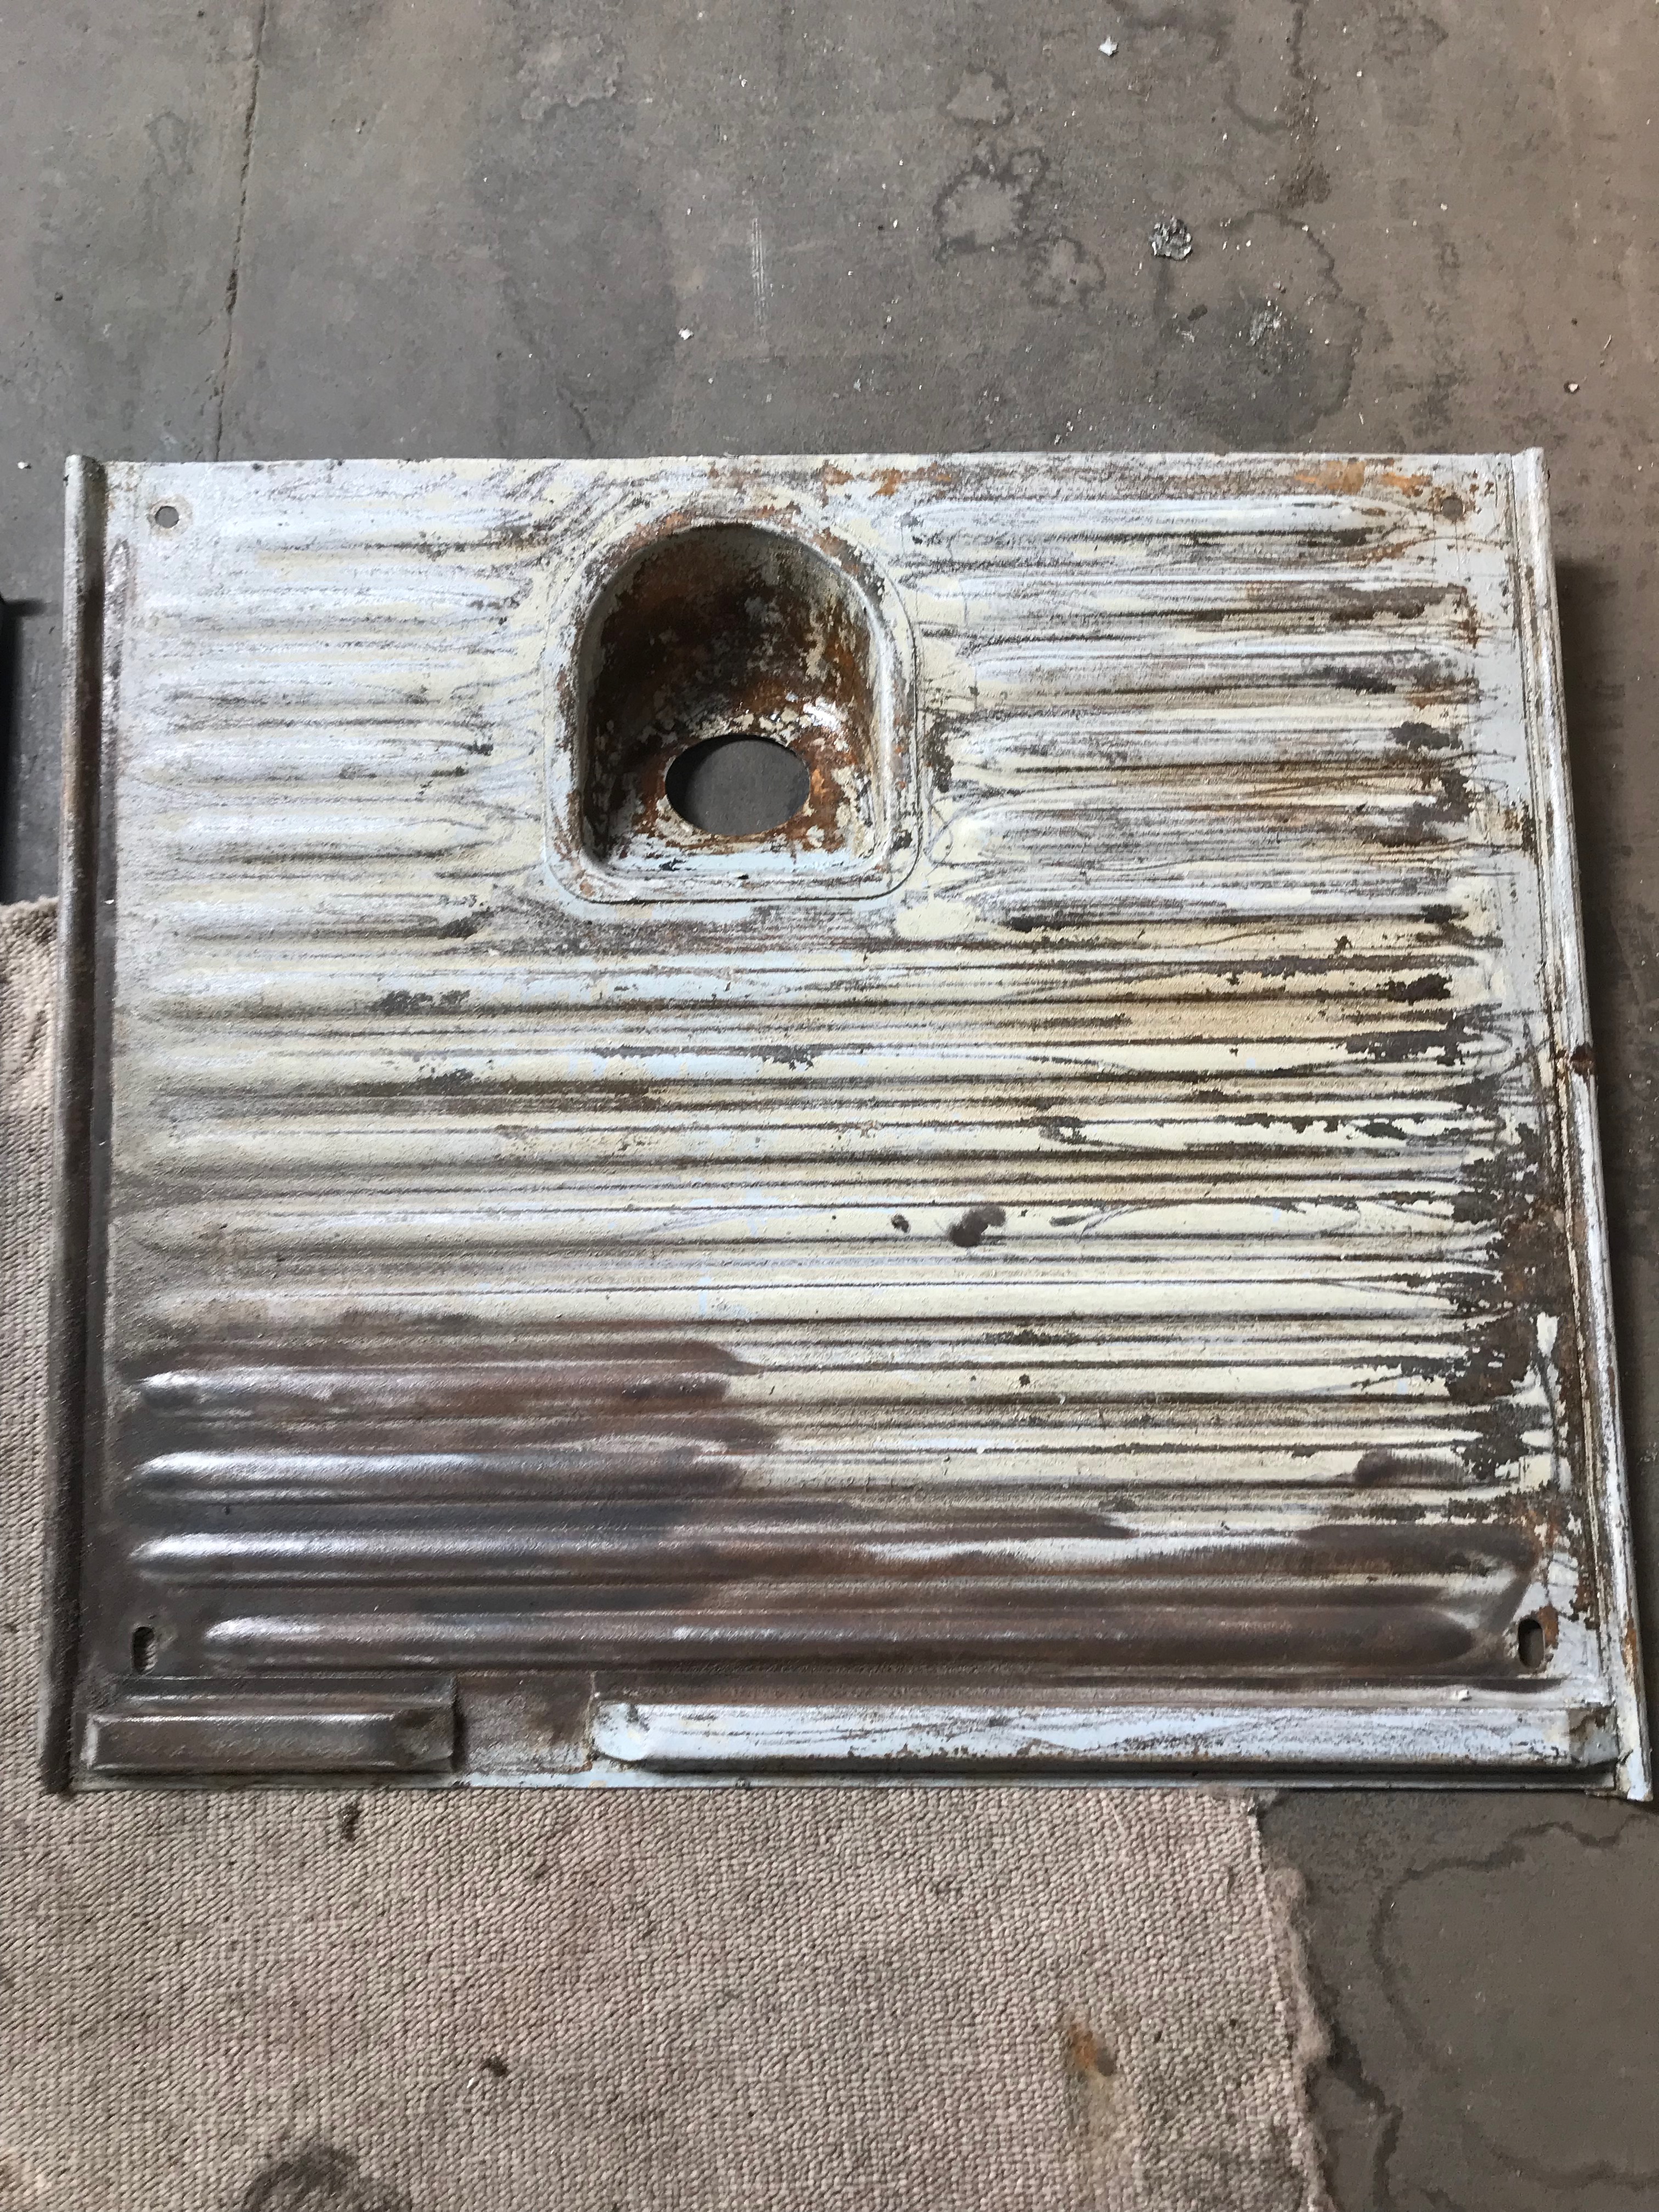
Here’s a picture of the underneath.  The greeny coloured paint on the floors is the new etch primer.  It’s acid based and will have bitten right into the steel, which will be a good base for the proper (grey) epoxy primer coat which will be next to go on. 

Other small but equally satisfying jobs:

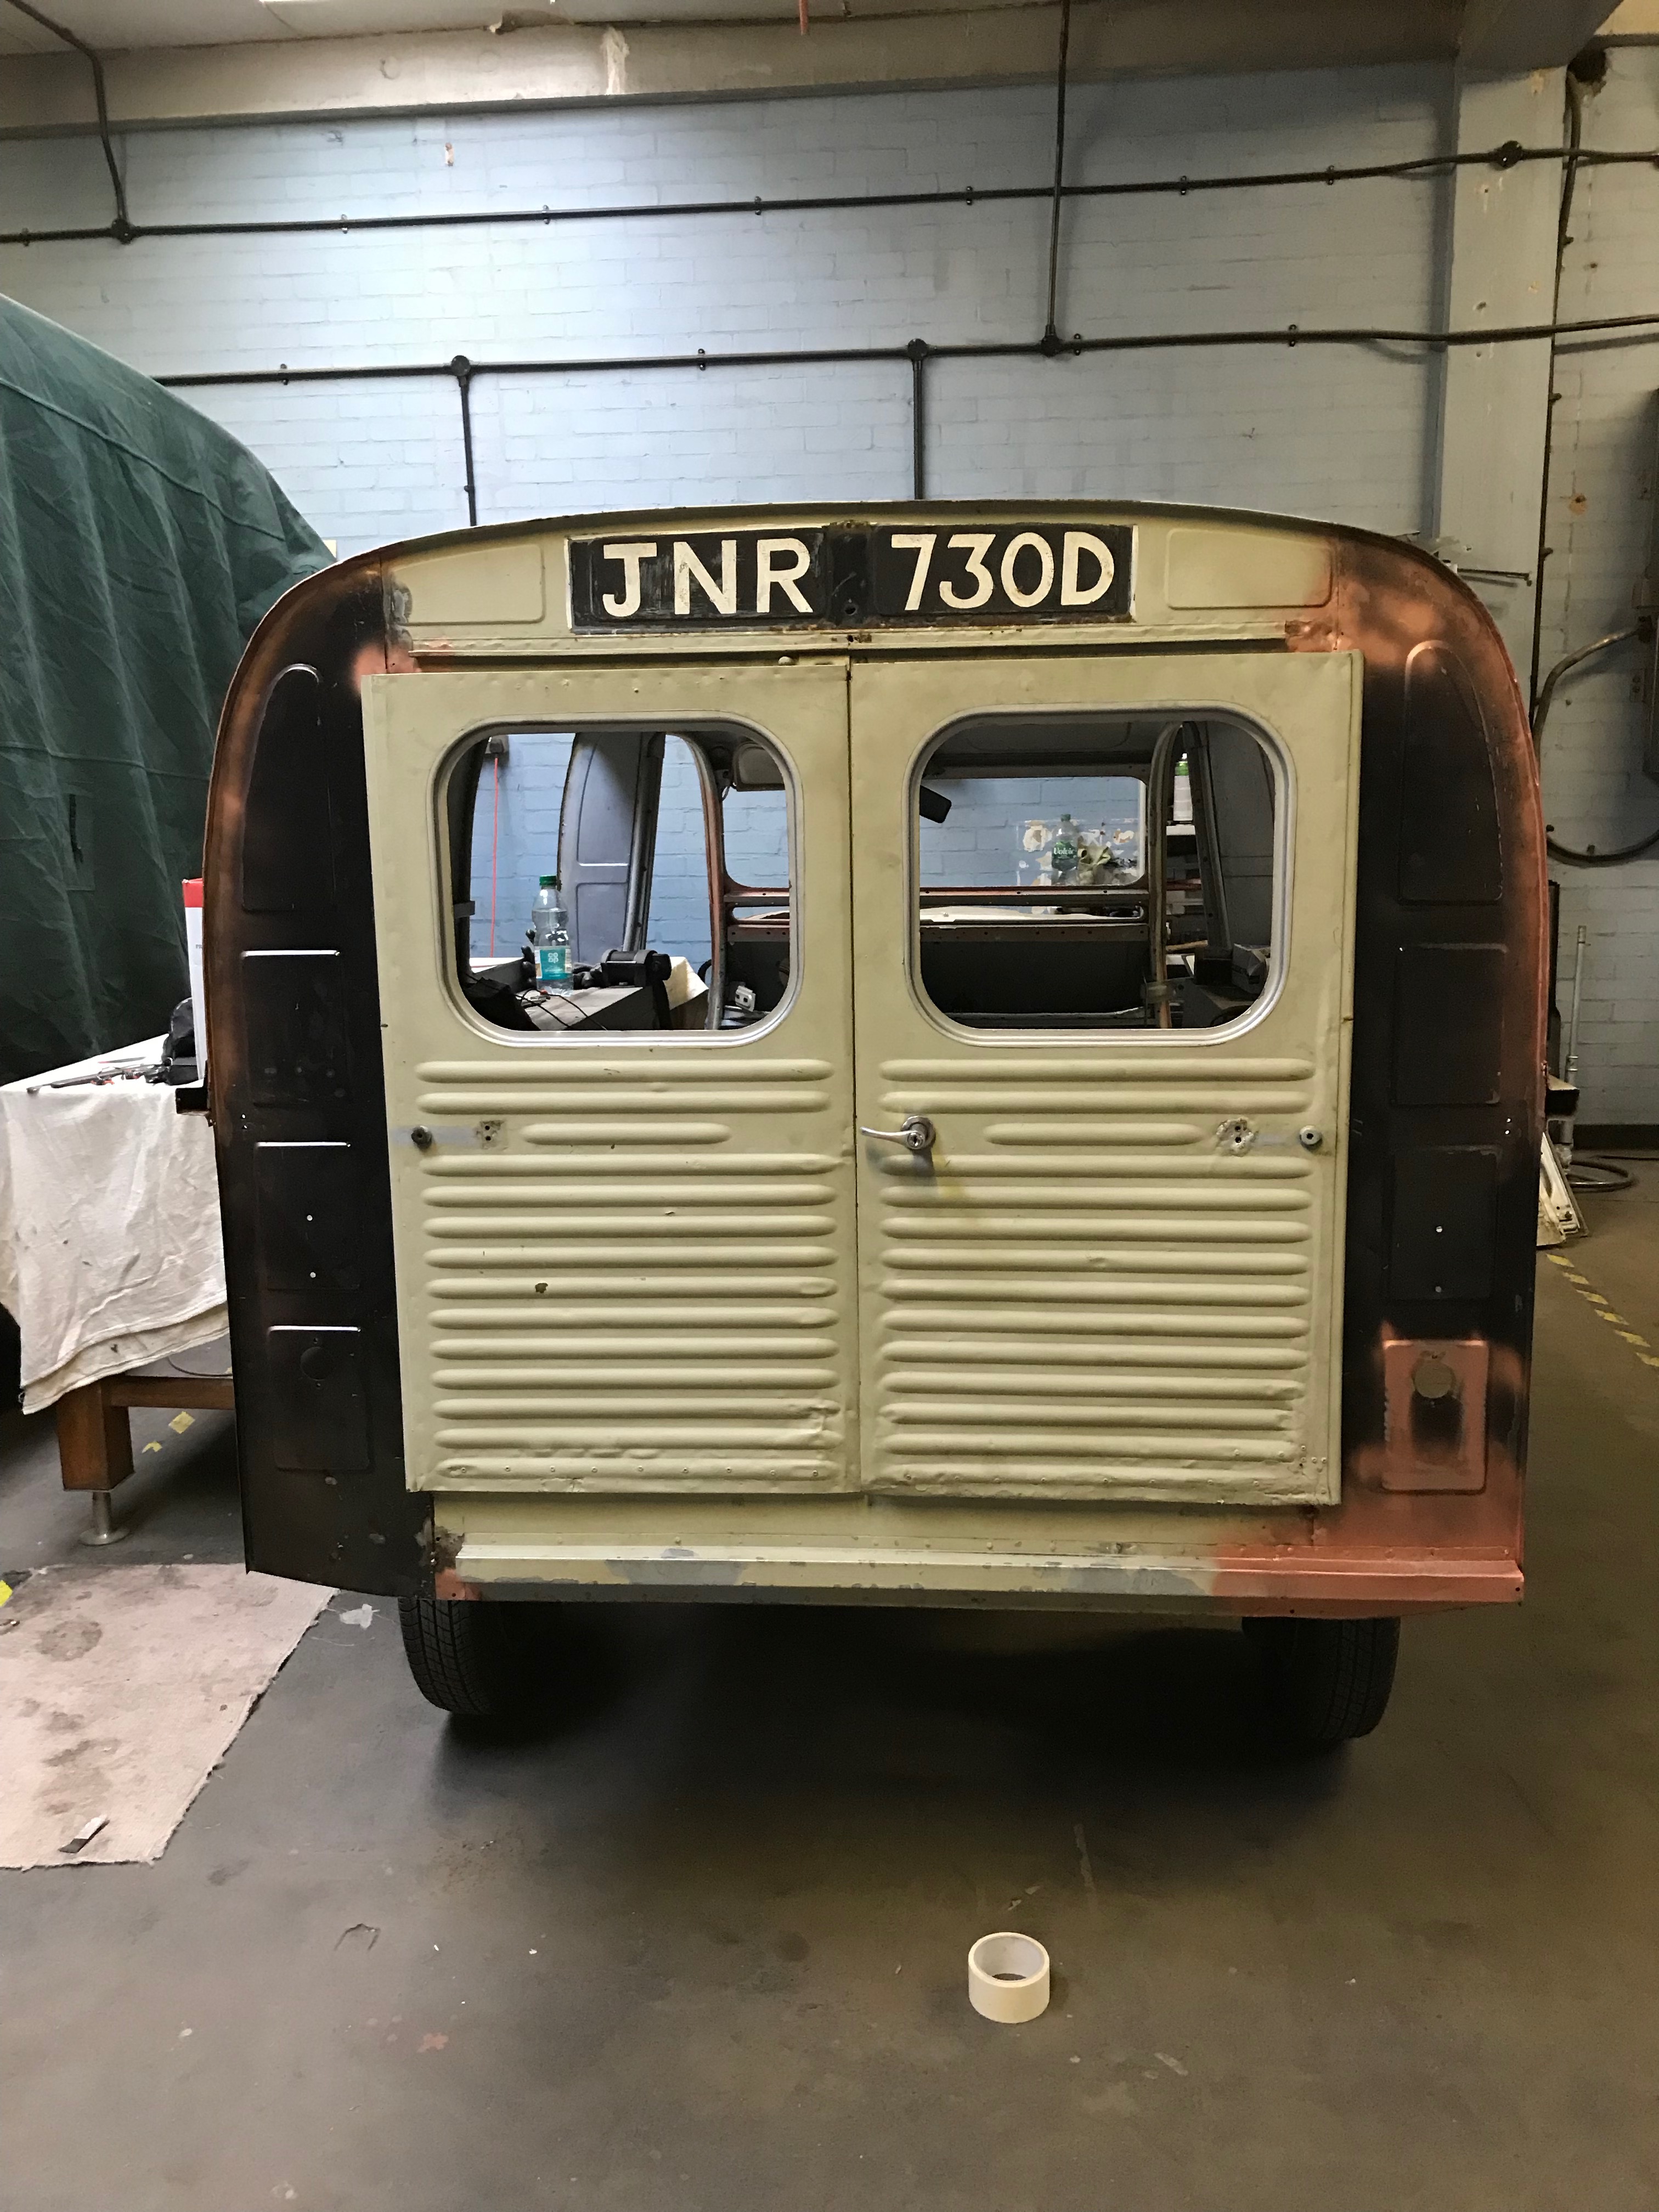
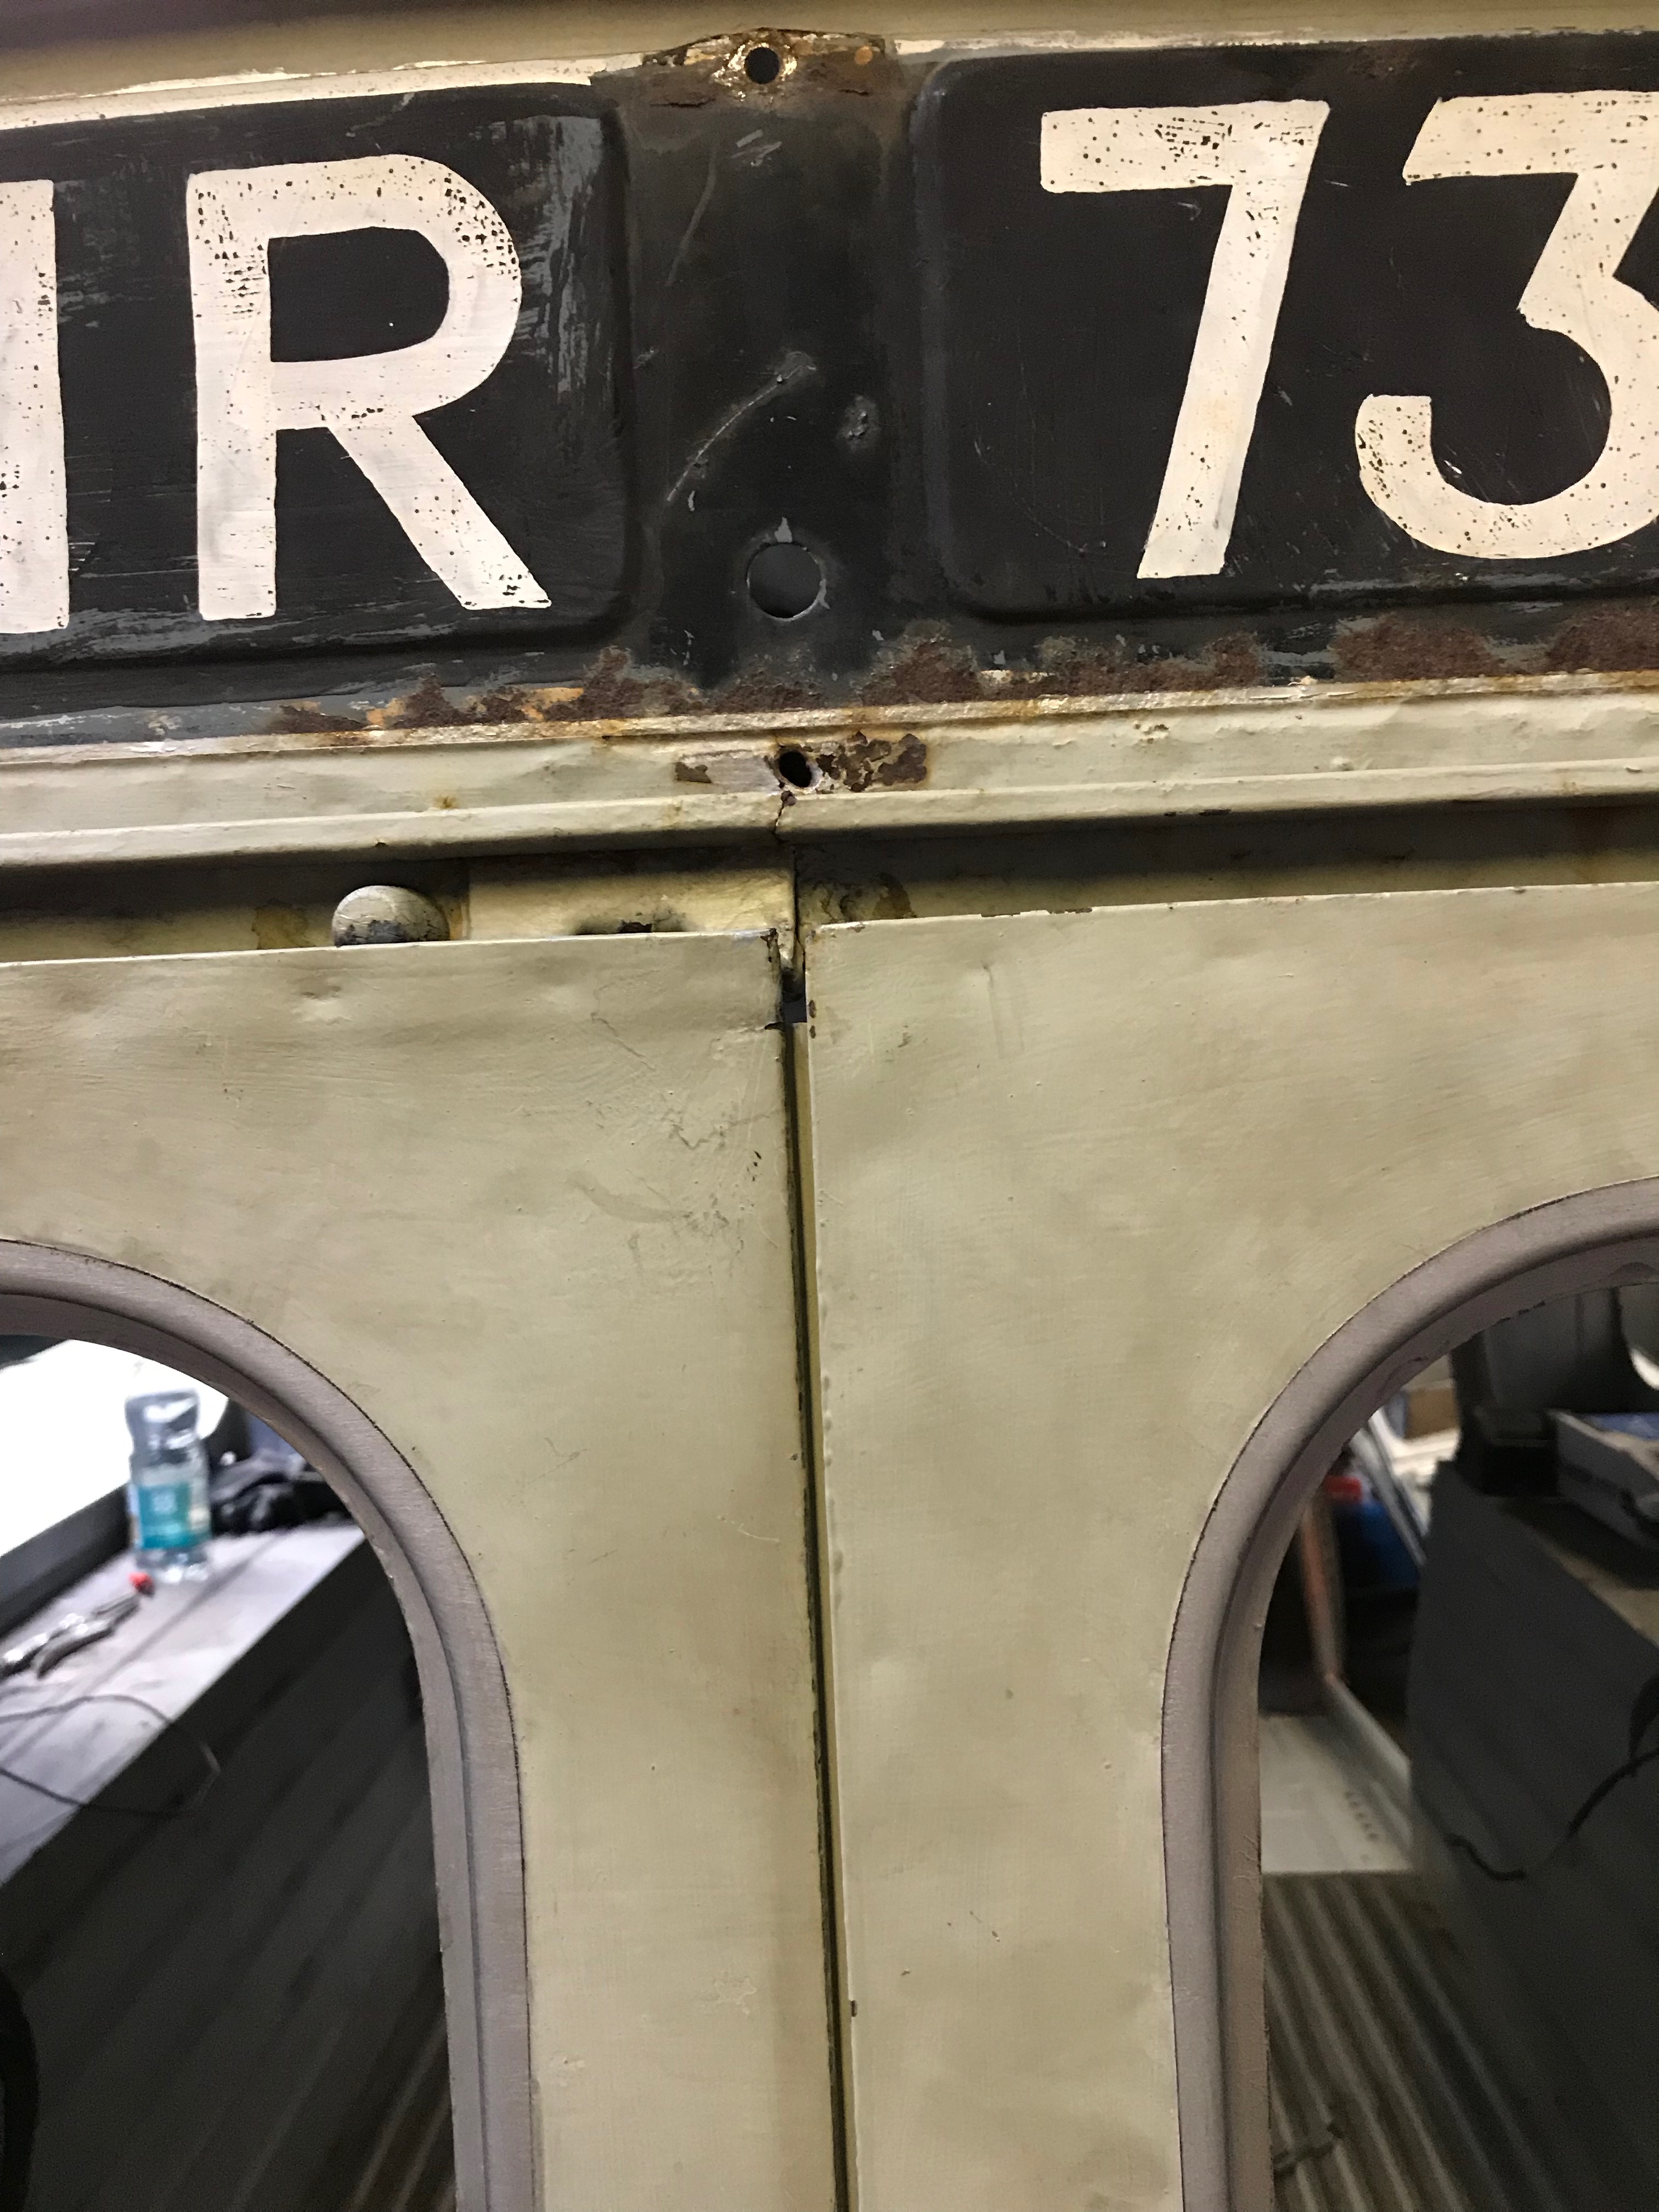
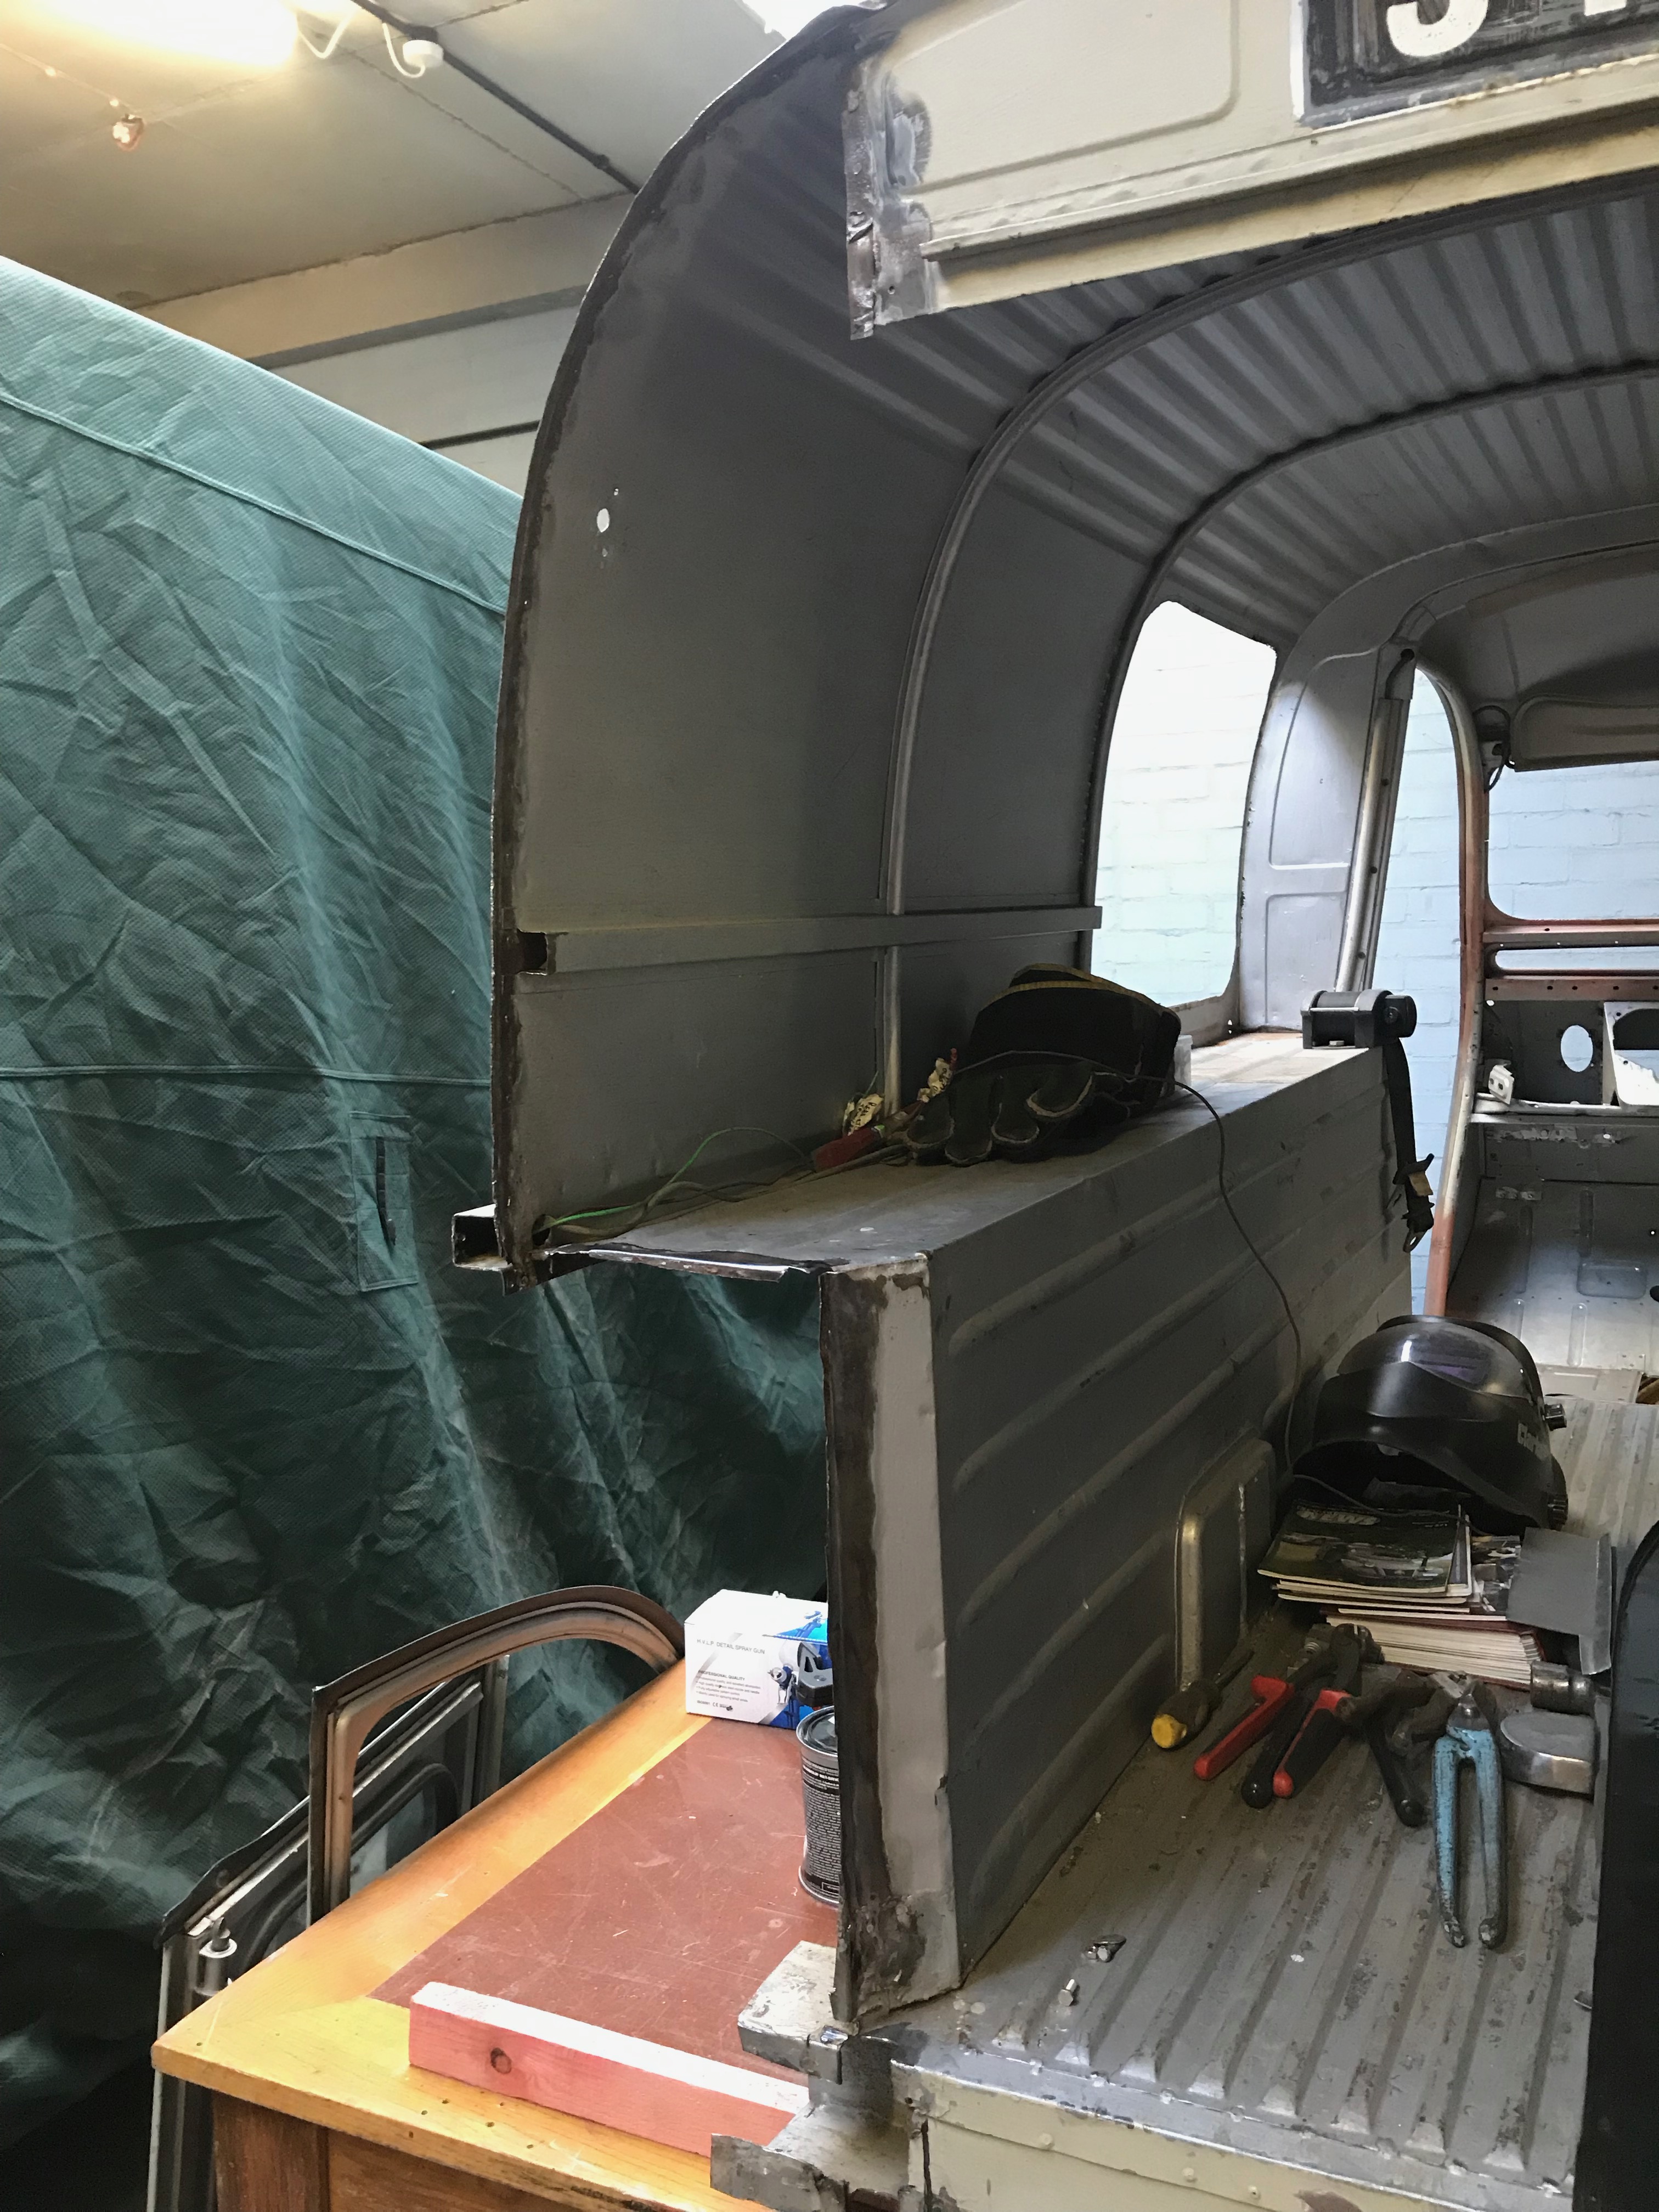
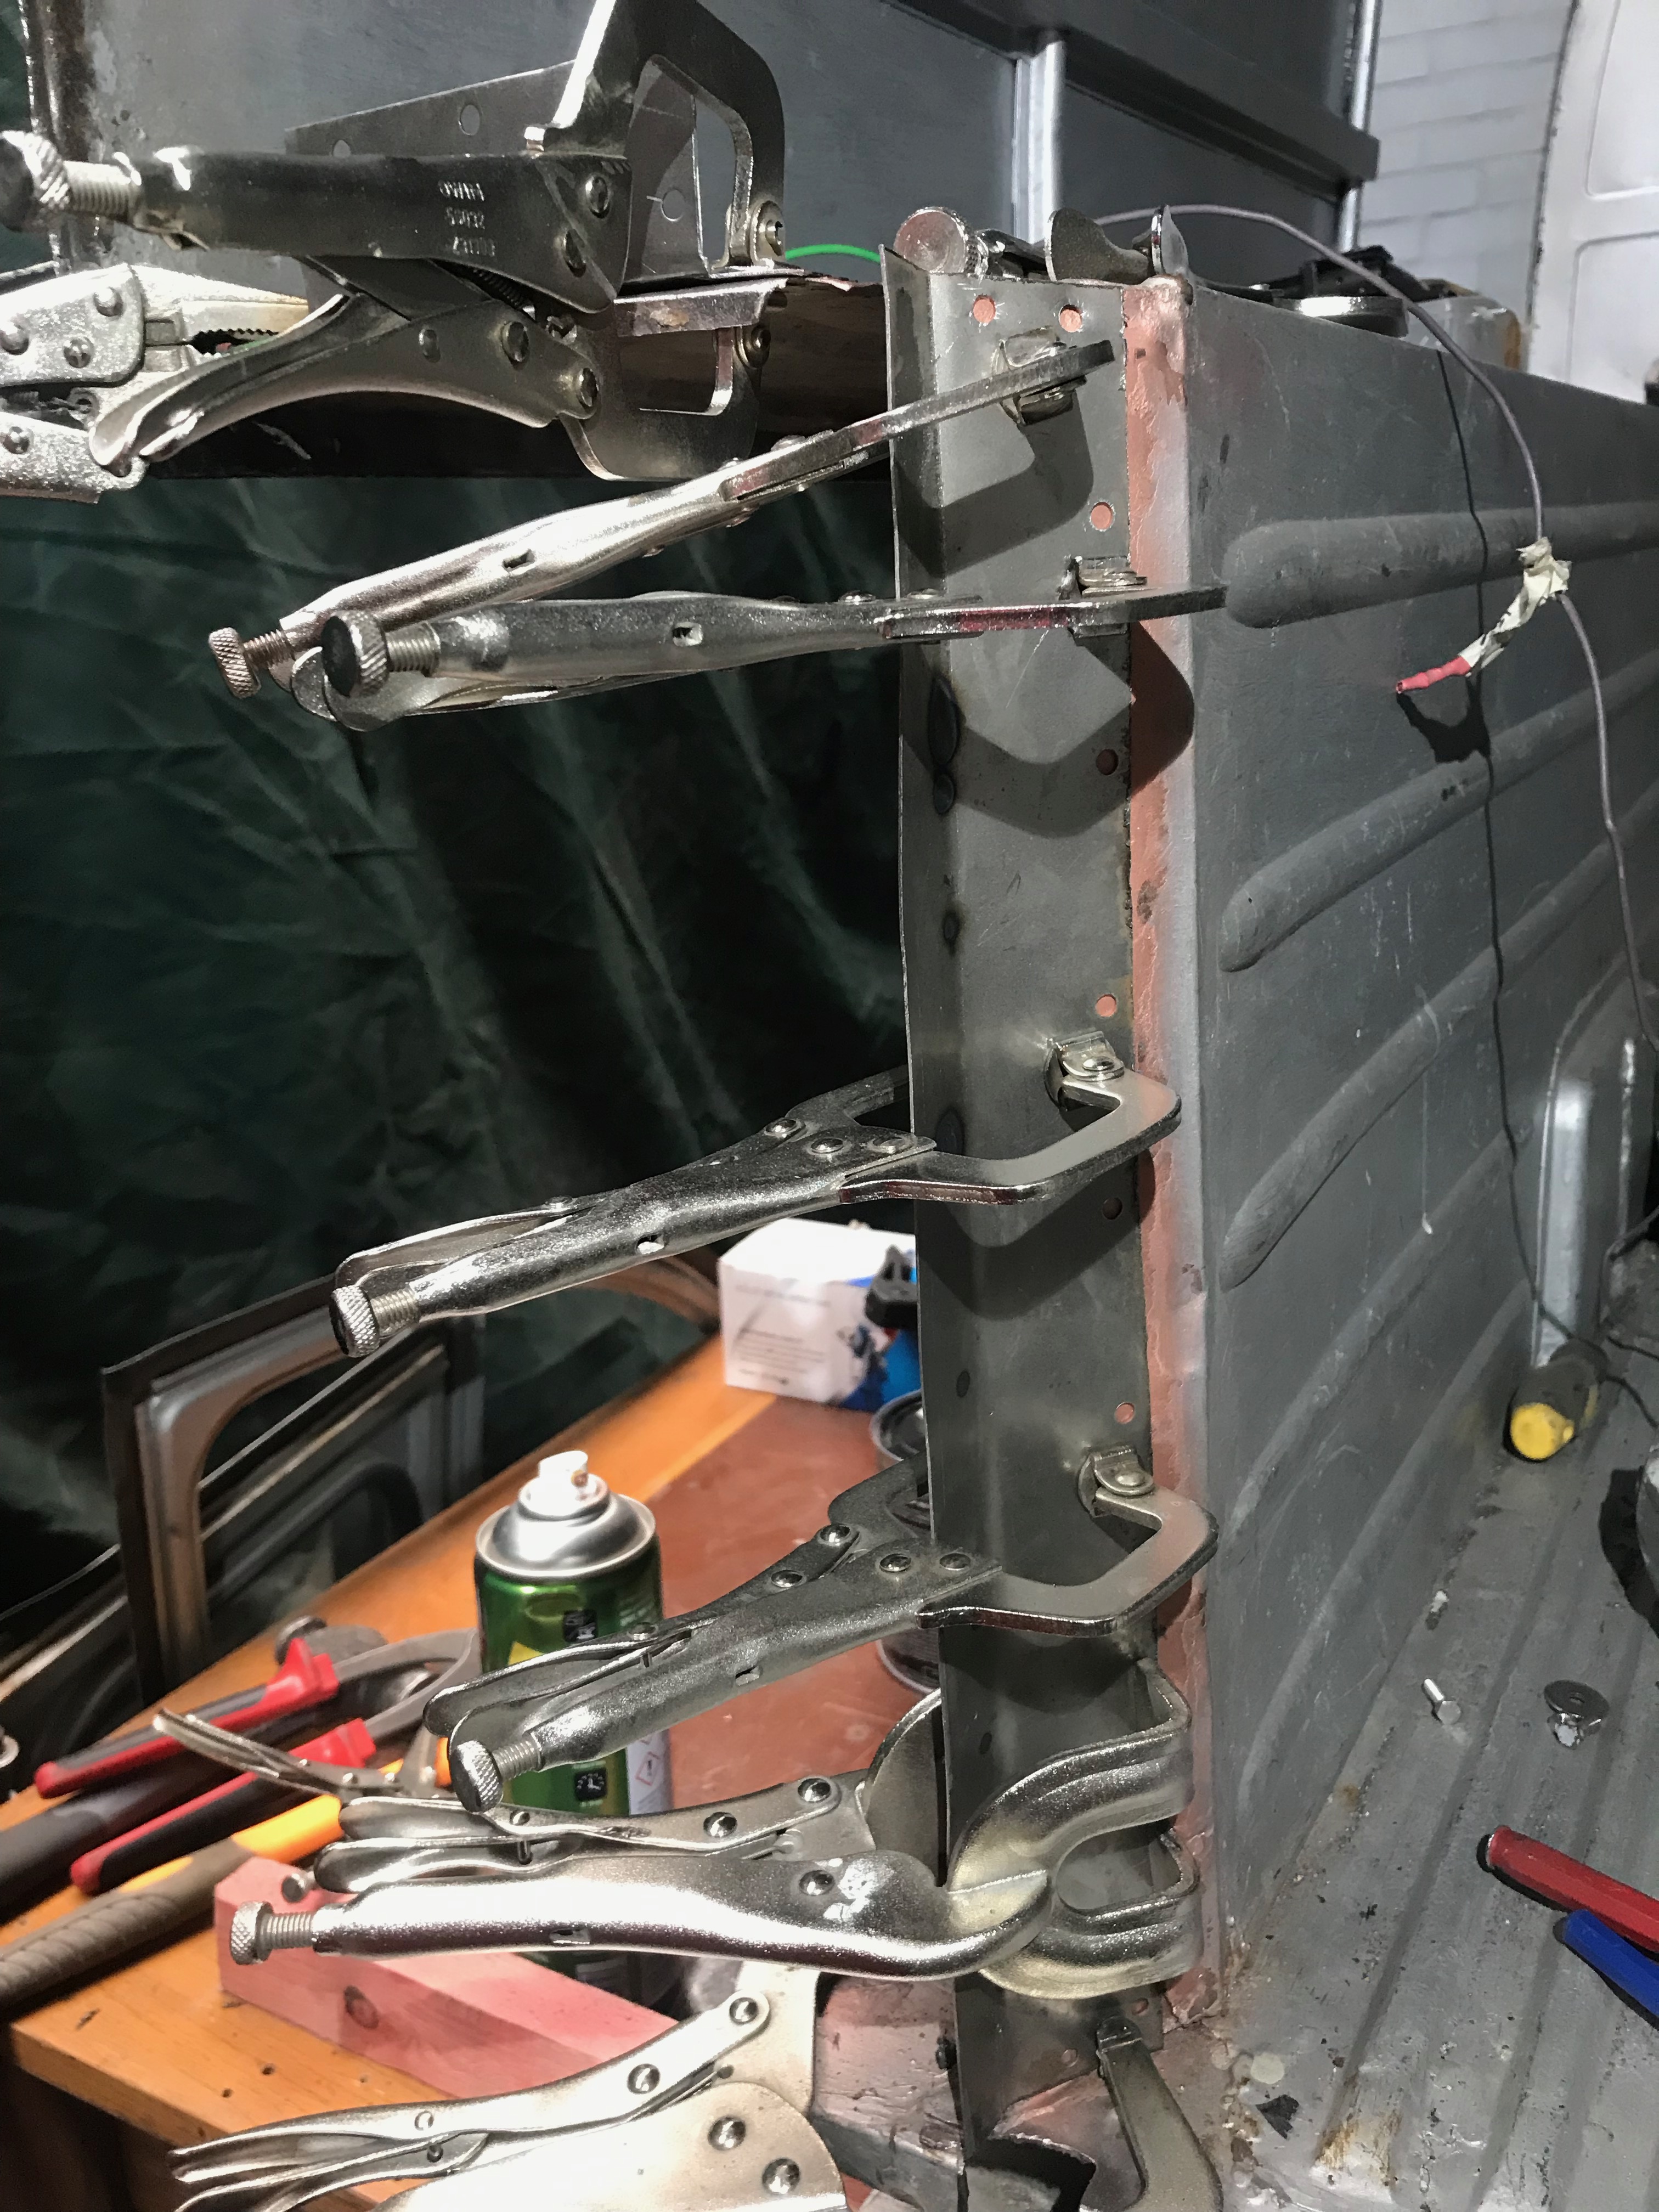
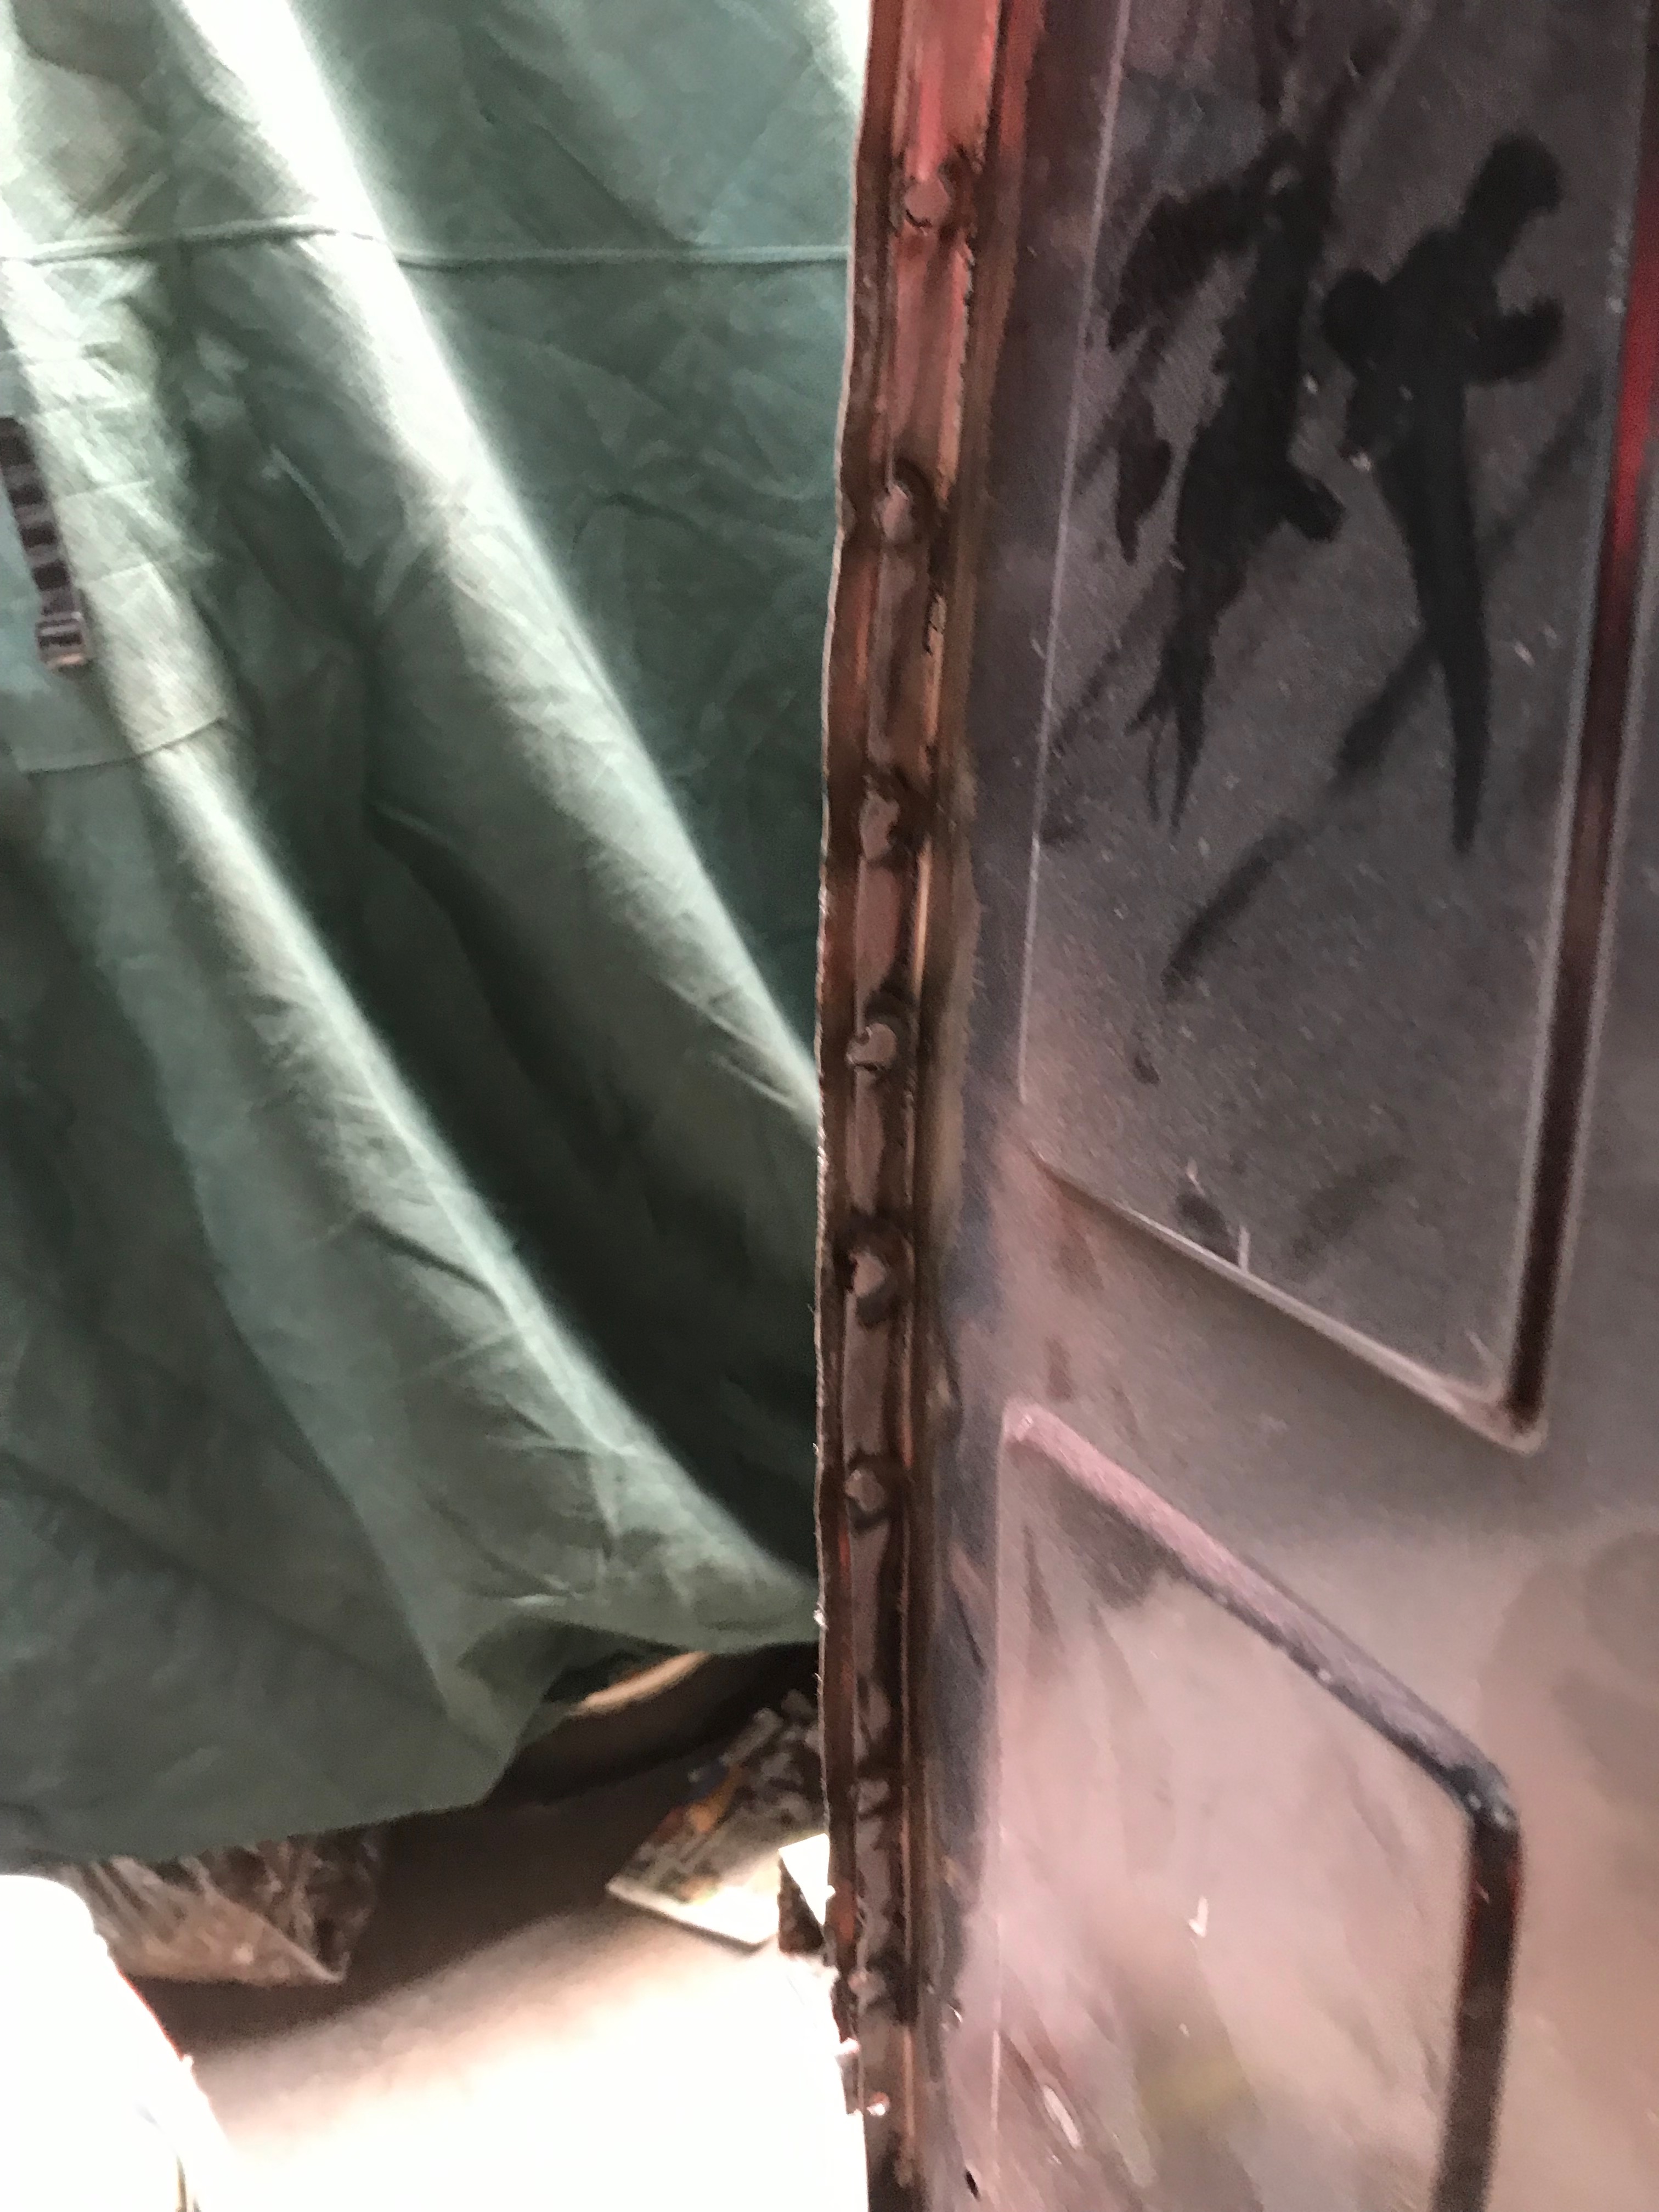
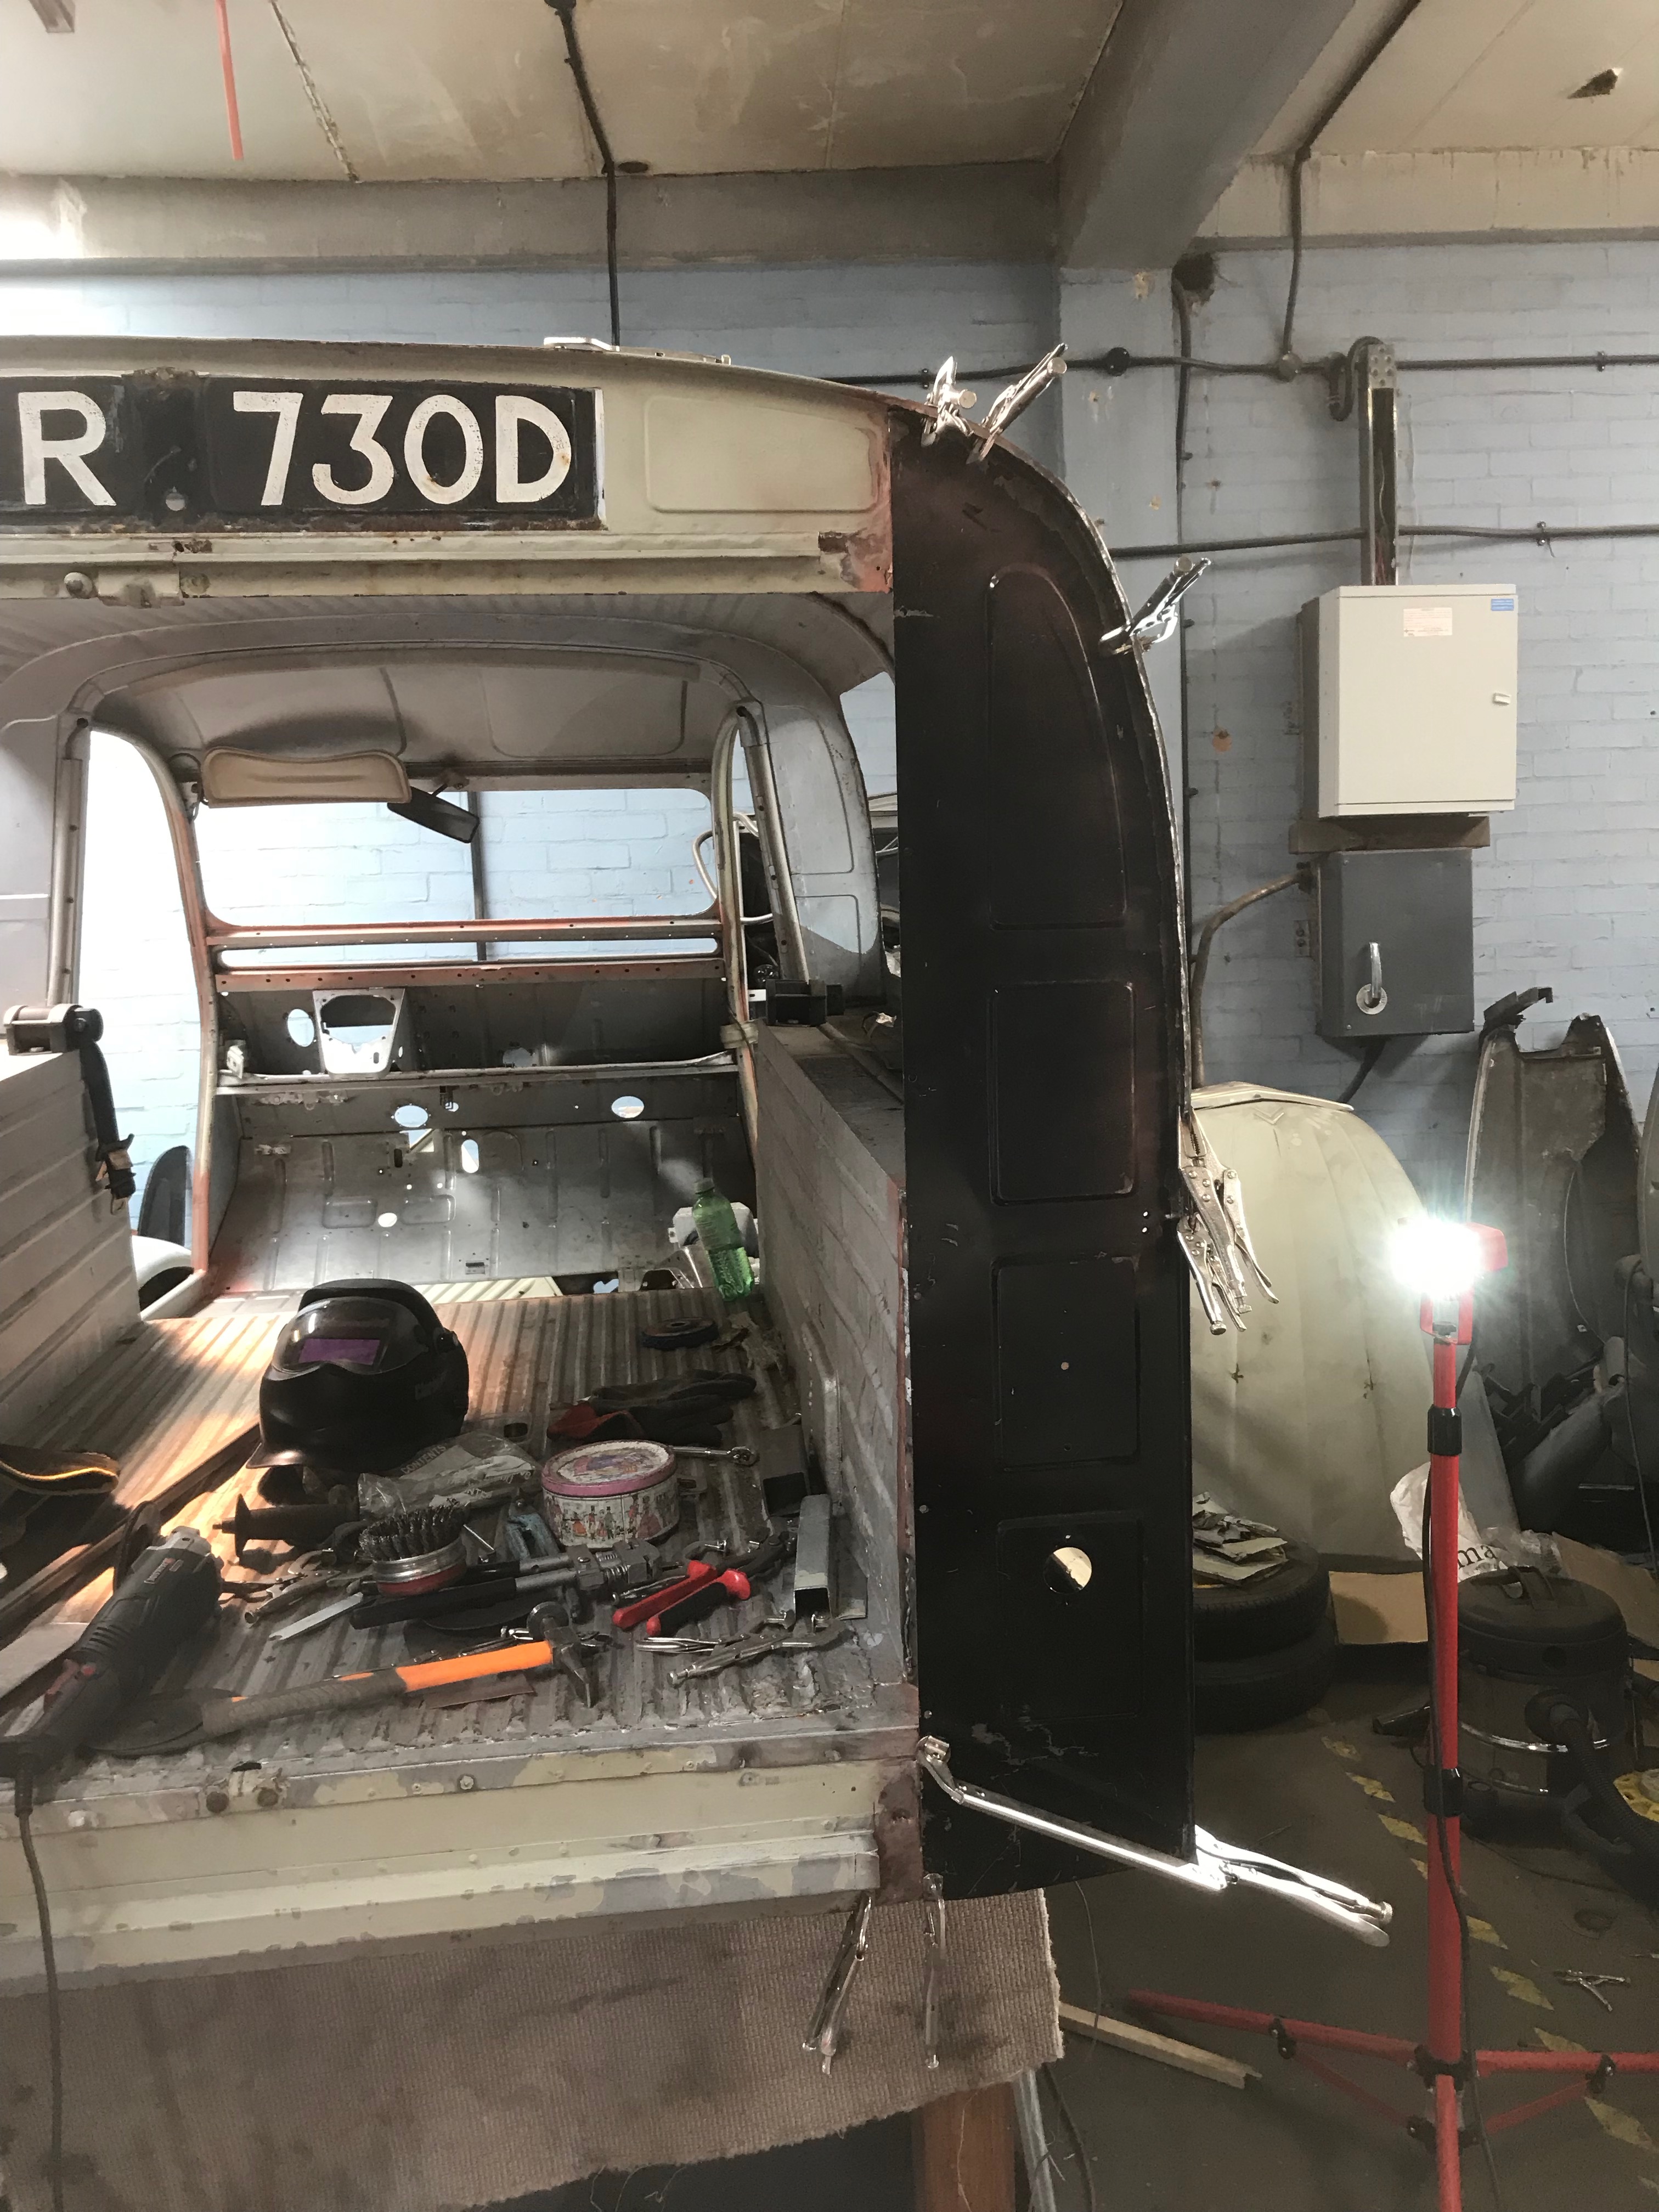
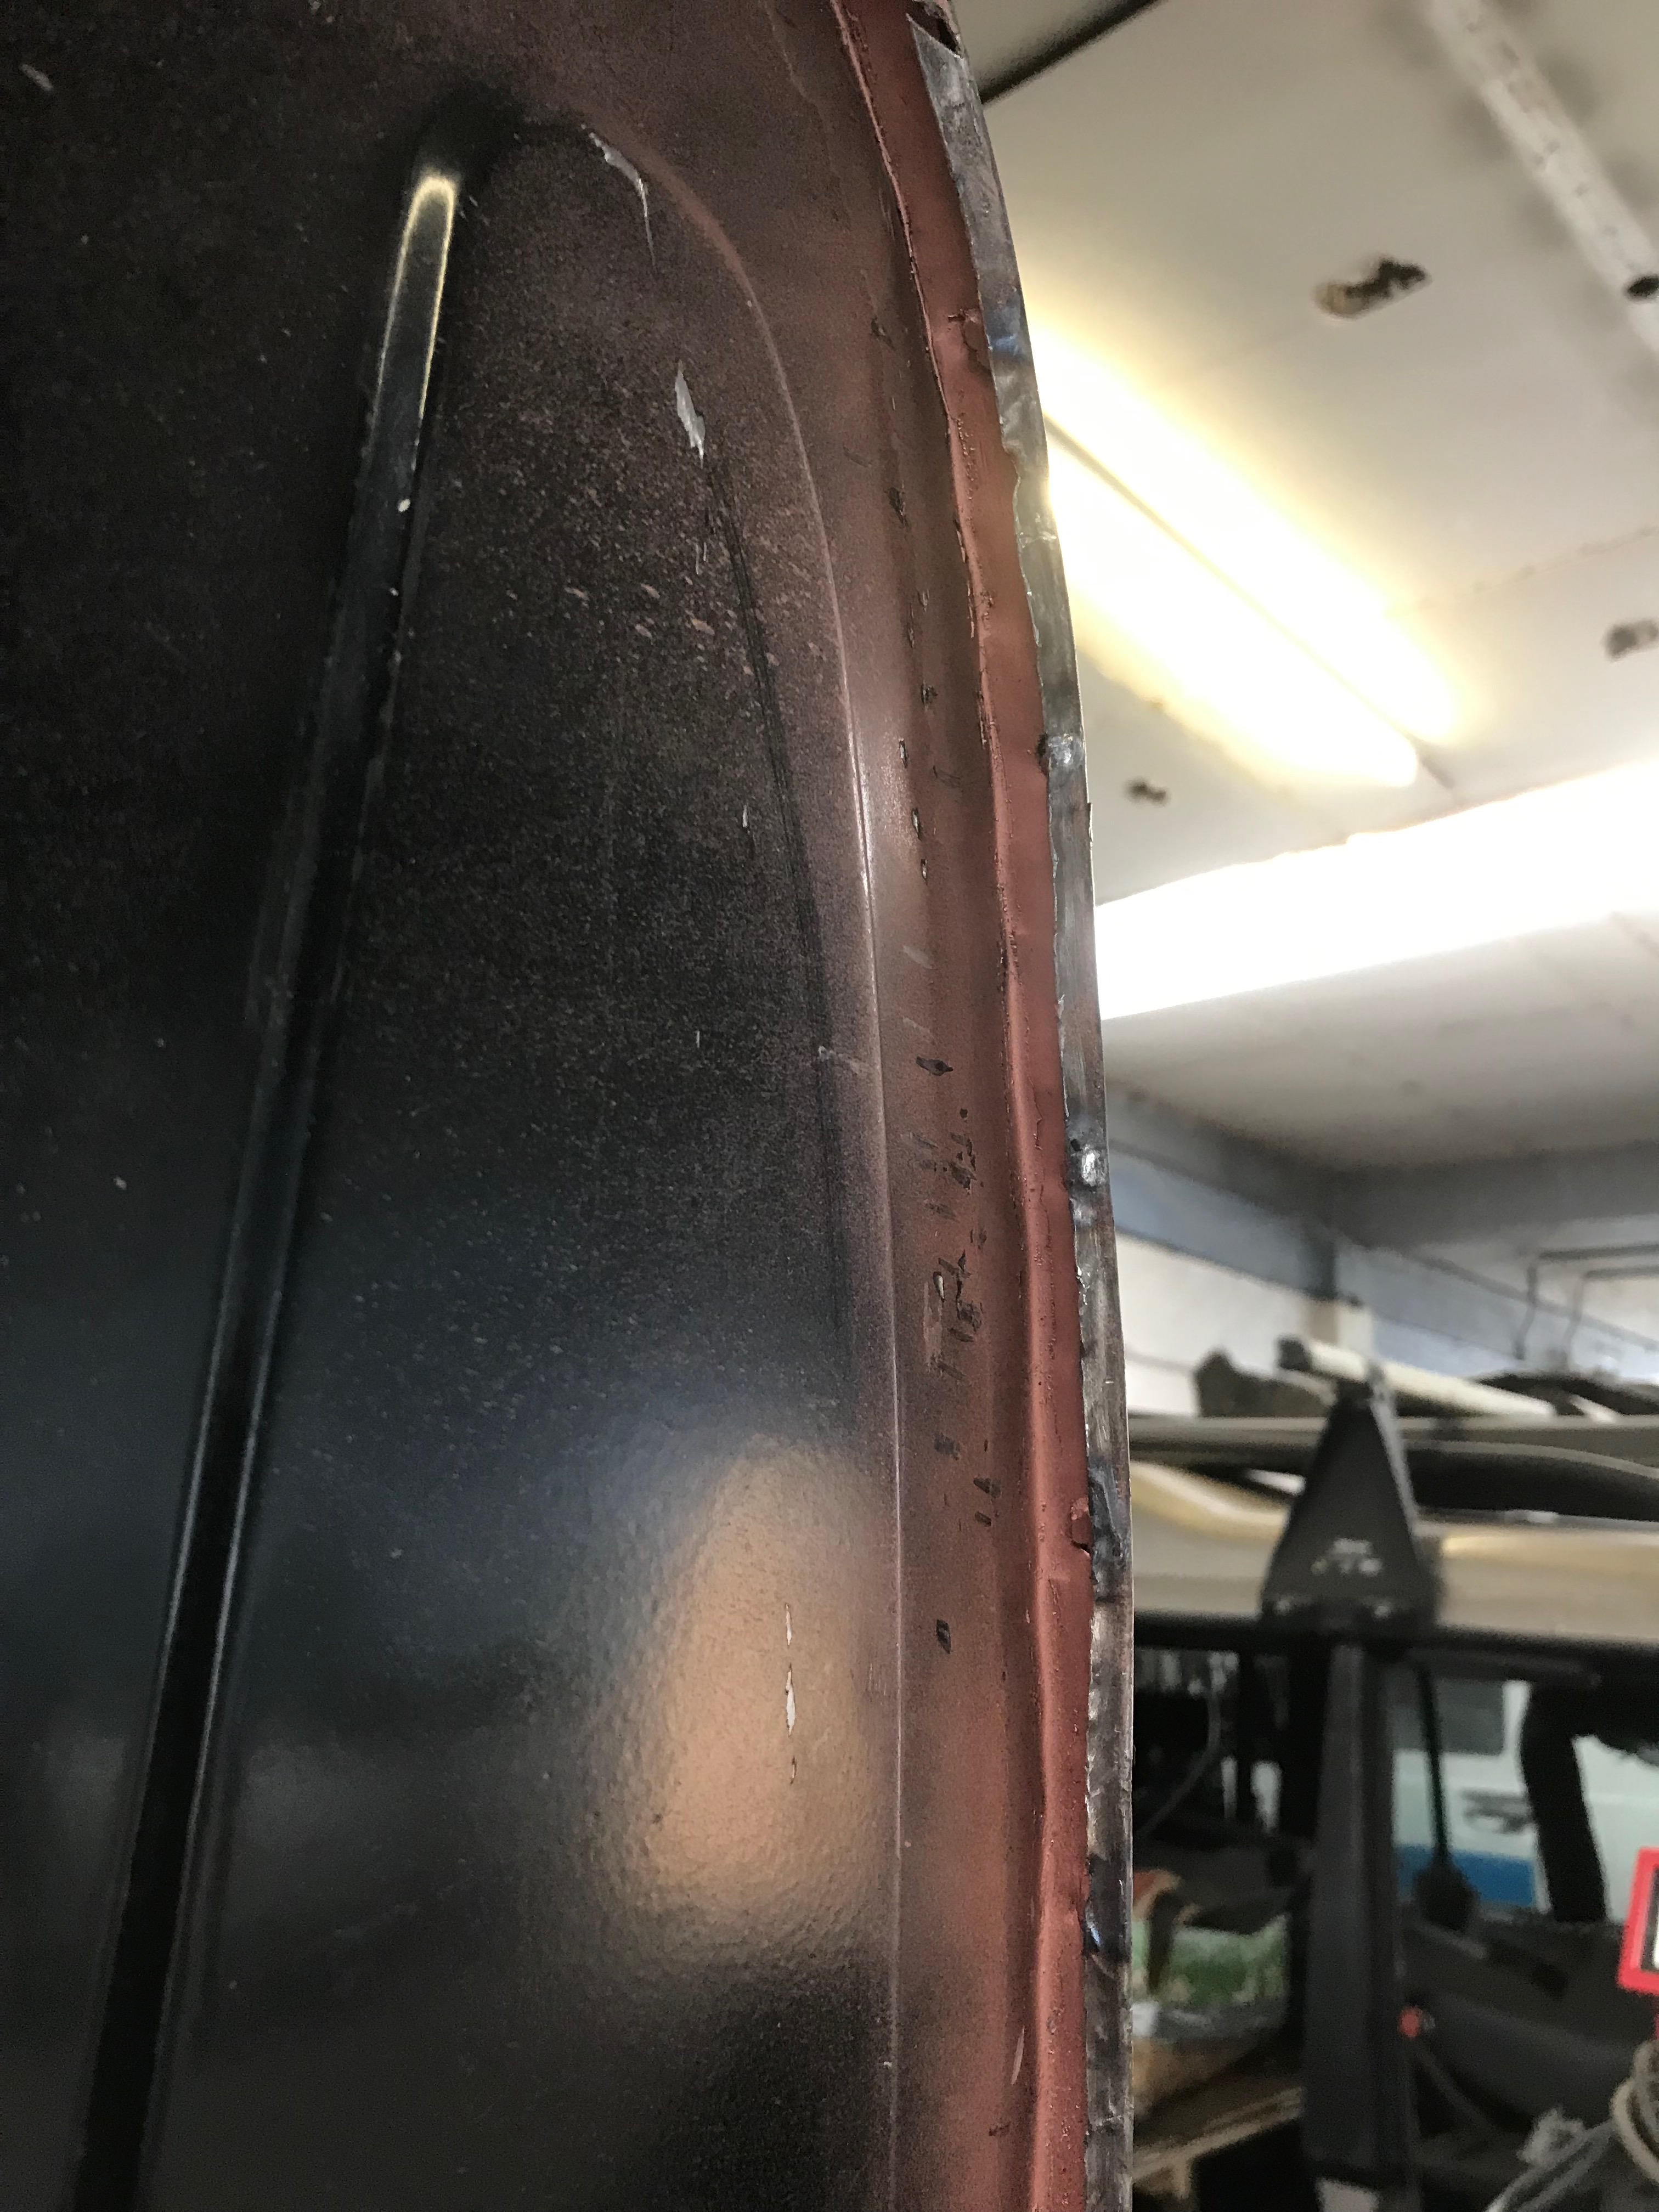
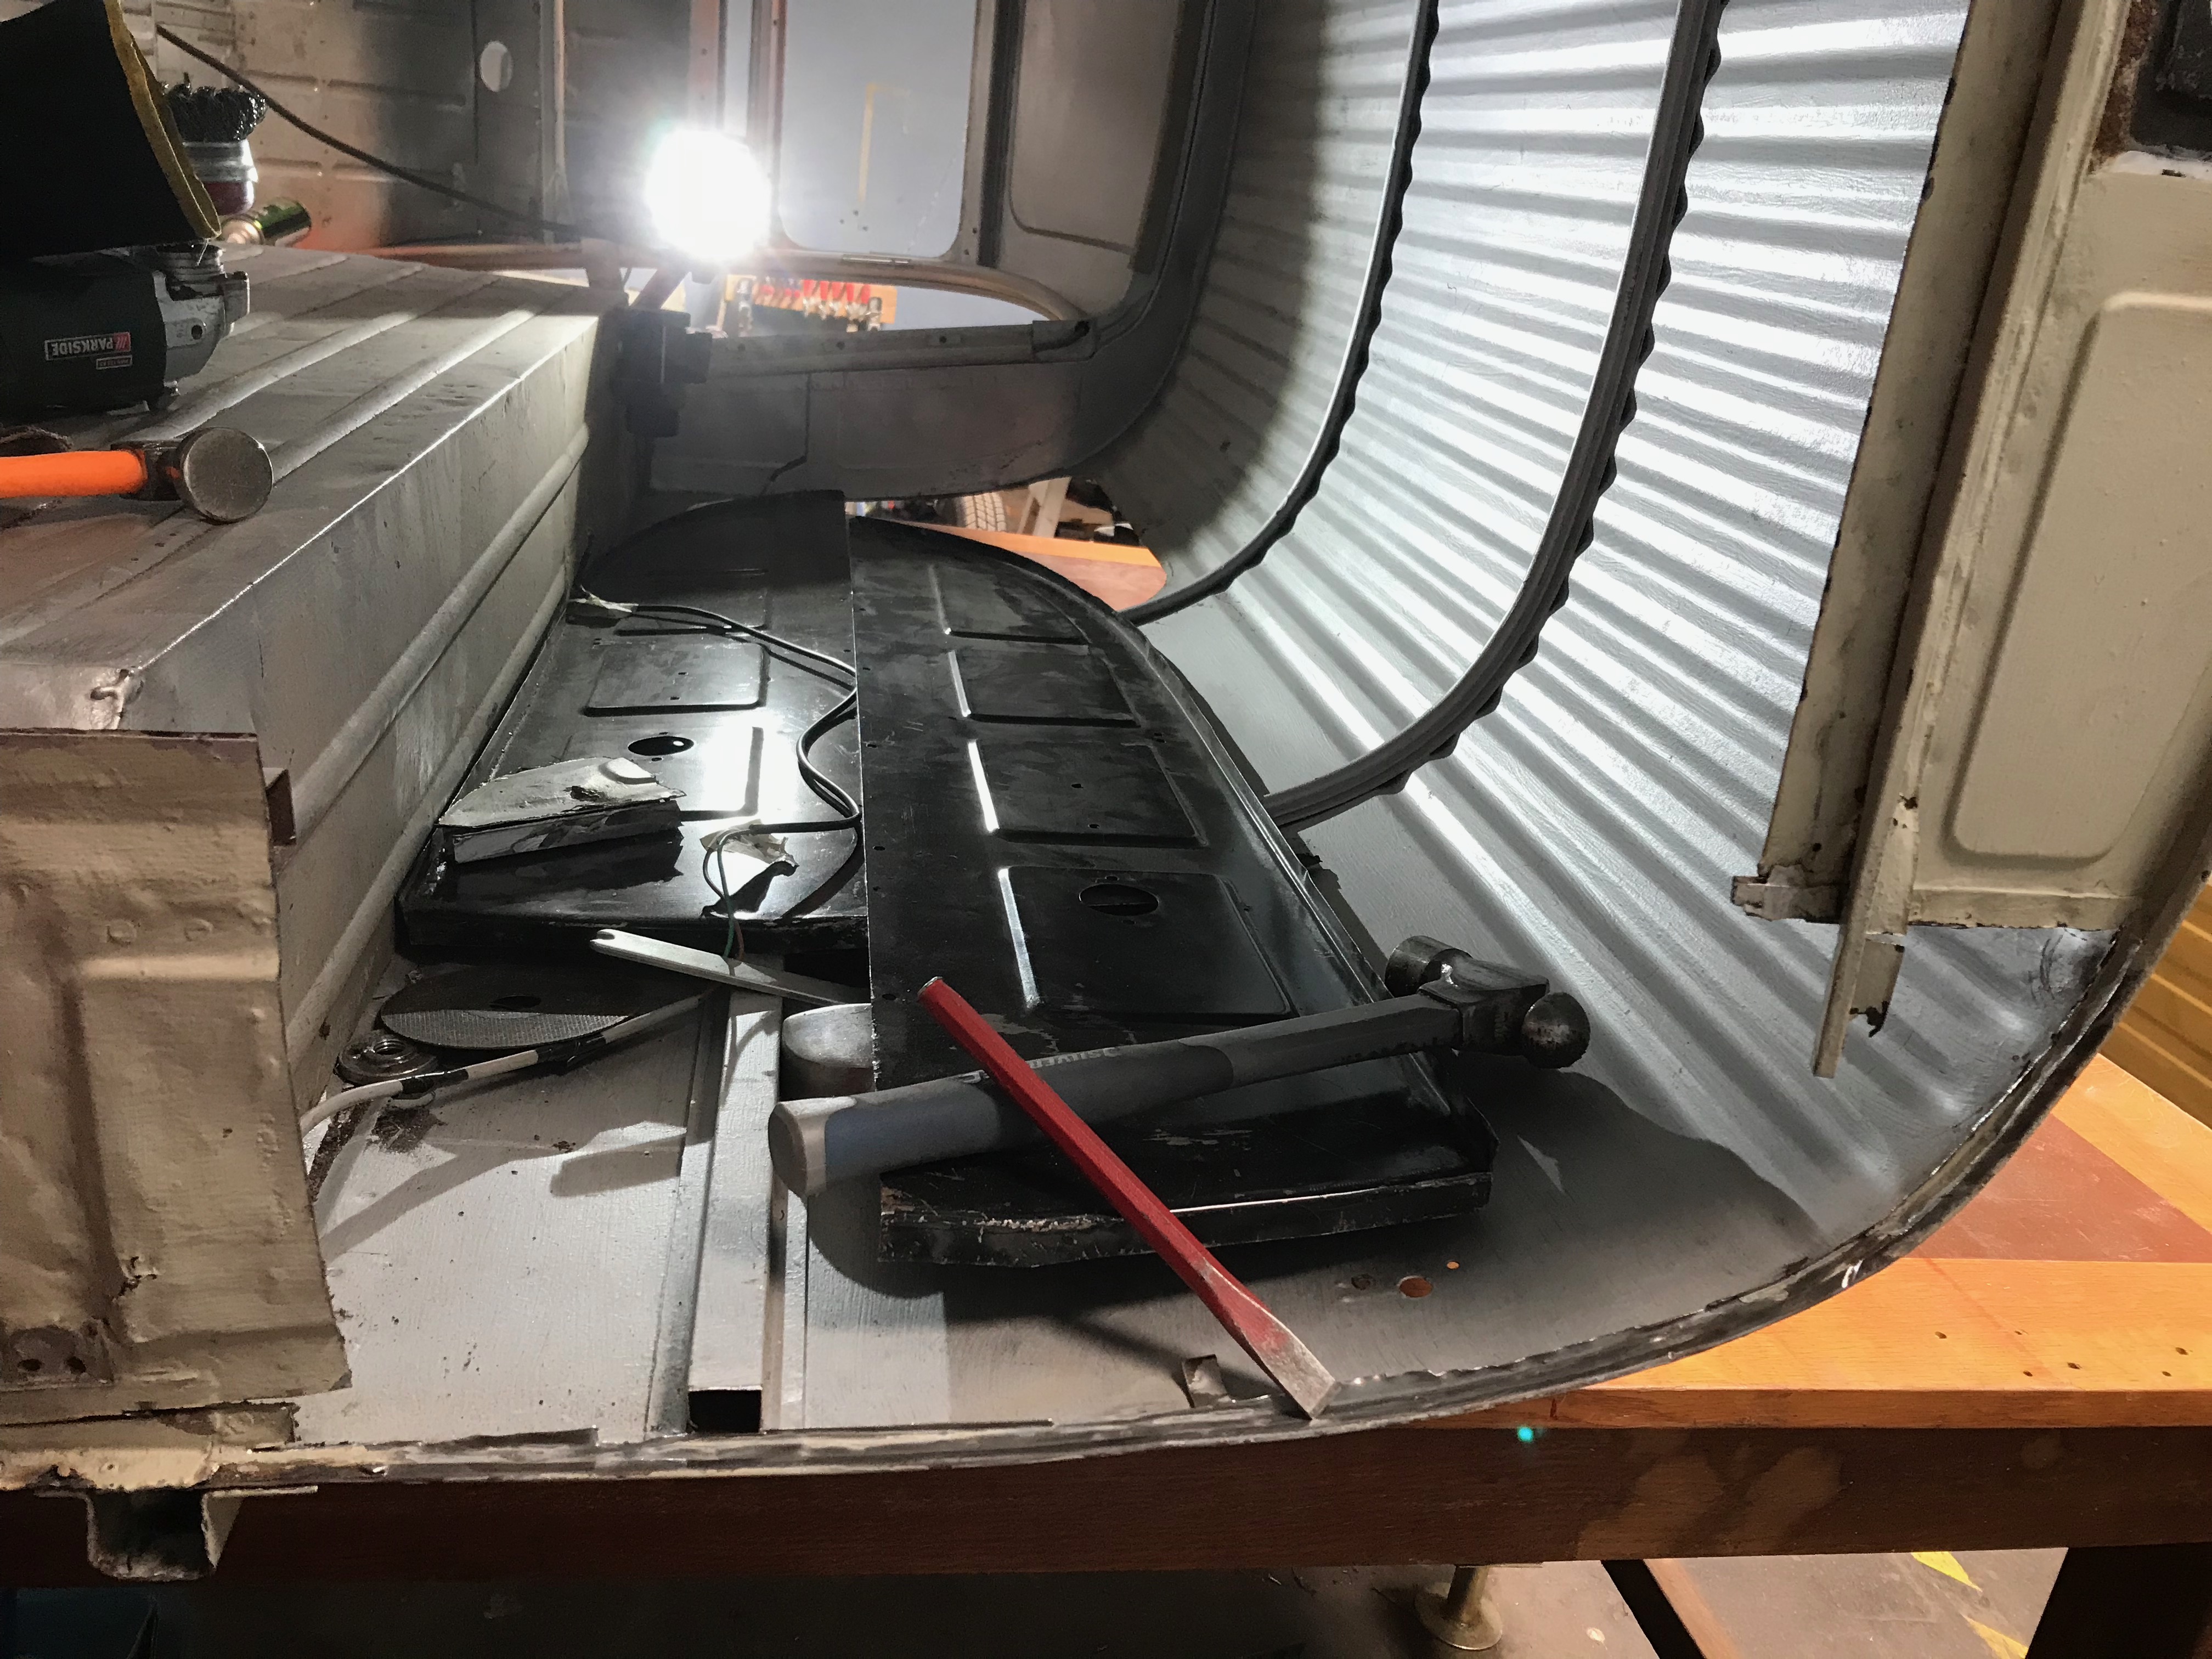
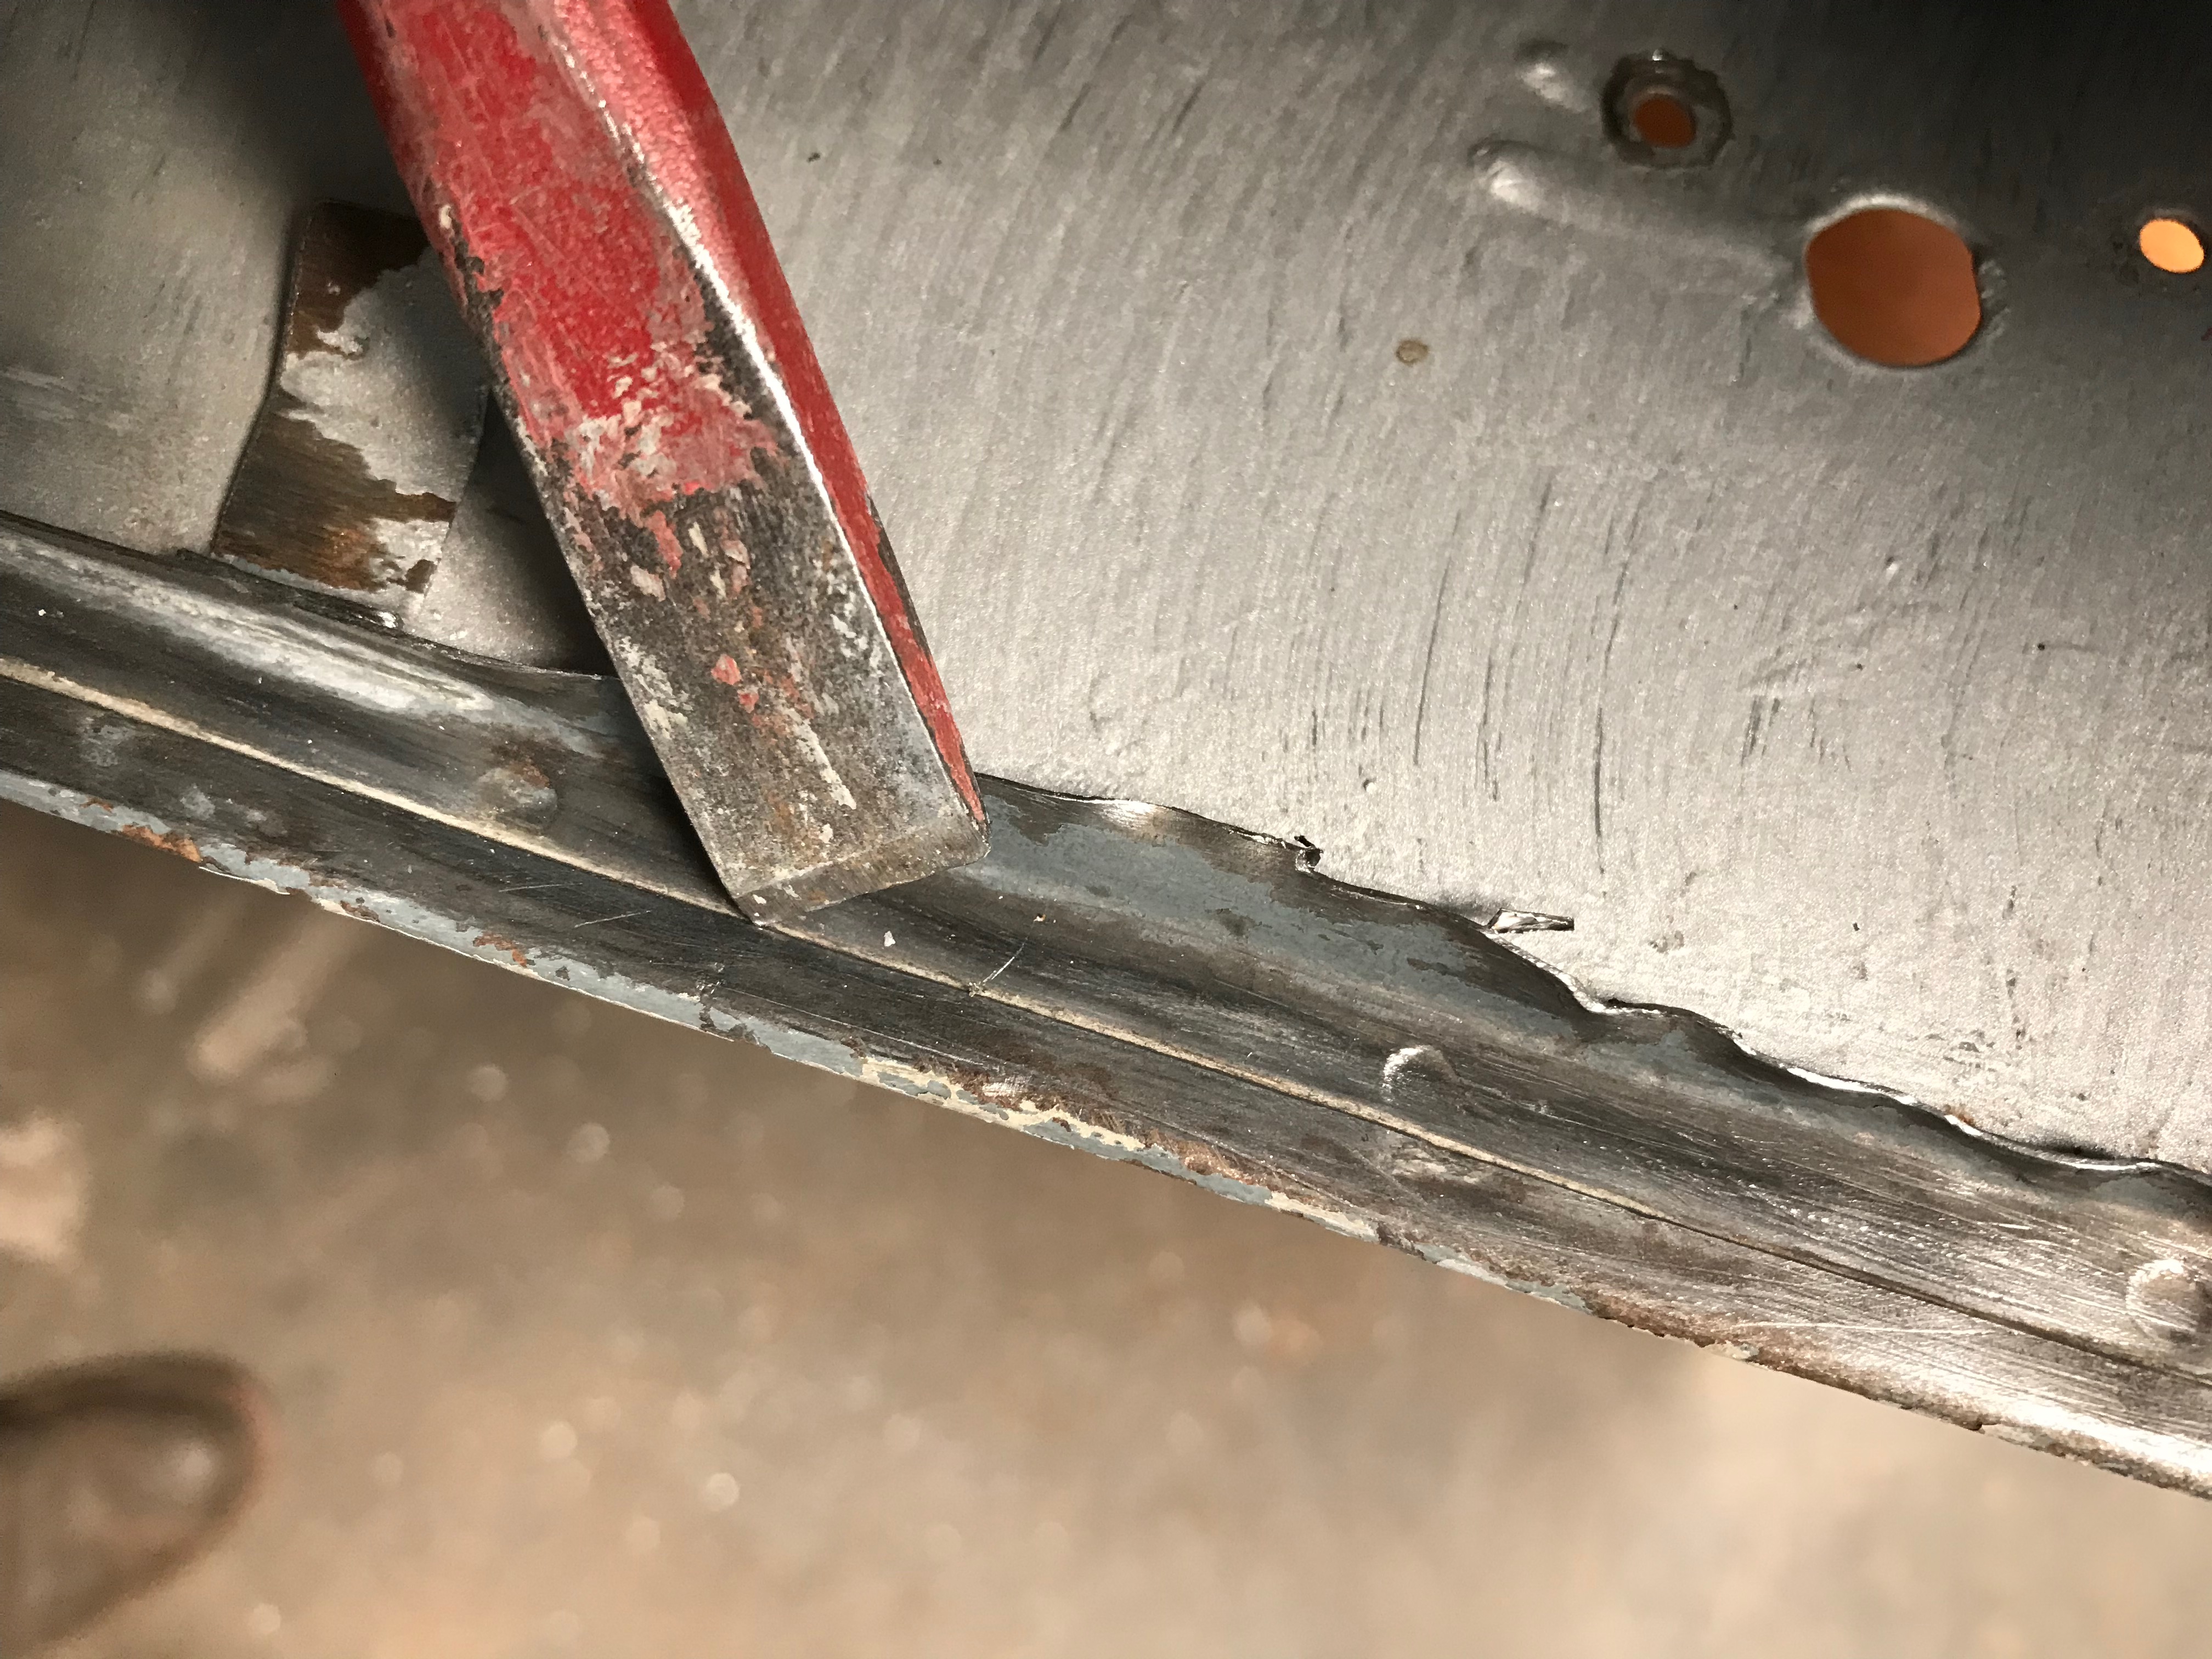
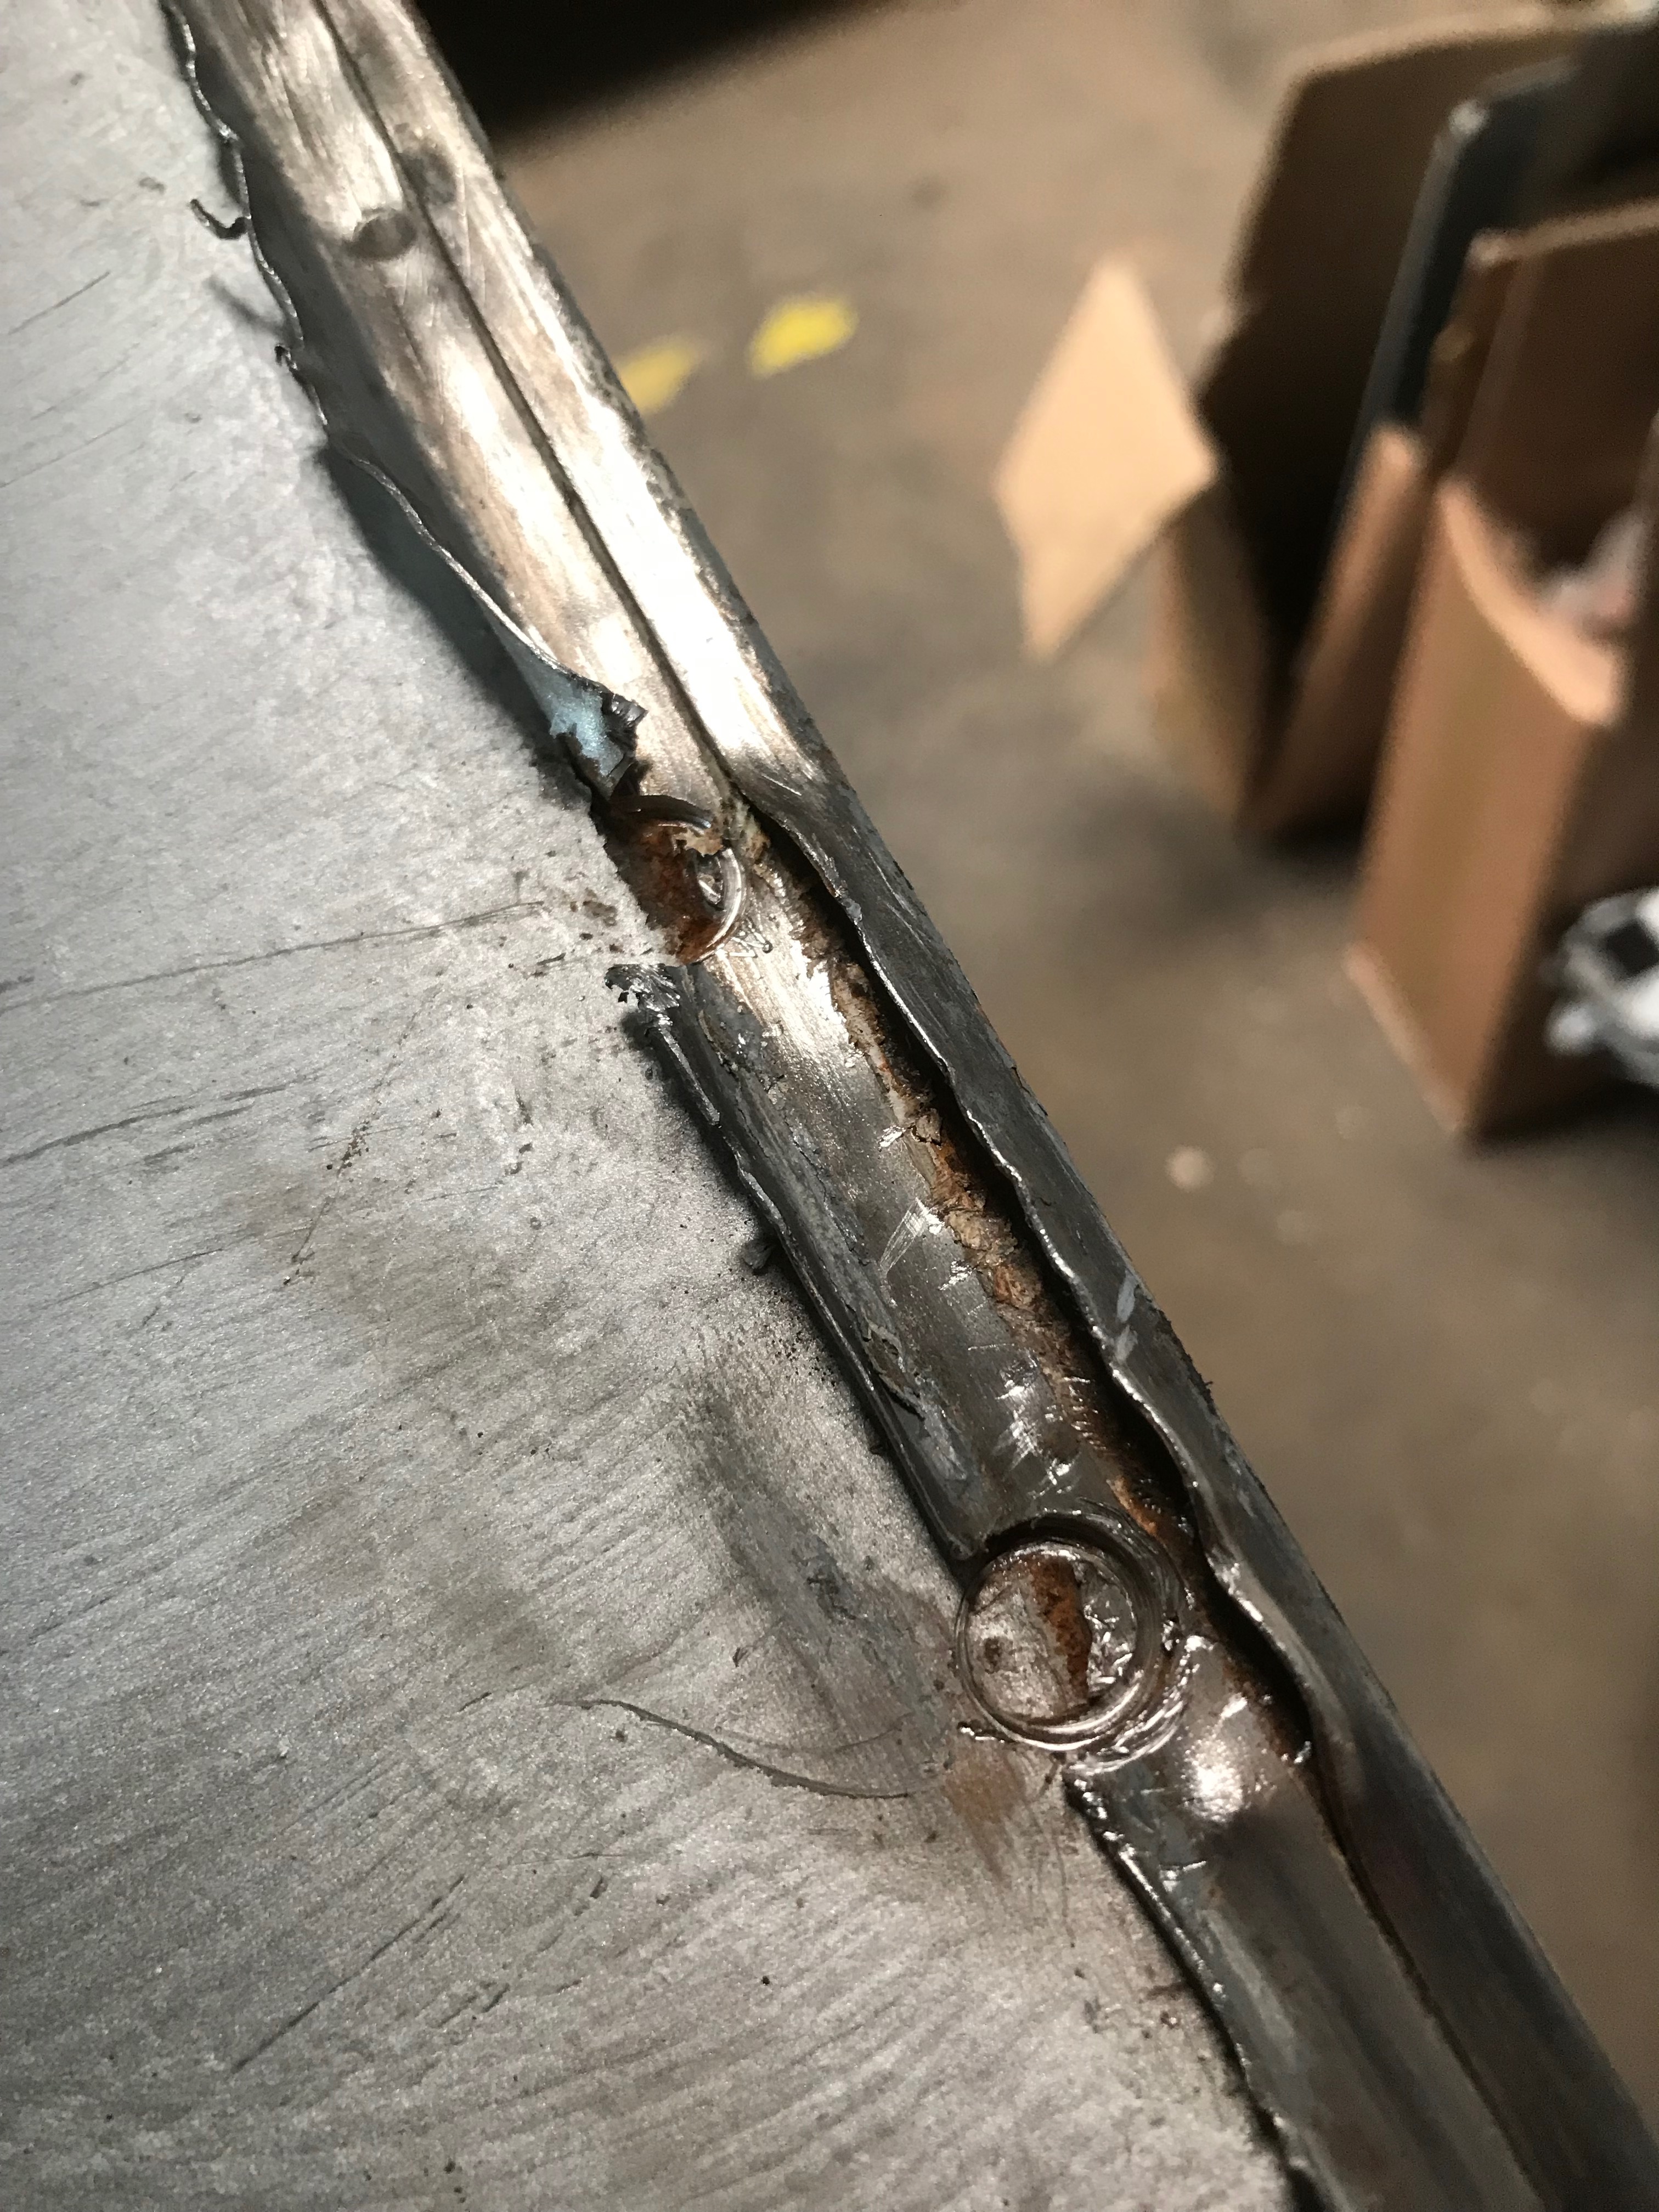
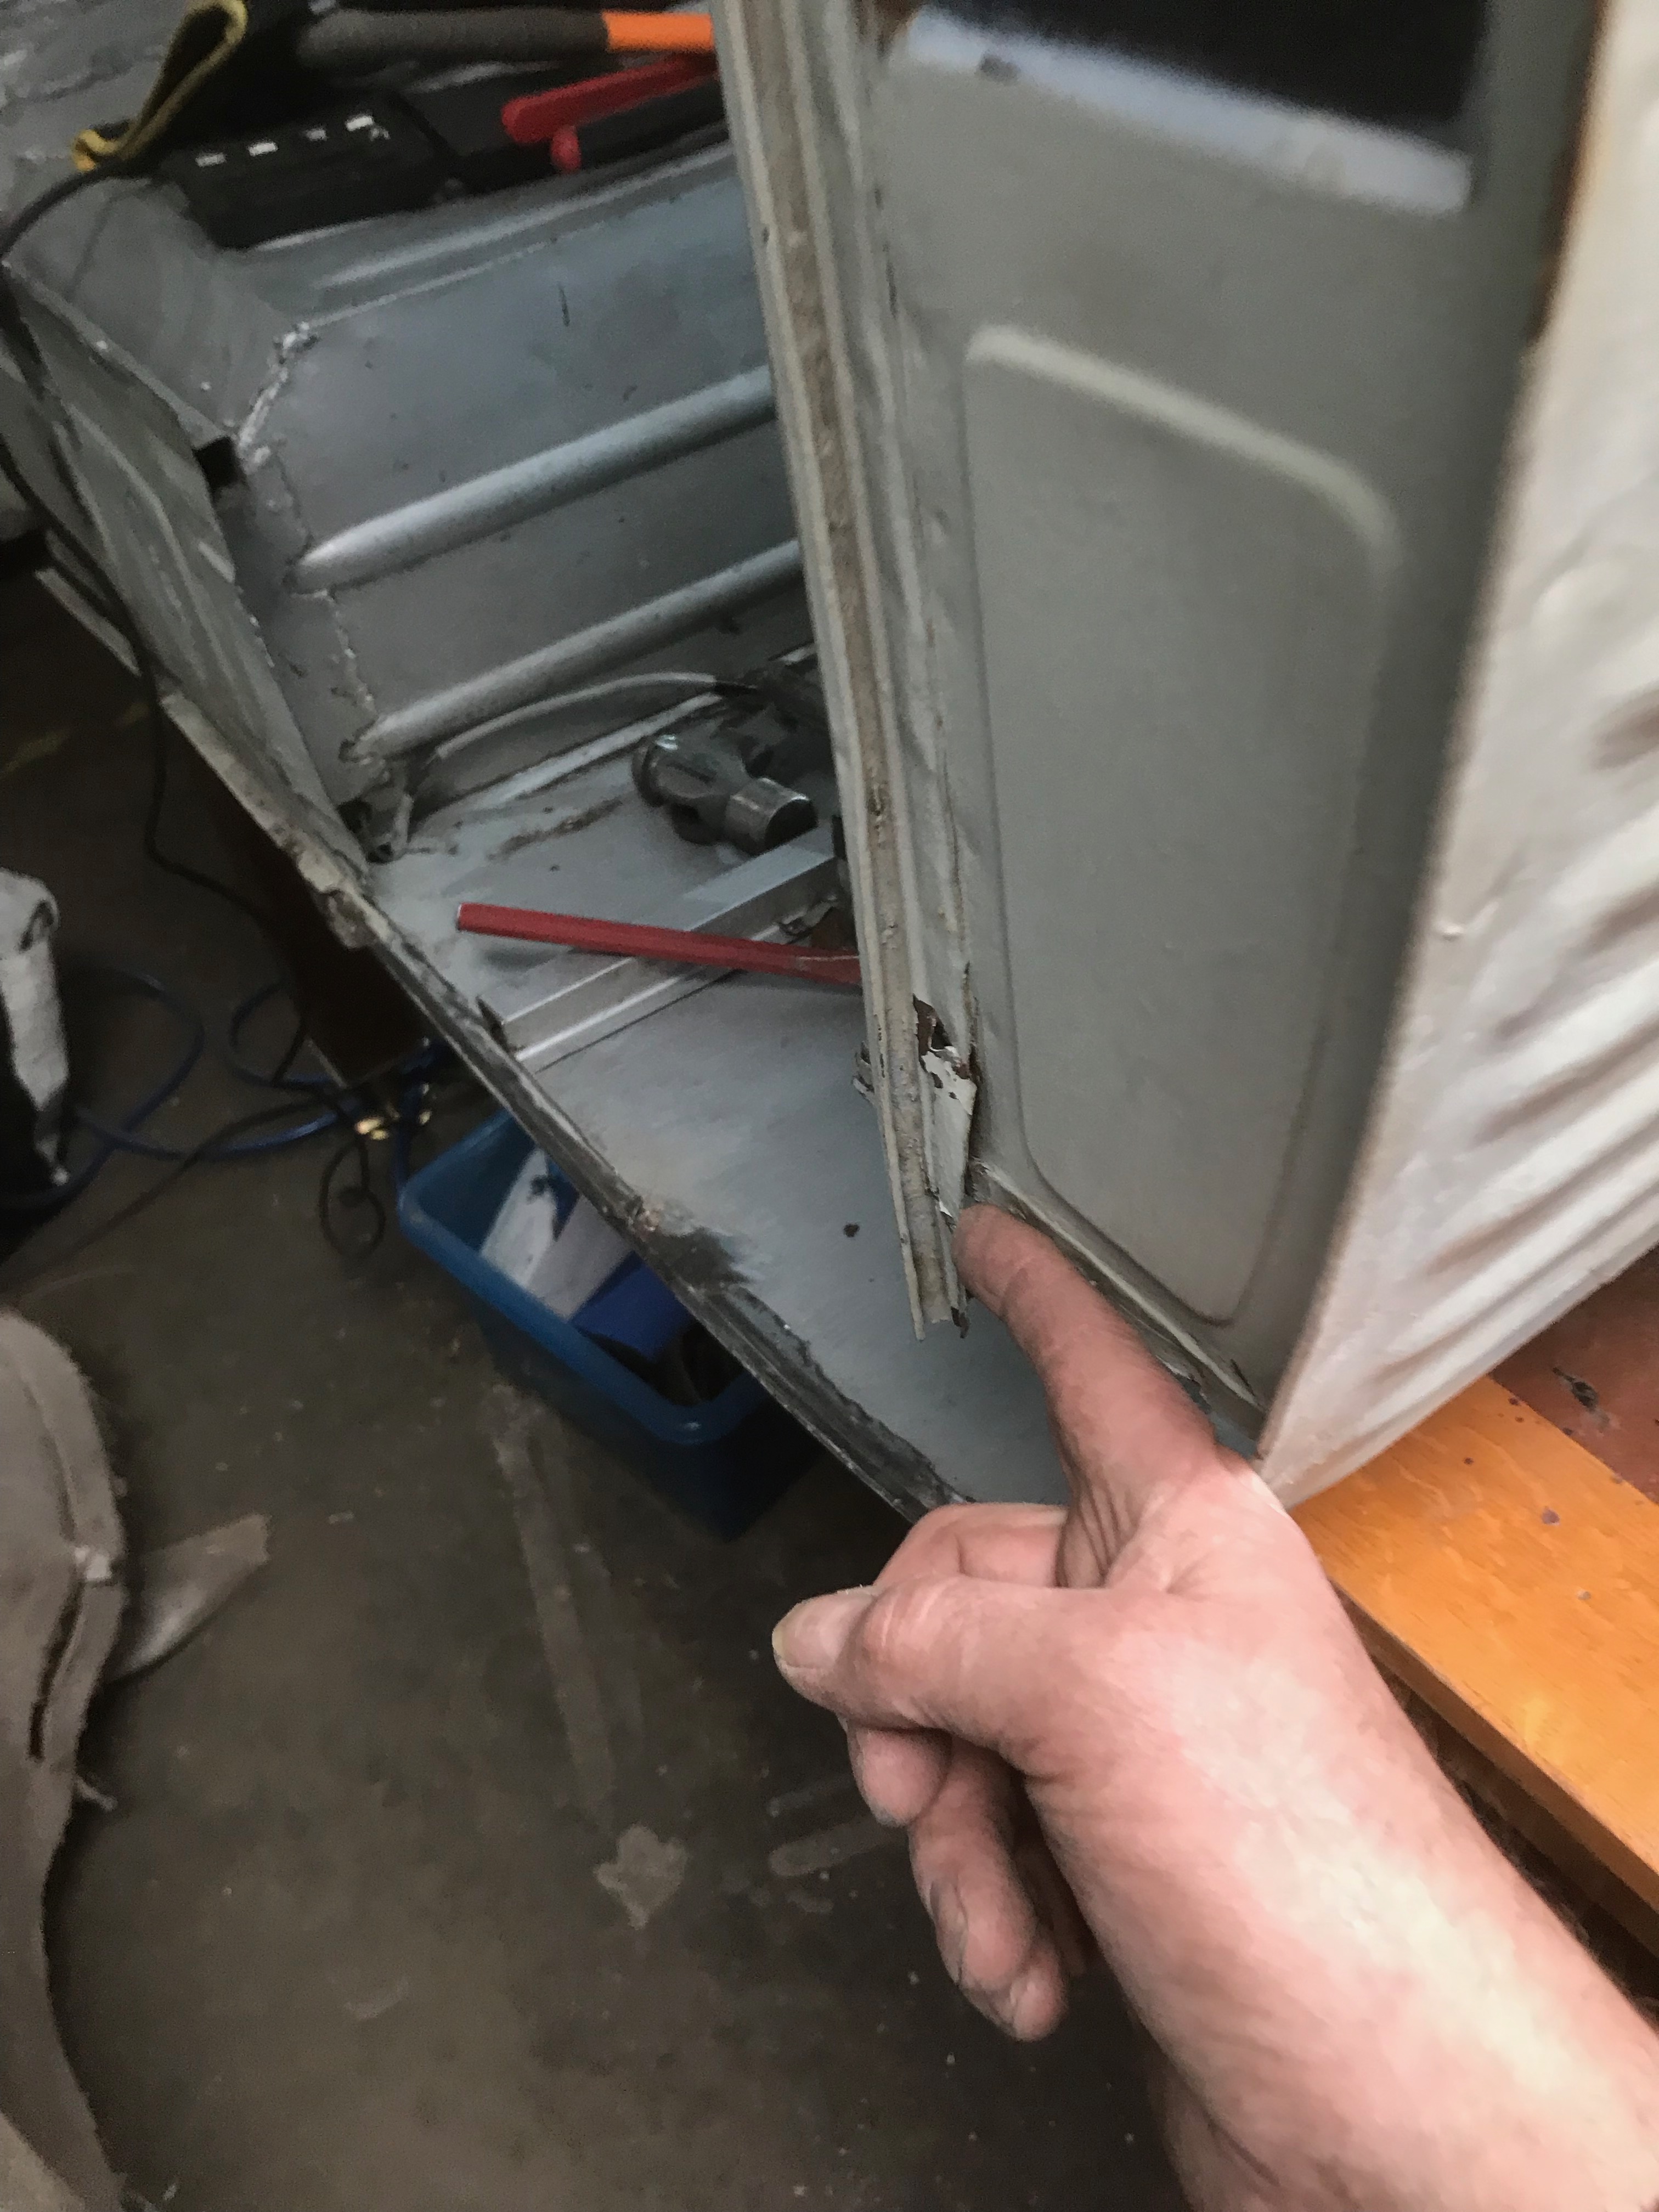
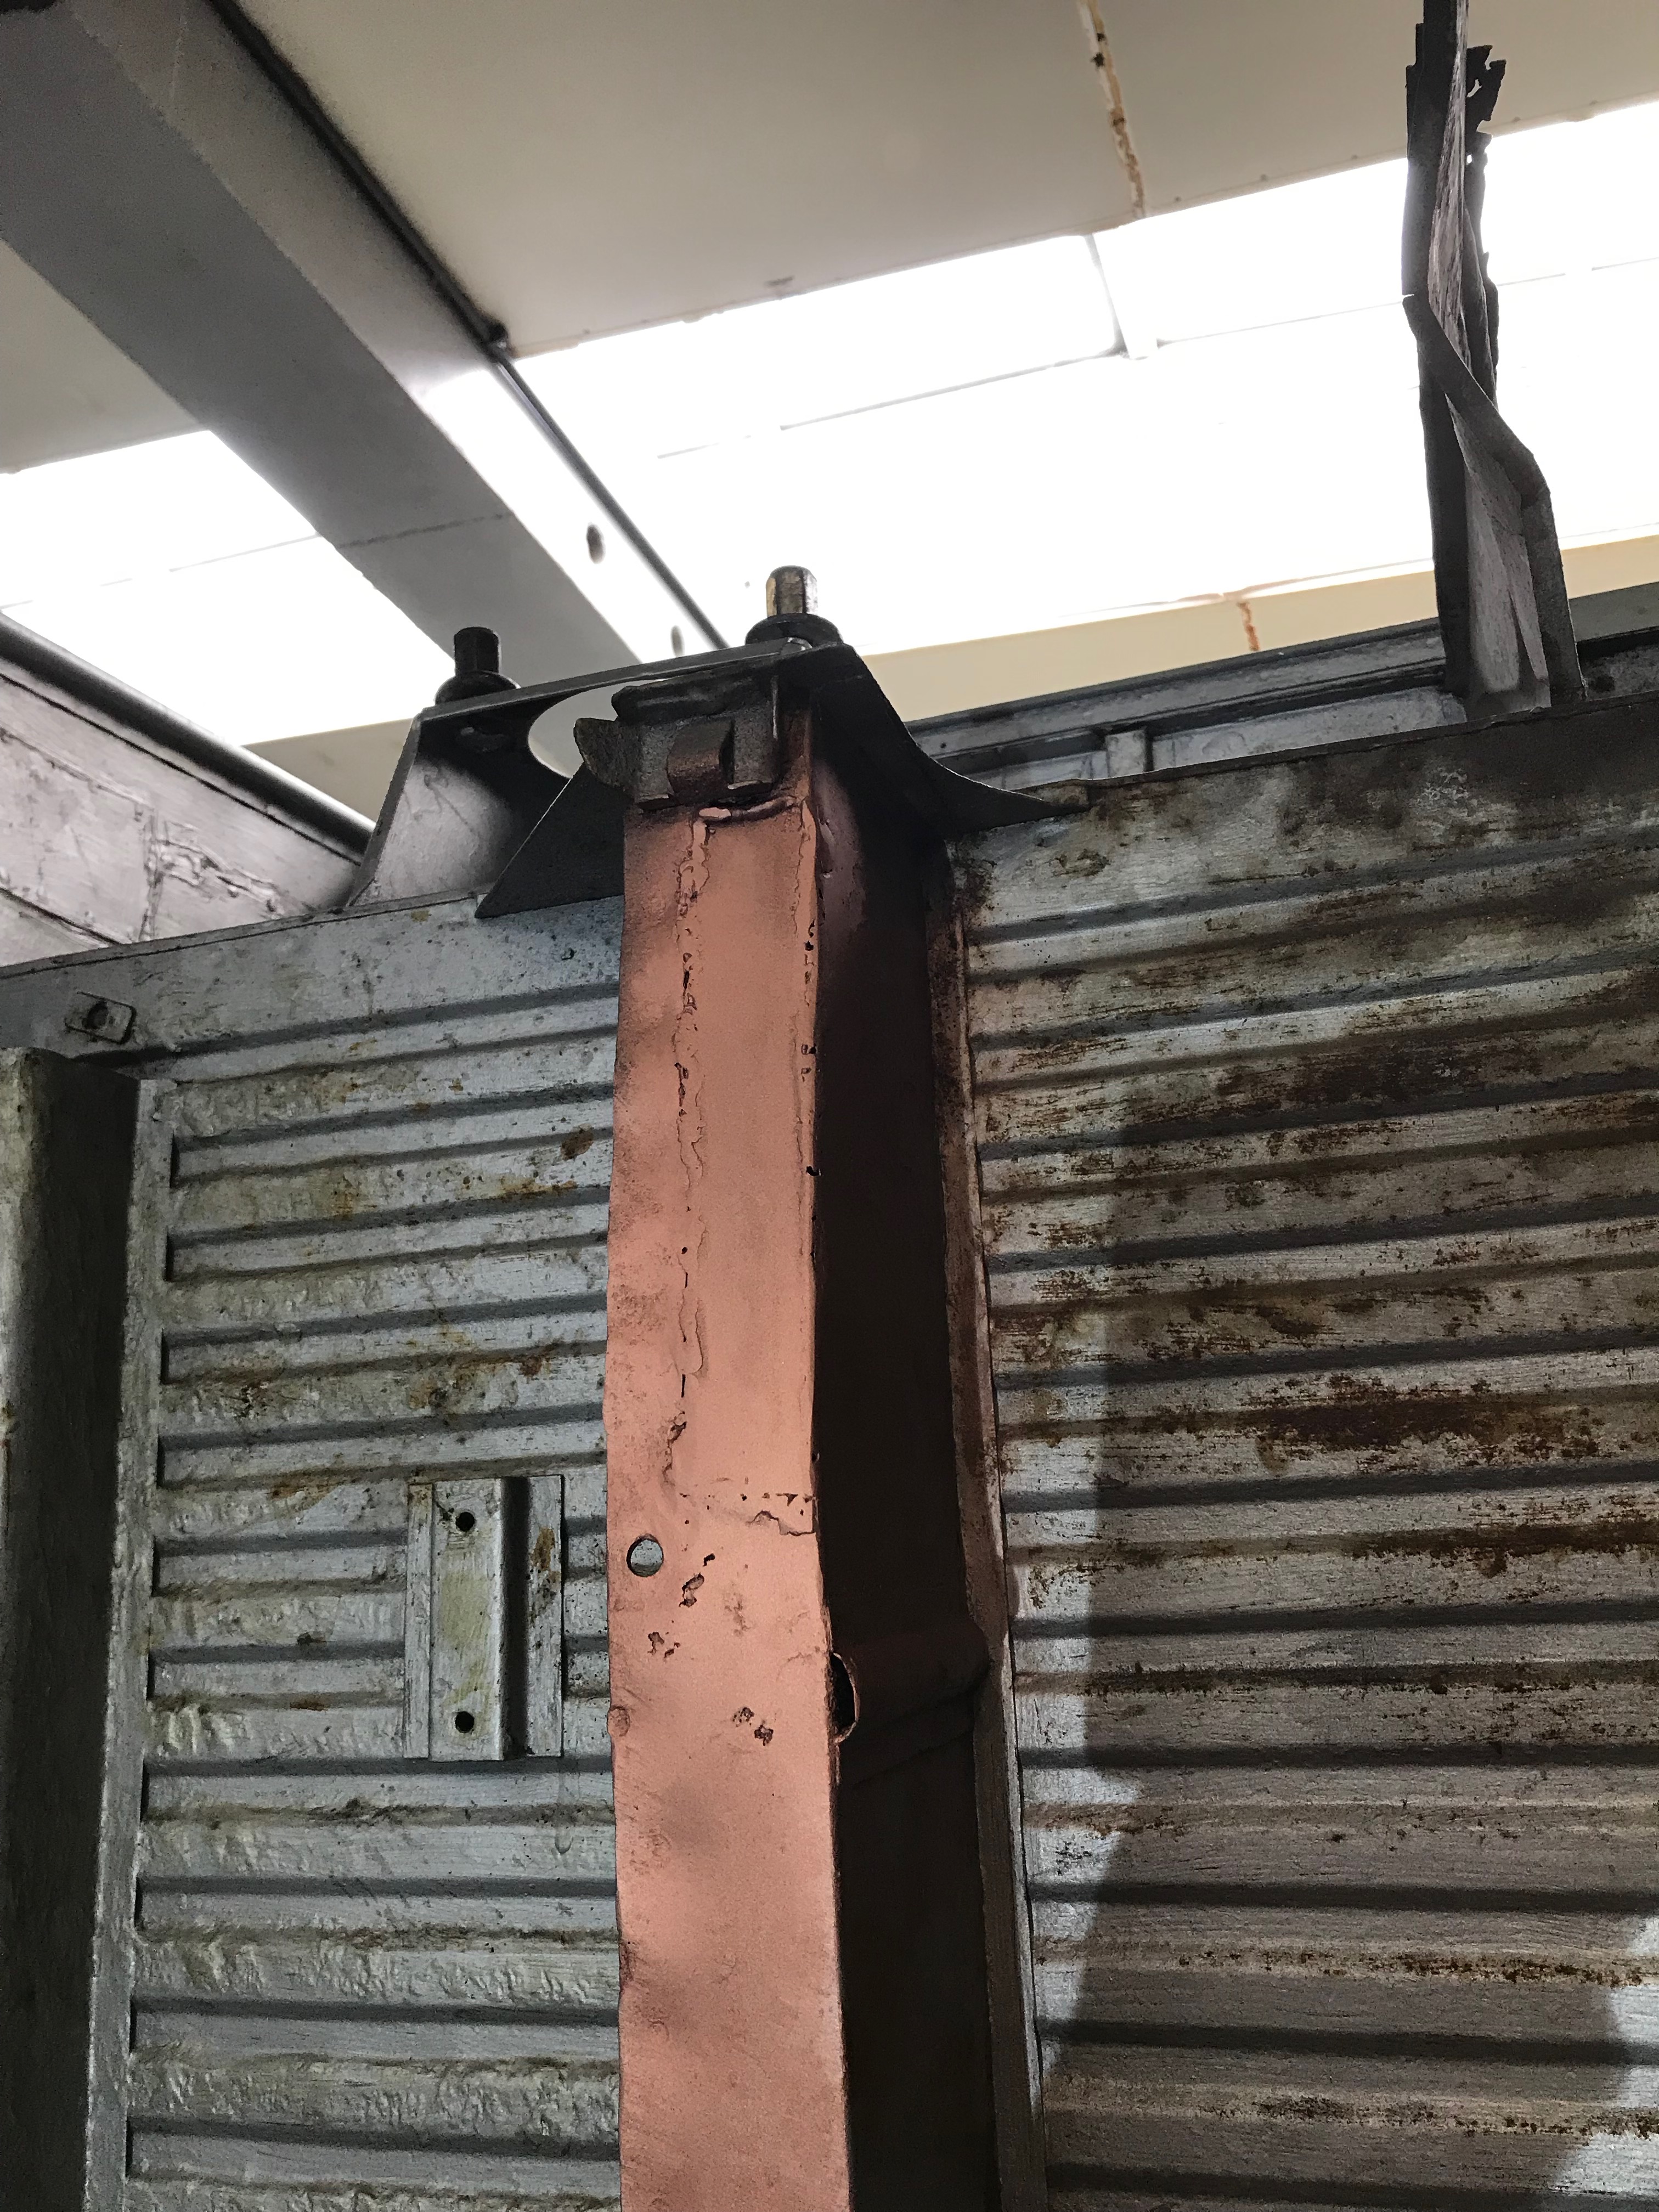
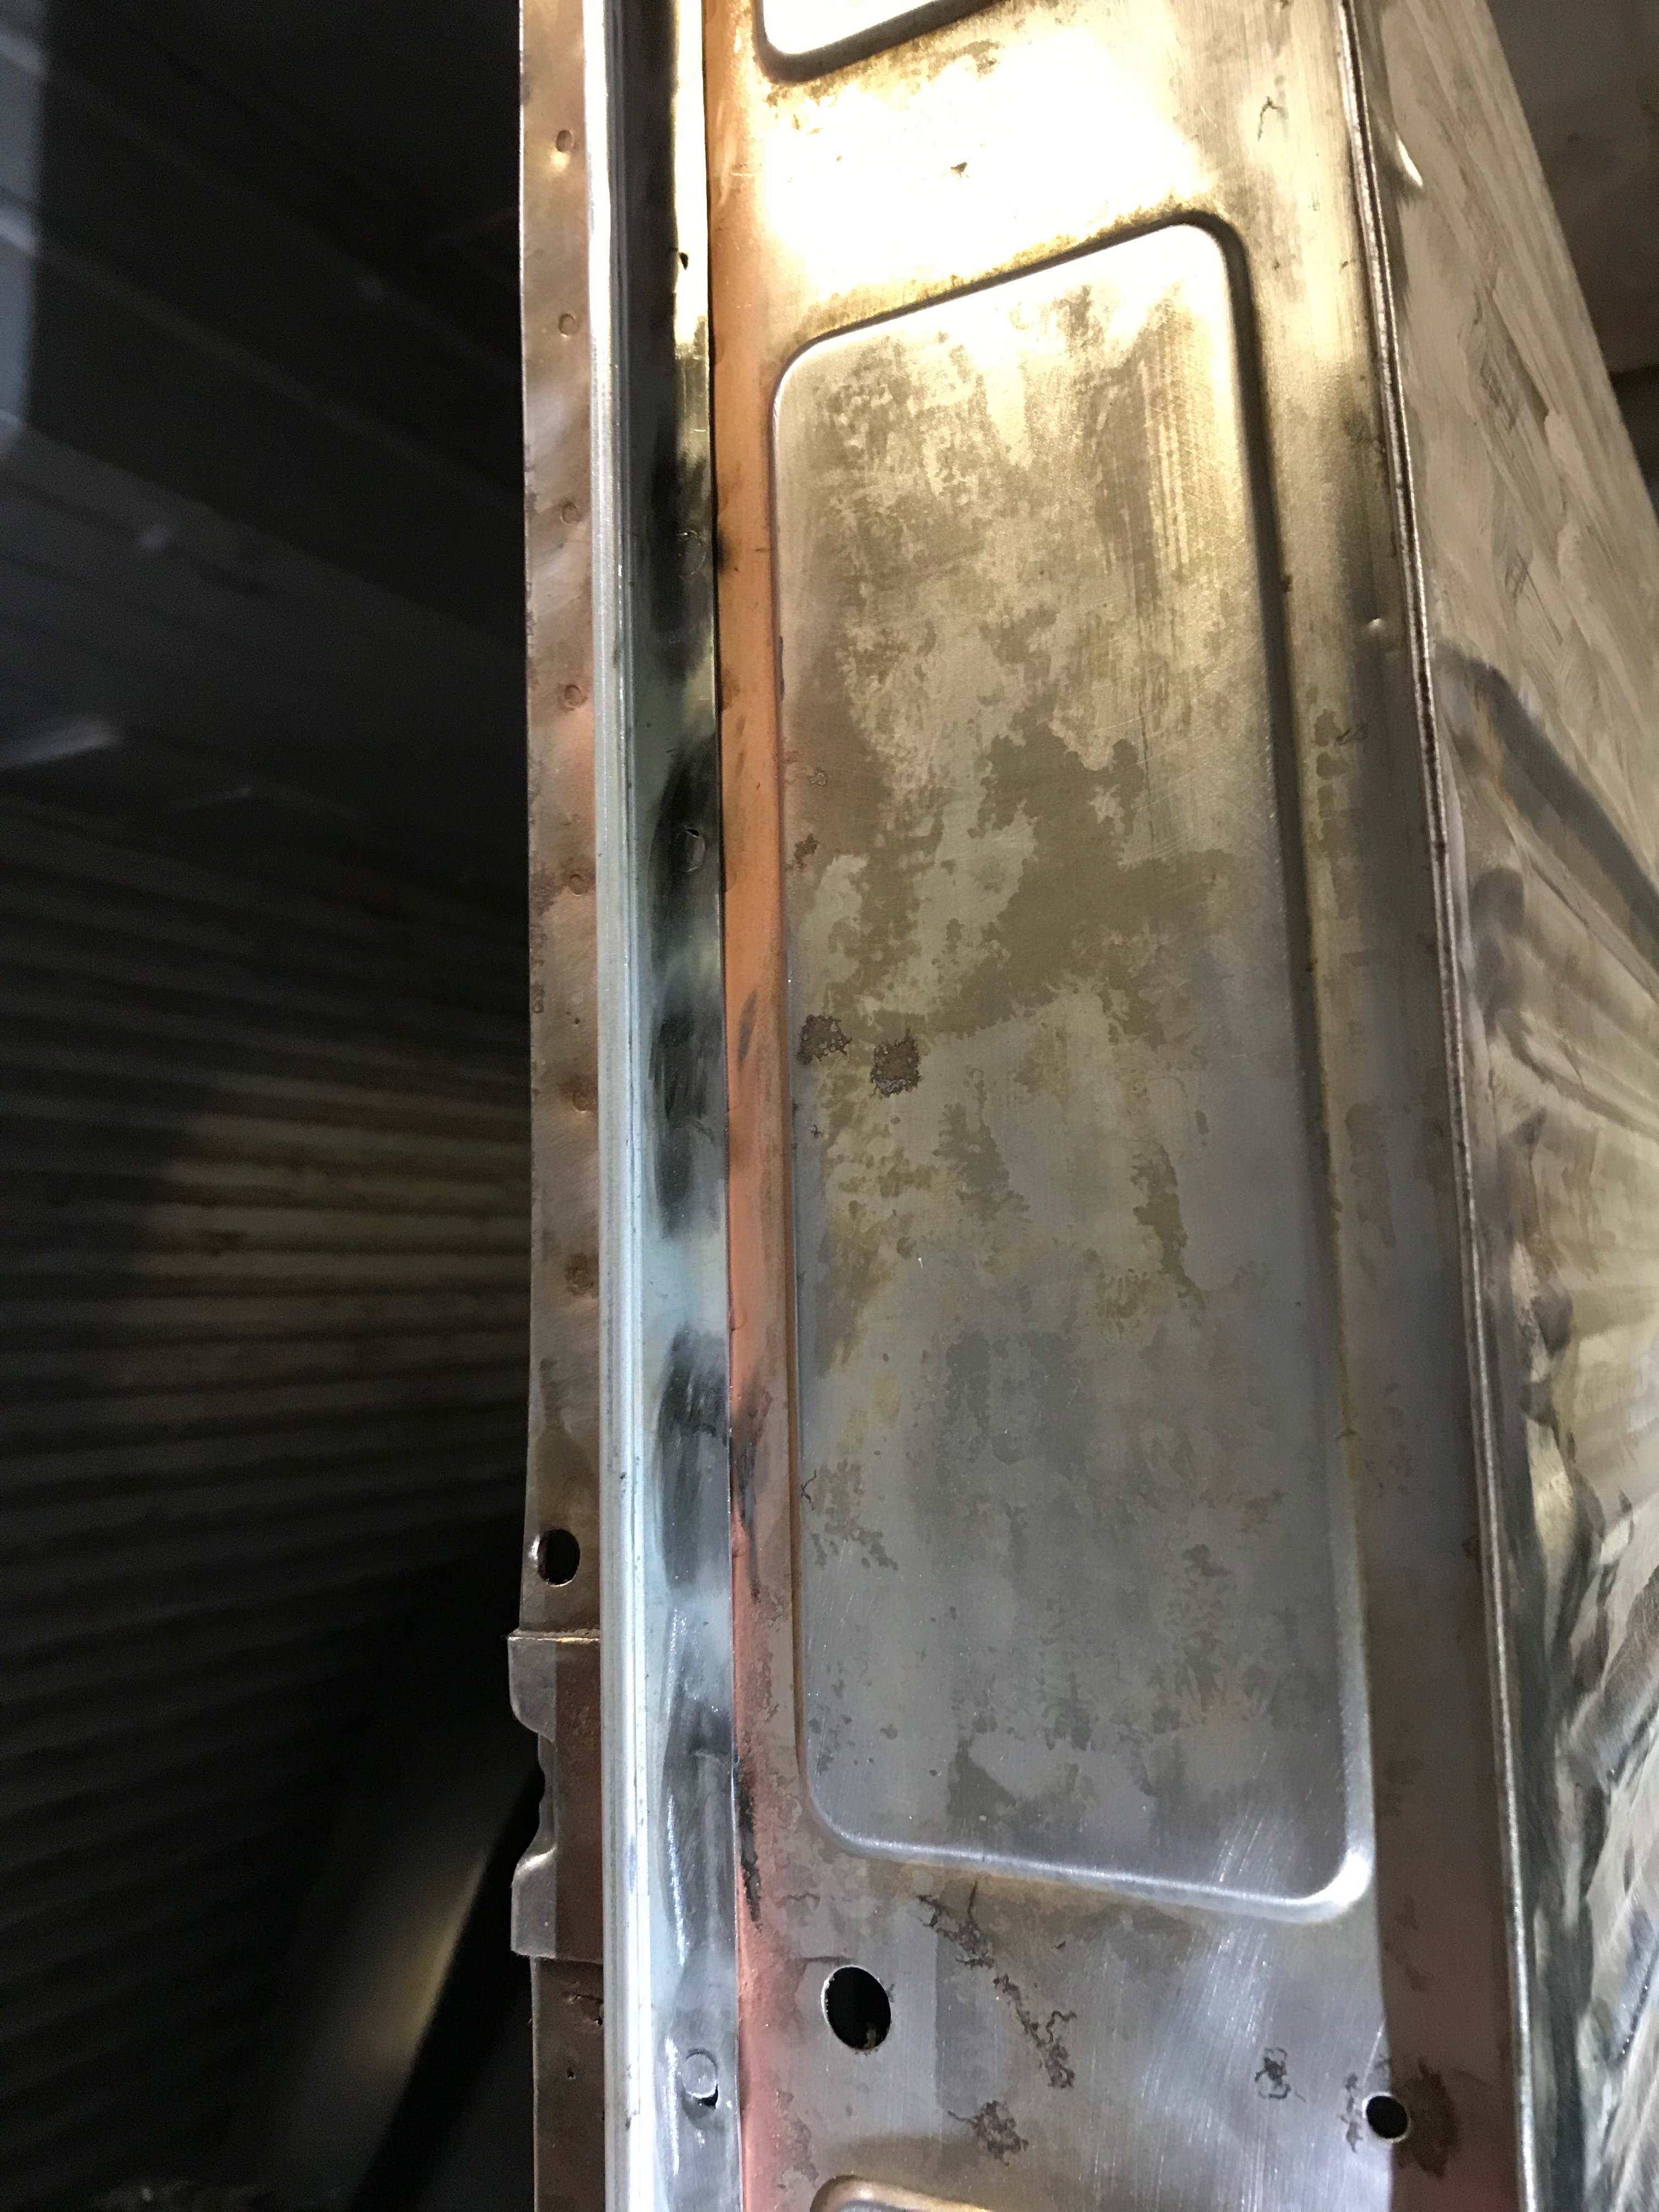
I fitted the new drip channel to the back of the van (above the rear doors).  This was just a case of punching a series of holes in the new channel, clamping and plug welding it to the body.  I’ve ground off the excess weld and it looks pretty tidy now.  I’ll put a smear or filler – or body sealer over any small holes, before painting.  It’s both surprising and disconcerting how much more solid the panel is now with the addition of this small strip of new steel.

I did sort of measure this before it was clamped and welded – I don’t suppose anyone will notice if it’s a few ml out though

Plug welds ground down – not too bad!

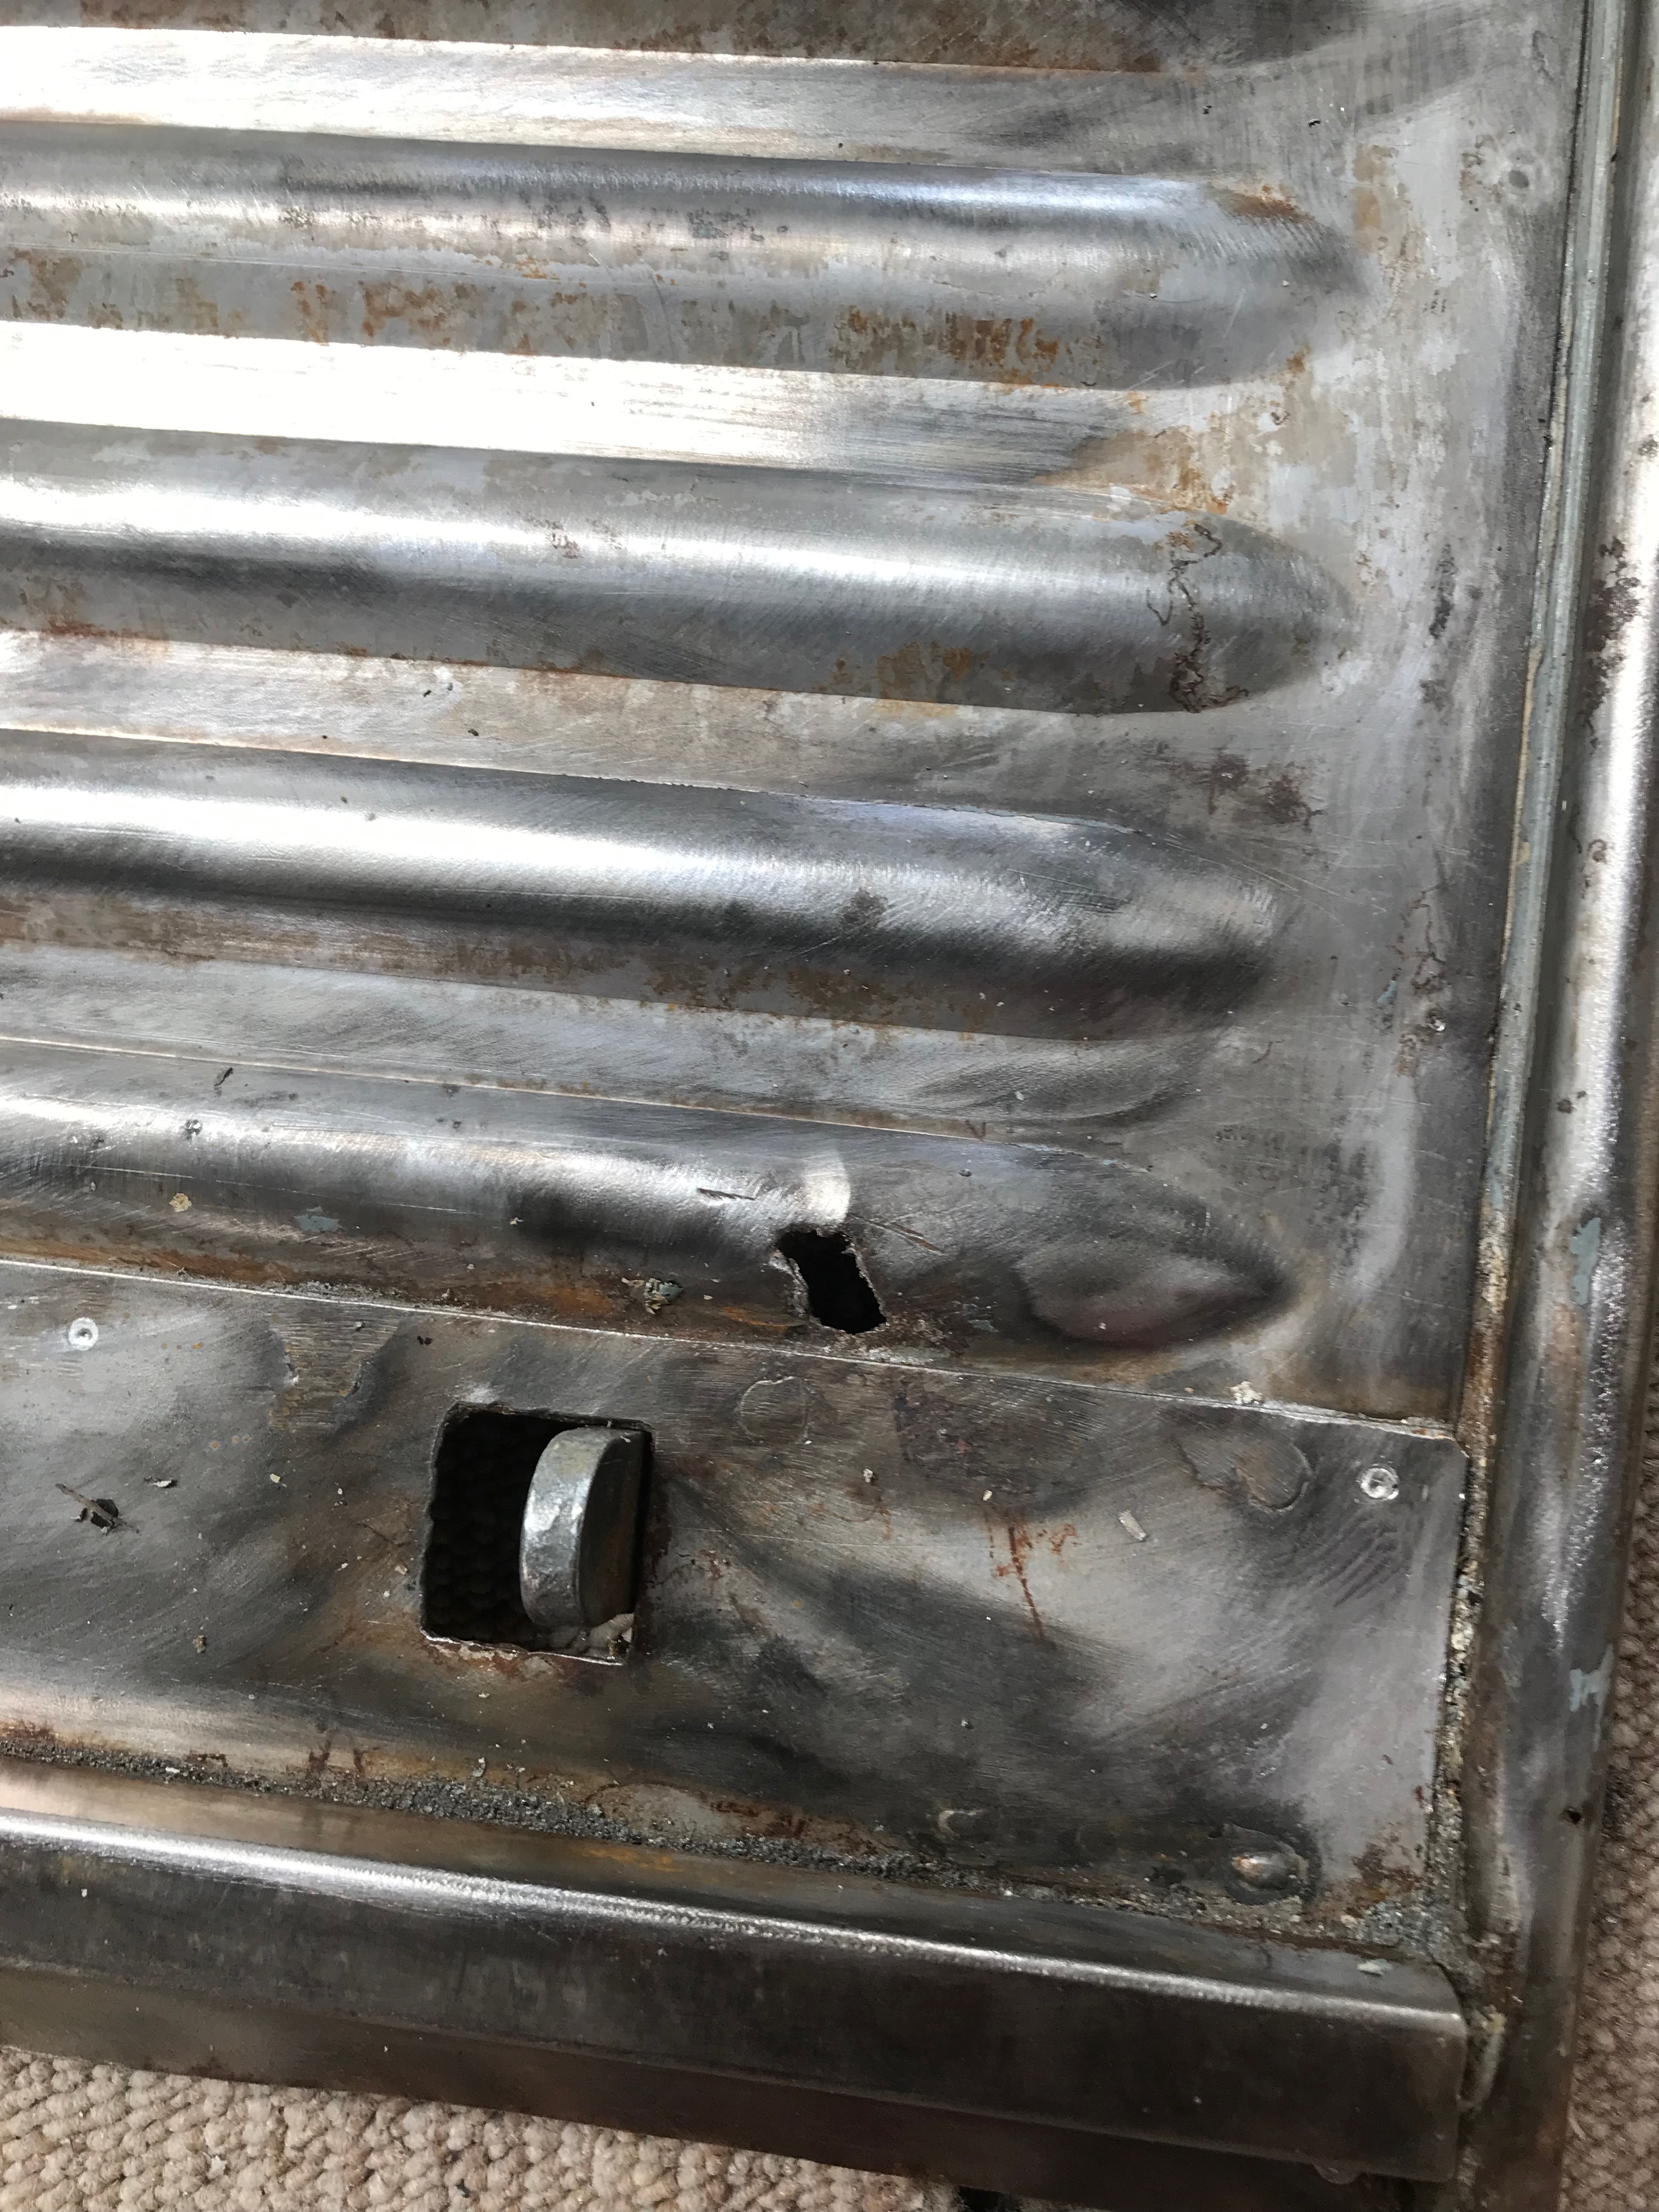
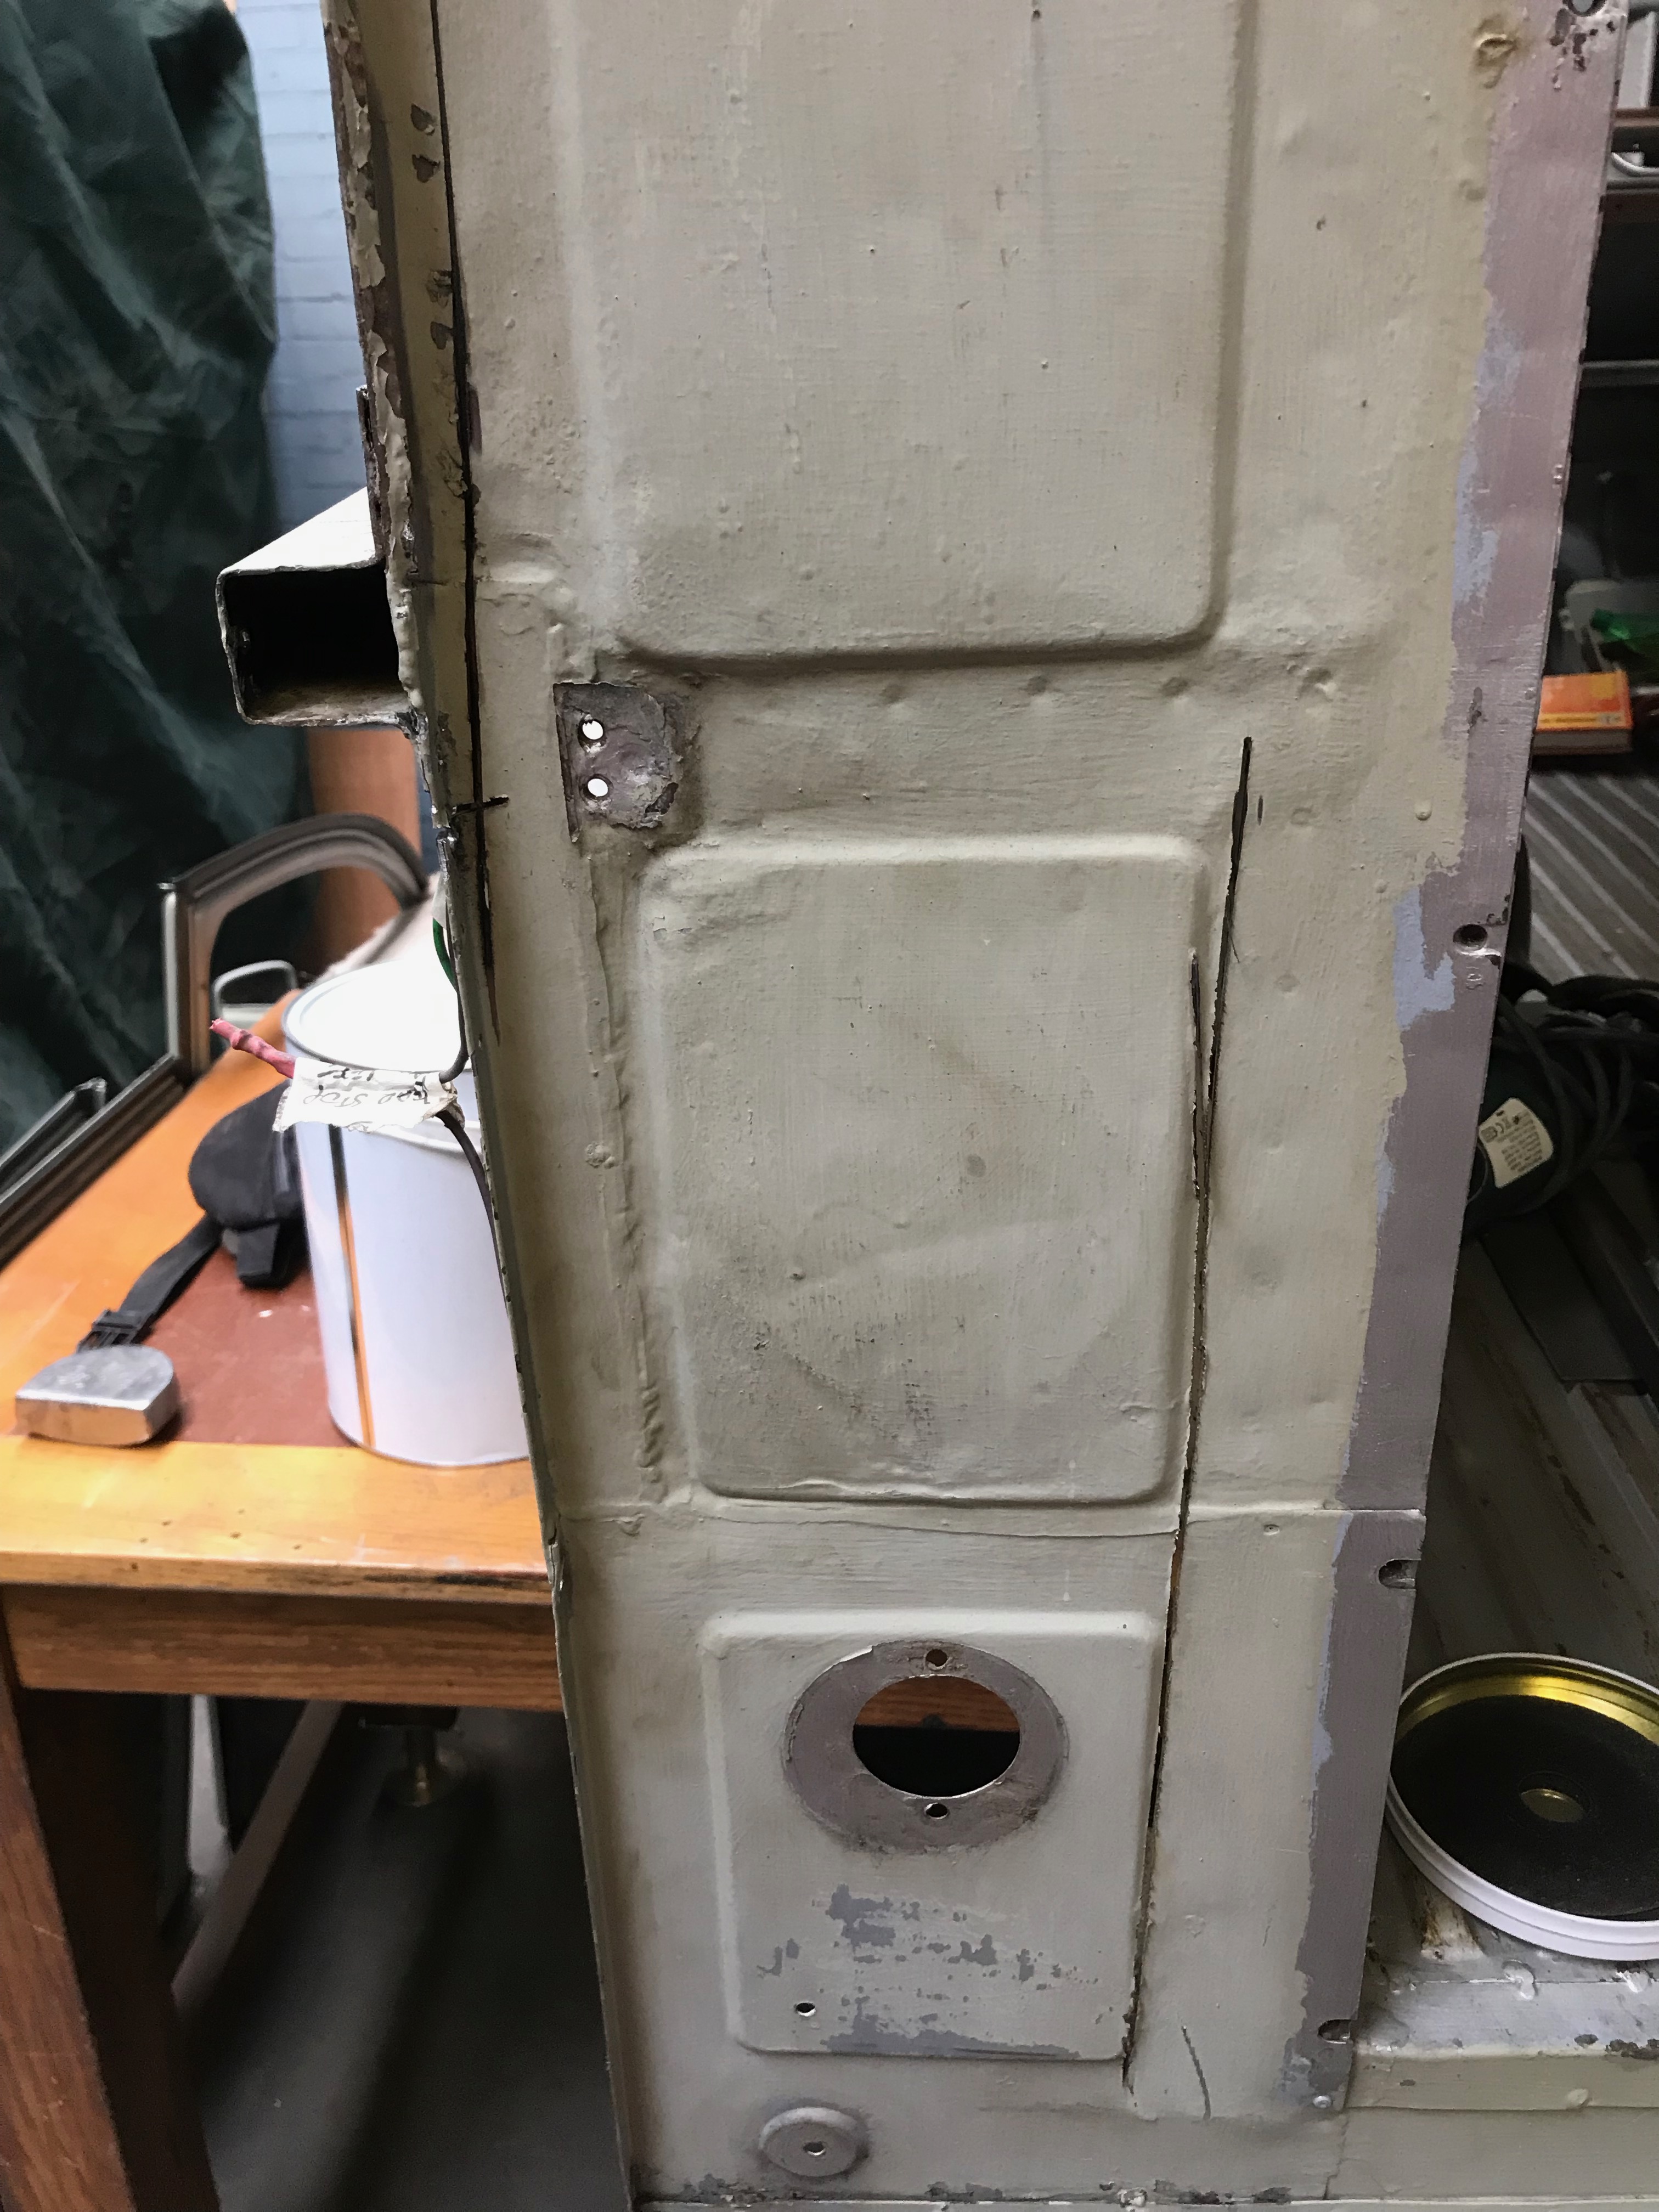
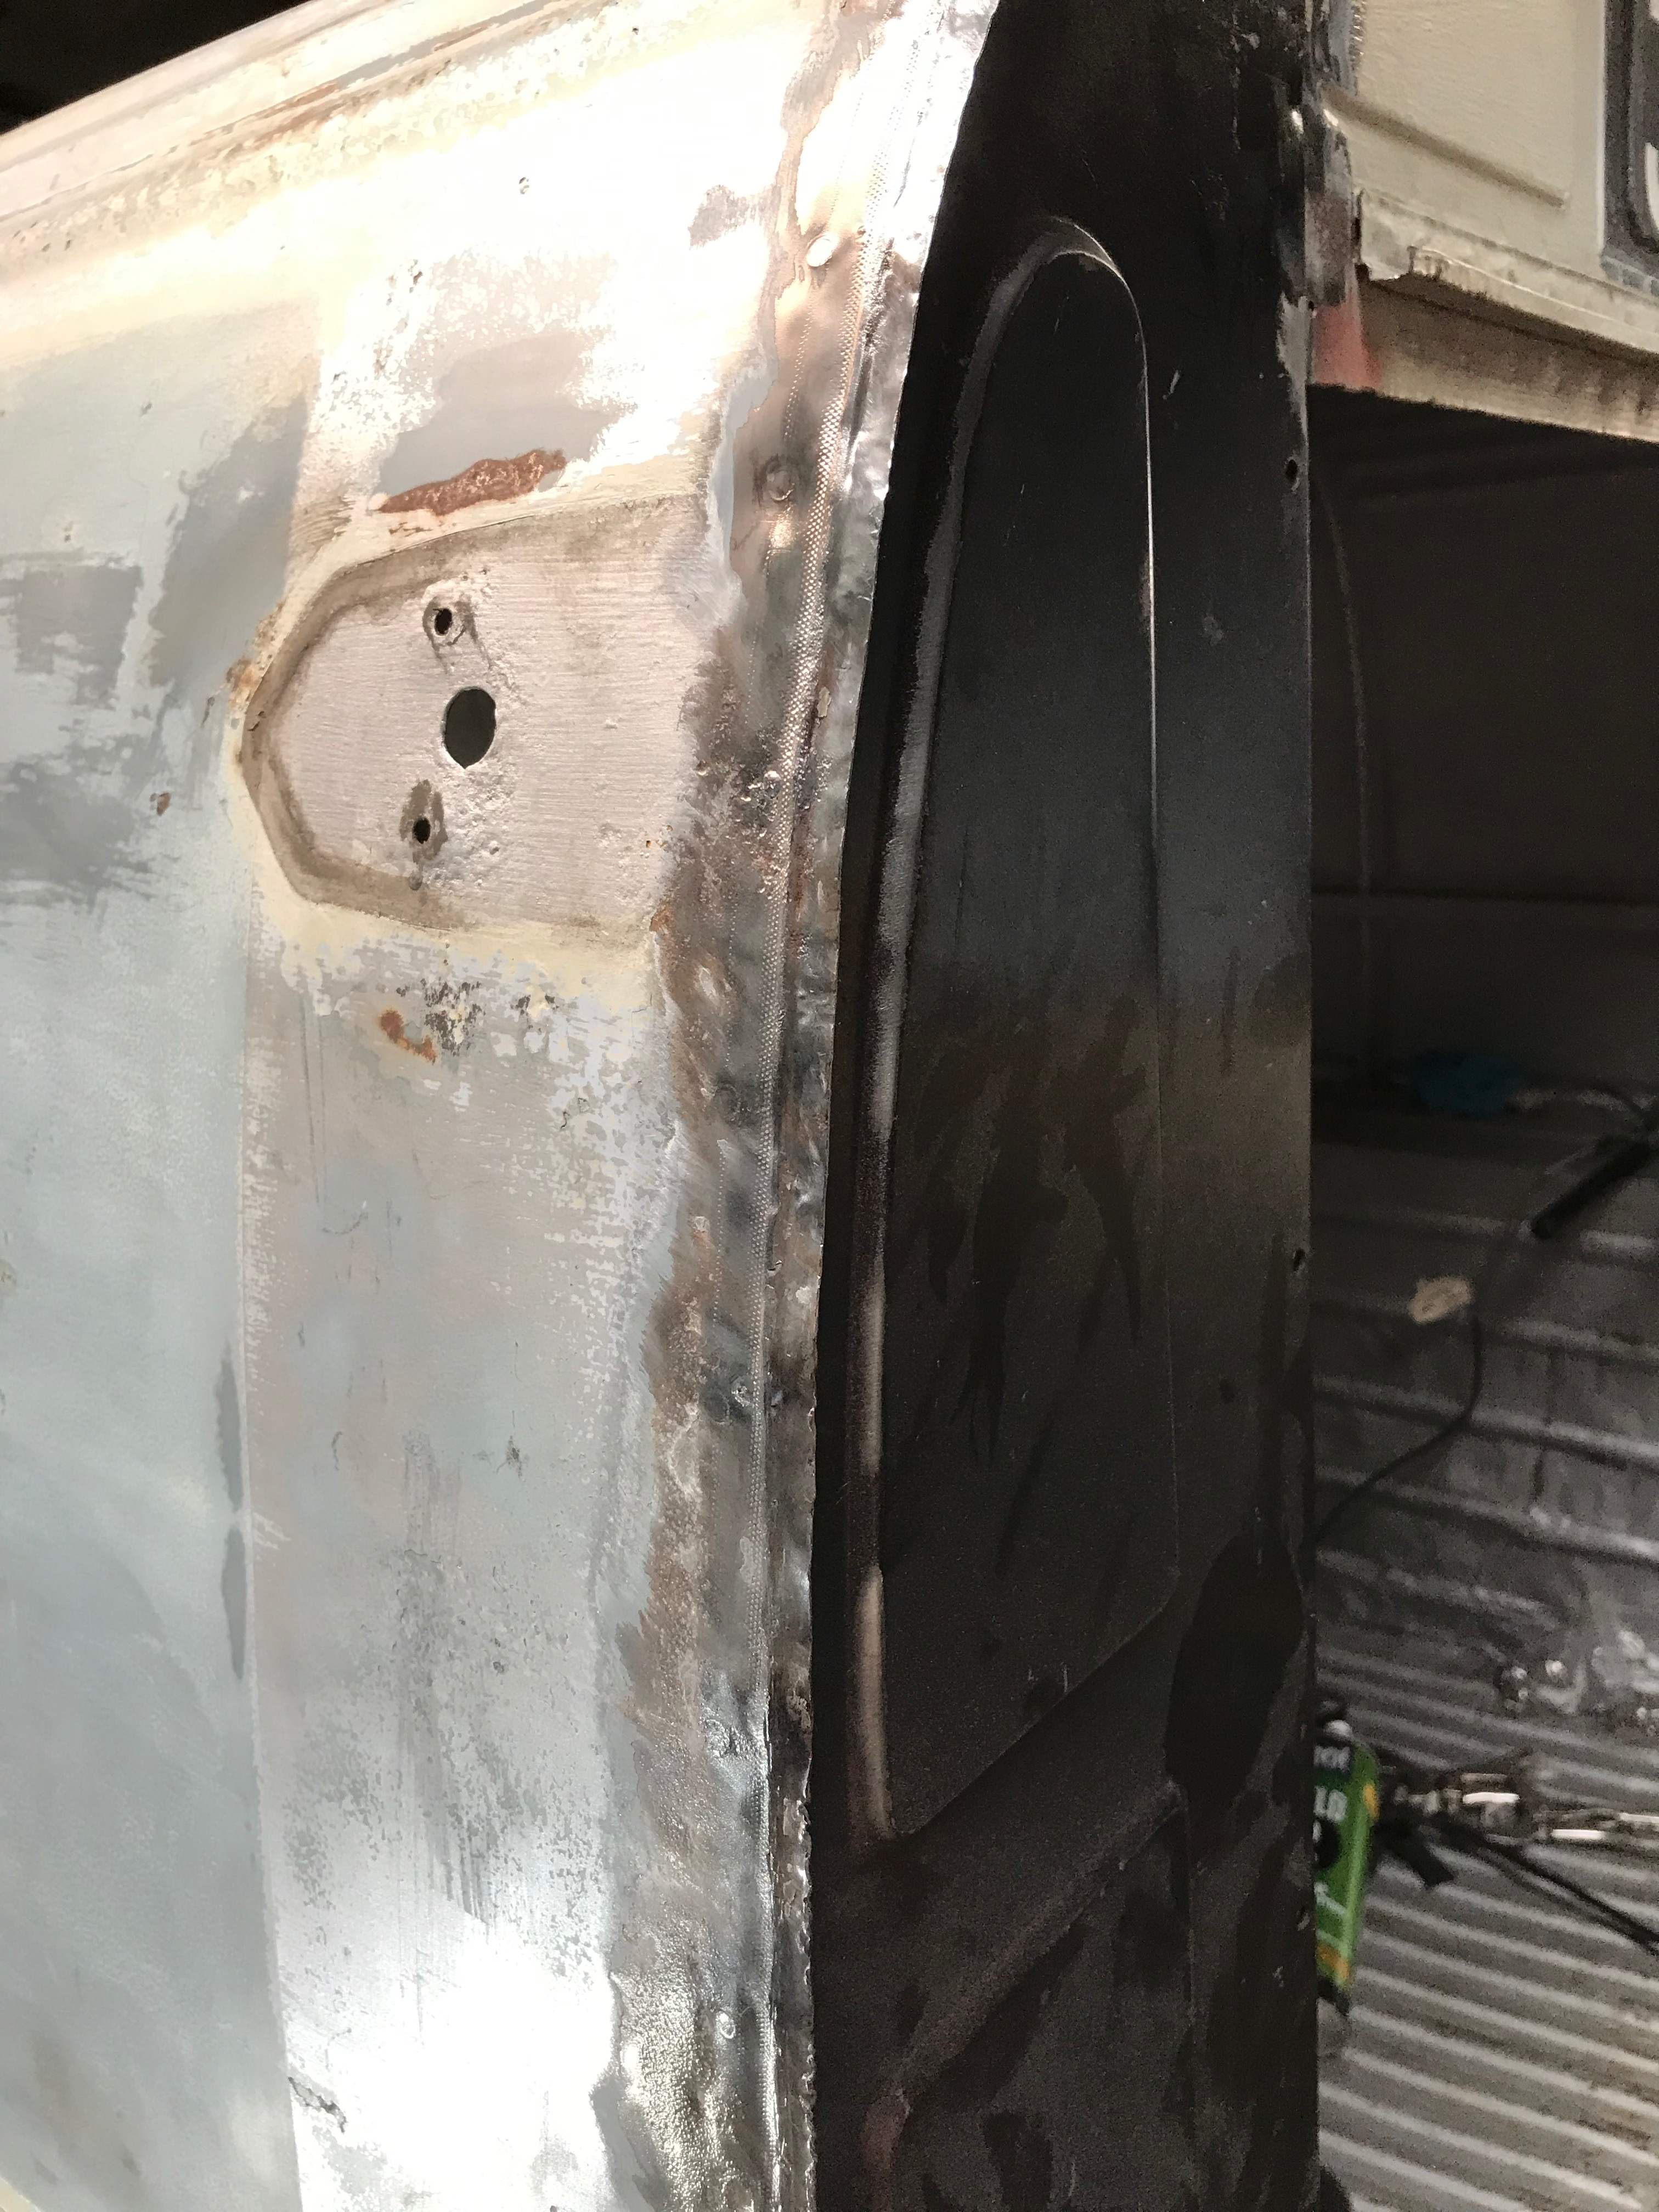
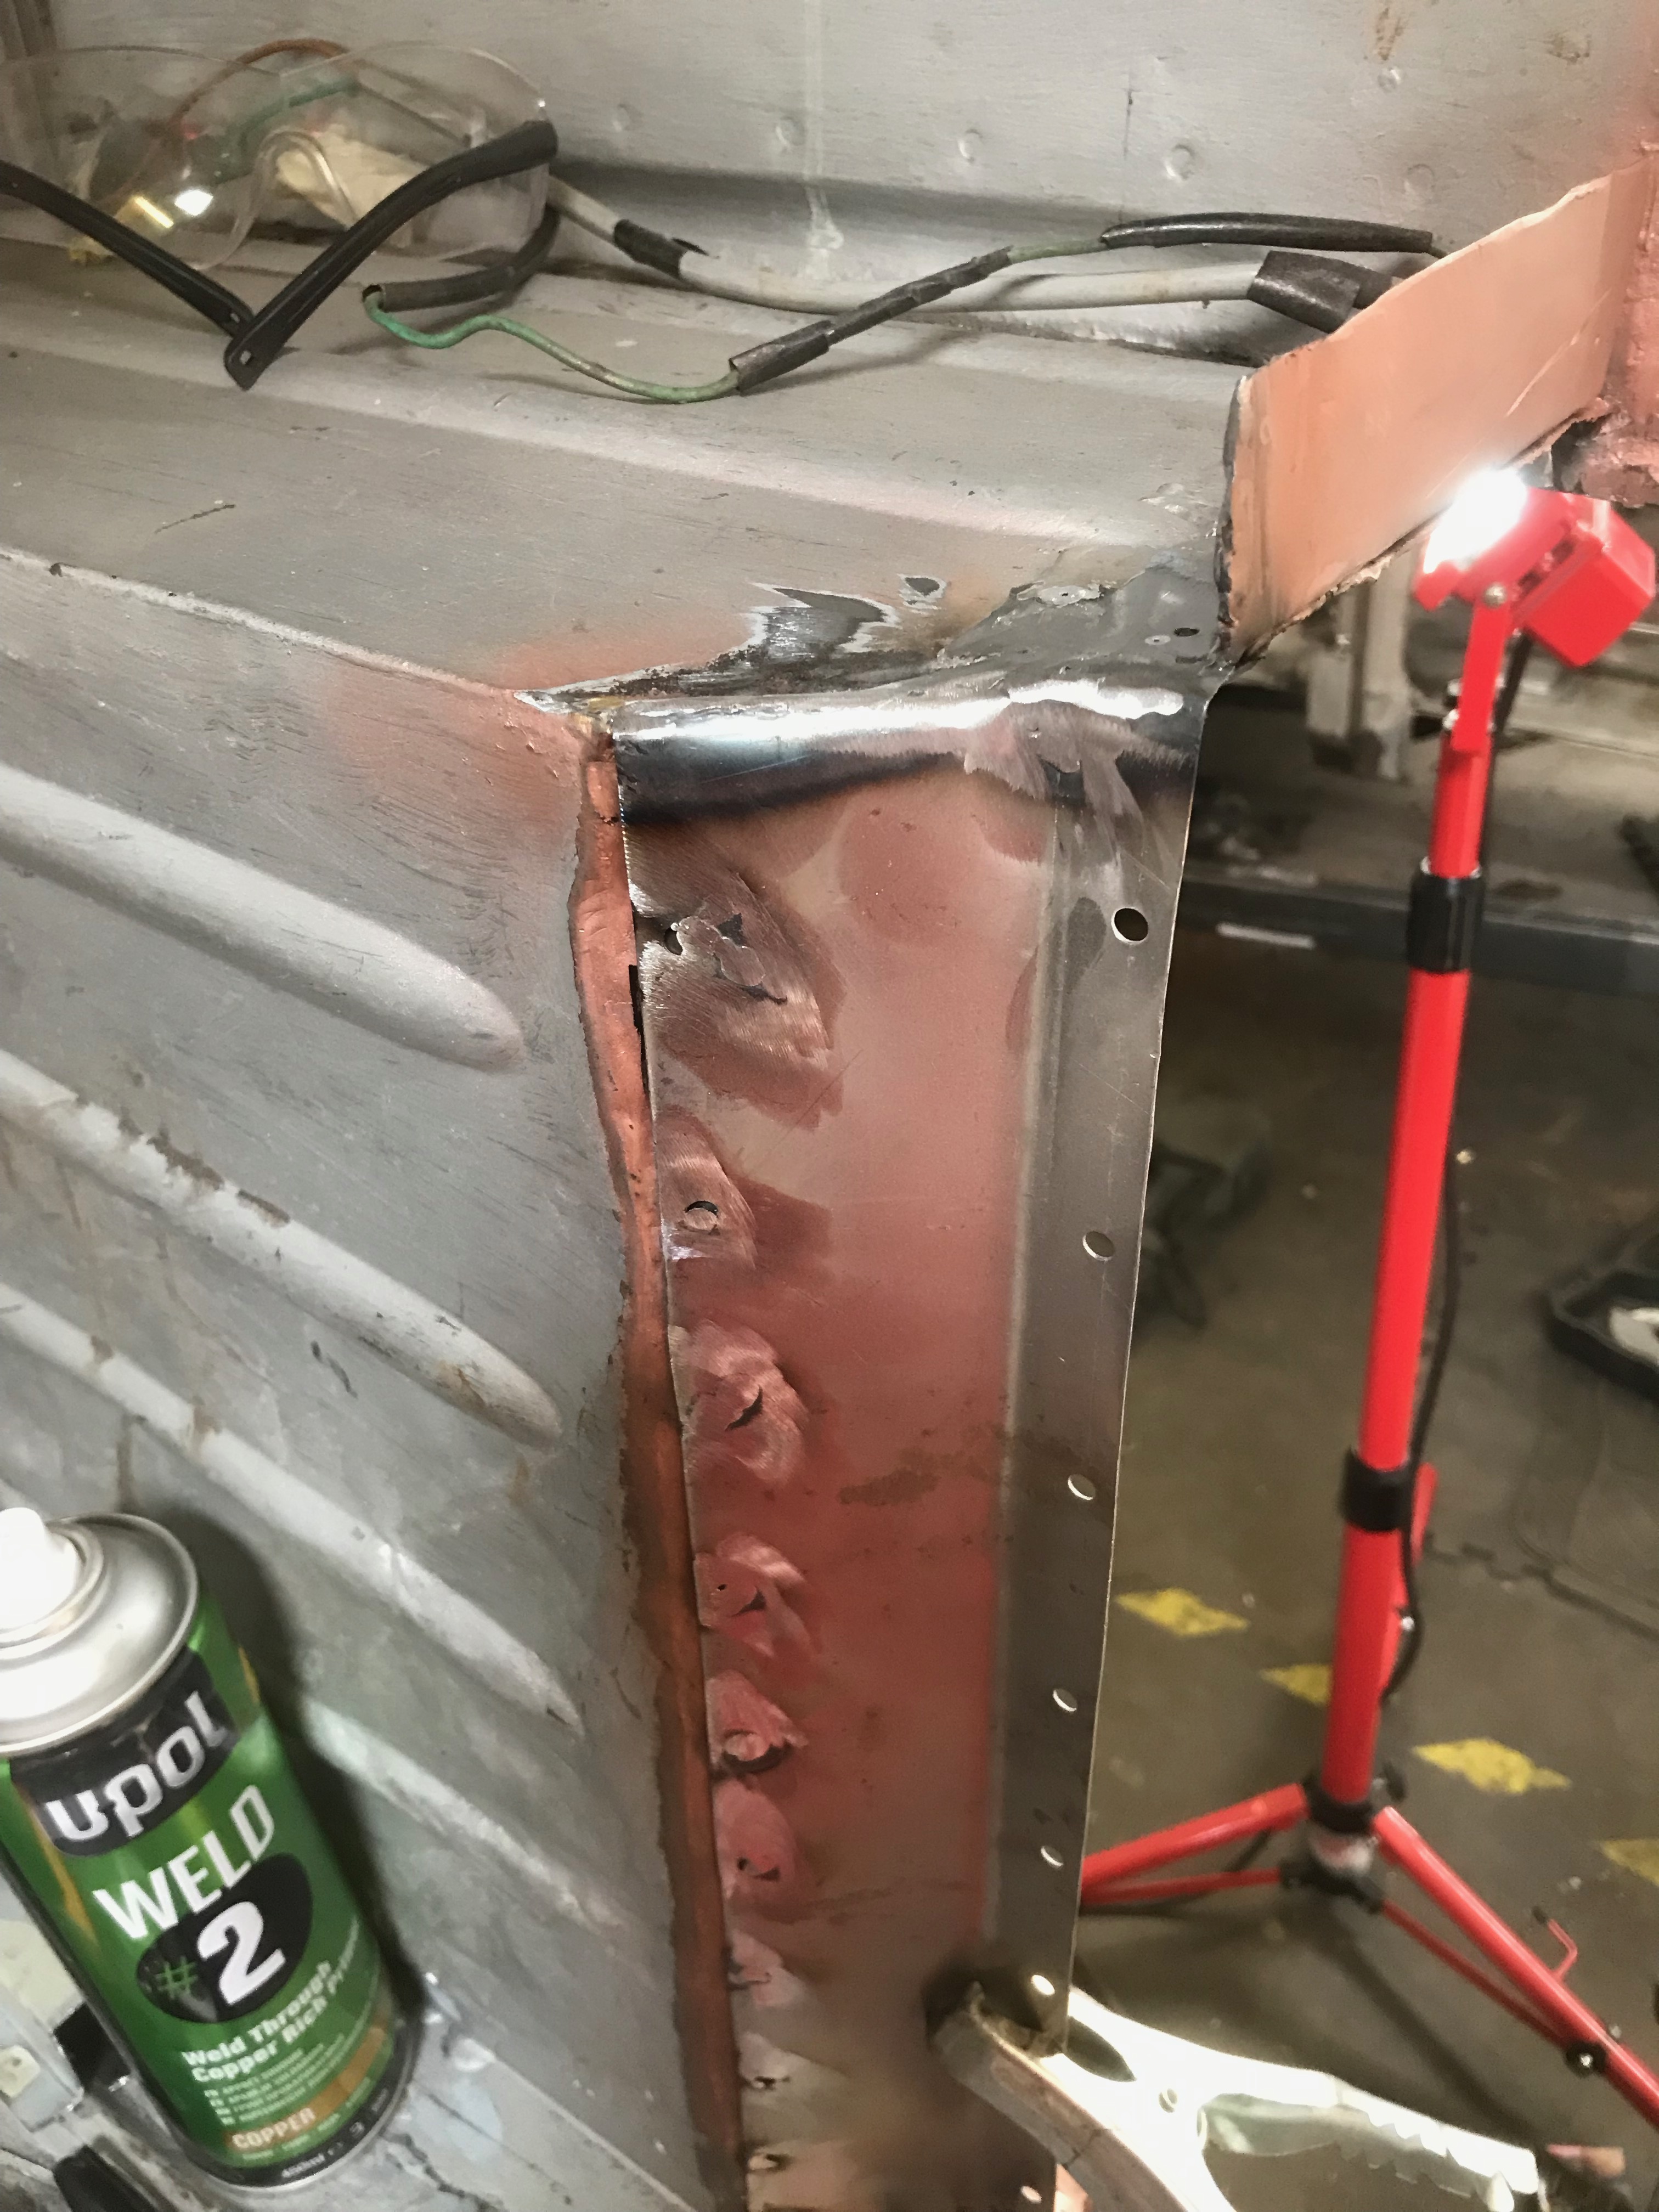
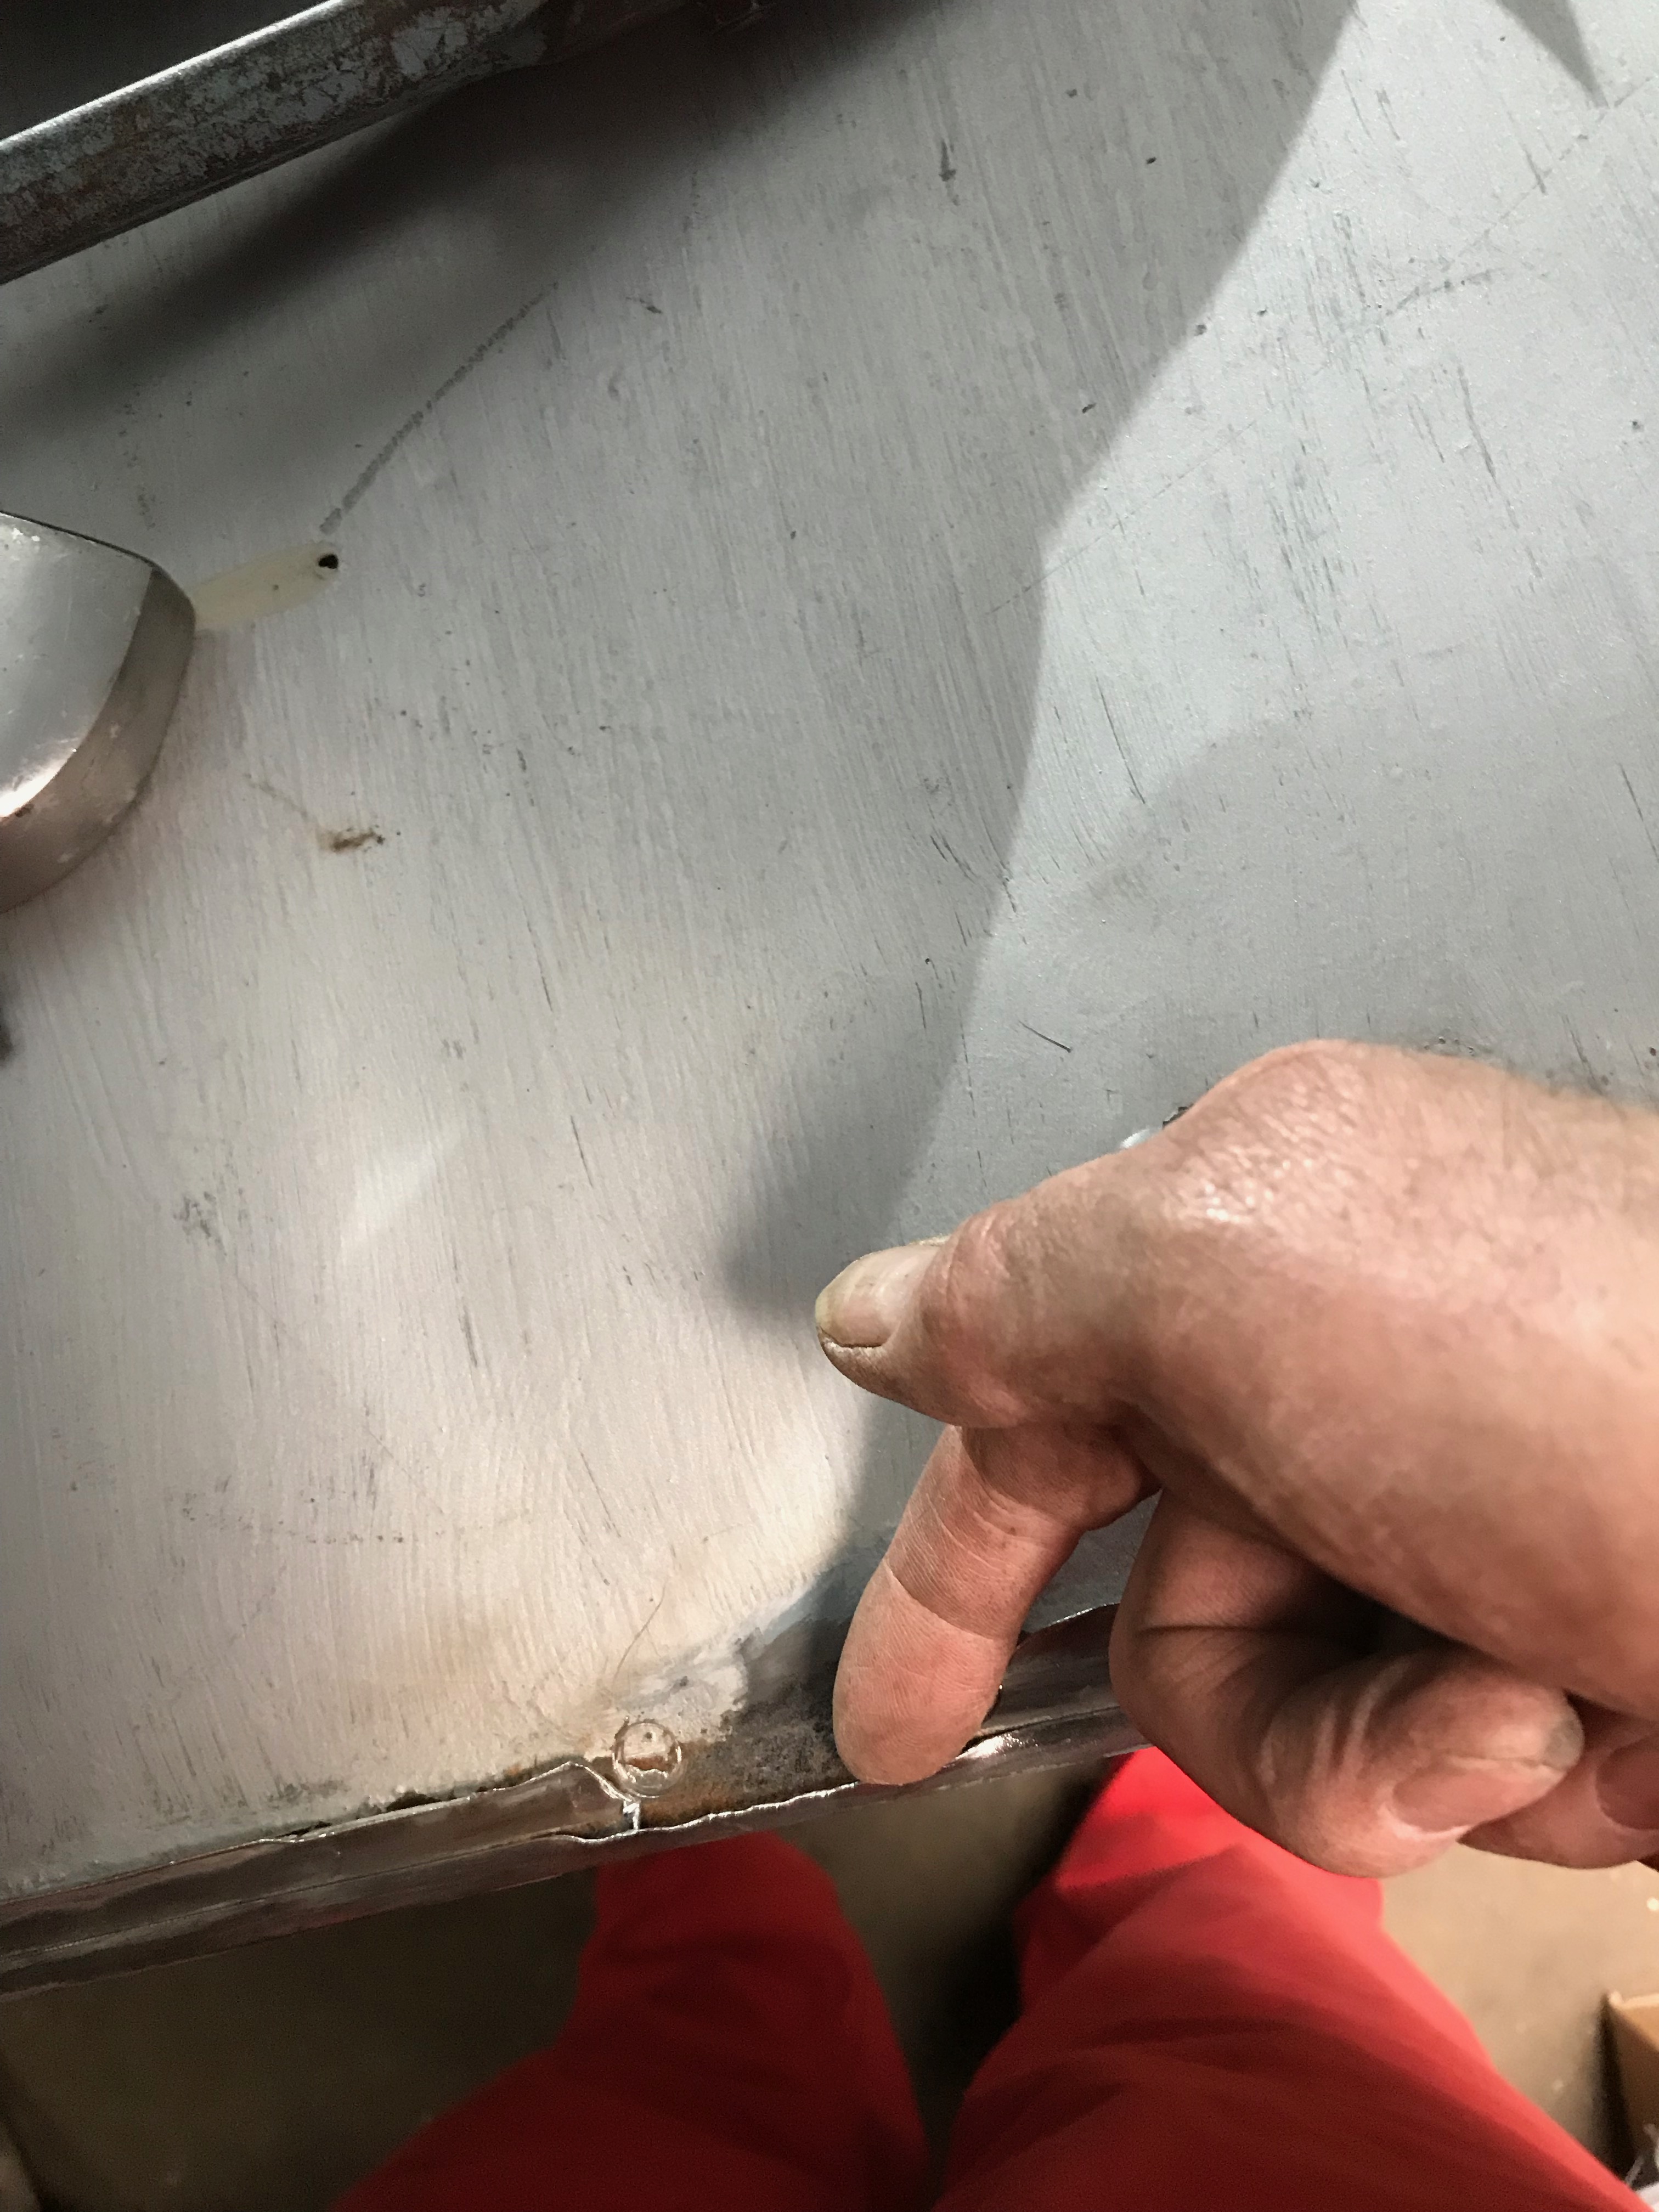
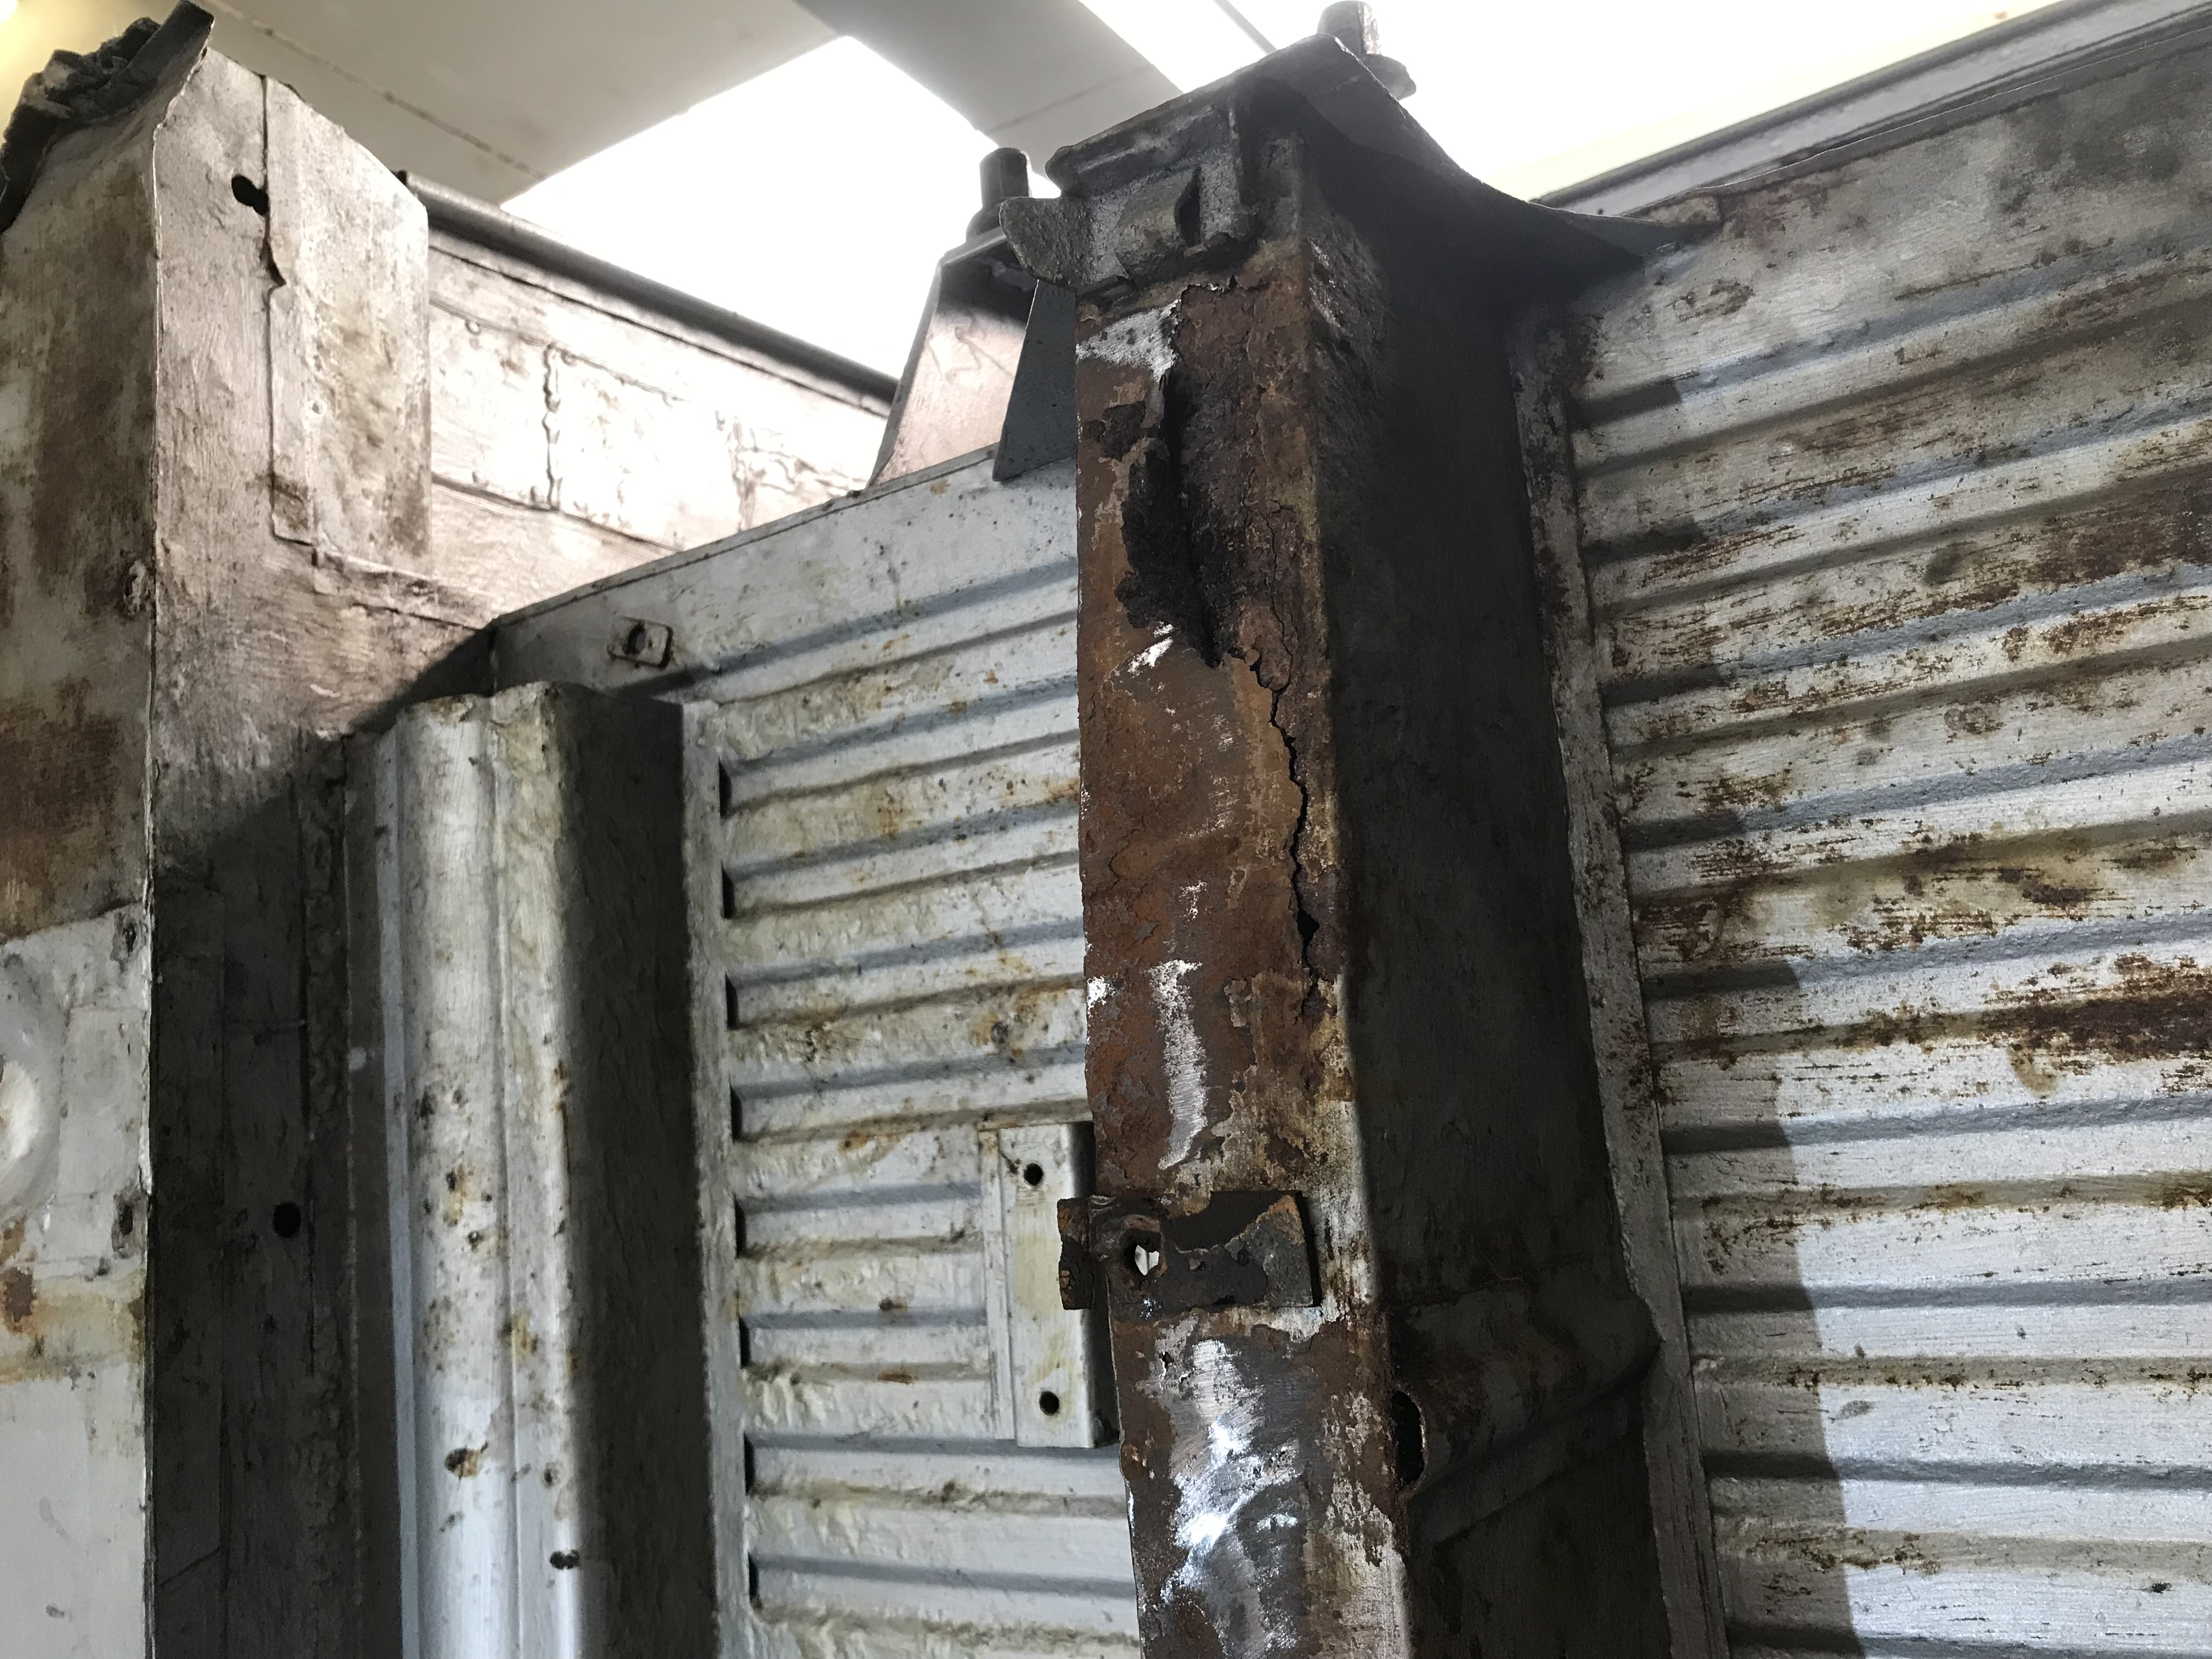
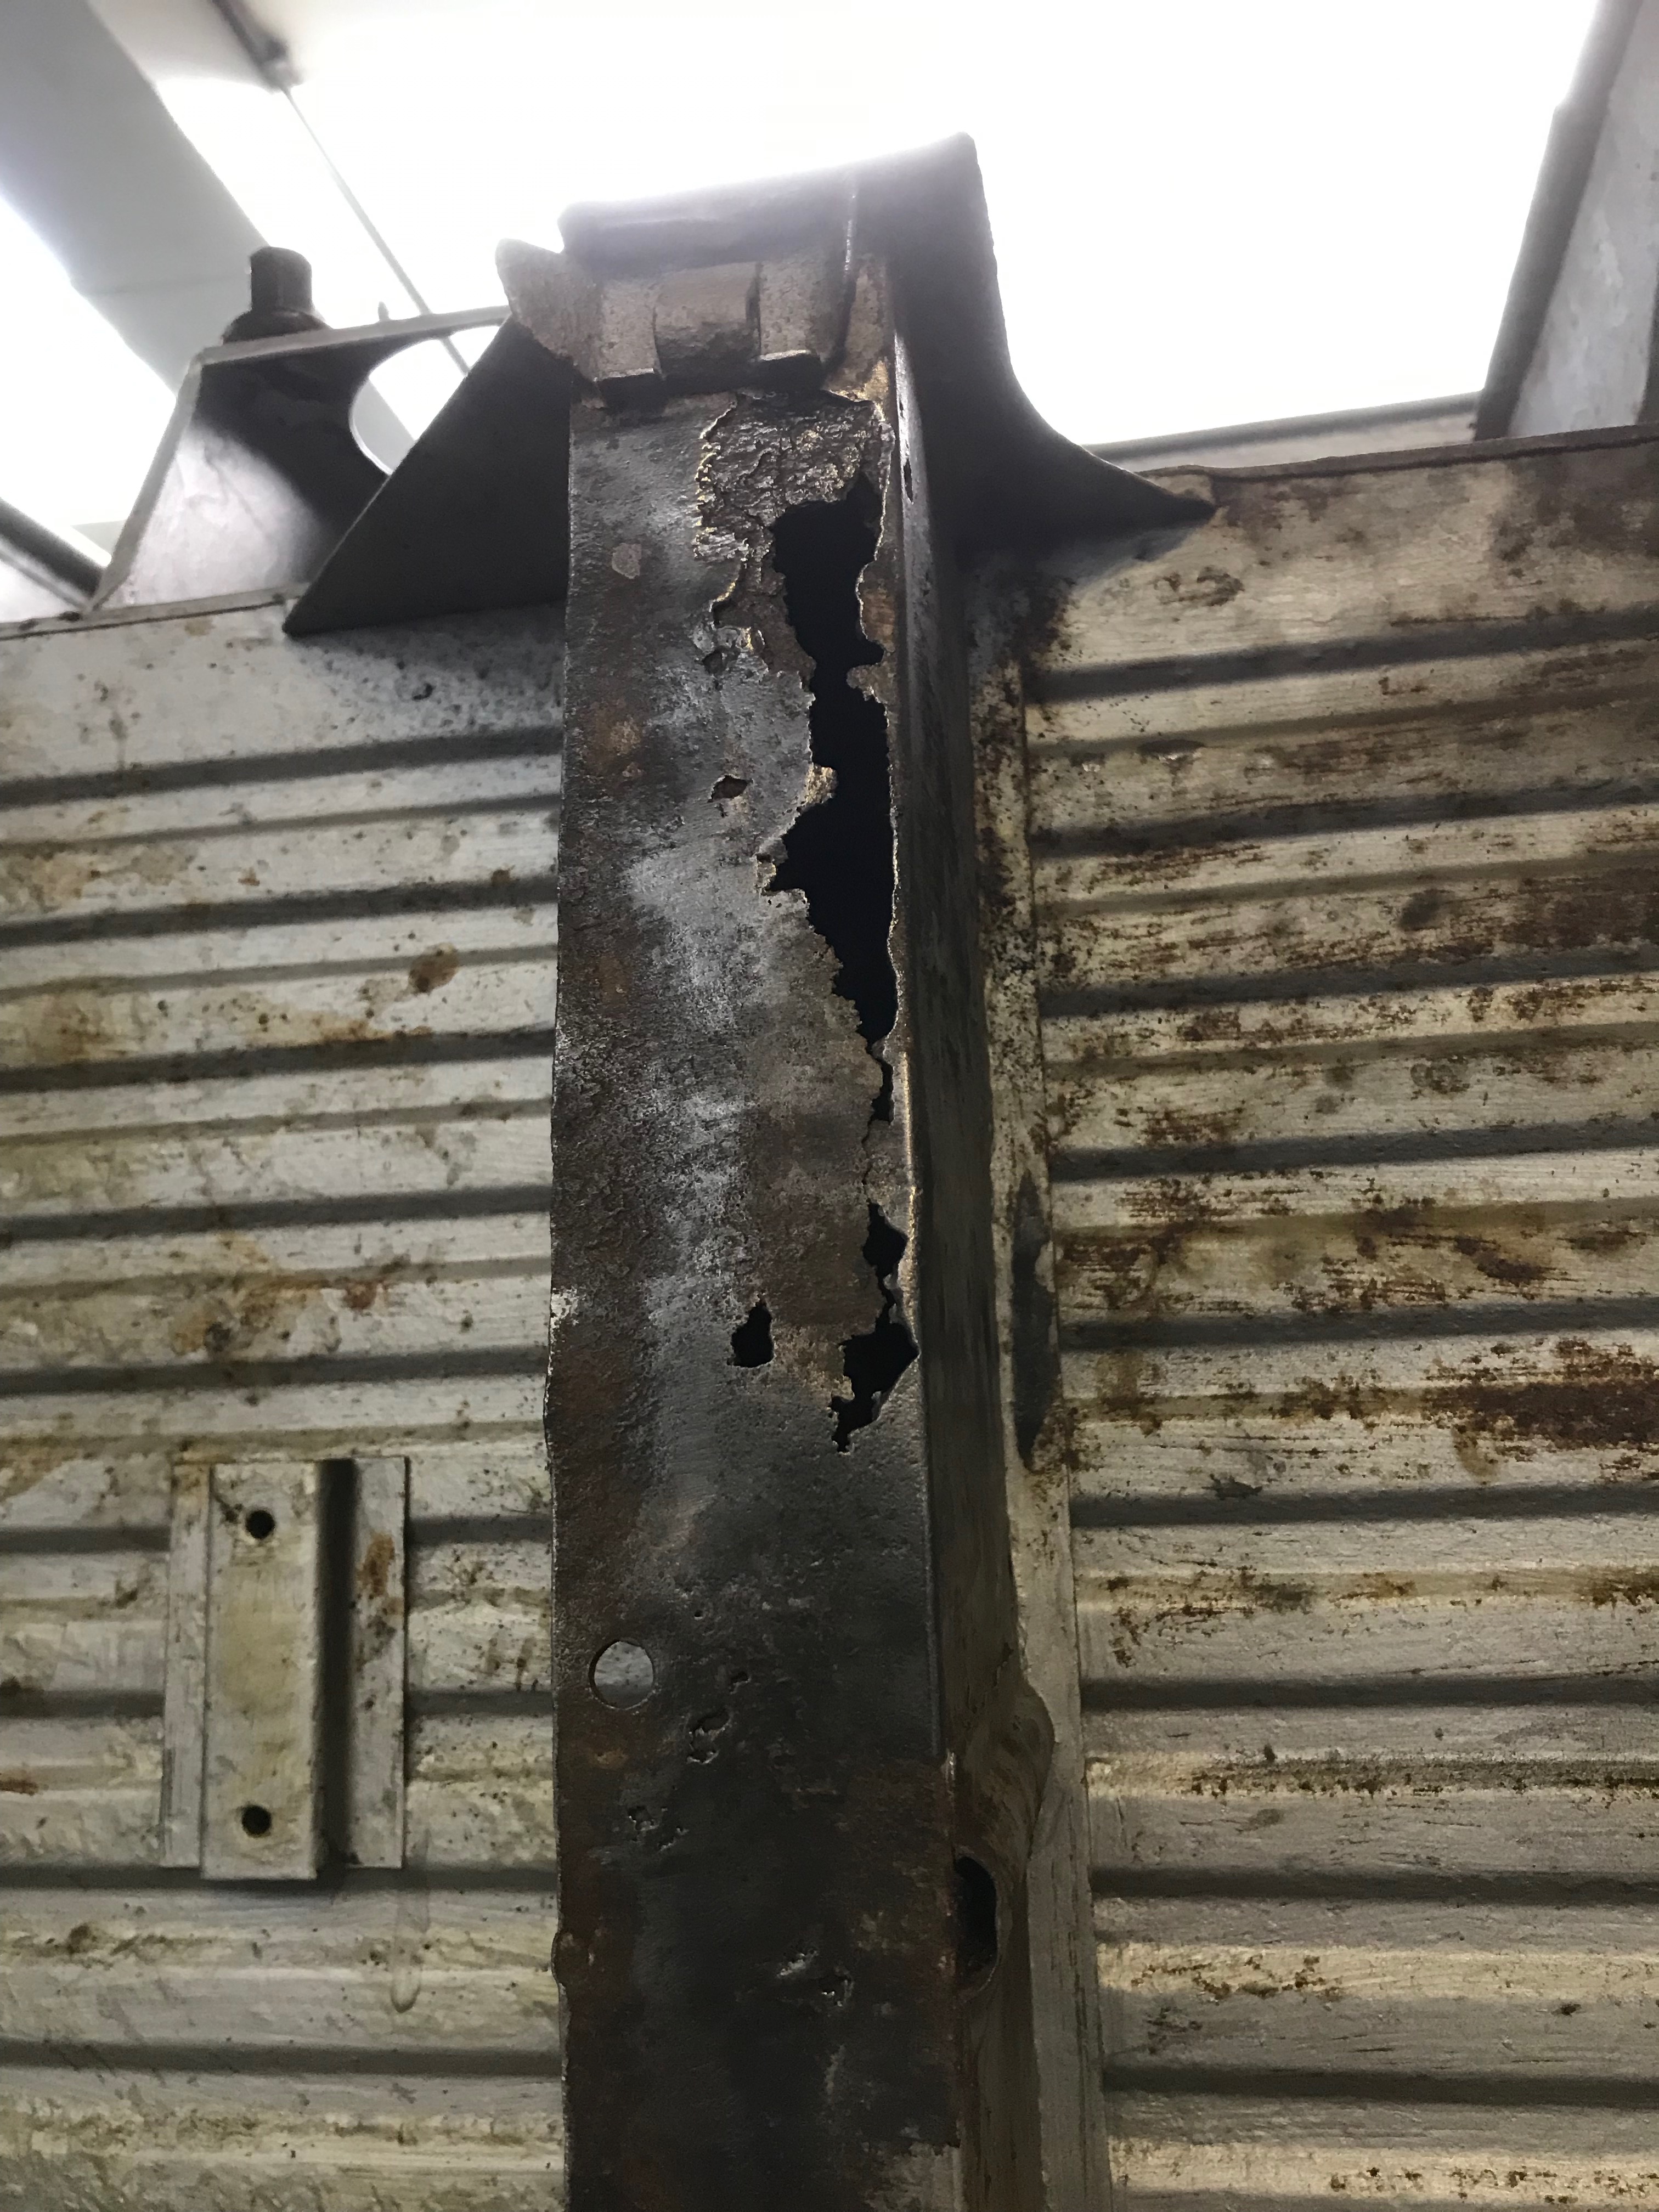
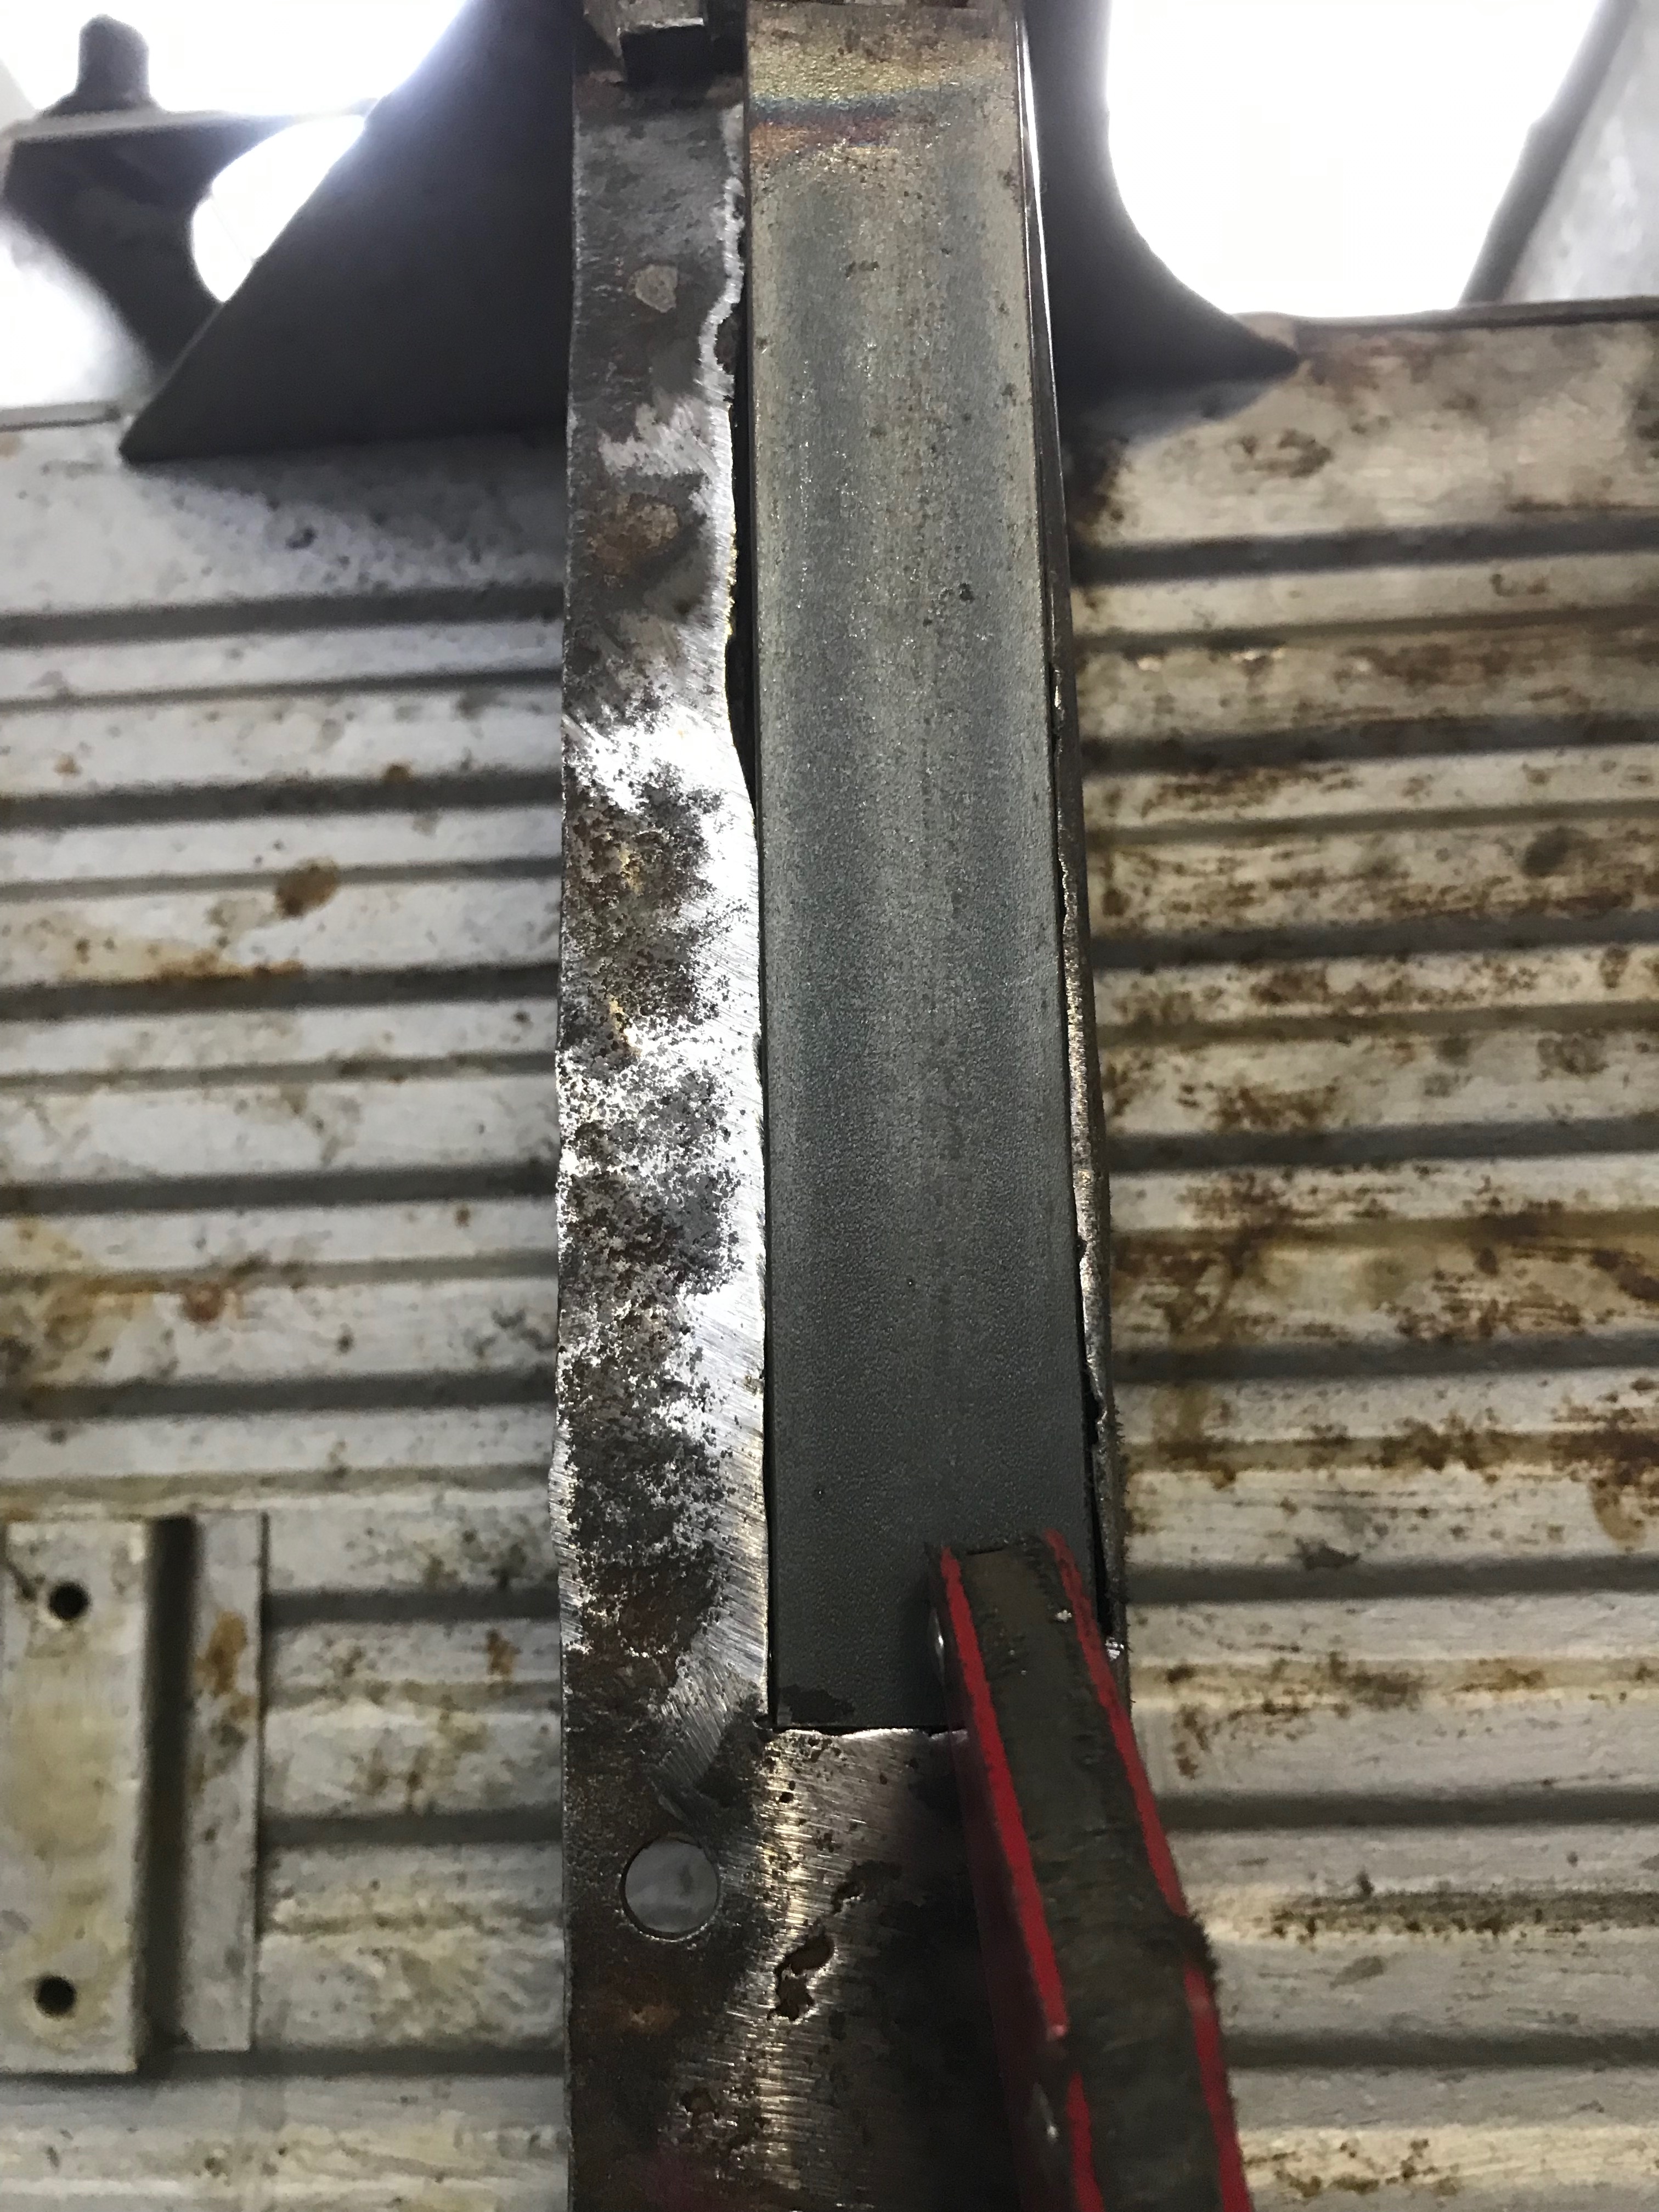
I also made a proper (round) patch for the ‘spare’ ventilation hole in the bulkhead by cutting out a circle of sheet steel and carefully tack welding it into place at 12, 3, 6 and 9 o’clock positions, then I filled in the gaps with small tacks and ground off the welds flush with the rest of the bulkhead.  Most of it will be covered up with the master cylinder bracket but filling the hole in properly means that I won’t have a permanent draught of cold air blowing onto my feet from the engine bay.  

I’ll need fit another heater nozzle into the bulkhead on the drivers side as the original was sacrificed when the van was converted from the chassis mounted pedal arrangement to the more modern pedal hanger arrangement.   It’s a shame that I had to block the hole off as I now need to cut another one the same size next to it –  without the new hole I will have no heating on the drivers side footwell and my feet will get cold. I’m also going to need to fit  a second heater nozzle to the new hole in the bulkhead so that the hot air can flow into the cab – does anyone have one spare?

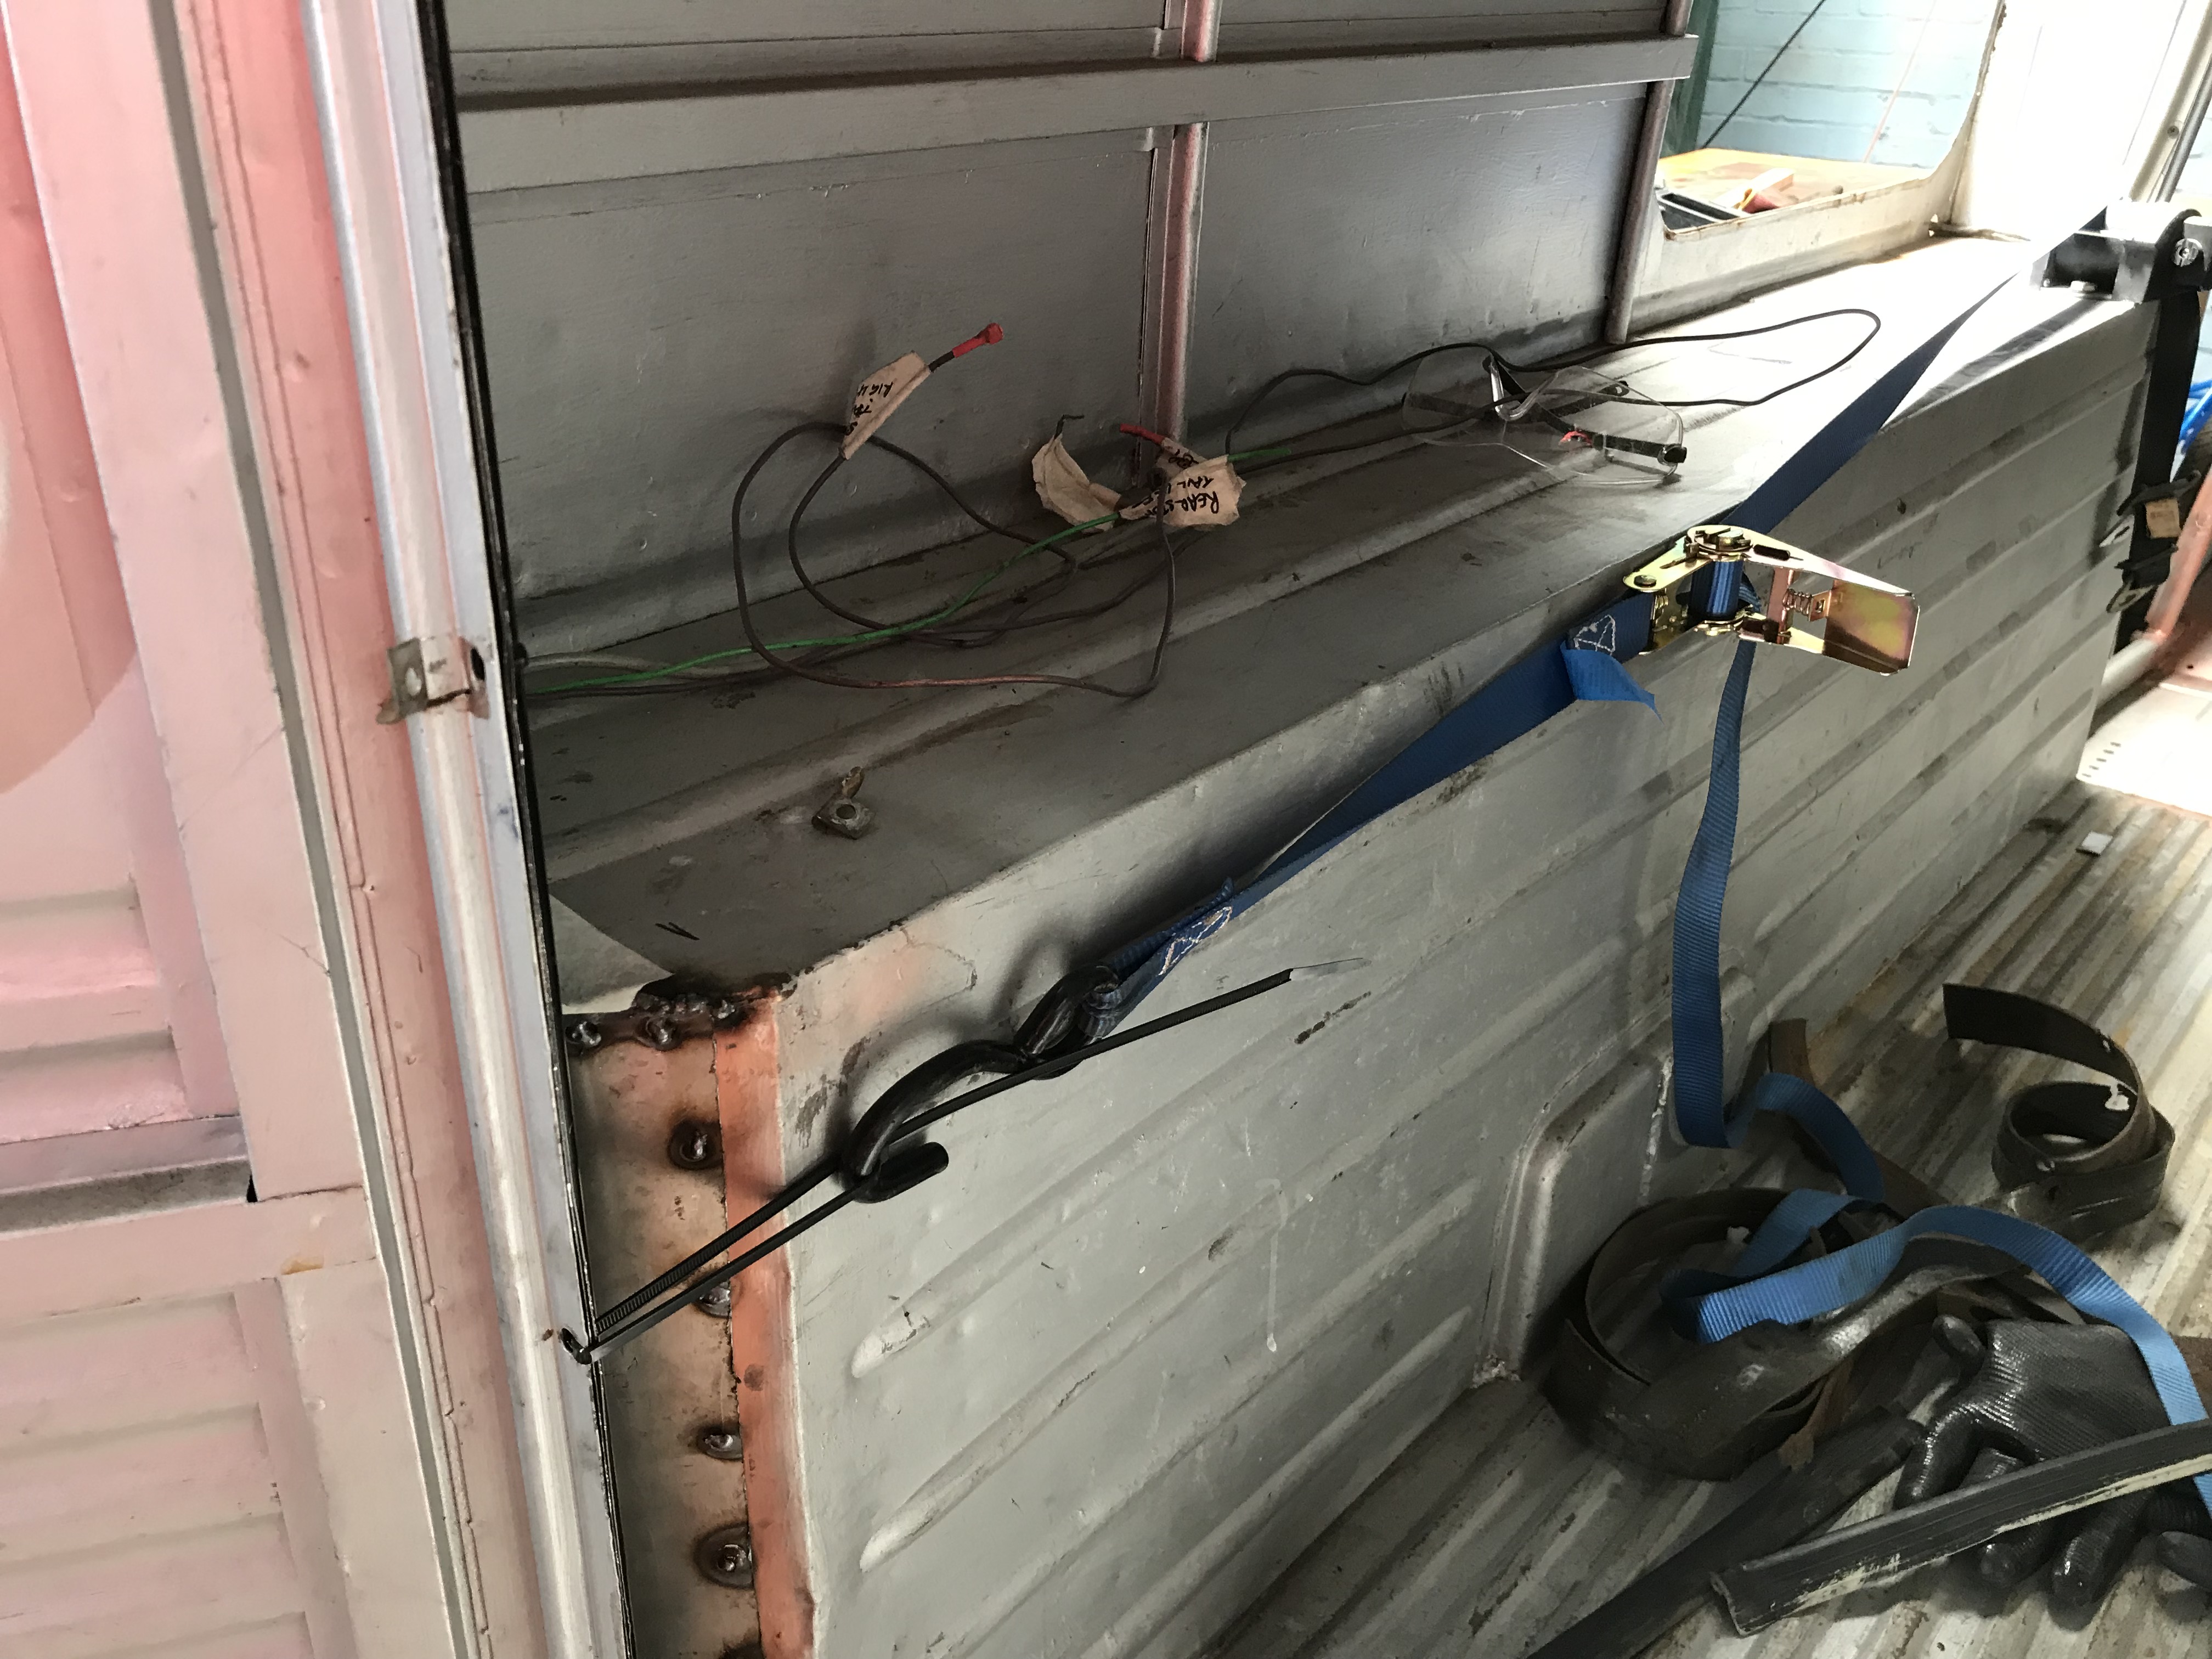
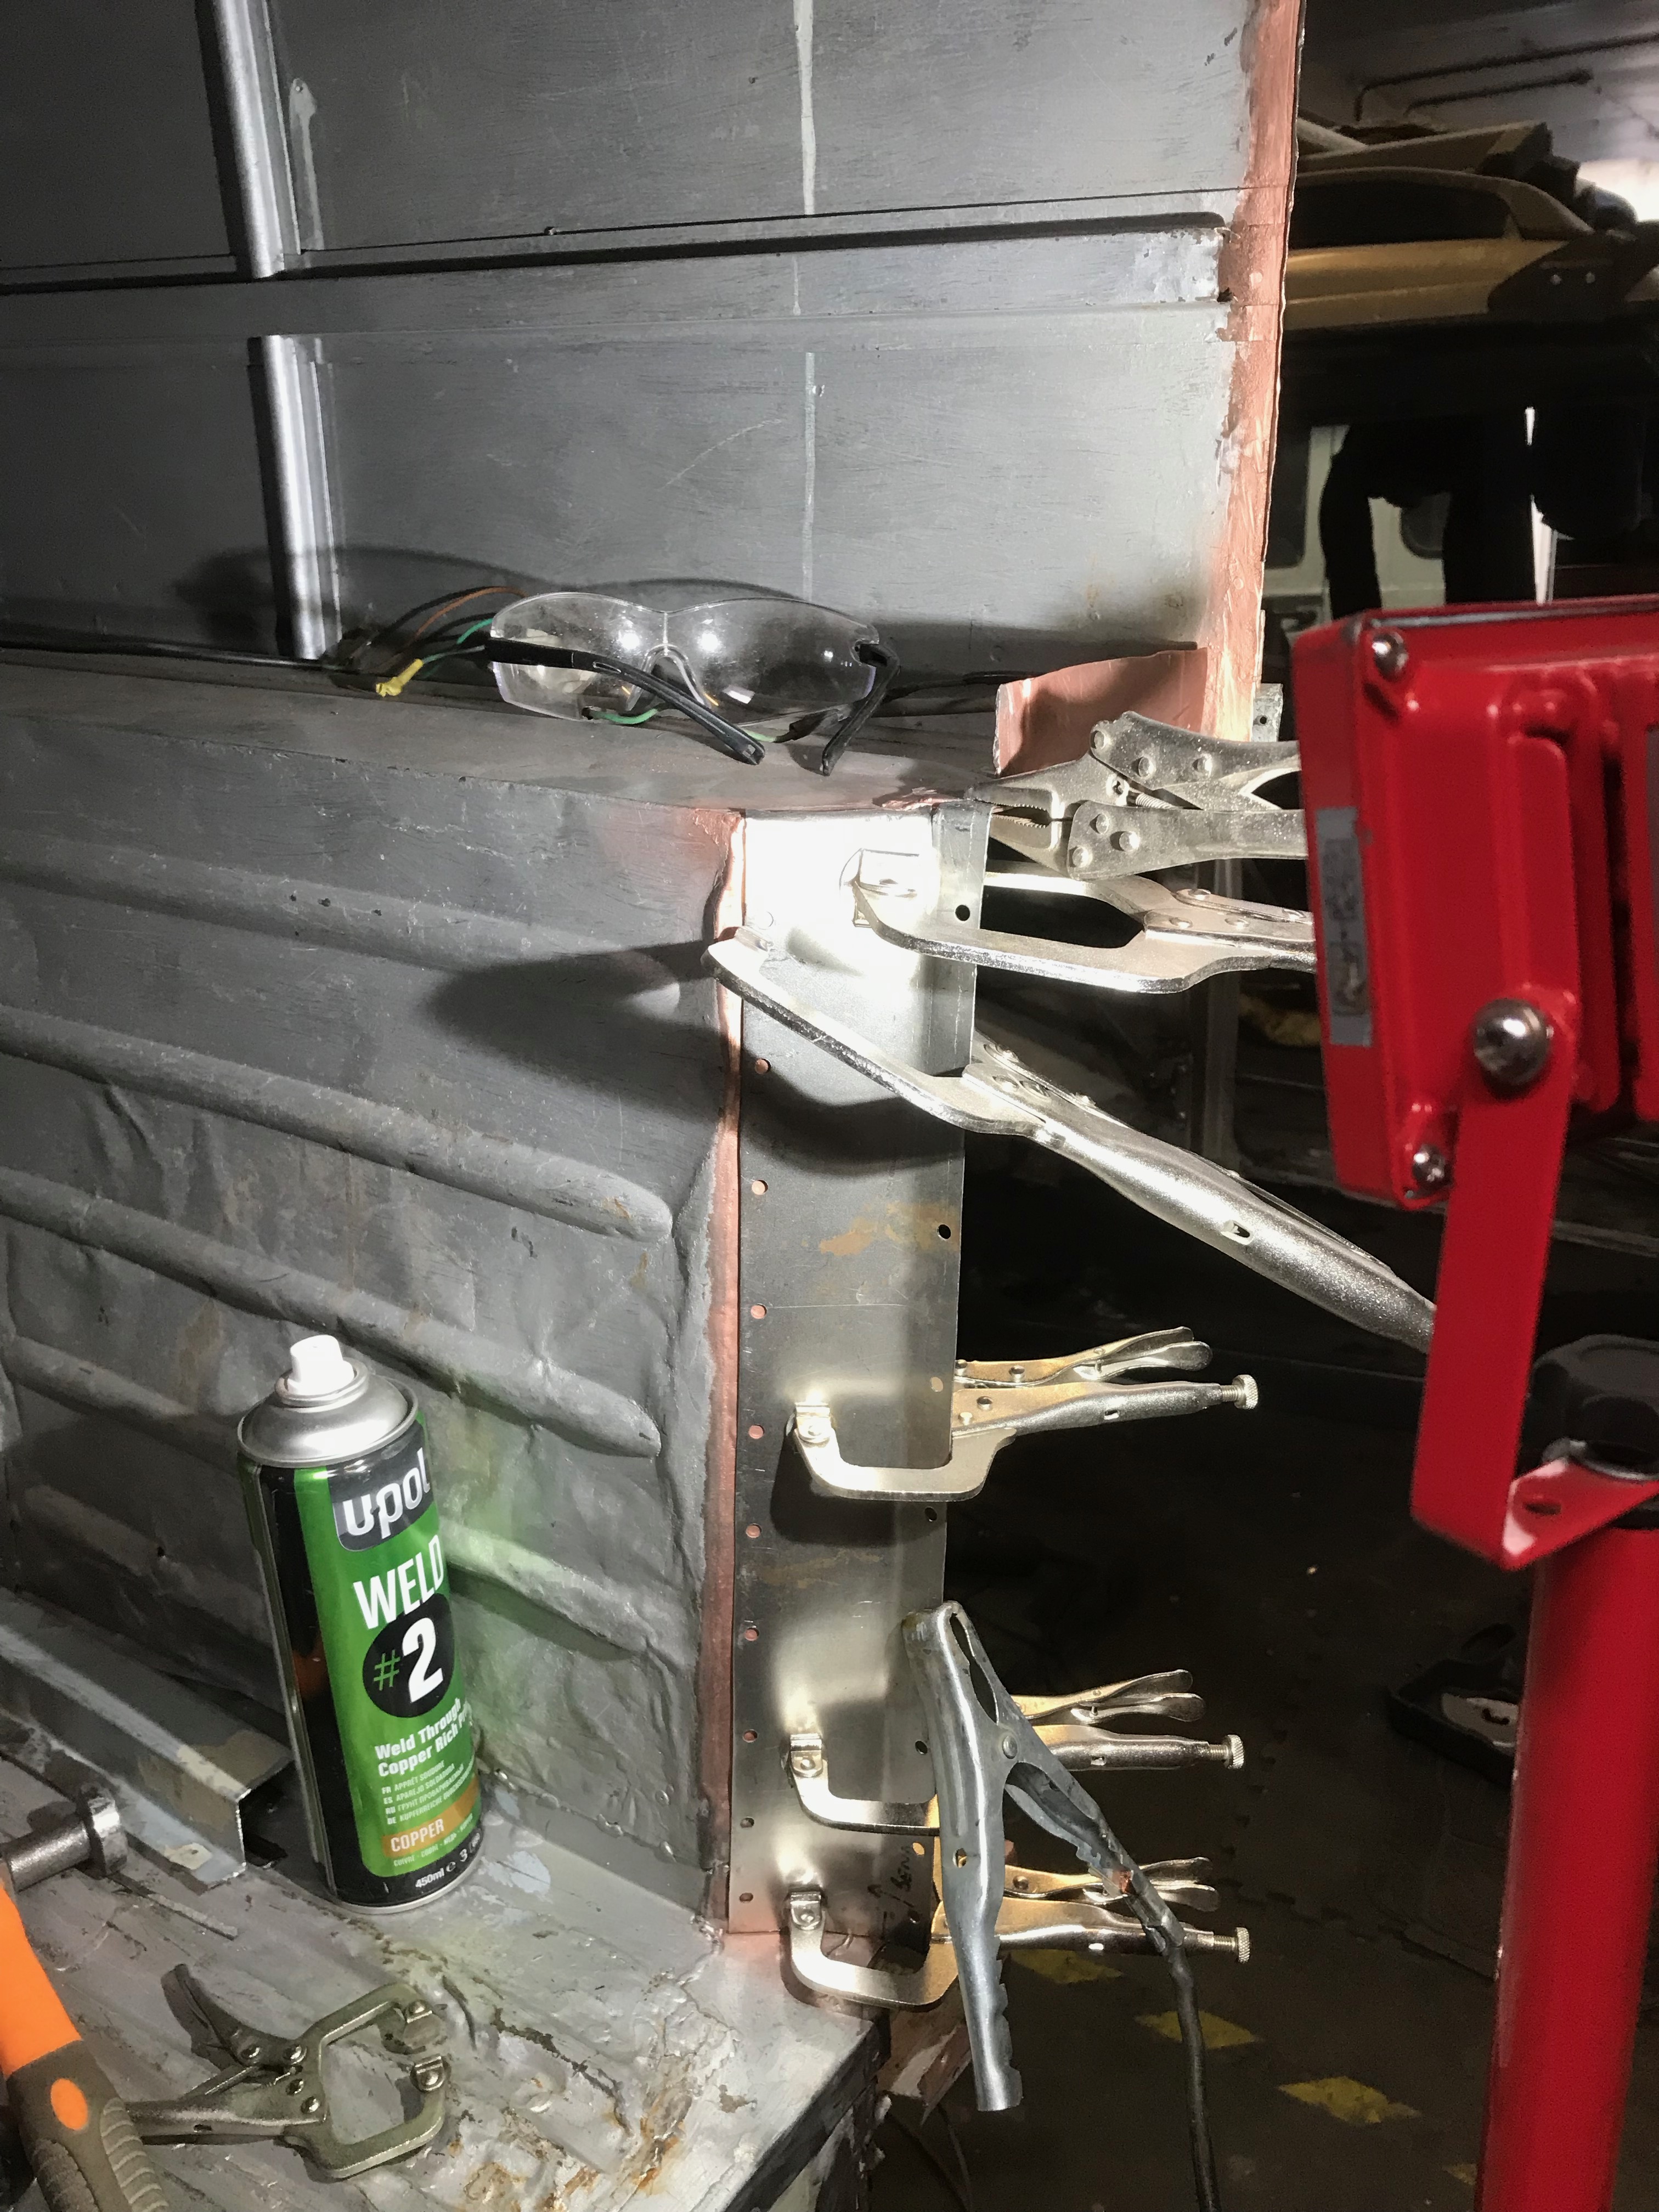
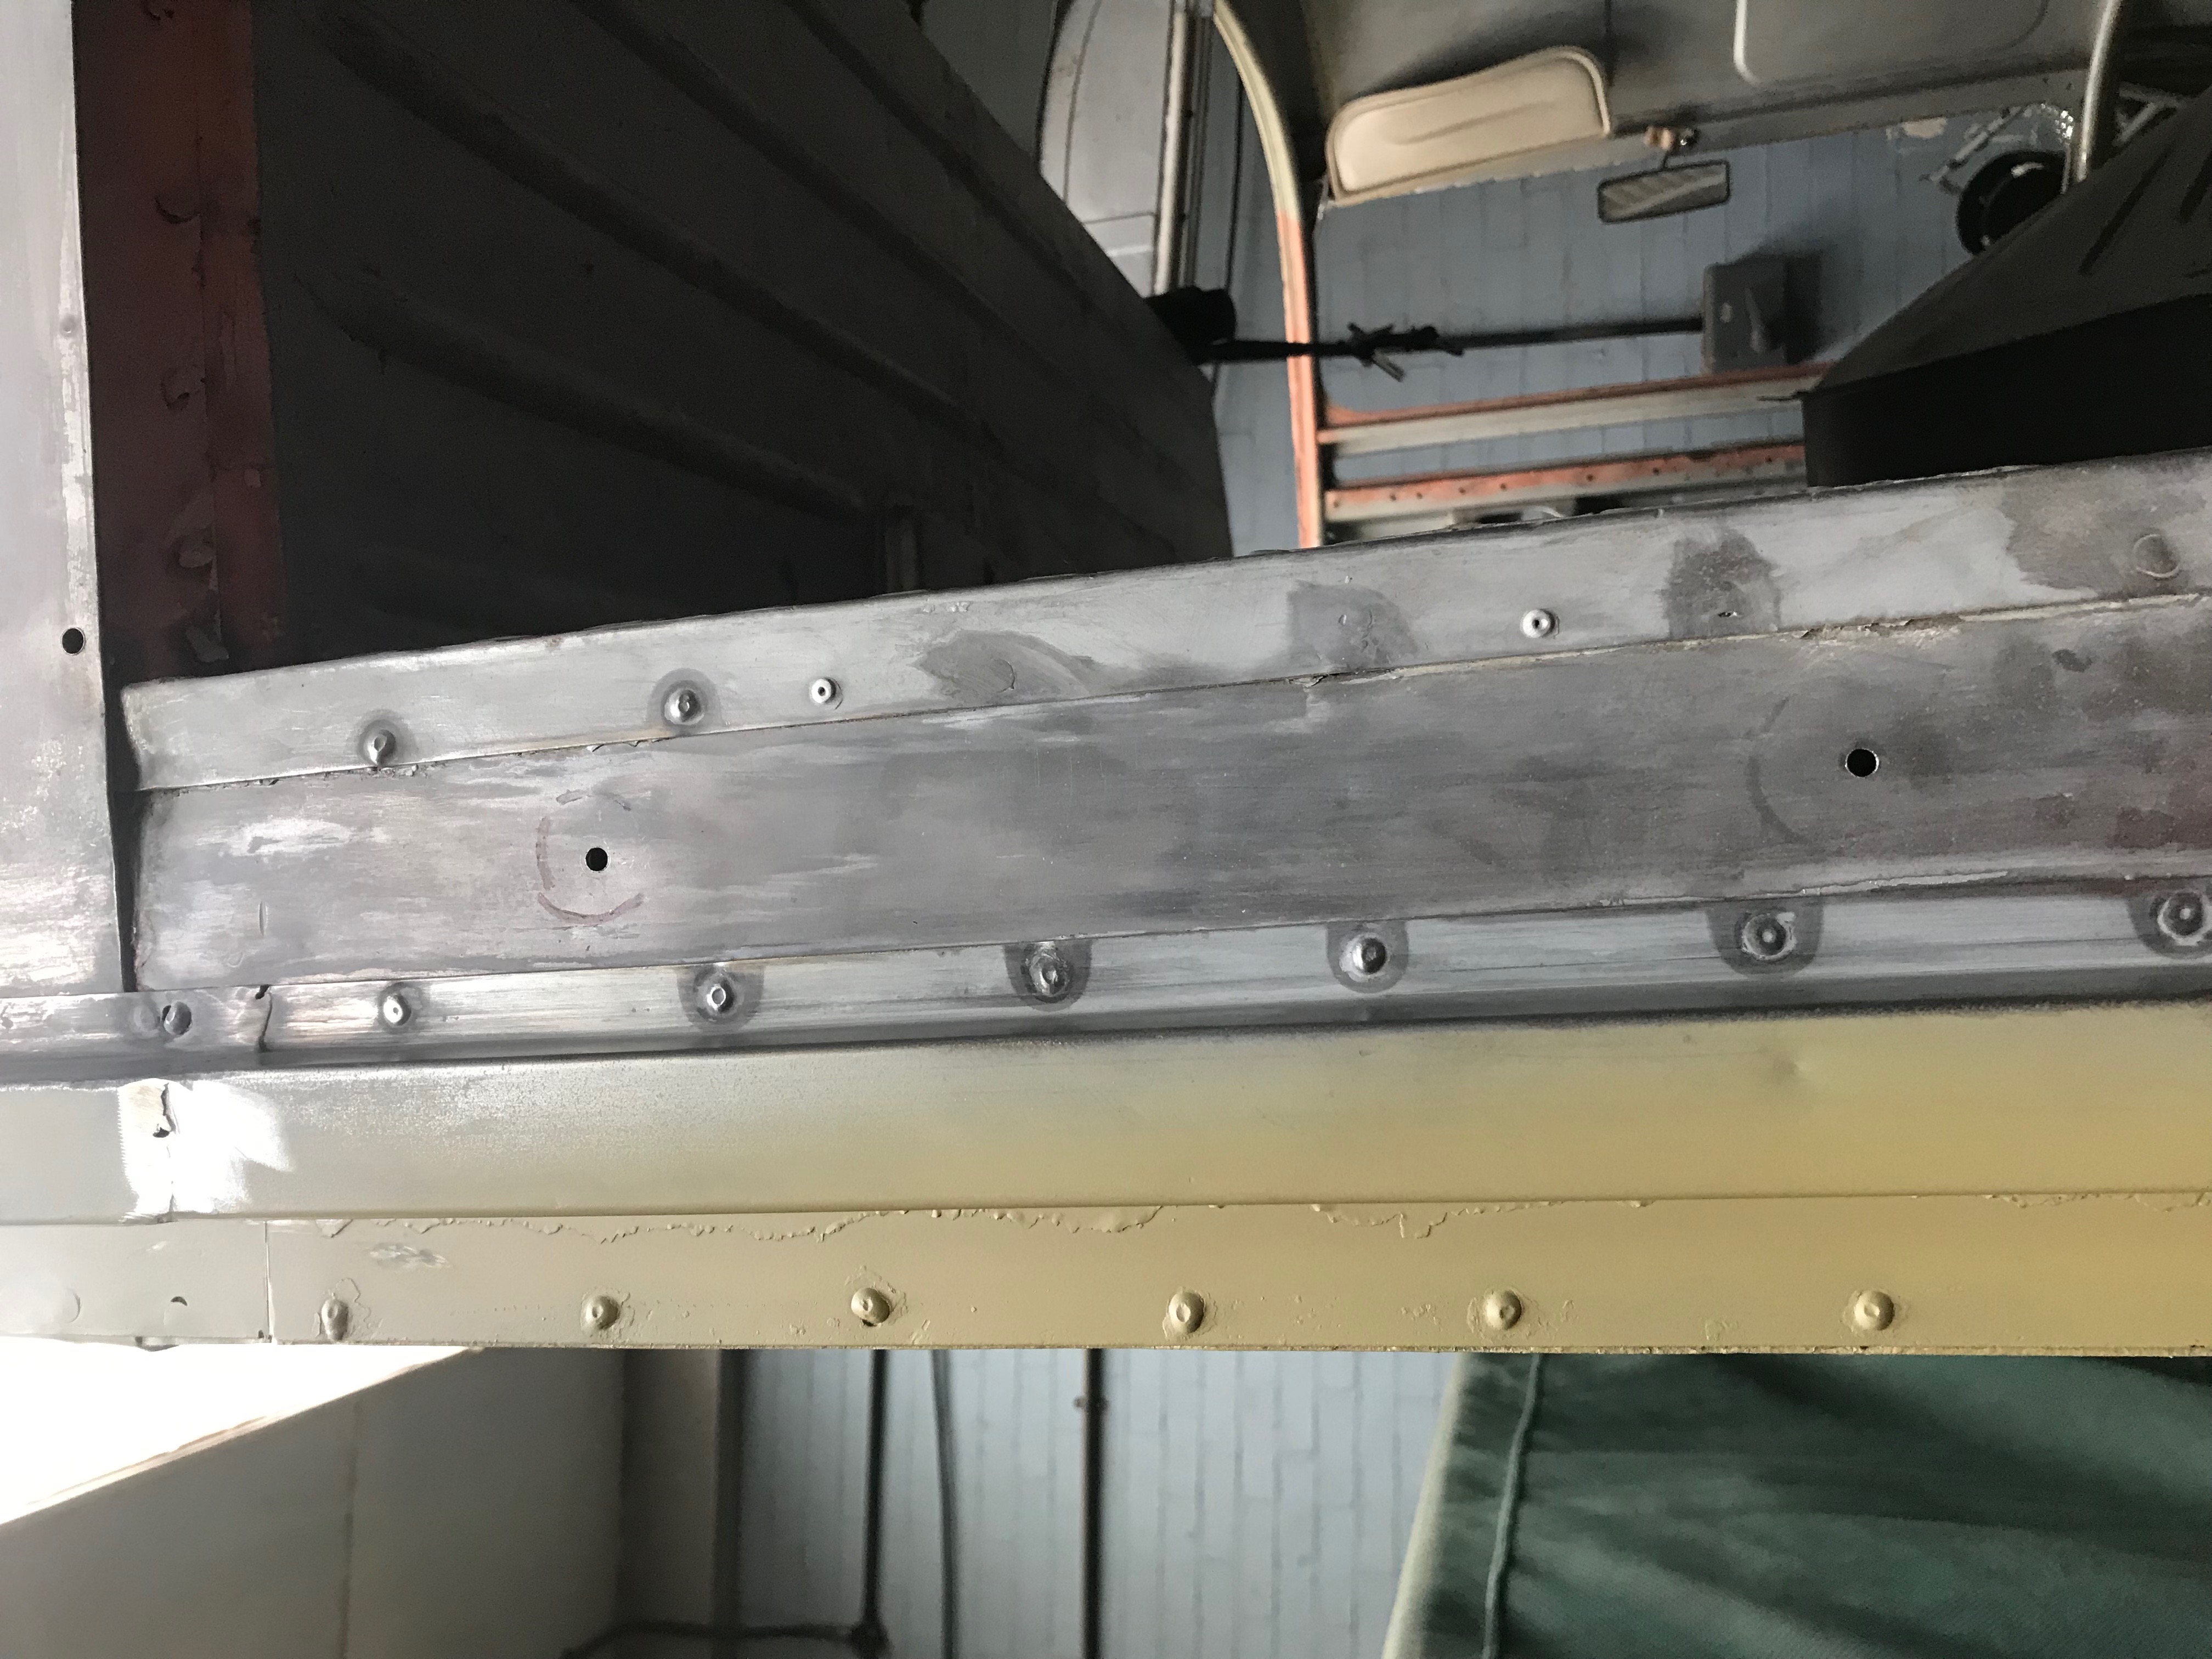
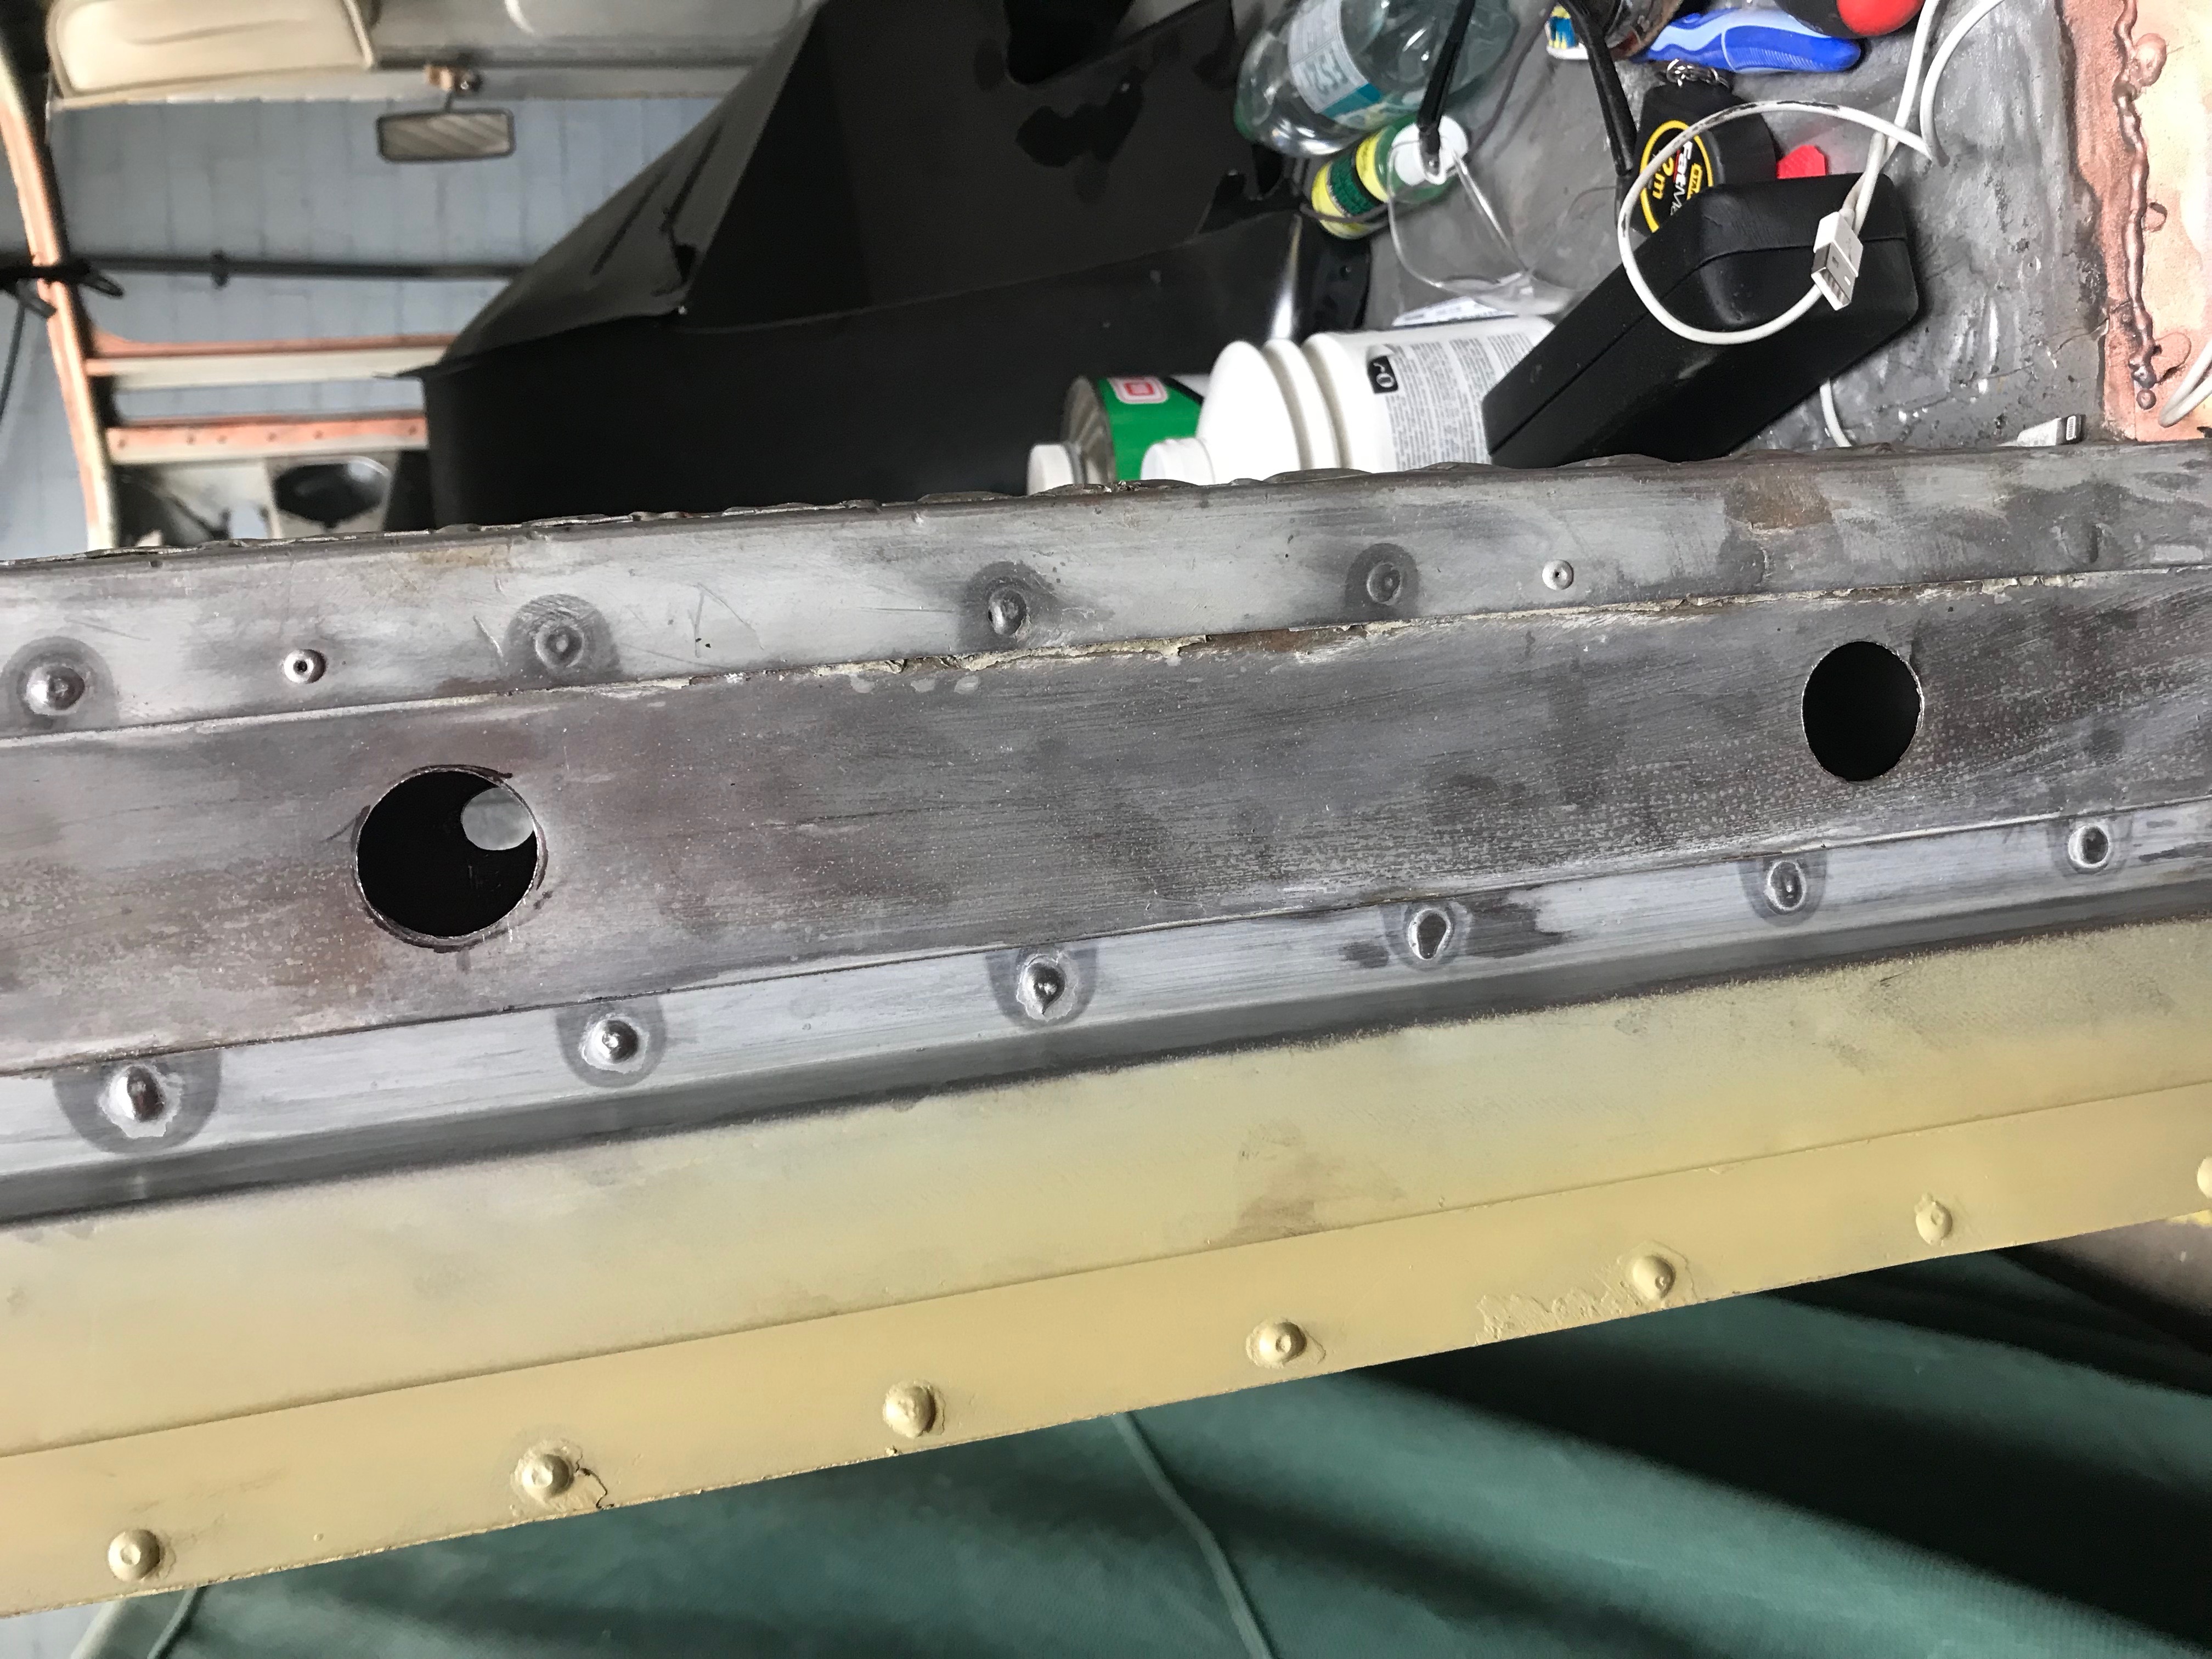
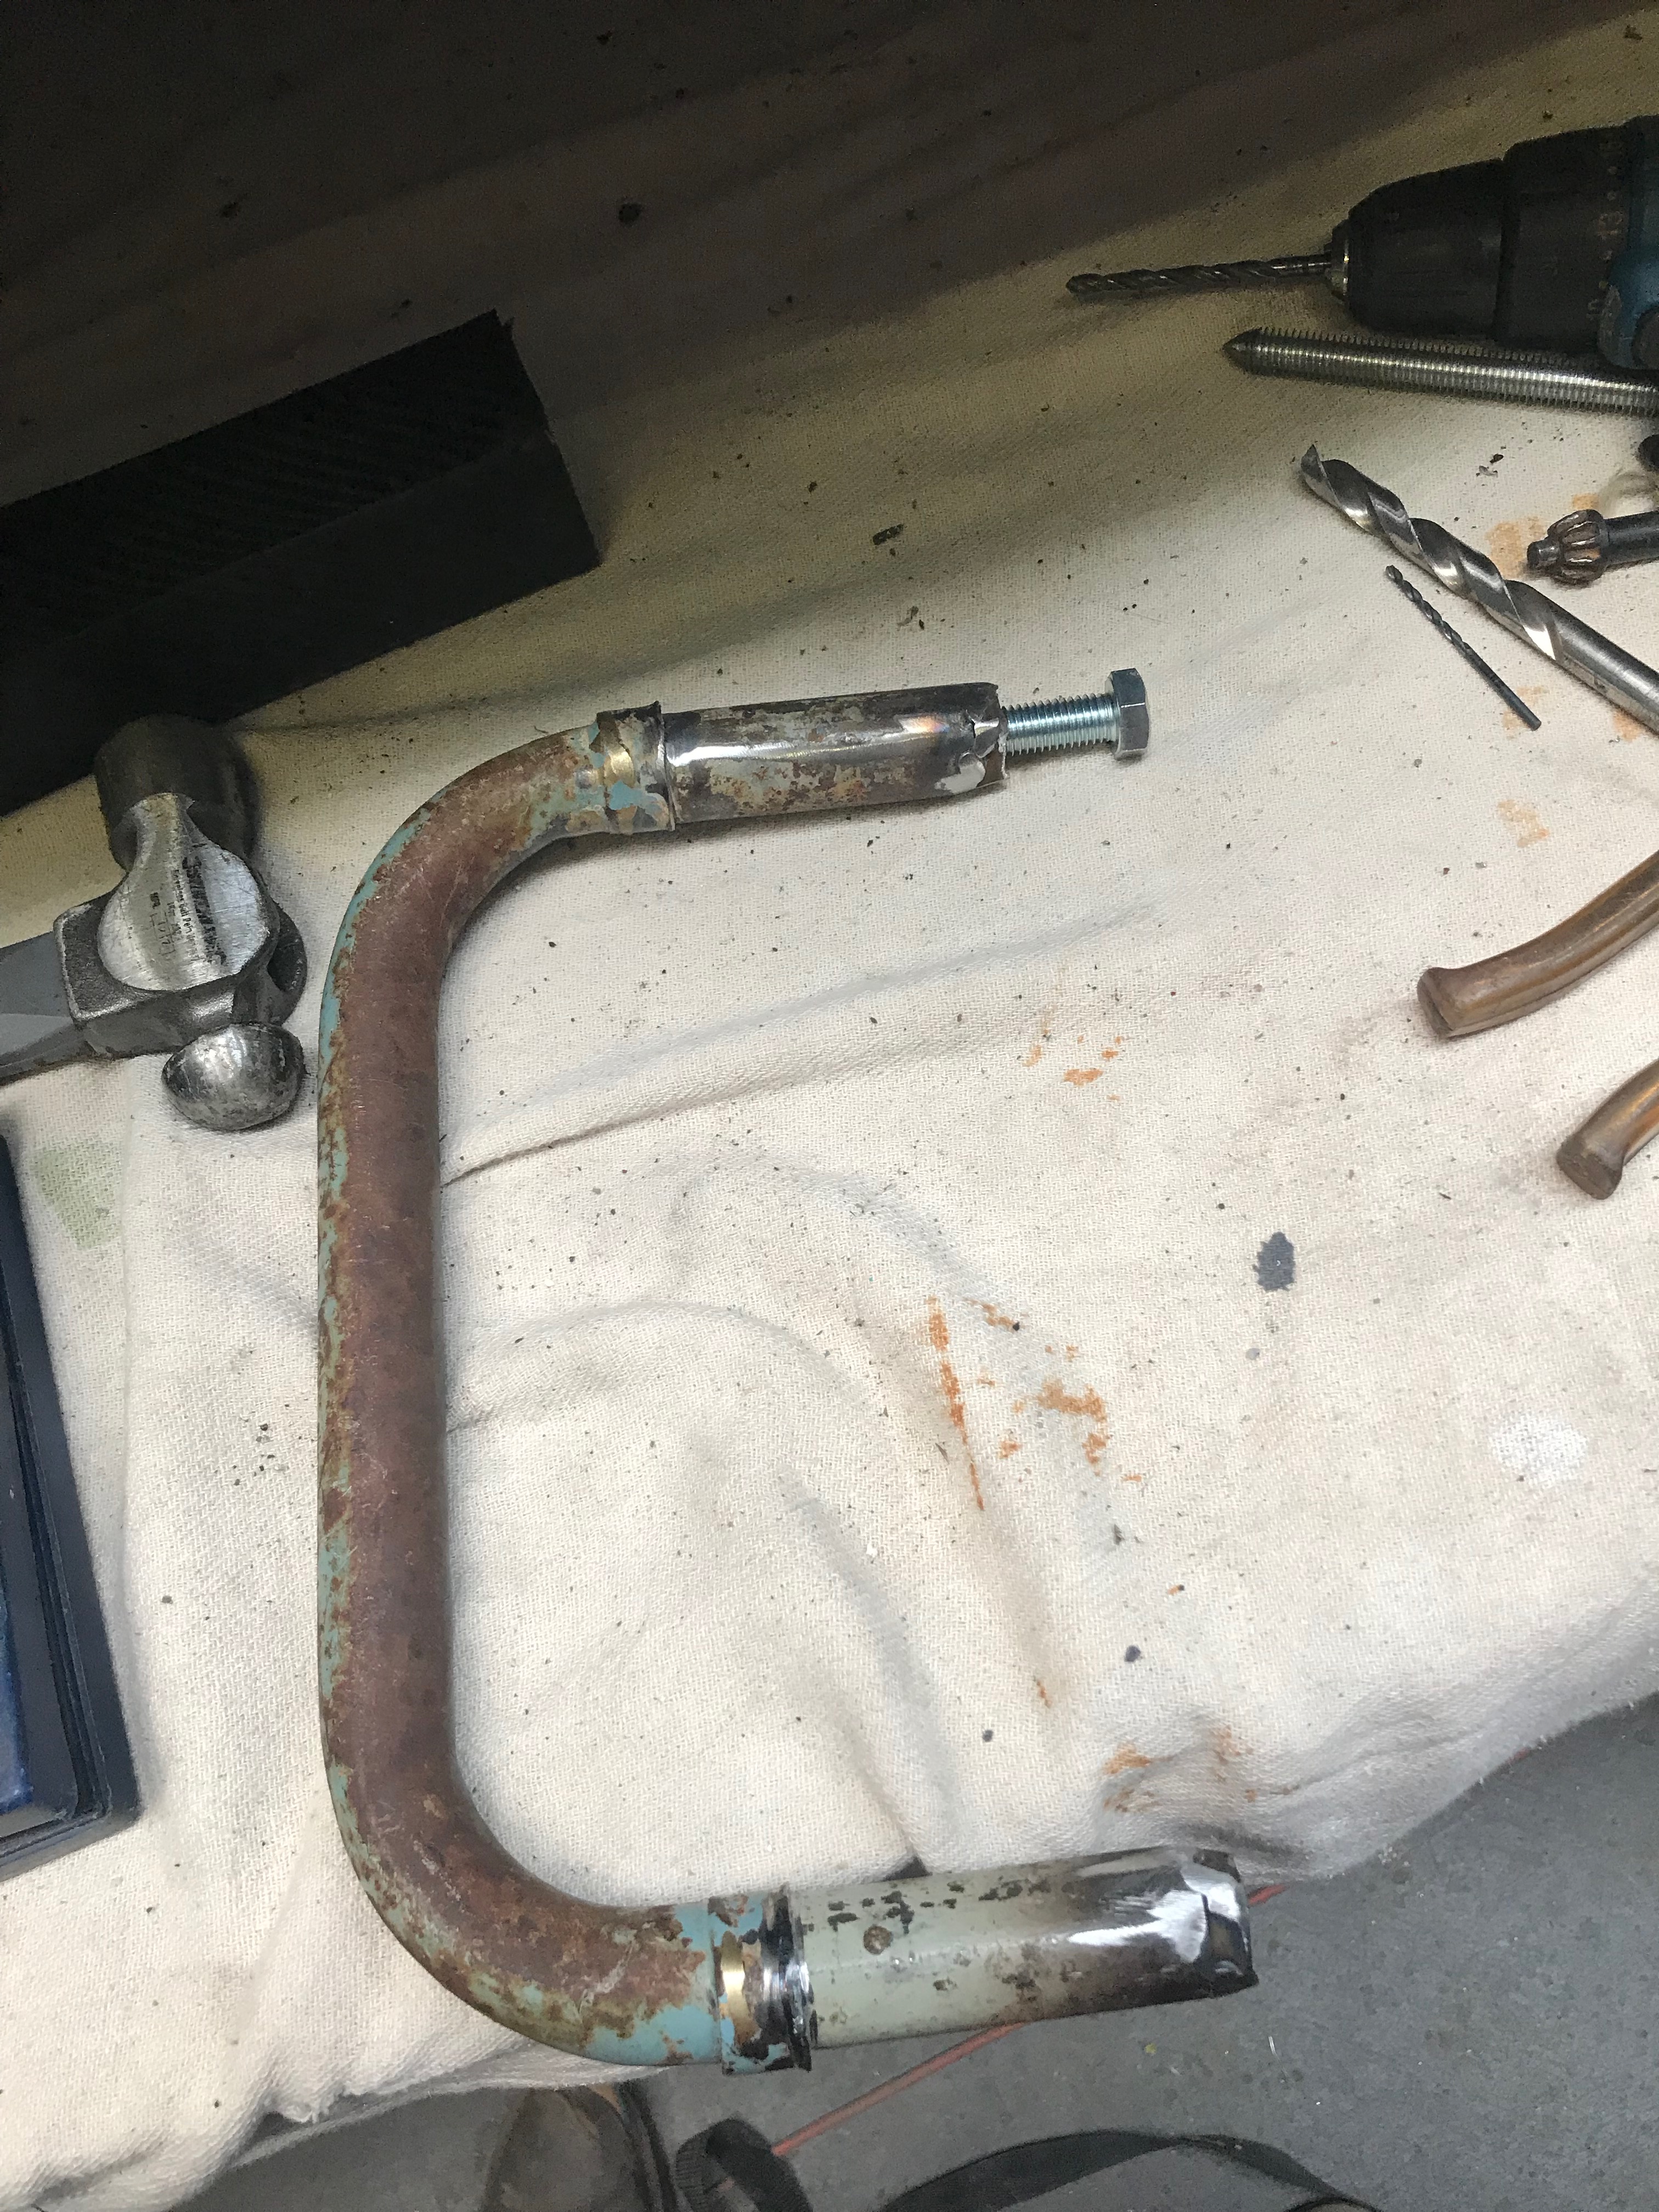
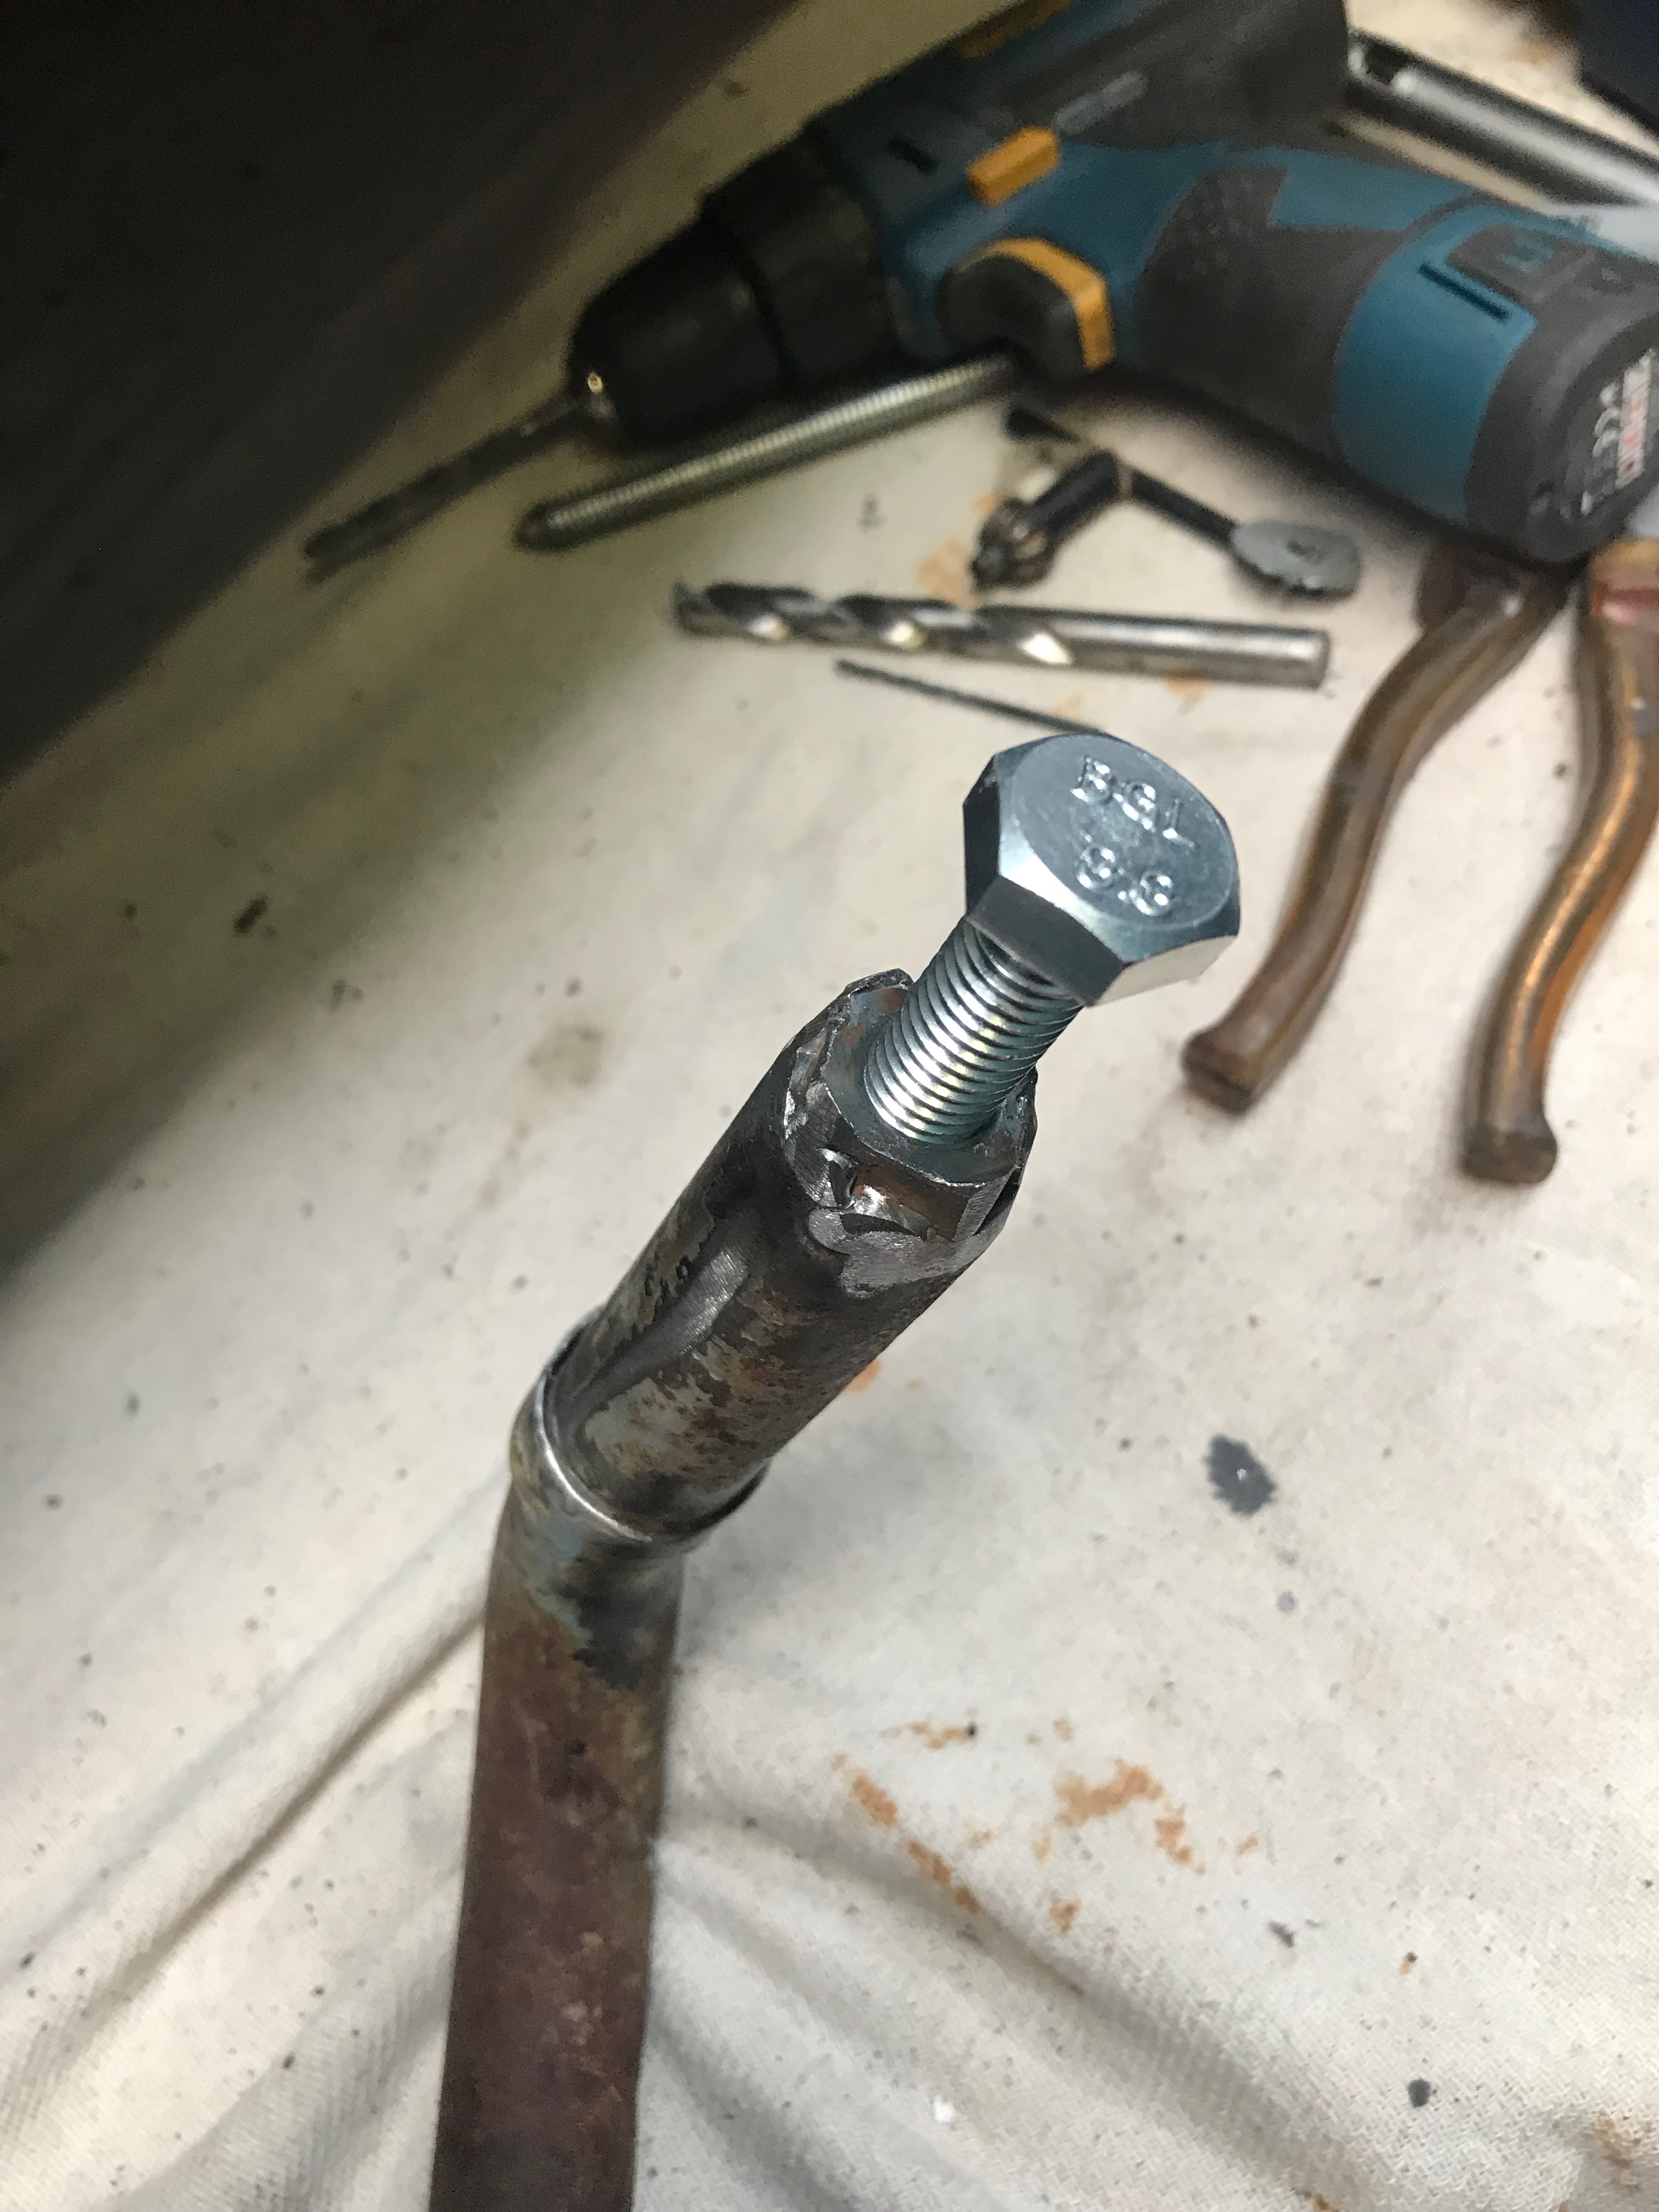
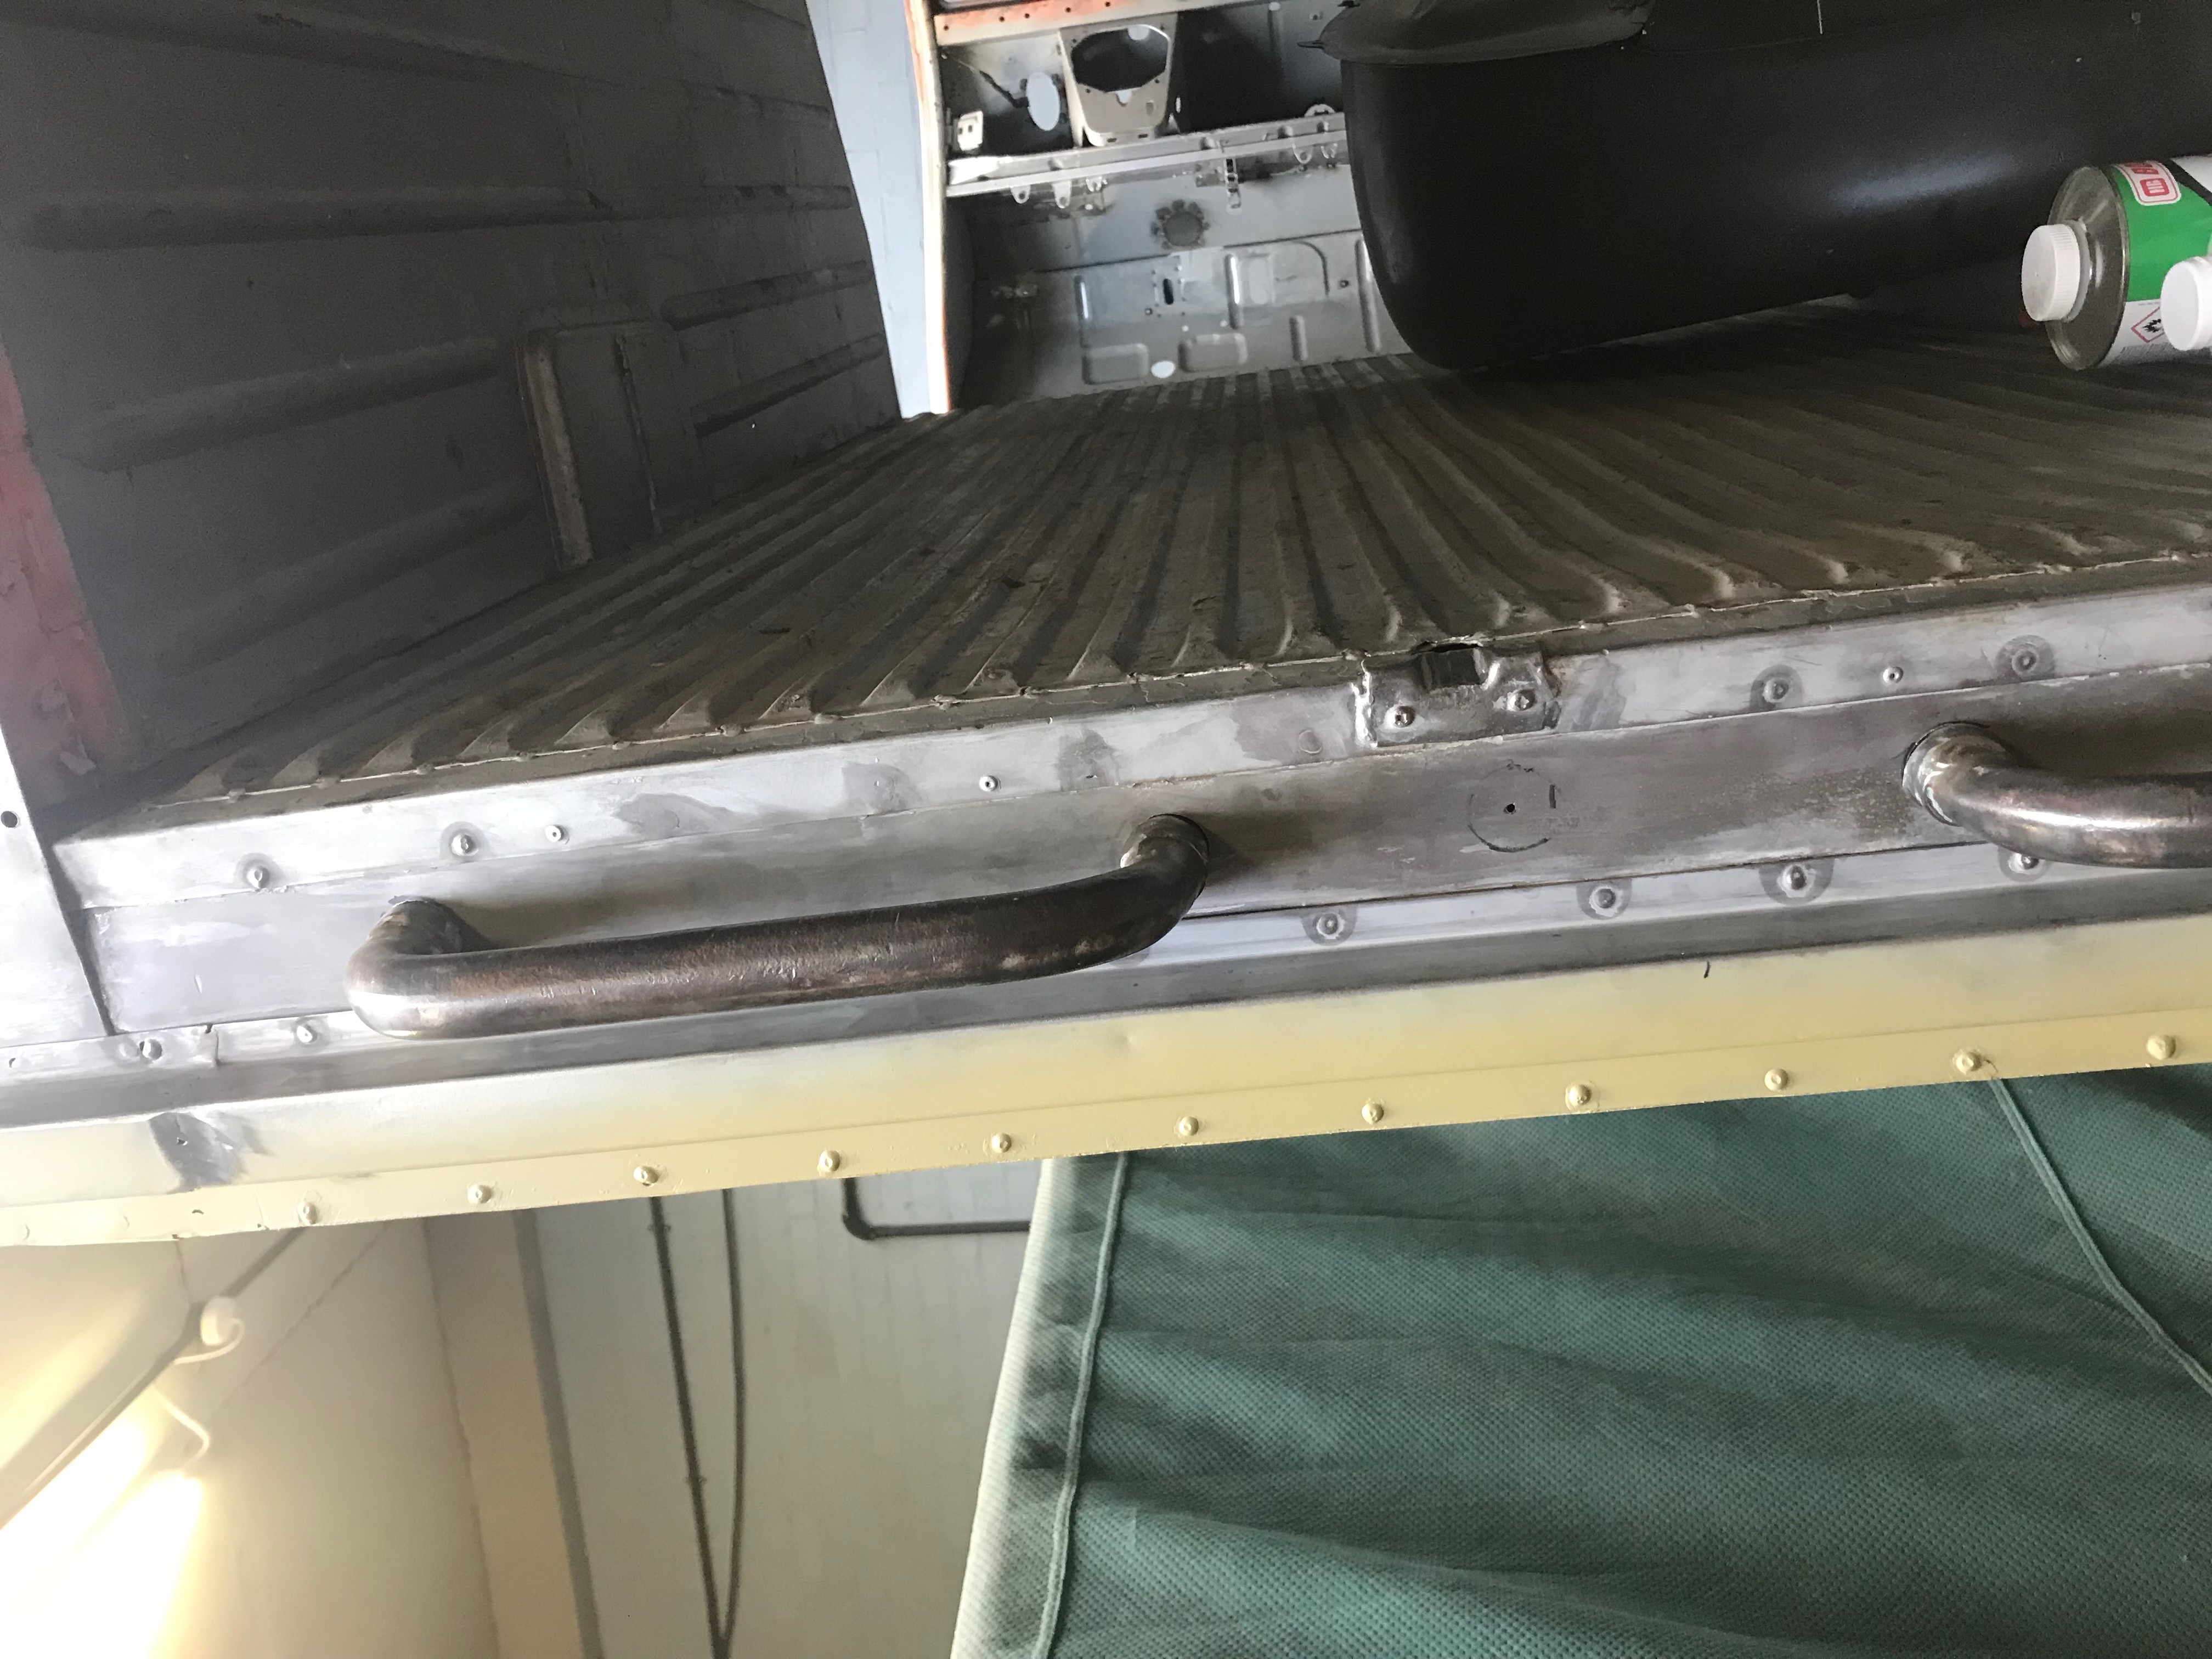
I marked up and drilled some holes in the rear valence panel under the back doors, so that I could retro-fit the second hand bumpers (which were sent from France by a very nice chap who has been following this blog) into what must have been a previous repair panel for a different van (an Acadianne) – I say this because there are no holes in the replacement panel and the word ‘Acadianne’ was written on it, under the paint.  Anyway, the plan was to drill the holes, weld a nut to each of the ends of the bumpers and bolt both of them to the rear of the box section that they slot into.  Sounded easy enough and actually worked out ok. Here are few pictures

This is the rear valance – just below the rear doors. I drilled pilot holes first

Then some bigger holes, you can just see on the left, the smaller hole drilled into the back of the box section.
Nut welded onto the end of the bumper tube
and there we are – cleaned up and bolted to the valence

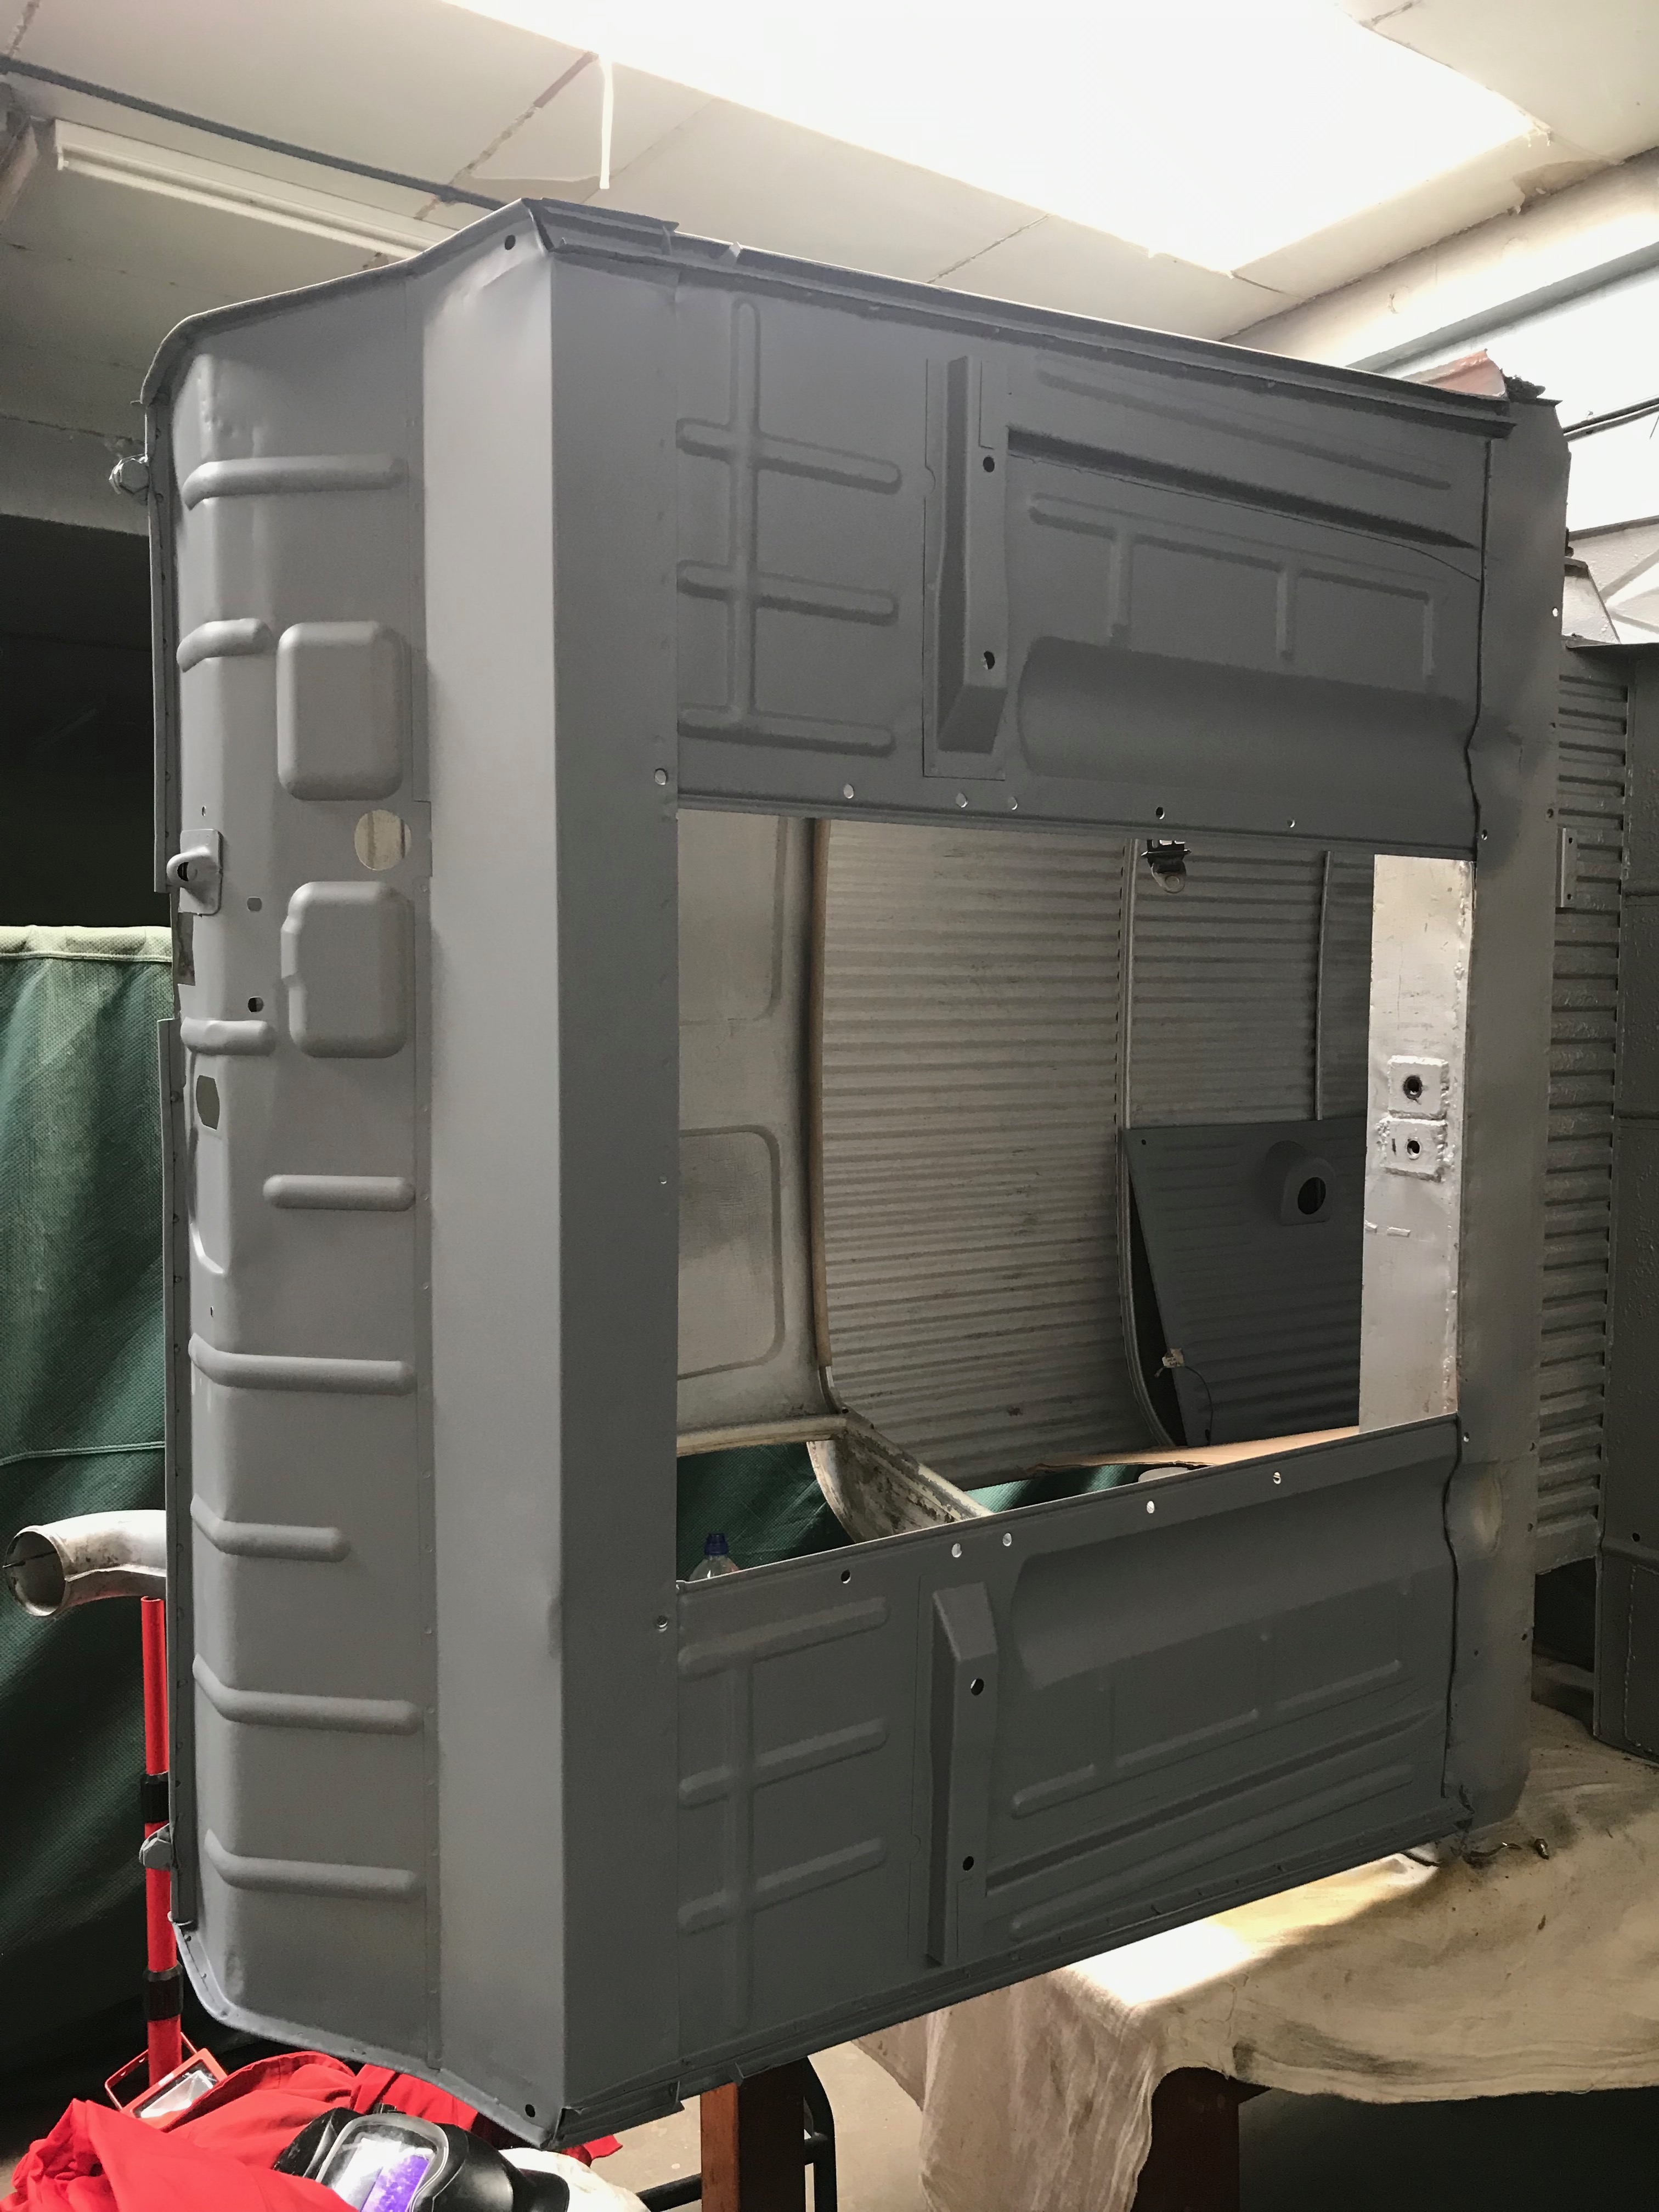
Having fitted the bumper, I mixed up and sprayed some of the ‘Fast’ epoxy primer onto the floors and toe board. This went on really well. I still have to close off where the front of the sills join the toe board – I realised that after I’d painted it… so out with the welder again and re-prime again. I’m going to fold over the bottom edge of the A-panels so that there’s not gap where they meet the sills – something I also should have done before the primer went on.

PRIMER!

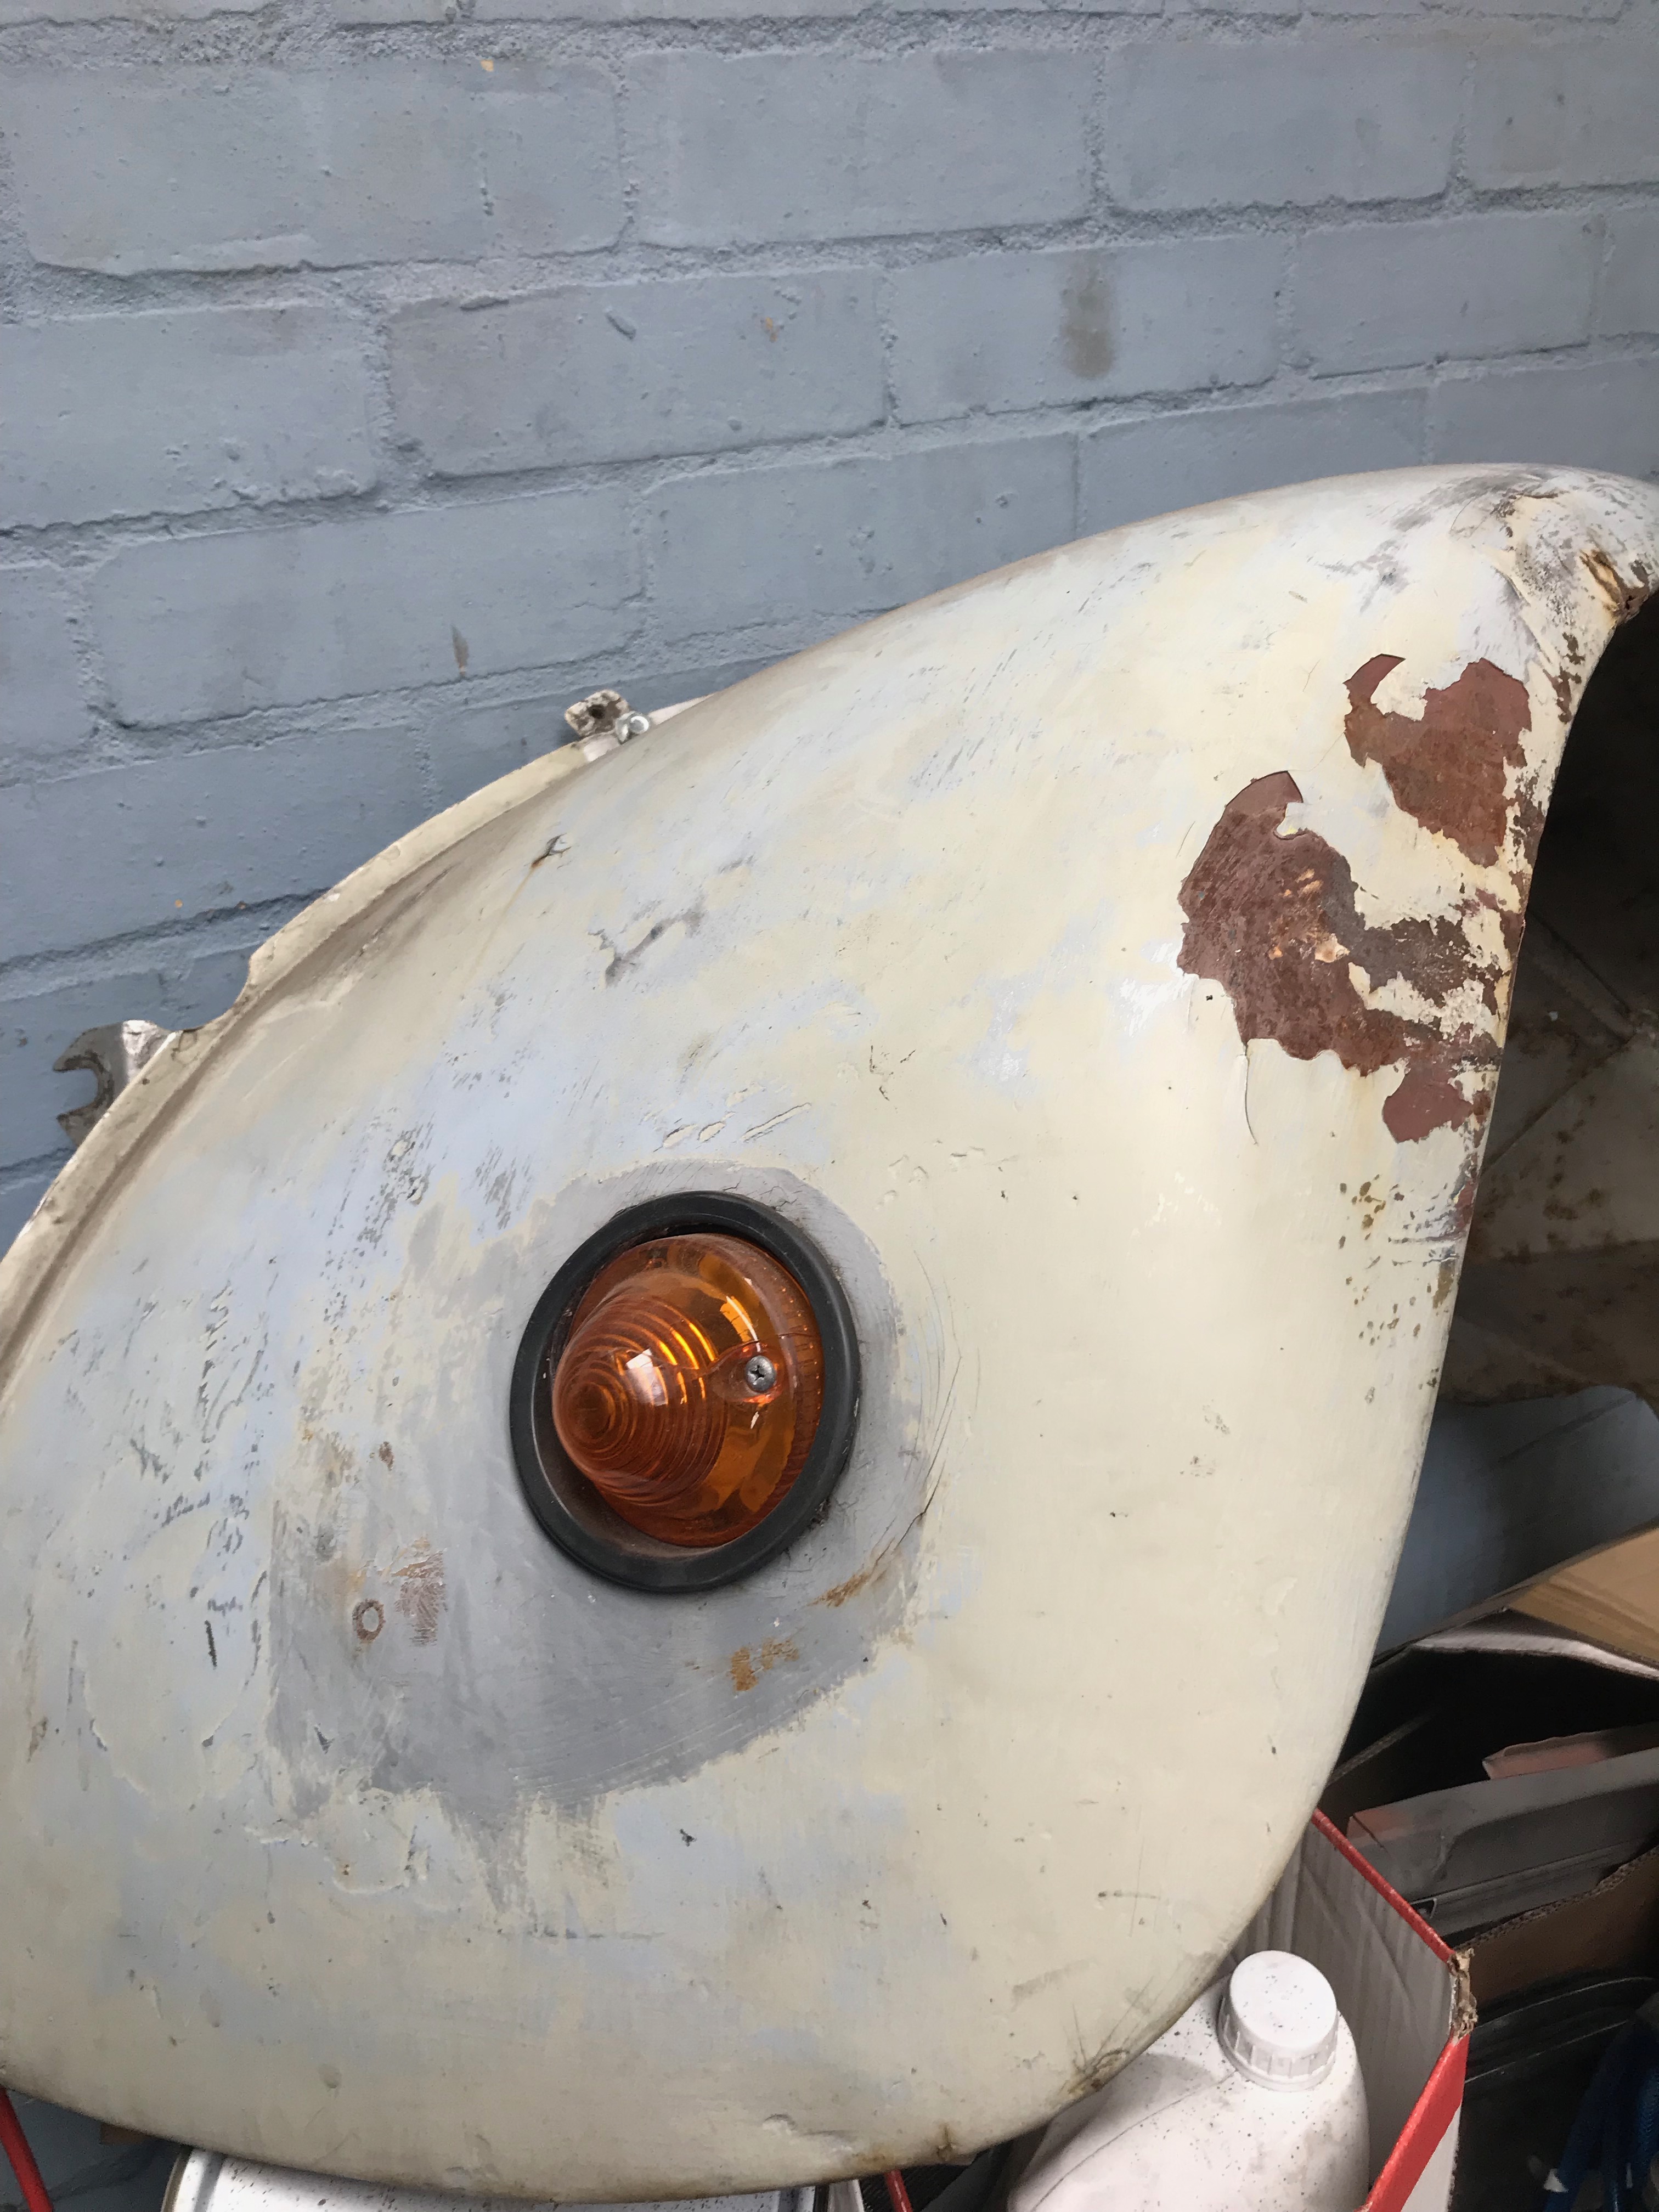
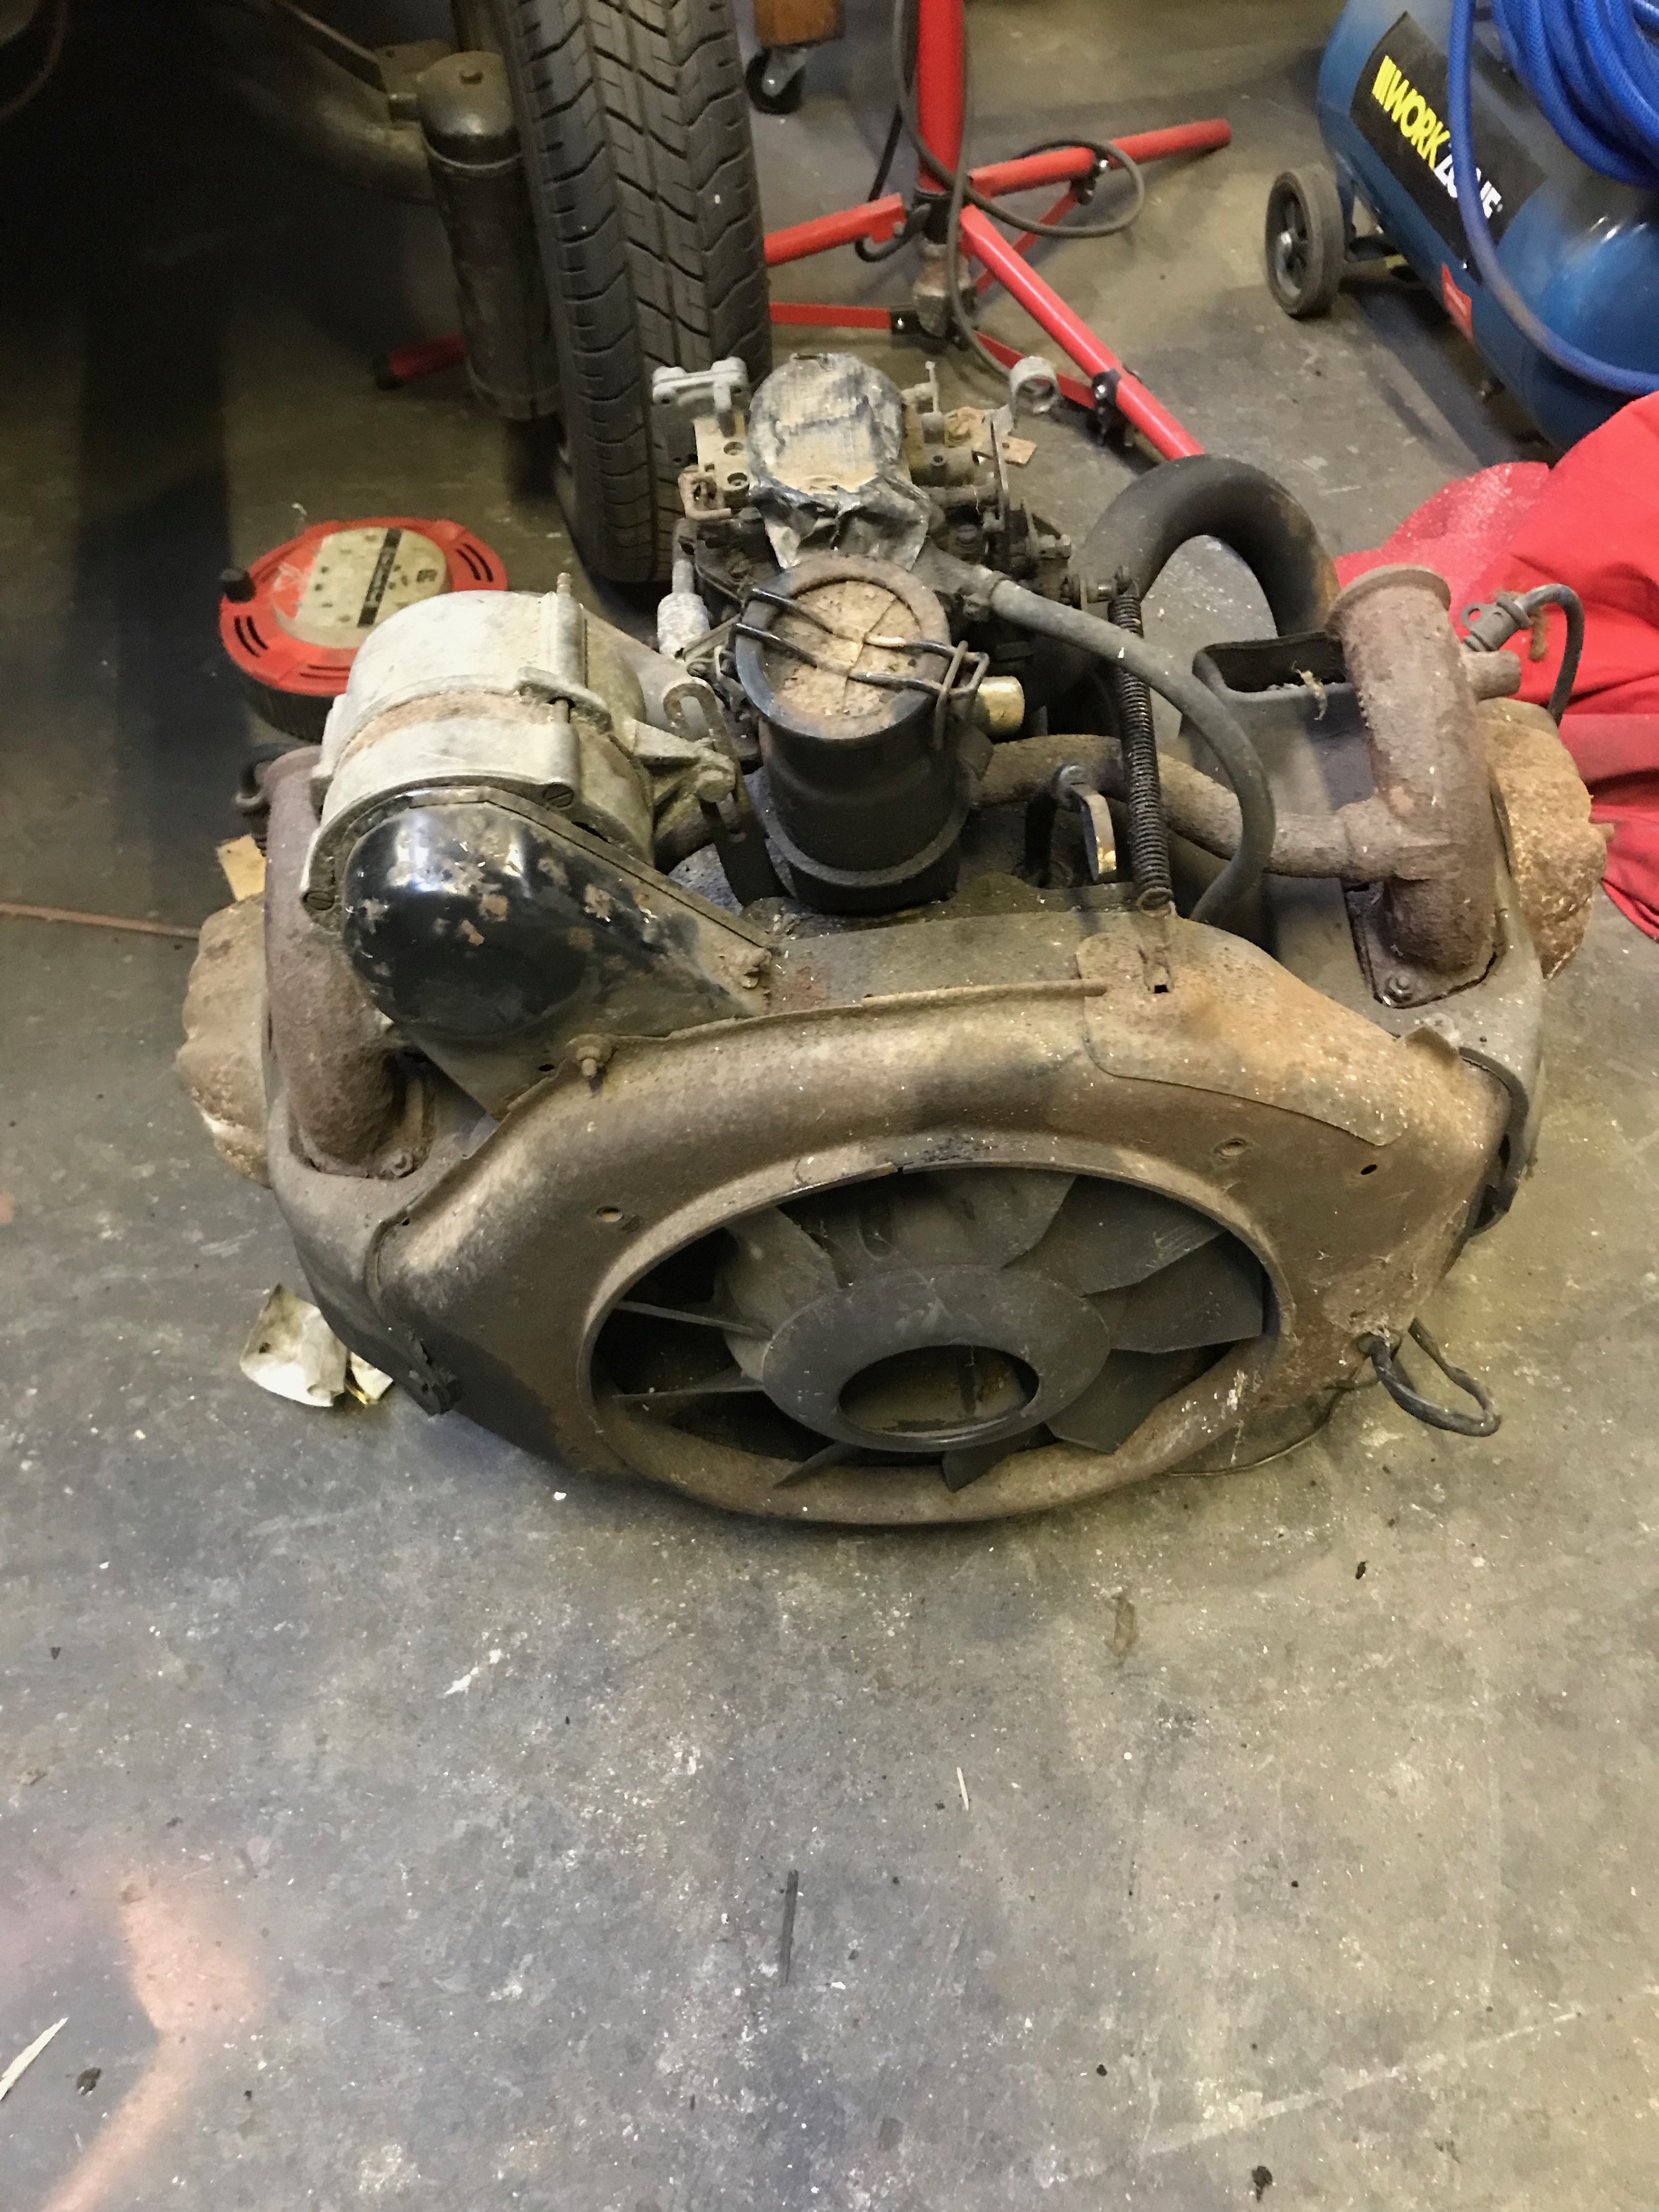
While on holiday in Crete, I spotted a 2CV engine on eBay, close to where I live in Norfolk and decided that even though my van engine is ok, it would do no harm to have a spare.  I can strip it down over the winter, rebuild it and get it ready to fit as and when I need it.  So I bought it.  When I picked it up, the seller also had a decent bonnet with a good hinge and a few dents and a headlight bar, complete with steel light pods.  I thought the headlight bar would be easier to clean up than the one on my van, which has numerous coats of paint on it, but my van is left hand drive and the fittings are different. Never mind, one of my headlight shells has rotted out at the bottom and the ones on the new bar are in perfect condition, so all in all it has worked out well.  I’m not sure if I’ll use the bonnet – yet.  The engine is complete with carburettor (twin choke) and alternator.  It turns over, has clean oil in it and I was assured that it was a runner before it was removed. Perhaps the engine stripdown and re-assembly will feature in a future blog. I might remove and re-paint the tinware and then transfer this to the engine in my van – we will see.

For a few minutes, I thought about fitting both engines to the chassis and making a 4×4 ‘Sahara Van’ – then I realised that this would be a whole new world of pain that I can do well without.  Just imagine how hard it would be to get 2 loosely connected engines to work in synch with each other.  I think there would be a continual battle between them as to which one was doing most of the work – one engine would dominate while the other engine would sulk and just be there for the ride, literally idling along…  It’s a bad idea and the stuff of nightmares.  The only realistic outcome would be that I’d still be writing this blog in 5 years time and the project would still be unfinished.

So – what’s left to do?  I’ve broken the rest of the work down into 3 tranches

Finish the bodywork – 16 hours

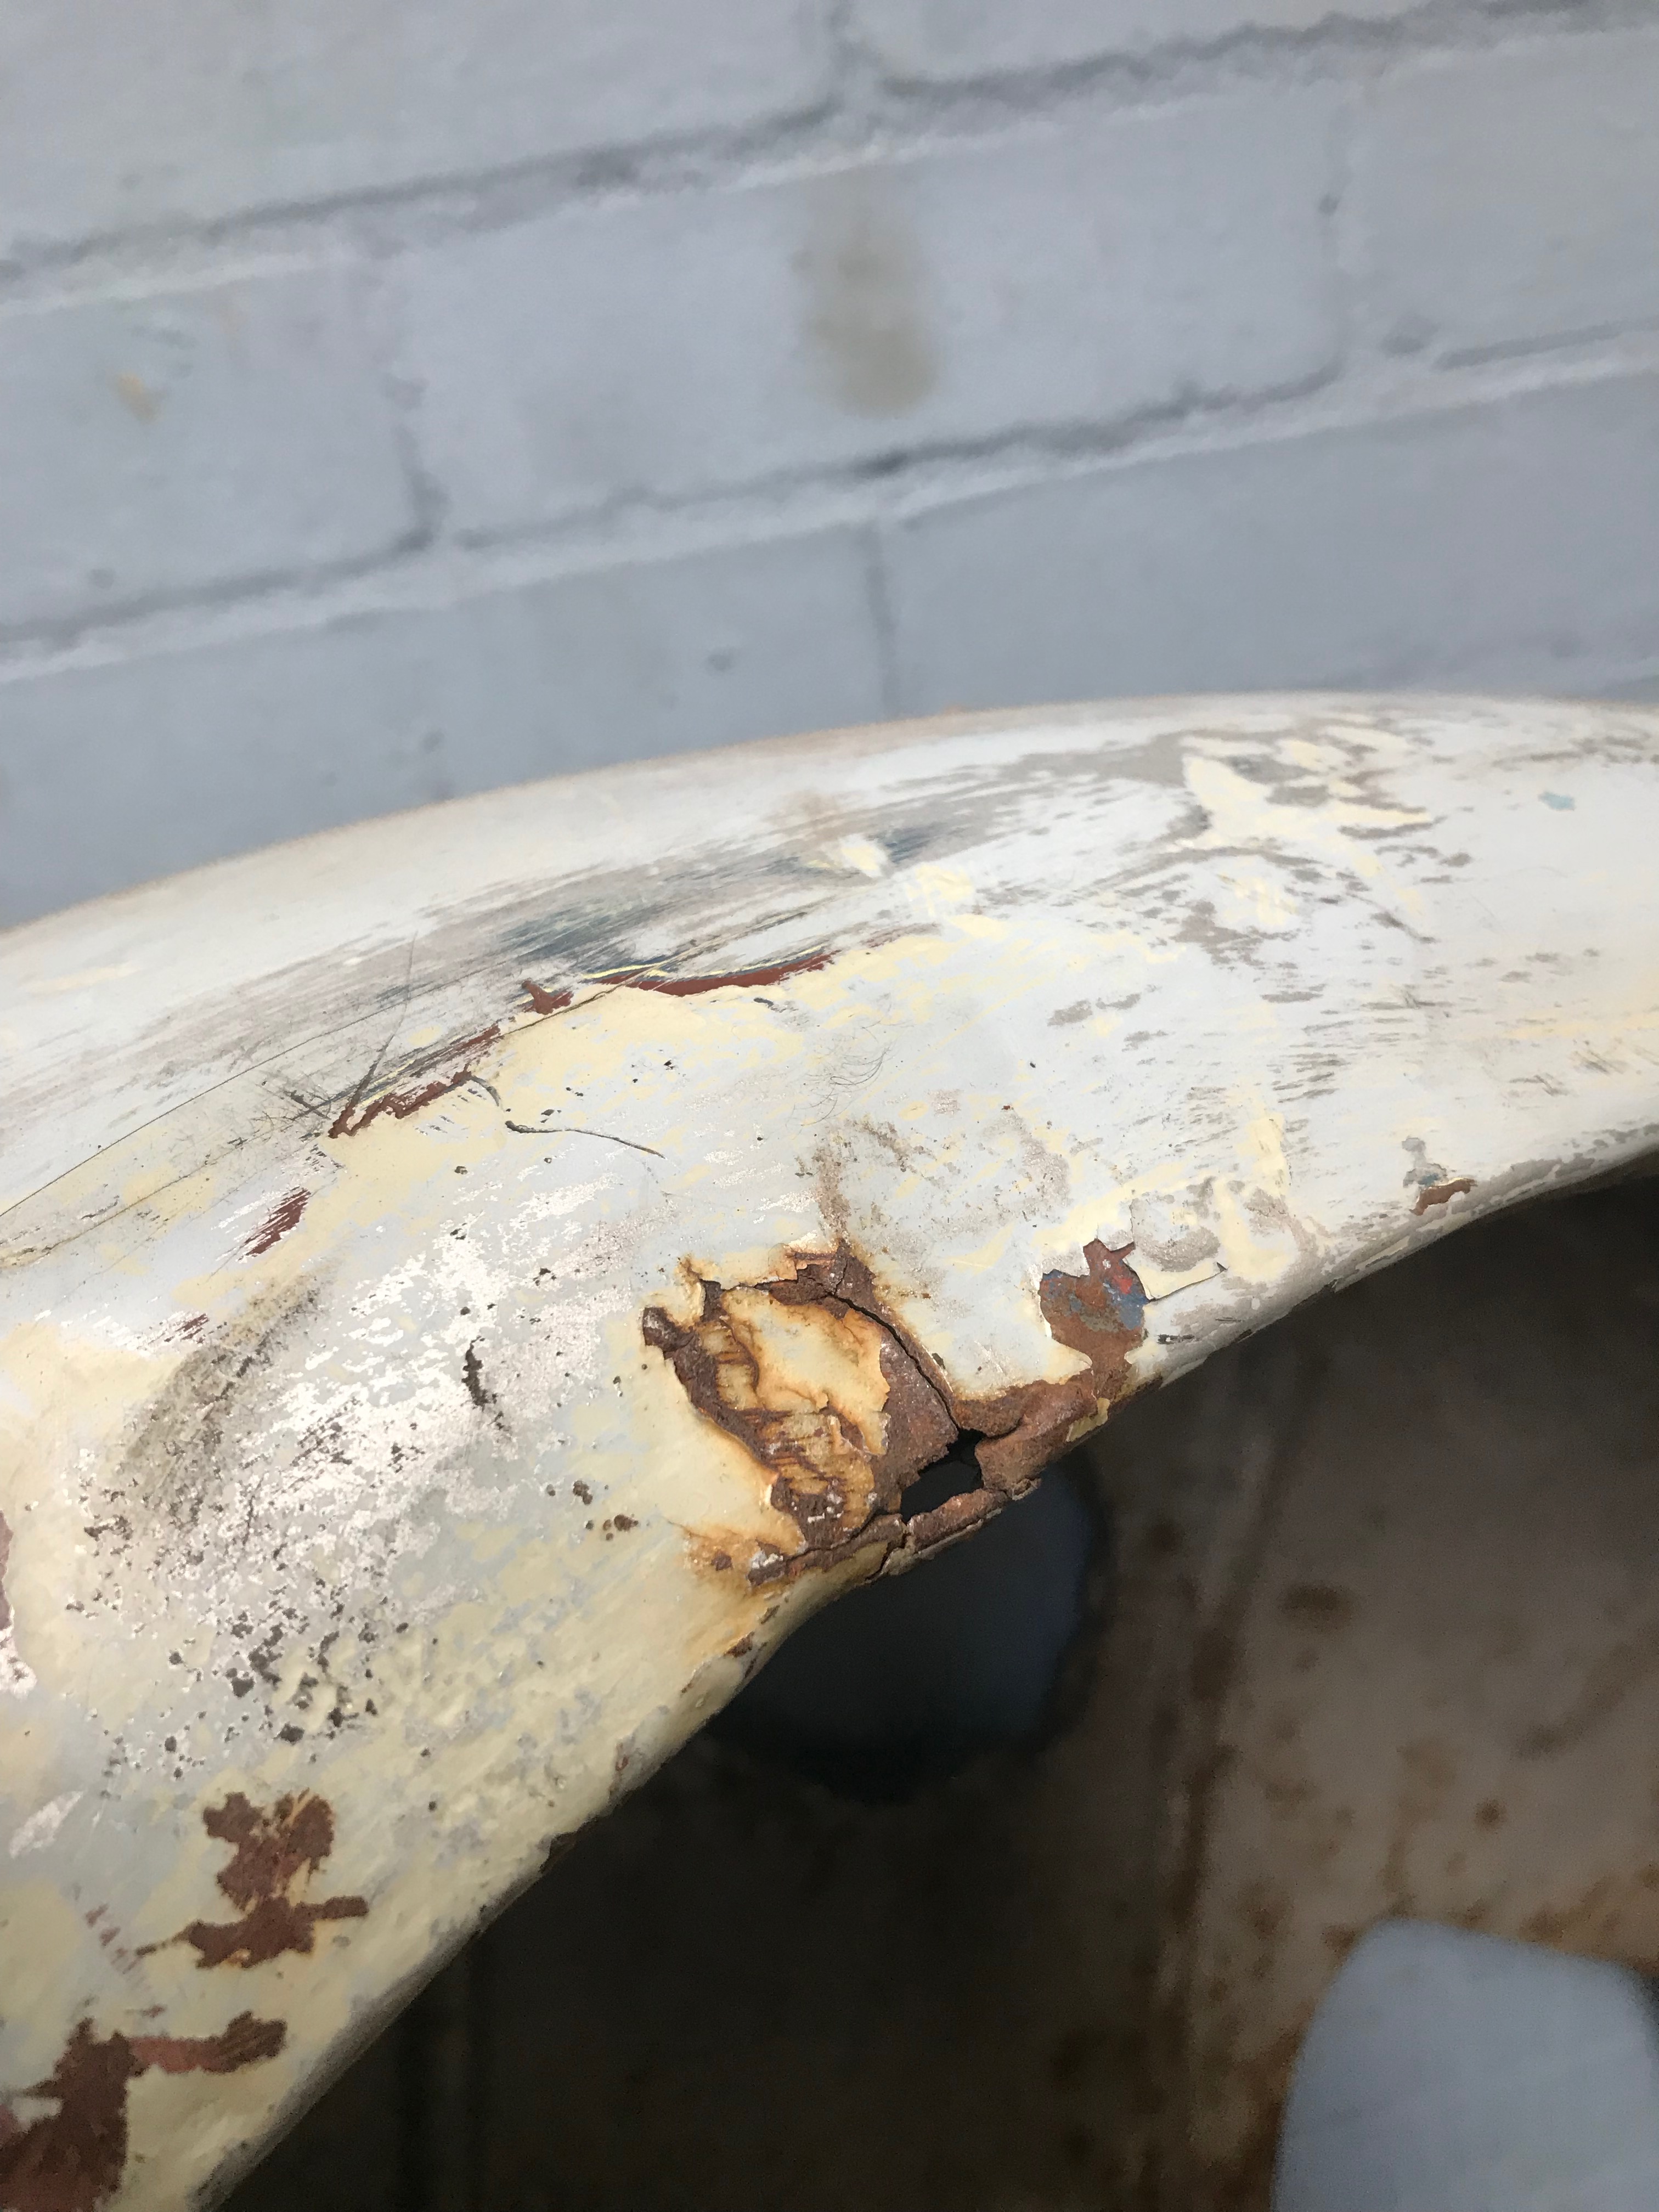
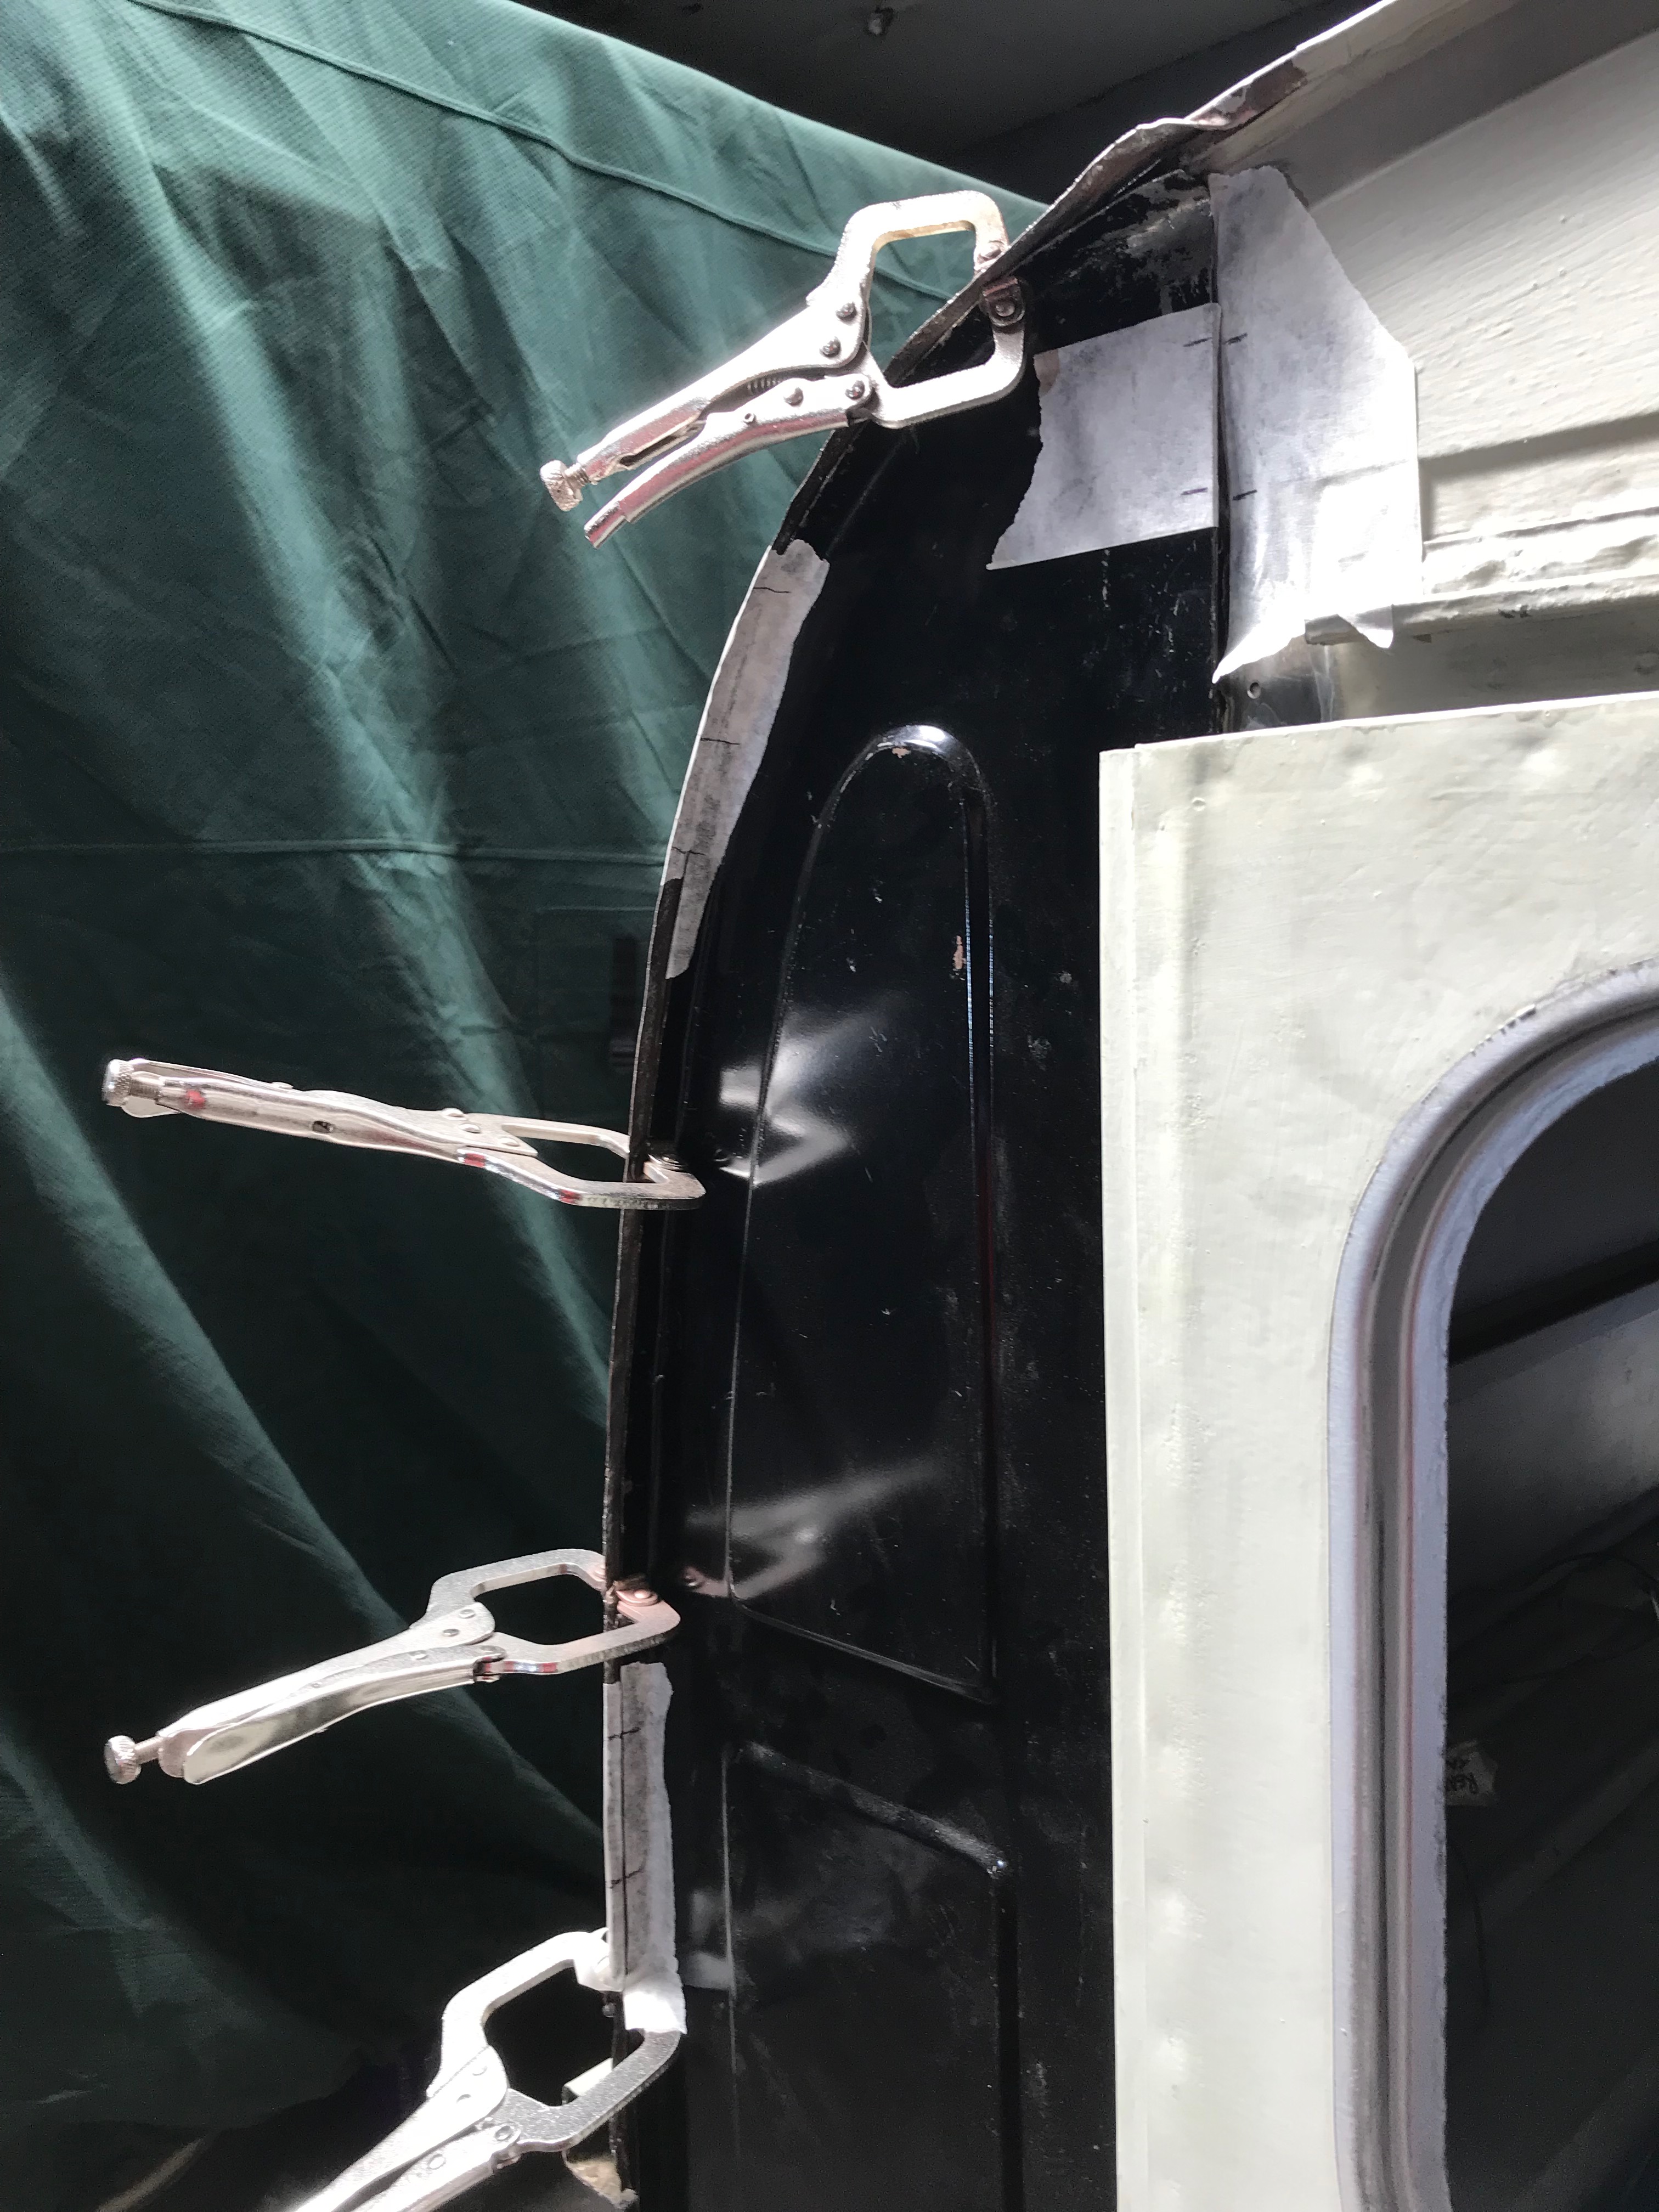
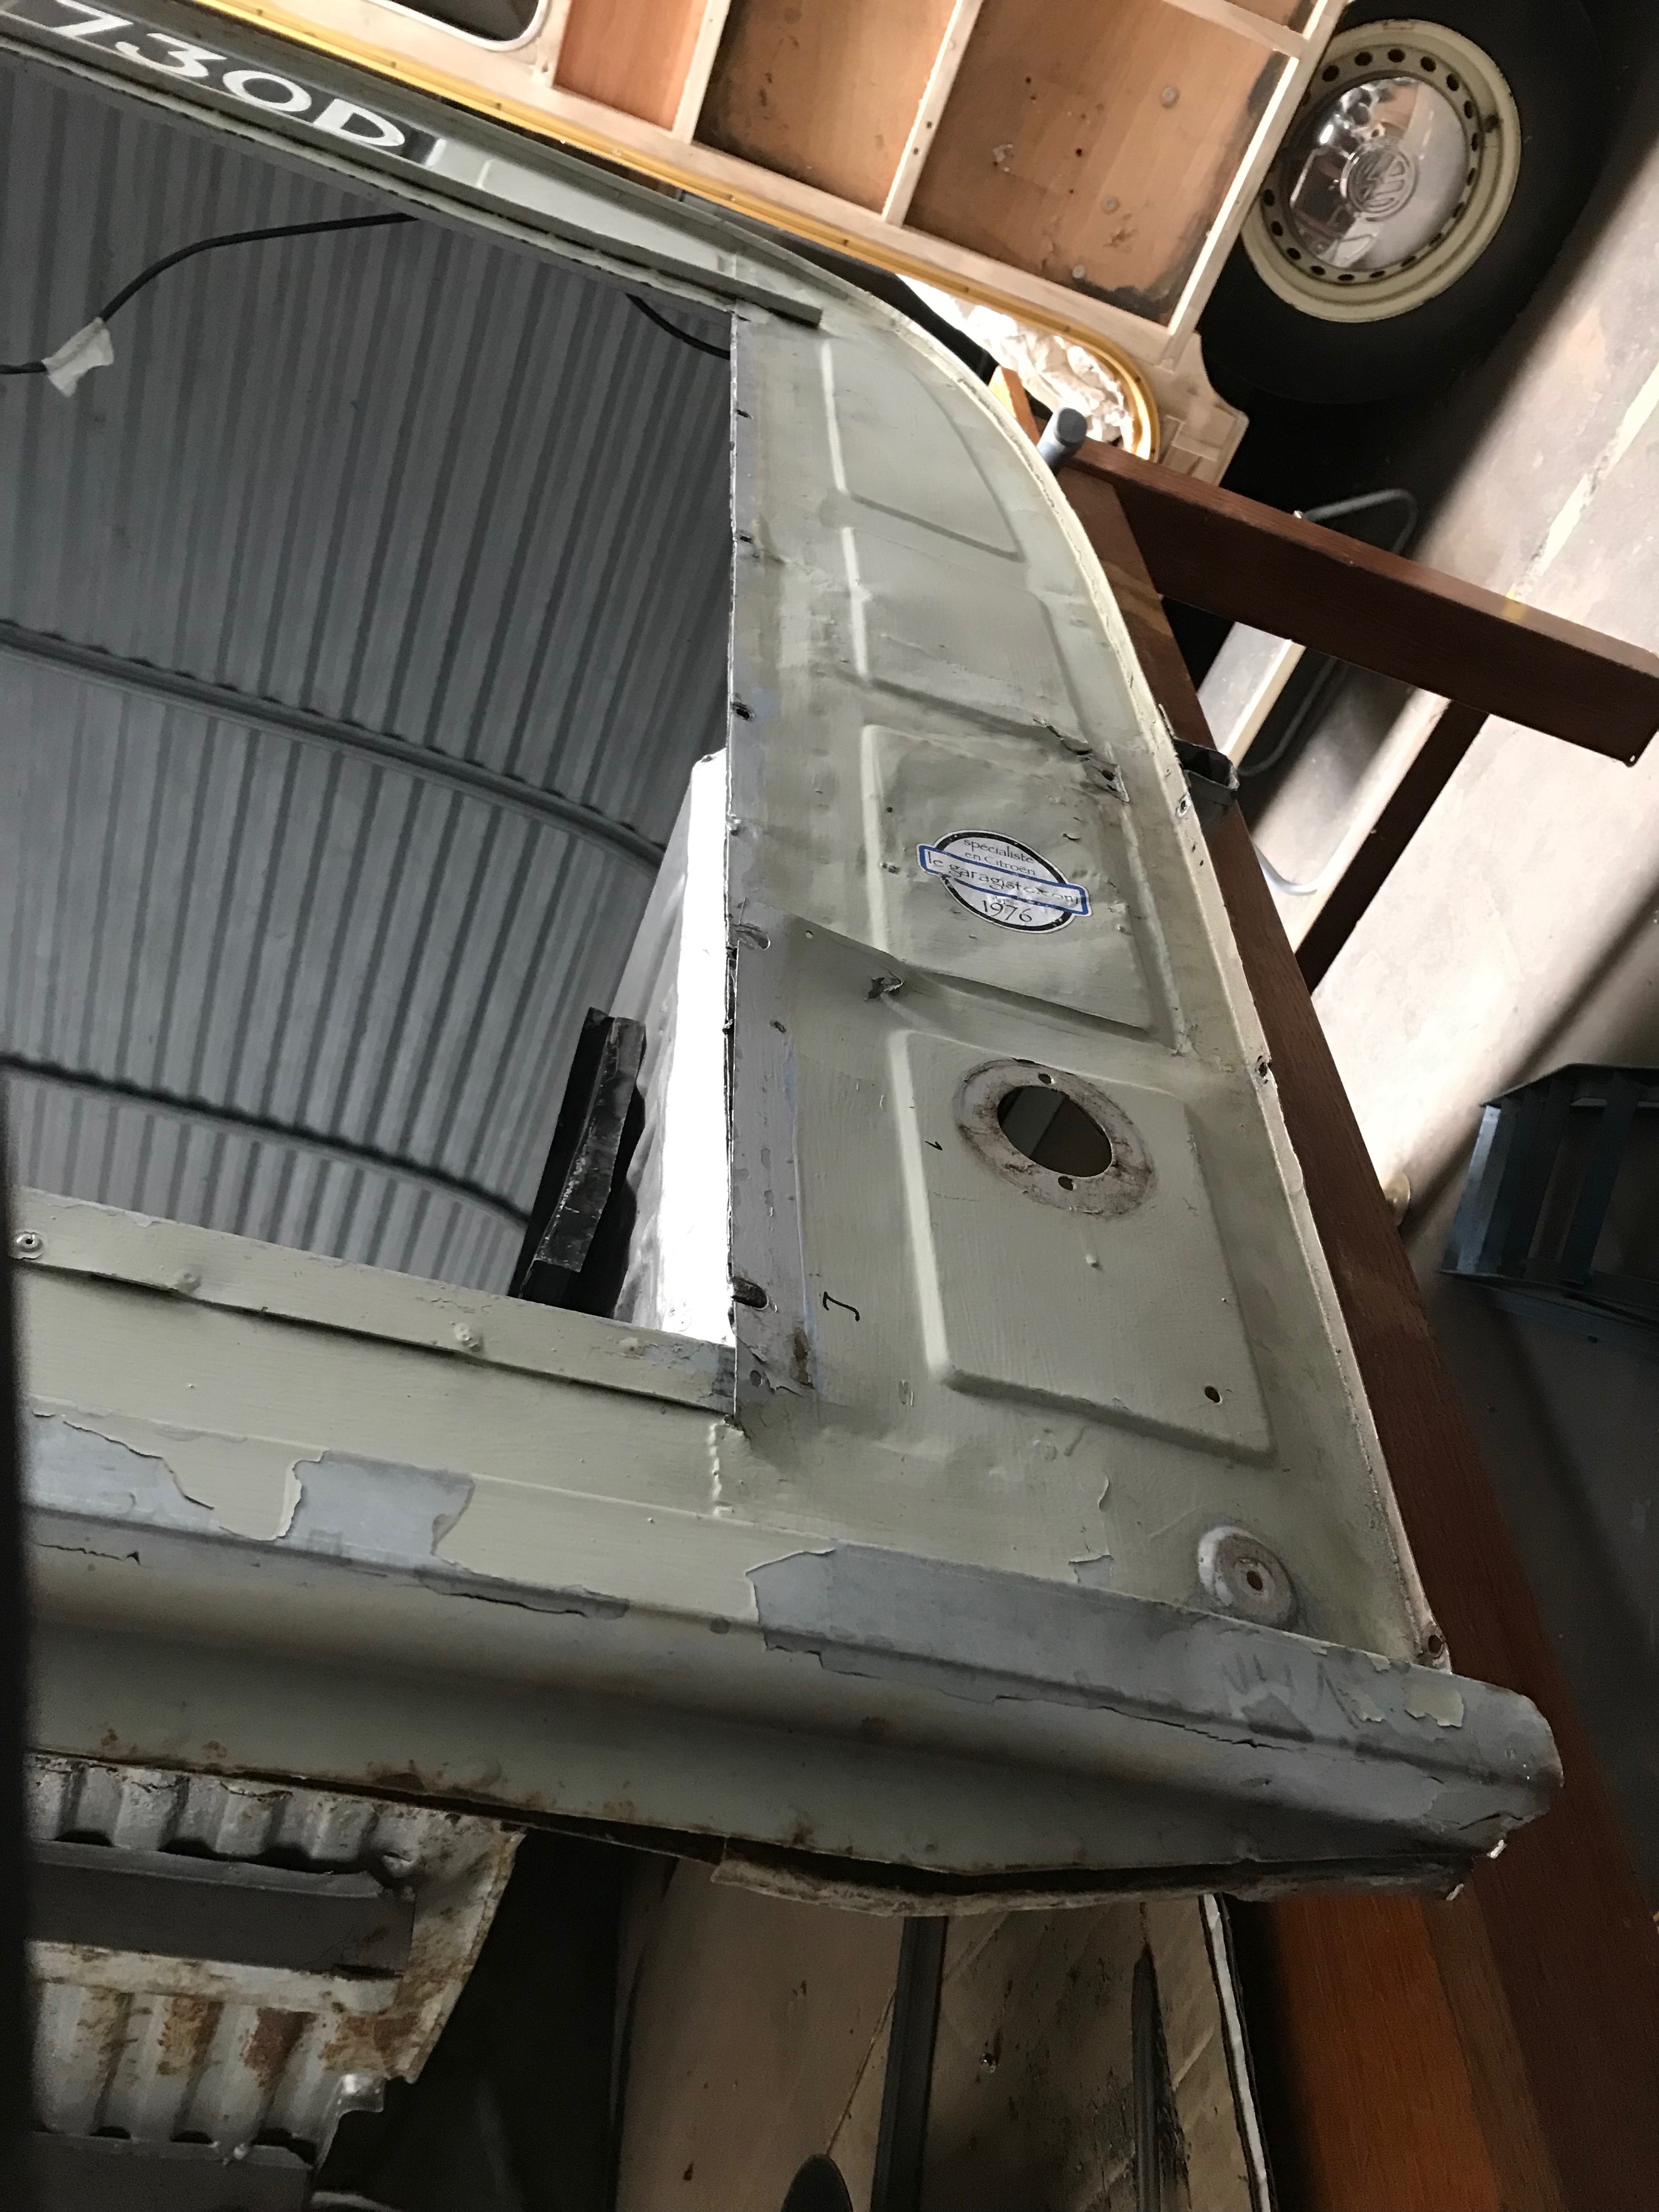
Really this should be called  ‘finishing off the tricky bits’.  With the new panels all fitted there are a few small jobs that need a bit more care and attention than I was prepared to put in at a time when there were much more rewarding things to do.  For example, having got the screen repair panel in place, I now need to tidy up the join where it meets the A-panel and because it would be all to easy to make a real pigs ear of it, I’ve been putting it off. 

There’s a split in the flange which will need to be joined up, the flange will need to have a bit trimmed off it, so that it sits just above the recess in the A-panel and there’s an odd bit of metal that needs to be folded over the firewall and then joined to it.   I’m not convinced this is all possible with the MIG welder and I might have to braze it or use some lead solder to make it good..  Neither of which I have any expertise in.

Paint the shell and panels – 25 hours

None of this can happen until all the body repairs have been completed

Paint the chassis and put it all back together again – 36 hours

Hmm…..

Of course, all of these estimates will prove to be hopelessly inaccurate – experience has shown that each job takes longer than it should do, because:

  • something as yet undiscovered will become apparent and will throw me off track
  • a vital tool needs to be procured – which will immediately take on the status of ‘lost’ as soon as it is brought into the workshop
  • someone will wander into the workshop for a chat and all planned work for that session will be abandoned
  • painting will be a disaster – I have a recurring anxiety dream in which I stand back to admire my work and watch while all the new paint slides off the van and ends up in a pool on the floor before it has had a chance to dry.

‘He wants to paint me naked!’

There are no words to describe what a ball ache of a job stripping a car back to bare metal is. If you don’t have to do it, don’t is my advice. I had no choice – it would have taken an age to flatten off the 2 brush painted coats of paint and would also have to run the risk of new paint reacting with the old mixture of factory paint, household gloss, silver paint and unknown primer and old seam sealer.

It’s a fact that each bit of the van that I strip reacts differently to the paint stripping process.  Here’s an example below:

Wrinky
A messy business is paint stripping – not something I want to do again any time soon

You can see that the door on the left has hardly been affected by the paint stripper – or so it would seem, except for some patches where all layers of paint have peeled off back to the bare steel.  The door on the right has shed it’s outer coat of the household eggshell paint as a single layer.  Unaffected is the (I guess) original coat of factory red – bar a few places where the stripper has managed to bite through and lift this off as well.

Both doors had the same product applied, were wrapped in cling film and left to sulk for 24 hours.  The door on the left had all but dried out under the cling film, whilst on the right, the peeled off paint was still wet with stripper.  OK, so under the top coat of paint, they are different – I think the door on the left has fewer coats of paint – perhaps only one coat of silver over some primer and then it’s bare steel, so maybe this is why they respond differently to the stripper?

It’s a mystery that I’m never going to understand – and to be brutally honest I don’t really care why it happens, I just know it does. 

I wrapped them up in some more stripper and cling firm and left them overnight, after which most of the paint scraped off without too much fuss – except for a few recalcitrant patches which had to have another application of stripper. This seems to be a feature of working on this van. I do 90% of a job in a reasonable time and the remaining 10% takes forever and is a real pain.

With the shell and nearly all of the panels stripped, I thought it was about time to fit the rear wings. Once again the previous shunt the van had in the rear right hand corner is causing me issues. With the petrol tank cover in place and the wing clamped in, the rear edge of the wing which should be folded over the rear door pillar is about 5ml longer than where it should be. What to do? I can’t really see that cutting the wing and putting a new fold in it is going to work – it’s a tricky job and realistically is beyond what I can do without a proper metal press brake / folder. I could put a jack against something solid on the front of the shell and push to back a bit, but I can’t see that the bottom of the door pillar will move anywhere. It’s welded to the rear box section at the base and at the top is welded to the rear of the shell, but it’s he only viable option. More on this later, I might just have to make do and mend, If I can do a reasonable job, I’ll post pictures of the repair, or it will be problematic – in which case I’ll skip over writing it up and distract you with something else..

The other repair I need to do is to replace the drip rail (gutter) just above the rear doors. Chopping the old gutter was going to be tricky. It’s held on with dozens of spot welds and the metal underneath is badly corroded. In the end I just peeled it off with a pair of pliers – a bit like opening a can of corned beef, winding the old strip of metal around the pliers and popping off the spot welds one at a time.

Brutal but effective..

It’s cleaned up ok, so I should be able to plug weld the new panel onto the old spot welds but this it will need a good dose of seam sealer to keep the water out – hopefully it will keep the rust a bay for few more years. We will see.

All of this bare metal is a concern. It’s dry in the workshop – mostly, but there’s lot of humidity in the air which is causing the steel to flash rust just as soon as it’s exposed. ‘Thas roite hoomid’ as they say in Norfolk. All I can do is give the bare metal a wipe over with some phosphoric acid, this should keep the rust in check while I get the rest of the shell ready for painting.

Lastly, a couple of people wandered into the hack space part of the workshop for a look around, so I press-ganged them into helping me flip the shell up on end so that I can paint the underside. They obliged and left with a bemused look on their faces. ‘What was it?’ one of them asked – I think that just about sums it up.

no too shabby, but a fresh coat of paint will keep the rust at bay for a little longer

Ready for lift off! – acres of metal to rub down

I’ve still got many, many hours of rubbing down with emery paper to do, so I’ll get on with it, therefore there will be no blog updates for a few weeks. In the meantime, I’m going to try and rent a paint booth and then figure out how to move the shell and all its component panels to the place where the spraying will take place. There’s a place about 15 miles from the workshop which will rent me their paint booth facility for a day, so I’m going to need a trailer – or a big van to put my van in. I’m away on holiday for a couple of weeks in July so painting looks like it will be a job for mid or late August.

Wings – Just listen to what the man said

I’ve had a long tedious day driving up North – to Stafford. Actually it’s not really North from Norfolk, it more like West, North a bit and then a bit more west. I probably should have titled this post ‘Go West’ but try as I might, I just couldn’t weave in the new front wings I’ve just added to the list of new bits I’ve bought with a reference to the Pet Shop Boys. Perhaps someone could help me out of this lyrical impasse?

Anyway – the epic road trip, started off because I had to collect my daughter, Rose from Sheffield and as I’d tracked down some new front wings (sans indicator holes) at ECAS (who are in Stafford) I thought I’d combine the 2 trips into one. Sheffield is not too far from Stafford. I arrived at this conclusion by looking at a map of the UK and figured it would take about an hour or so extra to swing by Stafford on the way to Sheffield. It probably would only take an hour if I had an aeroplane or could drive over the Pennines at 90 miles per hours in the trusty Volvo-saurus….

The wings. The eagle eyed amongst you may have spotted that that my van has front indicators fitted. I had these put on when I bought the van – in the interests of safety, as I reckoned that no-one would see the lone 2 indicators mounted at the rear on the sides of the van body when viewed from the front. Actually this is less of a problem than I thought, as most other motorists are shocked and surprised to see such an old jalopy on the road, which looks like a Citroen 2cv (unusual) to which someone has backed into a garden shed (downright weird) – so they tend to give way regardless of what the indictors are indicating. I therefore don’t need front indicators, they weren’t fitted when the van was built in 1966, so I’m going to re-fit the correct period wings.

I picked up the new wings from ECAS in Stafford, plus a few other essential bits and bobs – and a few parts for Brian – a nice chap who has a very nice 2cv Dolly and swings by the workshop now and again to see how I’m getting on. With all of my stuff and his few bits in the back of the Volvo, there was not going to be a lot of room left for Rose’s accumulated University flotsam and jetsam. Mostly shoes and clothes, some houseplants, some pots and pans, books, a printer, a large suitcase (more shoes?) and ten or so Ikea bags of clothes and bedding, plus a few groceries. It took me 2 hours to drive across the Pennines in the driving rain to Sheffield from Stafford, where we stuffed everything in and headed back to Norwich. Like I said, it was a bit of a mission. I left at 7am and got back to Norwich at about 6pm.

Here’s one of the old wings. It’s really floppy compared with the new panels and as well as being dented and rusty, it has started to spit along the outside edge. I probably could salvage it, but just don’t have the time. Also it has had so many repairs on the inner wing and trailing edge that I think it’s time it went into the skip.

Wafer thin, crusty and split. Tricky to repair

I cleaned up the back of the van, so it’s mostly back to bare metal now and I spent a couple of hours stripping and cleaning the spare wheel panel and petrol tank cover. The tank cover is heavily corroded but still sound, so I think I’ll persevere with it. There are a couple of small holes in the spare wheel cover, which I will repair, but the rest of it is all good steel.

Petrol tank cover – it’s seen better days but there are no holes in it – apart from the one into which one pours petrol, which is supposed to be there
I quite like the hand painted number plate but I think it will have to be stripped back. The black factory primer which coated the rear door pillars came off really easily.

Back to the front wings – ‘Make sure you trial fit them before painting them’ was the parting shot from Roy at ECAS. ‘They are pattern parts, so you might need to adjust the mounting points to get them to fit properly’. Right – so having just removed the body from the chassis for the second time, I’m going to have to put it back together again so that I can fit the wings and make sure that the holes line up with the captive bolts which are welded to the front of the chassis, the sills and the firewall. Brilliant.

‘What are pattern parts?’ – well, these are parts made by manufacturers other than Citroen, using non Citroen tooling. I could buy Citroen tooled wings, but they are £350 each as opposed to £110 for the pattern parts. This is sizeable chunk of extra cash is more than I can afford to lavish on the van, so fettling and fiddling is what I will have to do.

I won’t be fitting the wings for a while as I have ton of other jobs to do beforehand. In the meantime, here’s a quick update from the weekly gathering at the pub (aka the Old Mans Memory Club) last Thursday:

Pete R has lost some weight since he joined the Fat Club, although he did put on a few pounds last week, overall he’s still down so won’t incur the full wrath of the pack leader.

Pete F (the other Pete) has had his peace shattered by the arrival of his daughter and 2 young children, who are residing with him temporarily. I expect this will result in him spending more time at the workshop with me – which is a good thing.

Steve has gout, which despite it’s music hall comedy value, thereby providing a rich seam of Henry V111 related jokes for us to tease him with, is very painful and stopping him from even thinking about starting on any of his car/motorcycle projects, so we all wish him a speedy recovery.

Chris said he was going to turn up this week but didn’t. To be honest, no-one noticed which will amuse him greatly when we tell him (if he ever shows up).

Don’t give up, I know you can make it good

Anyone reading this blog will understand what a mission it is to successfully tackle bodywork on the 2cv. Being a gung-ho sort of chap, I weighed in with my size 10 boots and with hindsight took on much more than I was initially capable of. Notwithstanding I don’t think anyone should be put off from at least having a go. Bodywork is difficult but it’s also expensive to have done at a bodyshop and goes a long way to explain why a car respray costs so much money.

Here are a few things I’ve learned from others and have discovered though trial and error.

Rust – your 2cv will be rusty. If you are lucky, you’ll be able to see it, which might sound perverse but as you are only the latest in probably a long line of previous owners, all sorts of shenanigans may have gone on before: covering up previous rust spots with expertly applied filler, pop riveted patches, aluminium backed foil tape, expanding foam, baked bean cans glued on with Araldite (Justin knows all about this…) – and all hidden under a nice shiny looking coat of paint or a thick coating of underseal. The worst offenders are those cars which have just been re-sprayed, so unless you look very hard for the very shallow dimples left by the original factory spot welder, lack of tell tale pinholes indicating the presence of the dreaded filler and check that there are still seams where some of the panels overlay each other, you can expect the worse. A good example is that if you see a line of rust between the floors and the toe board, the chances are that the dreaded rust has already taken hold and has eaten away at this double skinned panel from the inside. OK – it’s not all doom and gloom but don’t be fooled into thinking I’ll just tidy up that bit and the rest will be fine. This is what I thought when I started.

It is impossible to weld rust – I know this because I’ve tried, so don’t attempt to weld a nice new shiny bit of steel or a new repair panel that you’ve bought (or made) to an existing part of the car which is rusty. The best you can hope for is that some of the weld will stick for a short time to the rust and then pop apart again, but most of the time all the rusty stuff will just burn away. Sparks and spatters of hot metal will be the result. Your mig welding torch will cut through rusty metal like a hot knife through butter. You must keep cutting back until you get to sound metal before you start to weld. Then what you will then find is that your nice new repair panel is too small to fit into the hole it’s meant to occupy. – if this happens, see ‘new panels’ below

New panels – even of your budget is tight, it is much more economical in the end to replace 2 or 3 panels instead of just one. It will be easier to weld new panels together, they will fit better and – if you have chopped back to good metal, you will have something sound to weld them to. There’s some very good advice regarding repair panels on the parts suppliers websites (eg ECAS) – better still, ring them up and have a chat with them. They are not in the business of selling you something you don’t need but they do know, for example, that if you ask for a floor repair panel, the odds are that the toe board will also be shot and will also need to be replaced. They will tell you this – send them pictures of your rusty bits and take their advice.

Plug welding – this is is your friend. 2cv’s were largely spot welded at the factory. There are very few, if any factory made seam welds on a 2cv – and most of what looks like a seam weld is probably brazed or just been filled with seam sealer. Unless you can afford £600 to buy a spot welder or can borrow one for your restoration, treat yourself to a joddler / hole punch tool (about £50 will get you a good one) and where you need to replicate a spot weld, punch a hole in the top panel, clamp it up and hit the area with the mig welder. Work from the edge of the hole in the top panel, towards the middle until you have build up a small, round mound of weld pool. You’re aiming to melt the weld pool into the bottom piece of steel, penetrating this enough to get the weld to melt into the steel and at the same time melt into the edges around the hole in the top panel.

Seam Welding – very, very, very difficult on the ultra thin metal that your 2cv is made out of, unless you can turn your welder right down to 35 amps and you are using 0.6ml welding wire. Even then it’s easy to get carried away and run a nice bead of weld, only to find your panels have gone banana shaped because you have put too much heat into them. Seam weld only if you are capable of doing it in short sections and are willing to take the time to join up the short lengths when the work has cooled off.

Clamps – you can’t have too many clamps. I’m sure I’ve said this before. Get some small ‘C’ clamps – these have small jaws and are great for gripping together edges of panels where the flanges are small. Get some clamps with long nosed jaws – they are much better for getting into tight spaces. One or 2 large (1o inch) ‘C’ clamps will get you into awkward spaces – such as the inside of box sections. If you can’t clamp it, drill a hole through both bits of steel that you are planning to plug weld and use a pop rivet or self tapping screw to hold them in place, ready for welding. Drill out the pop rivets when you are done and fill the holes with a bit of weld, otherwise the MOT inspector will think you’ve pop riveted your car together and fail or condemn it – this will ruin your day. You must clamp panels together tightly (no gaps) before attempting to weld them together. If there are any gaps around the punched hole and the panel underneath then your plug weld will not work. You will either burn a hole through the bottom panel – or your nice new plug weld will pop apart overnight and you will have to unpick all your good work and start again. I use a small metal punch with a flat tip – about 3ml in diameter with a small hammer to tap the edges of the punched hole until they are butted up tight to the bottom panel. A squirt of weld through primer on the inside of both sides of the metal to be joined, prior to clamping them together, will help the weld to penetrate.

When things go wrong – if this happens when your are welding, walk away or do something else for a bit. It’s easy to keep piling on the weld in the belief that it will work in the end. It won’t and you’ll spend a huge amount of time grinding it all off again – only to find that your weld hasn’t welded at all. This will irritate you.

Get the right kit – purchase or borrow an ‘auto darkening’ mask and use a nice bright LED light to illuminate the work before you hit it with the MIG torch. You can’t start a weld in the dark and expect it to all come good when the arc is struck and you see the weld pool for the first time. The chances are you will have missed your target and will just deposit a nice new blob of weld in the wrong place which you will have to grind off again.

Flap disks – use these to tidy up your welds. 60 or 80 grit are fine. Turn your angle grinder down to speed 3 and work slowly and carefully. Grind the weld down until it is flush with the surrounding metal but no further. It’s all too easy to keep grinding down until it’s all nicely blended in and then to find out that the metal around your nice new weld is the now the same thickness as tinfoil and just about as strong as rice pudding skin.

Unpicking old panels apart – do this whenever you can. Get a spot weld drill bit kit – they cost about £30 and will save you hours of frustrating work with a hammer and cold chisel. Drilling out spot welds will cause minimum damage to any panels that you need to salvage. On my van, I drilled through with the spot weld bit until the metal swarf turned from shiny steel to a rusty colour – this indicates when you have hit the top of the panel under the spot weld. Stop here and use a pair of pliers / cold chisel and hammer to carefully prise the work apart. Clean up the old spot weld with the flap disk. When plug welding to a previously spot welded panel, try to line up your holes with the old spot welds. The steel here will be harder and thicker than the rest of the panel and your plug weld will be easier to make. I used masking tape to mark the spots and then transferred it to the panel that would be hole punched.

Brace it – get a few lengths of 1/2 inch box section steel from your local steel supplier. I bought 12 metres of it for about £10. Before you cut out any major panels, such as floors, sills or door posts, weld in a few lengths of box section across the A, B and C posts to brace the shell. This will stop it flopping about when you cut out the old metal and ensure that when you are done, the geometry will be the same as it was before you started. The box section only needs to be tacked into place and can easily be removed later. When welding in new floors and sills, do this when the body is bolted to the chassis, or make a jig to replicate the chassis. Drill holes in the jig that match where they are on the chassis and bolt the jig to the body before you start replacing these panels. If you don’t, your van or car won’t go back together again, the doors won’t fit and you will be deeply depressed as the realisation that you are going to have to start again slowly dawns on you…

Do one thing at a time – this works for me, I like to focus on one area of repair and finish it before I move on to the next. This way, you can leave the shed, garage or workshop after a few hours of work and feel like you’ve achieved something.

Tidy up – when you’ve finished a session in the workshop, sweep up all the bits of rust, beer cans and other detritus you’ve created during your task and again – it will feel like you’ve done more than you actually have. This will boost your morale and you’ll keep up a semblance of enthusiasm for your project. Losing the will to live part way through a restoration is not uncommon, there are so many ‘unfinished projects’ scattered all over the country, some end up on eBay, others are just scrapped. It might seem hard to keep at it sometimes but you must persevere if you are to stand any chance of finishing. I still have a long way to go and am at possibly the most tedious and yet critical stage which is preparation for paint, so I’m in the danger zone.

I’ll do a bit more of a write up about paint later.

Rust Spiders from Mars

I’m running out of puns, I’m sure which will be a huge relief to most readers of this blog. Anyway, as the title suggests I have found some nasty bits under the paint. Lots of paint stripper and hours with a wire brush has revealed horrors under the many layer of paint. Ok – it’s not all bad and given that the van is 43 years old and spent most of it’s life under the blistering heat of Aix-en-Provence and it’s no surprise that the paint -(especially the roof) had become thin and porous – or just flaked off, leaving the bare steel exposed to the elements.

Here’s shot of the roof plastered with paint stripper and wrapped in cling film. The idea behind the cling film is that it excludes the air and stops the stripper from drying out

Paint stripper doing its thing – marginally more interesting than watching paint dry

And here is what’s under the paint

It’s a messy business – this car stripping lark

it took a few more applications of stripper to remove the 5 coat of paint and with a bit of wire brush work here’s the result.

Rust spiders – these probably started off as stone chips and water has worked its way under the paint, leaving little trails of rust in its wake. The corrugated part of the roof is in much worse shape, with scabby bits of rust all over. There’s deep pitting where the corrosion has eaten into the thin steel.

Bare steel – except where it’s rusty…

What to do? I could spend hours trying to grind out the rust but there will be very little steel left – which I would have to make good with filler. Or I can treat the rust with phosphoric acid, which will stabilise it. The whole roof will still be pock marked but actually I think it will be fine. I don’t want to hide any defects, it’s only an old French van and all those imperfections are part of its character (dare I say patina?). With the rust treatment, a coat of etch primer, couple of coats of poly / epoxy primer and the colour coat should keep the rust in check for a few more years yet – so that’s the plan.

Here are a few more shots of the stripping process. Sorry it’s a bit dull, but then this is going to be the most tedious bit of the restoration.

Is that a bit of Bleu Neve I see?
The original sign writing is too far gone to rescue – but I have a set of templates so I can recreate it after it’s been sprayed
‘Scabtastic’ – the cataphoric black primer was easy to strip off the new rear pillar – if only the rest was that easy!

In other good news, I’ve managed to track down a new pair of front wings – without indicator holes, as originally fitted to the AK350. I like to keep people guessing, especially on roundabouts, so having no front indicators won’t be a problem – not for me anyway.

Blast it!

Behold, the back of the van with the new rear pillars fitted – and the doors which fit perfectly – or at least as well, if not better than they did before I started chopping the body about. This is a huge relief. I’ve just got to fiddle in a section of the bottom rail which I had to cut out in order to fit the left hand door pillar, which should be as straightforward as the right hand side which you can see in its respondent shade of weld through copper primer.

The bottom of the doors will need a bit of attention with the hammer and dolly – there’s a bit of tidying up to do where the previous repairs were done but hey! its a van
The top of the rear doors – nicely aligned. I’m going to replace the drip rail as I’ve lost a bit from each side (still attached to the old side pillars) and the rest of it is too friable to repair.

Anyway – the main subject of this post is all about paint removal. I need to prepare the van for paint and since so much of the front, floor, sills, bulkhead, rear wings, rear pillars (and soon to be purchased new front wings) is new metal, I’ll need to etch prime these bits before I can epoxy prime the body prior to putting the top colour coat on. And – because etch primer will bury into the edge of any existing paint and lift it up, I’ll need get the whole shell, doors, bonnet, petrol tank and spare wheel panel back to bare metal first. Soda blasting would seem the most effective way of doing this. Soda as opposed to grit (sand) or any other aggressive media, because it (a) won’t blow holes in the incredibly thin metal (0.8ml steel) and (b) will not introduce heat into the metal and buckle it to buggery.

I got in touch with ‘Dan the blaster’ – a local expert in the art of car shell preparation, who works on Ferrari, Porsche, Rolls and all manner of classic cars. He let me down gently – explaining that he could strip my van and that there were two possible outcomes. The first was that he could do it quickly, and therefore reasonably economically but there was a very good chance that there would be very little van left at the end of the process – or secondly, that he could do it slowly and carefully but that this would take at least 2 days of his time and would cost around £2,000. Did I mention that he works on Ferrari’s and Porsche’s? Yes – these cars are stripped by him and are then typically treated to a £10,000 paint job. ‘What are my options?’ I asked… Cue sharp intake of breath – ‘You can get it dipped, but you’ll end up with stuff running out of all the seams which will ruin your paint job, or you could take it to a cowboy sandblaster and sweep up the remains into a couple of bin bags..’ and so it went on. I could use a DA sander, he suggested, but this would make an awful dusty mess and will put heat into the metal, which will distort it – or you could hand strip it with paint stripper and remove any residue with 120 grit paper, then finish off with 240 grit.

Hand stripping it is then. Recent EU legislation decreed that paint stripper can no longer contain methylene dichloride – this was the active ingredient in the old Nitromors paint stripper. It’s horrible stuff, bad for the environment and bad for ones health. The new paint strippers are much less effective, but are also safer and less harmful to the environment, so this is the way to go. Armed with a bottle of Wickes Paint Stripper and some cling film, I plastered a 2 ft wide section of the roof with stripper and wrapped it with cling film and left it overnight to do its work. Here are the results.

The top coat of household paint came off in one big sheet – deeply satisfying.
all wrapped up in cling film – letting the stripper do its magic

The top coat of Farrow and Ball French Grey has peeled away, leaving the next coat of brush painted silver paint more or less intact. Underneath this silver coat are the original cellulose top coats and under this is the original primer. It will take a few more applications to get through this lot, so I’m in it for the long game. Paint on the stripper, cover with clingy, remove a single coat or two and repeat until I get to bare metal. It will cost a few quid in paint stripper and will take a few days of effort but it will be worth it it the end. Next steps? After stripping, I’ll take the body off the chassis again, paint the underside with Hammerite or POR 15, weld on the new rear wings, weld in the front door hinge brackets and fit the doors, paint the chassis, strip and repaint everything (body and all associated panels with etch primer, ready for the epoxy primer and top coat. Then put back everything I originally removed, replace the clutch, fit my Michelin Man lorry mascot, put the windows back in, sort out the wheels, bumpers and headlight bowls etc. etc. So much to do. I’ve got bags of bits all over the place and a wiring loom which looks like a partially unravelled birds nest – ho hum..

There’s lots of surface rust underneath the paint on the bonnet. This will need to be cleaned off and treated with chemical rust converter before priming.

Back Doors – riding on a storm

I spent a couple of days in the workshop chopping out the other rear door pillar and fitting the new panel to the left hand side. I had a wobbly moment when trial fitting the rear doors – I just could not get them to fit – ie meet in the middle. The only way I could get an acceptable fit was to jack up the right side of the body 1 inch higher than the left side. Doing this and then welding up the back of the body shell would probably result in that 1 inch gap appearing between the back of the body and the rear chassis leg. A bodge would be needed to fill the gap and that’s not what I want

With the body off the chassis, replacing the pillars was bound to be challenging, if not impossible. So, I had to enlist the help of sons Bill and George to help me lift the body off the tables and fit it back onto the chassis. The theory being that if I bolt it all down to the chassis then I’ll be able to fettle the the rear door posts, line everything up and adjust it, then weld them into place. once welded, I can take the body off again and clean it up, ready for paint.

I’d built up the front of the van (floors, sills, bulhead, a-panels, screen surround and toe board on the jig that I made to replicate the chassis. I can’t say I was entirely happy about this approach as all the experts say that body repairs must be undertaken with the body fitted to the chassis, otherwise nothing will line up. I didn’t make the jig to run to the back of the van because, well.. because I couldn’t be bothered. Anyway, the jig worked a treat and all the holes lined up perfectly at the front and at the back. With the body firmly bolted into place – all the way to the back of the van, I tried the doors again. They fit! Well, they fit when everything is firmly clamped together and with a bit of fiddling, I was happy to commit and start welding it all back together again. I think the body is a bit out of shape at the back. The van has had a big clout at the offside rear corner and some point in its life, evident by some ripples in the inner rear wings and a slightly bent B post, so it’s a pig in a poke. Never mind, I can’t make it perfect, so I’ll have to do the bast I can and live with it.

Here’s a shot of the old nearside rear door pillar. I cut it out with a 1ml cutting disk on the angle grinder and unpicked all of the old spot welds

The bottom section of this panel has had a repair panel let it – sandwiched over the remains of the old panel and while it’s strong and sound, it looks a bit dented and shabby

The following pictures tell the story. It was just a matter of clamping, adjusting, welding and dressing with the flap disk to get the new panel in place.

Rear pillar cut out, leaving a very floppy structure!
I made a small flange to join the inside of the rear pilar to the rear of the inner wing
You can’t have too many clamps. I had to make a new piece to replace the rotten rear section of the inner wing. This was plug welded and will be seam welded later

Door and pillar fitted. I had to use a ratchet strap to pull it tight up to the edge of the inner wing
Top tip – I used masking tape to record the exact location of the rear pillar during the trial fit. Then I removed the panel, punched holes in the flange, ready for welding and then clamped it back, lining up the marks
All plug welded and ground down, ready for the edge to be peened over the join
Here you can see the 1/4 inch of the van side, still with it’s original fold mark, which I folded over to cover the welds on the inside edge.

What’s next? I’m going to try and get the shell soda blasted. It it’s prohibitively expensive (I reckon at leat £400), then I’ll have a go with paint stripper – although I expect stripping the shell by hand will be a horribly messy and slow process…

Pain….t

I’m suffering from withdrawal symptoms, having not been to the workshop for a ‘poke about’ for a few days, because I’ve got a frozen shoulder. Not a shoulder of Lamb, but my own shoulder has frozen, probably from welding upside down and stretching too far, so I’ve taken an enforced break. Anyway, my thoughts are turning to paint – or re-paint to be precise. The two previous owners of the van had their own solutions to the traditional methods of vehicle painting. The first was to use a thinnish coat of silver paint, applied with a brush. This looks like it might have been a base coat of metallic silver – sans lacquer and actually looks very good and quite period. I think I could have lived with this and with a bit of flatting off and a couple of coats of clear, it would have left the van looking like a used, well worn but well preserved example. Furthermore they had masked off the original signwriting, so as to preserve some of the patina. The sign said:

  • Bernard Merli – Ebeniste
  • Chemain De La Soux
  • Aix en Provence + telephone number (I can’t recall the exact numbers)

Anyway, the next owner neither liked the silvery finish, nor did they appreciate the original signage, so they obliterated all with a tin of Farrow and Ball ‘French Grey’ – applied with a brush again and quite liberally to boot. Underneath these coats of paint is the original (or what is left of it) factory paint. Bleu Neve code 609 which translates to French Navy Blue. I tried stripping off the French Grey from the sign-painted panels, with limited success and I think I’m resigned to re-painting the whole van in the correct colour and then re-instating the sign writing.  Luckily I managed to find a full set of metal letter templates in a very French looking typeface, which are about the right size, so I’ll be able to recreate the sign writing without too much bother.

So – the question is, what paint should I use and how to apply it. The choices as I see are:

1.Cellulose paint and thinners – actually this has been outlawed as environmentally unsound, but can be used on classic cars. I have painted with this before and it’s quite forgiving in that a poor finish can be cut back (wet sanded) and polished. The downside is that all that buffing and polishing takes time and removes most of the applied paint.

2. Modern Auto paint. This is water based and is a two pack system. It is toxic to breathe in and one has to have an air fed mask and all sorts of heath and safety precautions have to be taken when spraying it. It needs to be ‘cured’ in an oven as well. All modern cars are painted using this system – primer, top coat and lacquer to give it a shine and protect the paint from the elements.

3. Synthetic Auto paint – AKA tractor paint.. Nothing too fancy about this, but it can be mixed to match any colour and should be relatively easy to apply.

After a chat with the Auto paint suppliers nearby, they have recommended the following ‘system’ using Synthetic paint.

First, strip the outside shell of all existing paint, down to the bare metal. Then, fill in and flatten off all defects with filler and sand smooth. Next, apply a coat of Etch Primer. This is a 2 pack paint, which is a bit toxic, so I’ll be doing this bit outside. Next, I have to apply 2 coats of synthetic primer, which is mixed with 10% ‘thinners’ . I’m guessing it’s some sort of polyurethane paint which can be sanded flat, ready for the top coat(s). The top coat is the same synthetic paint which comes in 2 finishes, Satin and Gloss. Now here’s the thing: I don’t want to use a load of filler on the van. It never looks right and because the panels are so thin and flexible, it will at best crack and at worst, fall out in chunks. So, my bare metal surface is not going to be free of dings, dents and the odd ripply bit – and if I paint it with a highly glossy paint, every one of it’s many carbuncles and warts will stand out like sore thumbs. Nor do I want a ‘satin’ finish – it will just look like its been badly painted (which no doubt it will be), so the guys at the body shop suggested a compromise – 50% satin and 50% gloss. 

This ‘special’ paint can be applied with a brush, a sponge roller or sprayed. I’ll spray the outside, but the inside (also brush painted silver currently) will not get the bare metal treatment as it will take too long and will be an enormous ball ache of a job for very little reward. The front floors, bulkhead, sills and toe board are all new metal and will be sprayed inside and out, so it’s just inside the back of the van, roof and sides that will probably end up being brush painted again – and then only if there’s enough paint to go round. 

So, It remains to be seen what it will turn out like. If it looks horrible, I’ll have to deal with it. If it works as I hope it will, the van will look like it’s been around the block a bit. It won’t look too over restored, but then again it won’t have much in the way of original patina. A compromise then. More about paint later – after I sort out the rear door pillars and rest of the rear body. Will it ever be finished…?

Here’s a bit of work I did on the rear right pillar. I had the van on it’s side when I cut out the old panel, which with hindsight was a bit of a mistake. Imagine a cardboard box with both ends open, sitting on its side – now place a tin of beans or fruit cocktail on it – and watch it turn into a parallelogram. This is what happened to the van. The new panel would not fit and I had to flip the body the ‘right’ way up, clamp the new panel in place, re-fit the rear doors (to check the alignment of said new panel), re-clamp the panel, remove the doors, mark it’s position with a sharpie…. you get the picture. I chopped out some more rust where the door panel meets the rear inner wing and replaced it with a new fillet of steel.

That bit by the can of weld through primer looks horrid but it’s actually very sound – just dented. The new strip is clamped up, hole punched and ready to be welded
most of this is hidden, so I don’t need to dress the welds perfectly
New panel in place

One new reap panel in place. I’ve peened over the right hand edge – to fold over the side of the van and make a nice join between it and door pillar.

part-was through folding over the edge to to cover the plug welds. I spent another hour dressing it with a hammer and dolly and it looks ‘pukka’ now

That’s it for now, I’m off to Bearded Theory in Derbyshire (music festival) for a well earned rest tomorrow, so no more updates for a week or two.

Rear Door Pillars

I’ve done what I can to get the front door hinge plates in the right place and have twisted the top of the drivers door frame, so that it fits nicely in its frame now – or at least it’s much better than it was. Any more fiddling with it will invoke the law of diminishing returns, so I’m going to leave it for now and have a look at the rear door pillars. At some point in the past, the van has had a clout in the offside rear corner, which has been repaired by letting in a new section at the bottom where the rear light fitting is located. However, above this, the metal has been bashed about and has stretched too much for me to reshape. I do have a shrinking hammer but access is limited and I’m not sure I have the metalwork skills to put it right – and as I acquired a pair of replacement door pillar panels, now seems like a good time to sort it out.

Here’s picture of the offside pillar. You can see where I started to peel away the previous repair, just above the hole and to the left of where the rear light fitting goes. Below the light hole, another section has been let in. If I replace the whole panel I can sort this out at the same time.

The body is still on its side – at the bottom you can see where I’ve started to unpick the door pillar from the rear crossmember. Note, the ‘Farrow and Ball French Grey’ has not stuck well to the zinc coated crossmember. This will need stripping and etch priming before painting again

The edge of the van sides have been folded over to grip the edge of the door pillars – this is quite a neat way of closing the edge. Cutting out the pillar panel has presented me with 2 options. grind down what’s left and weld the new panel to edge of the old panel which is still spot welded – or unpick the spot welds, bend back the flange, weld in the new panel and fold the edge over again. A bit more investigation and I think I can replicate the original fitment – or I could be making a lot of extra work for myself.

The chisel is resting on the closed over flange
Close up, you can just see the edge which is folded over

I drilled out a couple of the original spot welds and had a look

Teasing open the flange. I then pulled out the sliver of old panel

Below is where the new panel will tuck into the edge, which can then be folded over again

Not too bad but the metal is pretty thin, so plug welding the new panel to it might be challenging
This is the rear door drip rail – I’m going to need a new one of these

I decided to call it a day and have a think about how best to proceed while I watch the snooker final….

The Doors

I’ve spent a couple of sessions in the workshop fiddling with the doors – or to be more precise, the drivers door. As mentioned in previous posts, the doors have never fitted very well and because I braced the shell before I chopped all the panels out and replaced them, everything is as it was before – and the doors don’t fit any better than they did before I started, if anything the fit is worse than it was before.

Being an upbeat sort of chap, I made a plan. No amount of hinge packing would make up the discrepancy and I’m either left with a large gap at the bottom of the door (at the front) or the top of the frame at the rear. I could (and probably will have to) give the door a bit of a ‘heave ho’ to twist it into shape. Anyway, before this I thought it would be best to flip the body on its side, lay the door into the opening and then adjust the hinges to fit. Brilliant…

on its side – easy peasy

Looking up through the passenger door opening (this is a left hand drive van) here’s the door sitting in its aperture as viewed from underneath

Note the large ‘Air gap’s at the bottom – not good

With the hinges in place, there’s clearly something amis. No amount of packing with the flat packing pieces is going to make up the wedge shaped gap between the flat faces of the door and the hinges. So, I’m either going to have to make up a ‘wedge’ of steel to bridge the gap – or bend the hinges into shape. More on this later, because the act of flipping the shell onto its side has exposed the underbelly of the beast, which needs a bit of attention. Here’s what it looks like from a distance – not too shabby… N’est-ce pas?

New floors, sills and toe board from underneath on the left and to the right, the original ‘van’ part of the body

On closer inspection, you can see a bit of crustiness on the front crossmember – at the top of the picture. Close up – there’s a hole.

I cleaned it up with the wire brush on the angle grinder (an unforgiving tool) and the hole became larger.

I chopped out the rust with the cutting disk on the grinder and was left with a neat hole, 6 inches by 1 inch wide, into which I placed a patch of 3ml steel, held in place with a magnet, which enabled me to weld the edges..

A bit of tidying up with the flap wheel and and a dusting of primer – and it’s looking much better. I’ll put a bit of seam sealer over the weld before I paint it later. This part of the crossmember needs to be strong as it the jacking point is fixed to the end of it.

Actually, sorting this small bit of corrosion out has offset the door / hinge issues nicely and I was quite happy to leave it at that for the day. More on the hinges in the next post. There’s a forge and anvil at the workshop, so I’m going to have a go at re-shaping the hinges (opening them out a bit), to see if that helps solve the problem. The doors are not the original van doors, when I took the door cards off, they are painted red inside and are off a much later 2CV saloon. Perhaps the dimensions of the AK350 doors is different to later models – someone might know, but not me.