The workshop
The workshop I am renting is freezing cold. This is less of a problem than the sparse fluorescent lights which just make the place look downright depressing. Grey concrete, grey lights, grey van. On the plus side, one of the other chaps is doing up a VW Camper van and has created a hack space with all manner of tools and equipment in it, some of which I can use / borrow on the understanding that I contribute some of my time to teaching others how to weld and make some of my equipment available, should anyone need it. The hack space has everything I have and a lot more besides, so this is a good deal. I now have access to a monster compressor, TIG welder, metal chop saw and drill press. We don’t have a sheet metal folder or press cutter. I reckon I can make a metal folder (out of metal) or get someone to make it for the hack space if I supply the steel and /or pecuniary enticement.
As far as the van is concerned

I have removed everything I can from the body. Some interesting points to note: The wiring is all the same colour (green) but is identified by different coloured end plugs and corresponding sockets. These are either brown, black, green blue or yellow. In the main, the socket colour is the same as the plug, but not always, so I’ve had to label everything. Actually I didn’t label anything that looked to have an unambiguous home or it was obvious where it should go. No doubt this will cause me huge problems when I come to put it all back together…
The front wings are held on by 3 large nuts – I get the feeling that that in an accident they would sacrifice themselves by crumpling up and detaching rather than damage anything
The rear wings would have originally been welded to the body, but somewhere in the past, they have been removed, repaired and put back on with dozens of tiny set screws and nuts, most of which sheared off when I tried to undo them
Doors – only held on by 4 bolts each
Rear doors – held on by the same tiny nuts and bolts as the wings
Bonnet, petrol tank and spare wheel cover just slide off their hinges
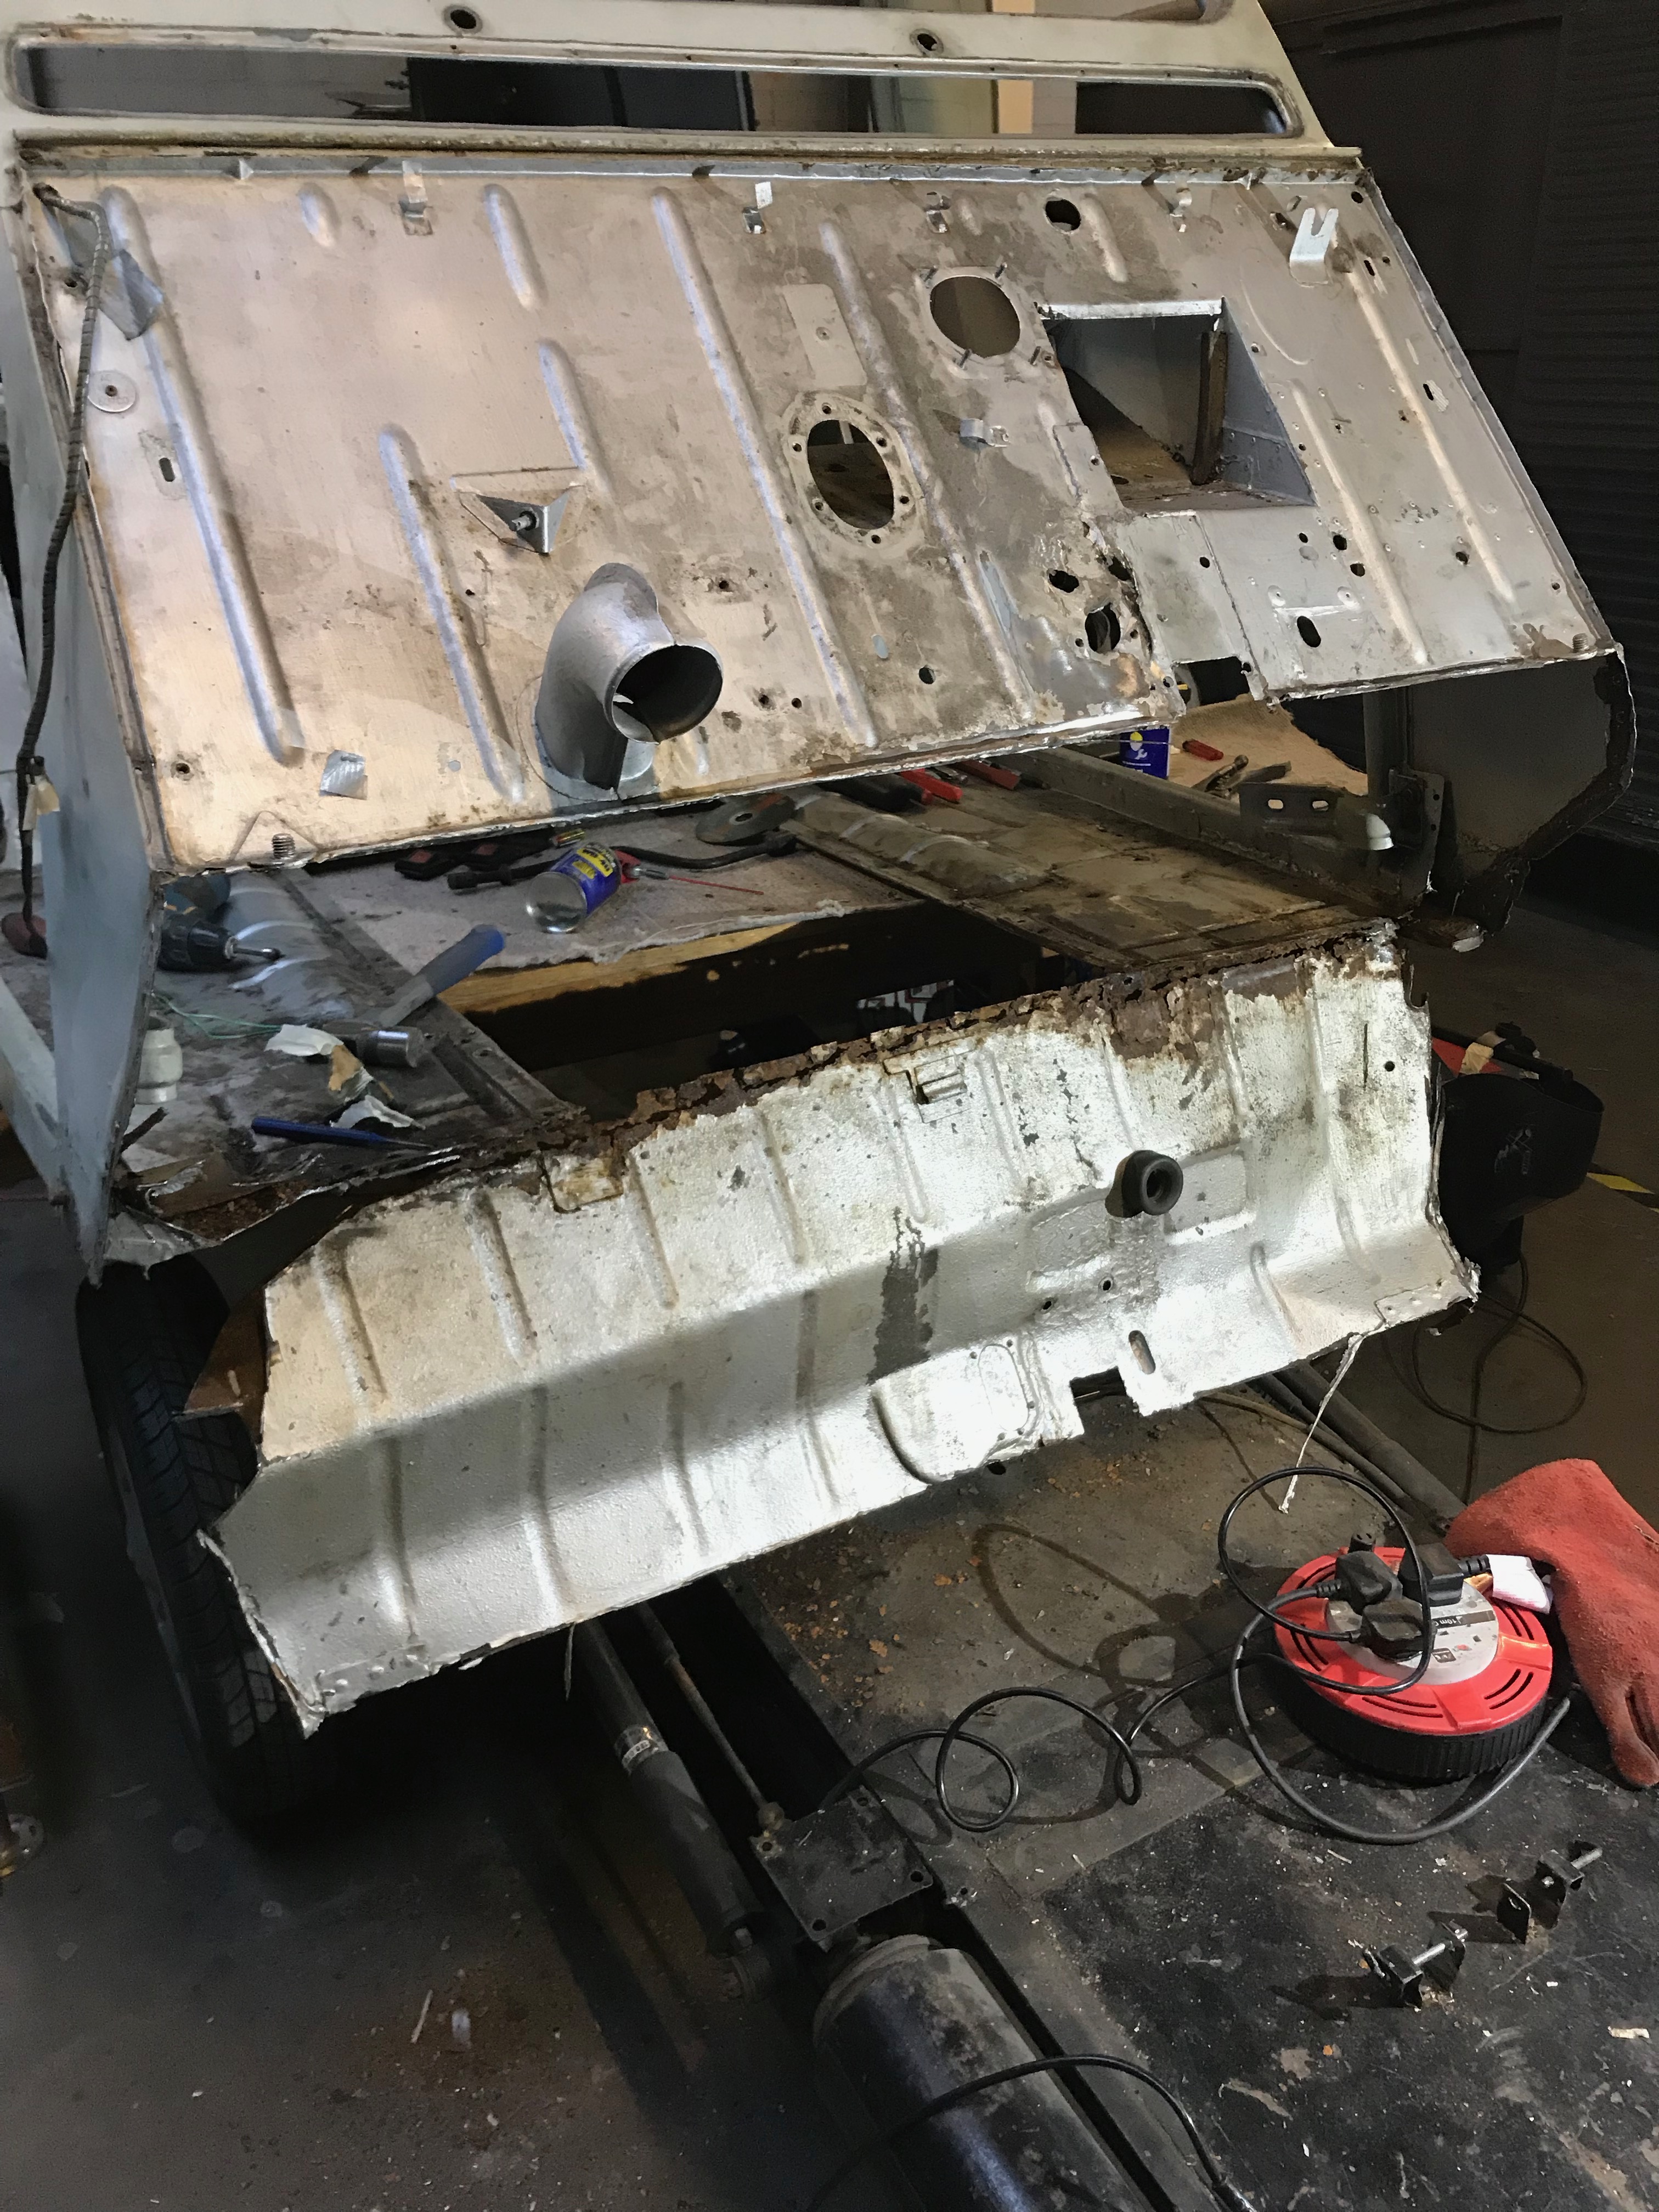
With everything that can be unbolted out of the way, I’m left with a naked shell. I didn’t have a workshop manual (I do have one somewhere but I can’t find it) but luckily, my sister bought me an Airfix kit of the same van for Christmas, which is uncannily accurate in detail and construction so I was able to use this for reference. After I’d done all of this, I ordered a ‘How to Restore a 2cv’ book from Amazon at great expense (£50) and whilst I waited for it to arrive, I found a copy in the library – which was irritating. It must be a man thing. Similar to when I decorate the house, I start off by painting in the clothes I have on at the time and only change into old clothes when I’ve got paint on my best clothes. I’m never short of old clothes, because everything nice I own has been ruined. Because I am convinced at the outset that I can paint without getting any on me, this is an ongoing and expensive problem.
I think my original workshop manual ended up in the charity shop over the road after one of Julia’s clearout sessions. Normally I would have found it when browsing for some other rubbish and simply bought it again – coming home and announcing to Julia – ‘look what I found in the Charity shop – I used to have one just like this, what a stroke of luck’. However it’s not there, so there must be someone else in Norwich who’s restoring a 2CV. I wonder how they are getting on?
Back to the van – nuts and bolts
One of the other quirks of the Citroen 2CV is the use of odd sized nuts and bolts. M7 is one of these oddities. I challenge anyone to try and find M7 nuts and bolts in any DIY store, builders merchants, nut and bolt specialists – in fact anyone bar Citroen themselves. ‘They don’t exist’ is a common response. Well I can tell you that they do. 16ml is another odd size – how many socket and spanner sets have 16ml included? None. Why then, did Andre and his friends choose to use 20 or so M7 set screws to hold the body onto the chassis for the 2CV? We will never know.
I was expecting the body to chassis bolts to be properly rusted in and had all sorts of thoughts about cutting them off with the angle grinder, hacksaw, drilling and re-tapping. However, they all came out easily except three, which were holding the bulkhead and front of the floors to the chassis. These simply remained screwed to the chassis as the 3 layers of friable crusty steel around them broke away like puff pastry. With all of these out, the only thing holding the body on was the brake master cylinder. Mr Haynes says ‘undo the brake pipes, 6 carrier bolts, fluid reservoir, pedal assembly and simply withdraw the master cylinder through the bulkhead into the car. I couldn’t. The previous owner had at some point decided that 6 M8 nuts and bolts were not sufficient to hold the master cylinder carrier onto the bulkhead and had also welded it in place. I cut it out with the angle grinder and spent an hour cleaning off the welds rather than pay out £45 for a new carrier. Deeply satisfying.


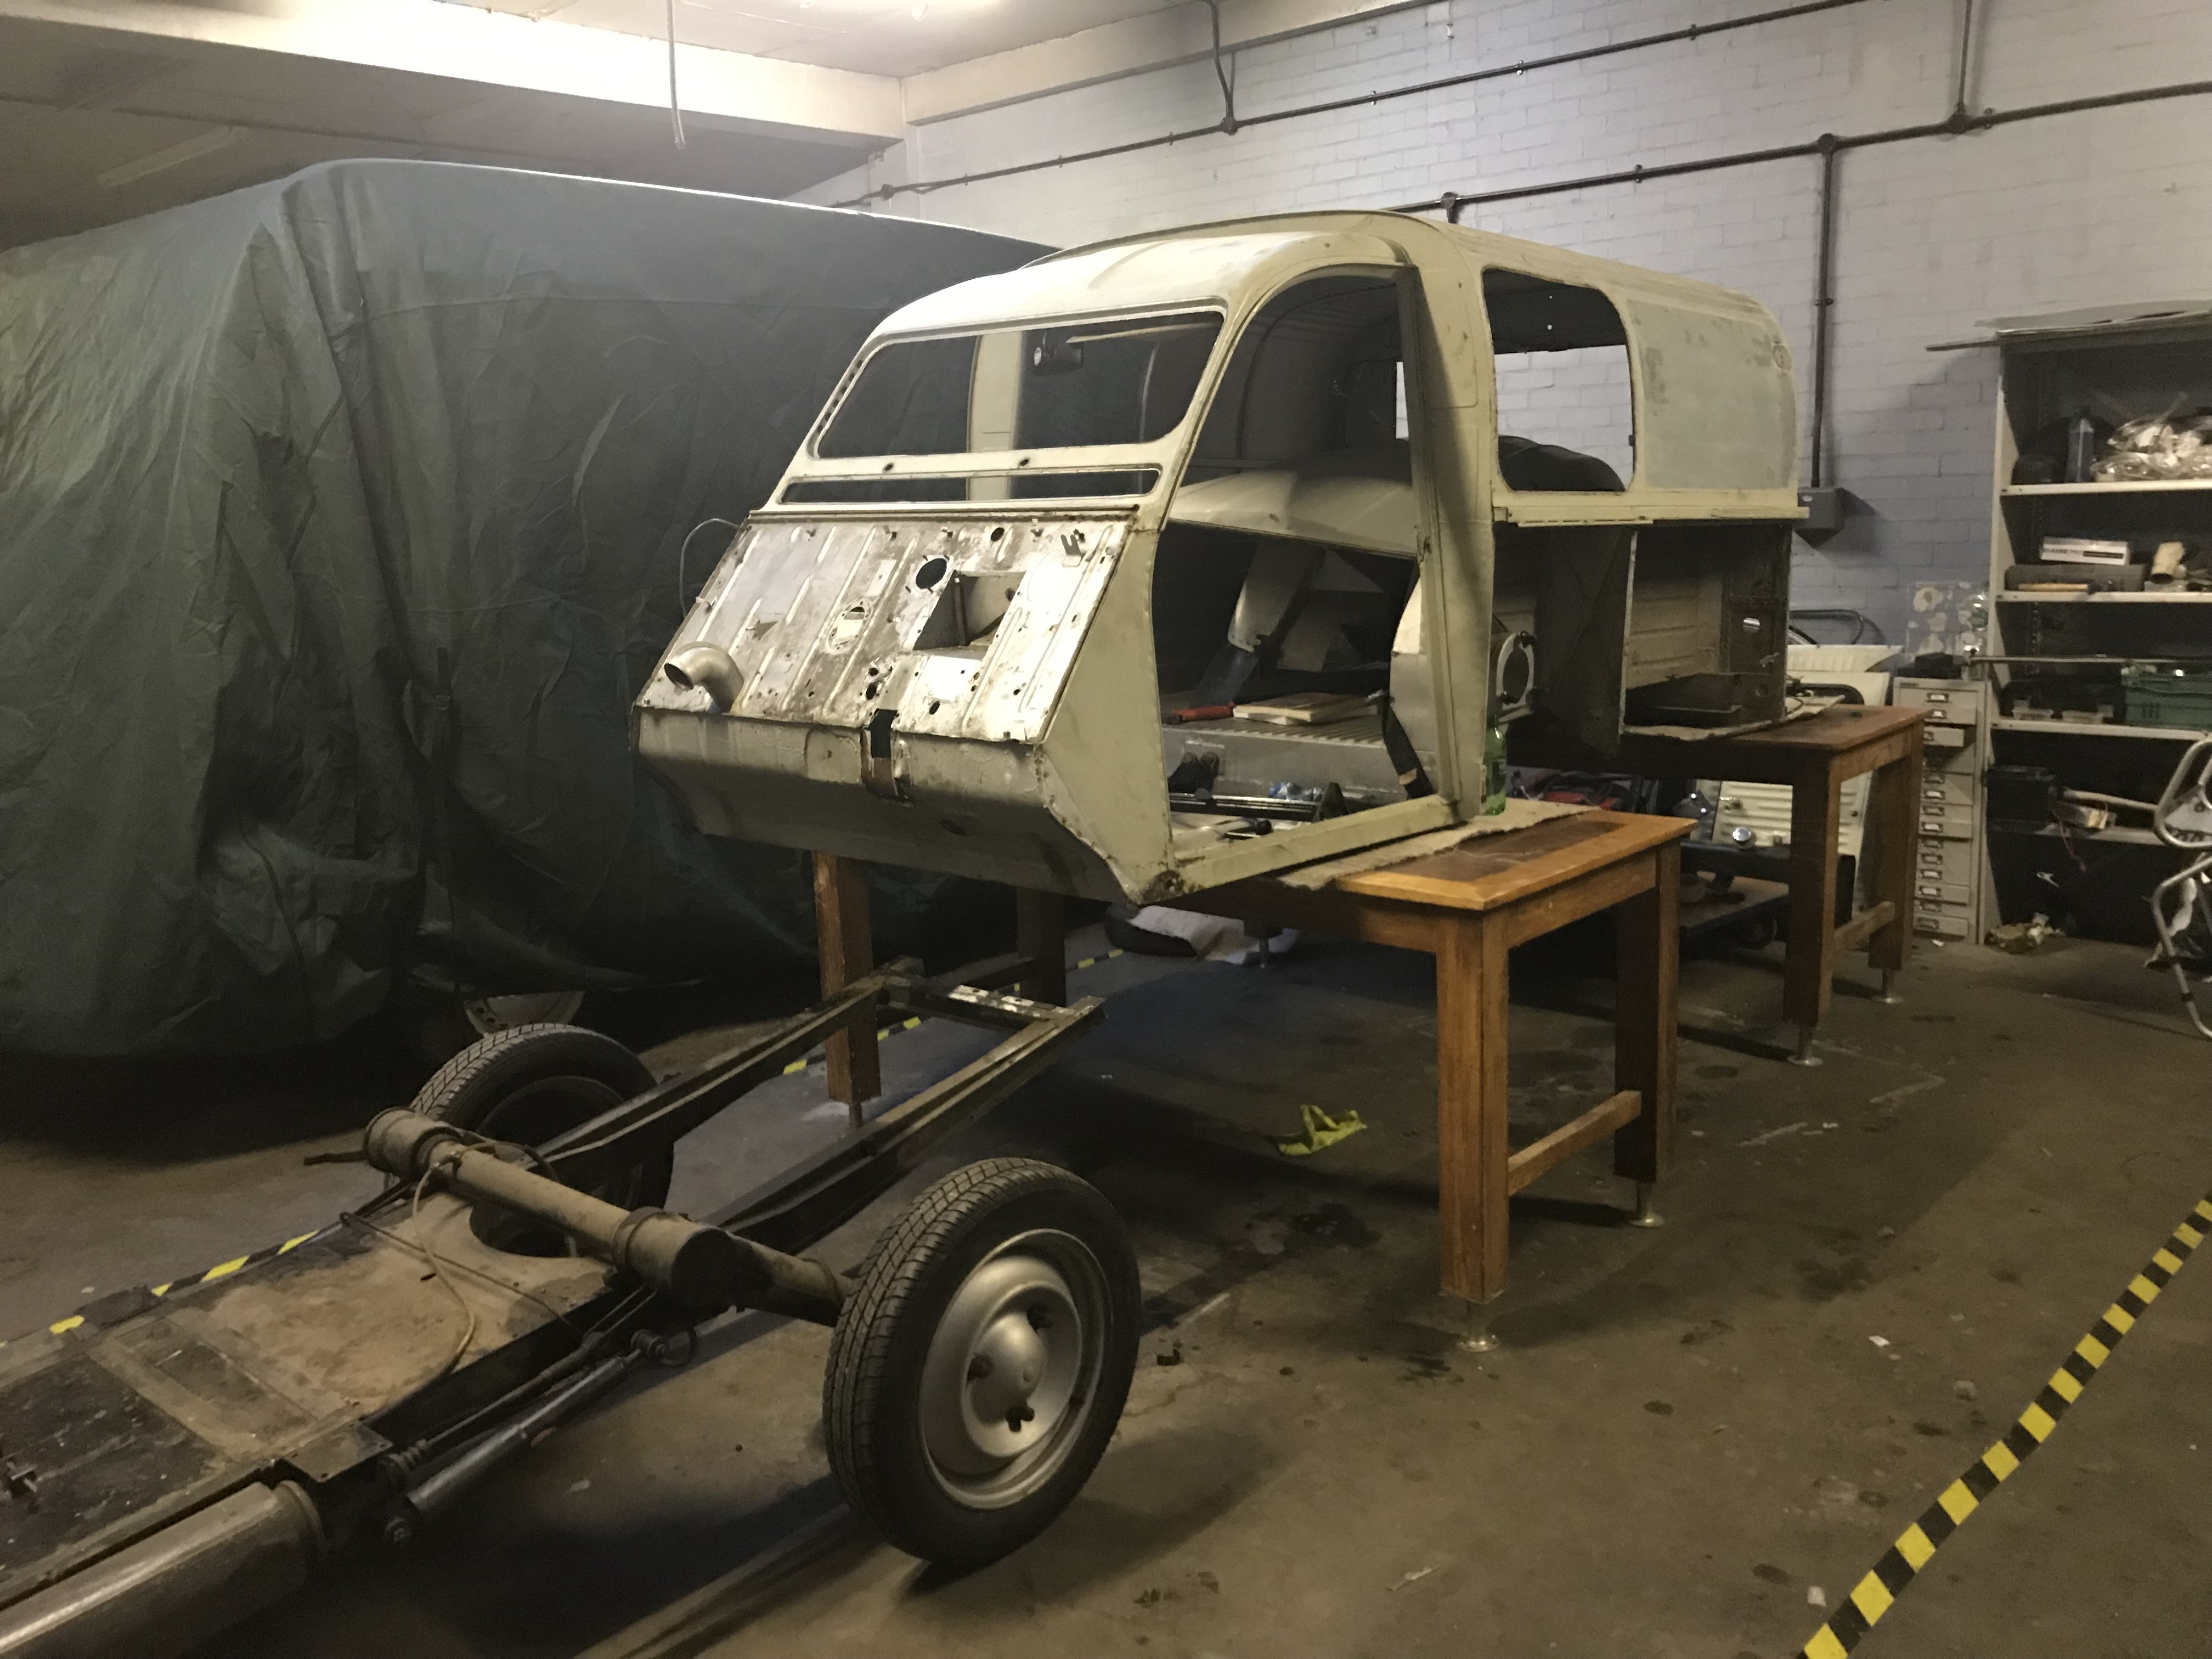
Body off
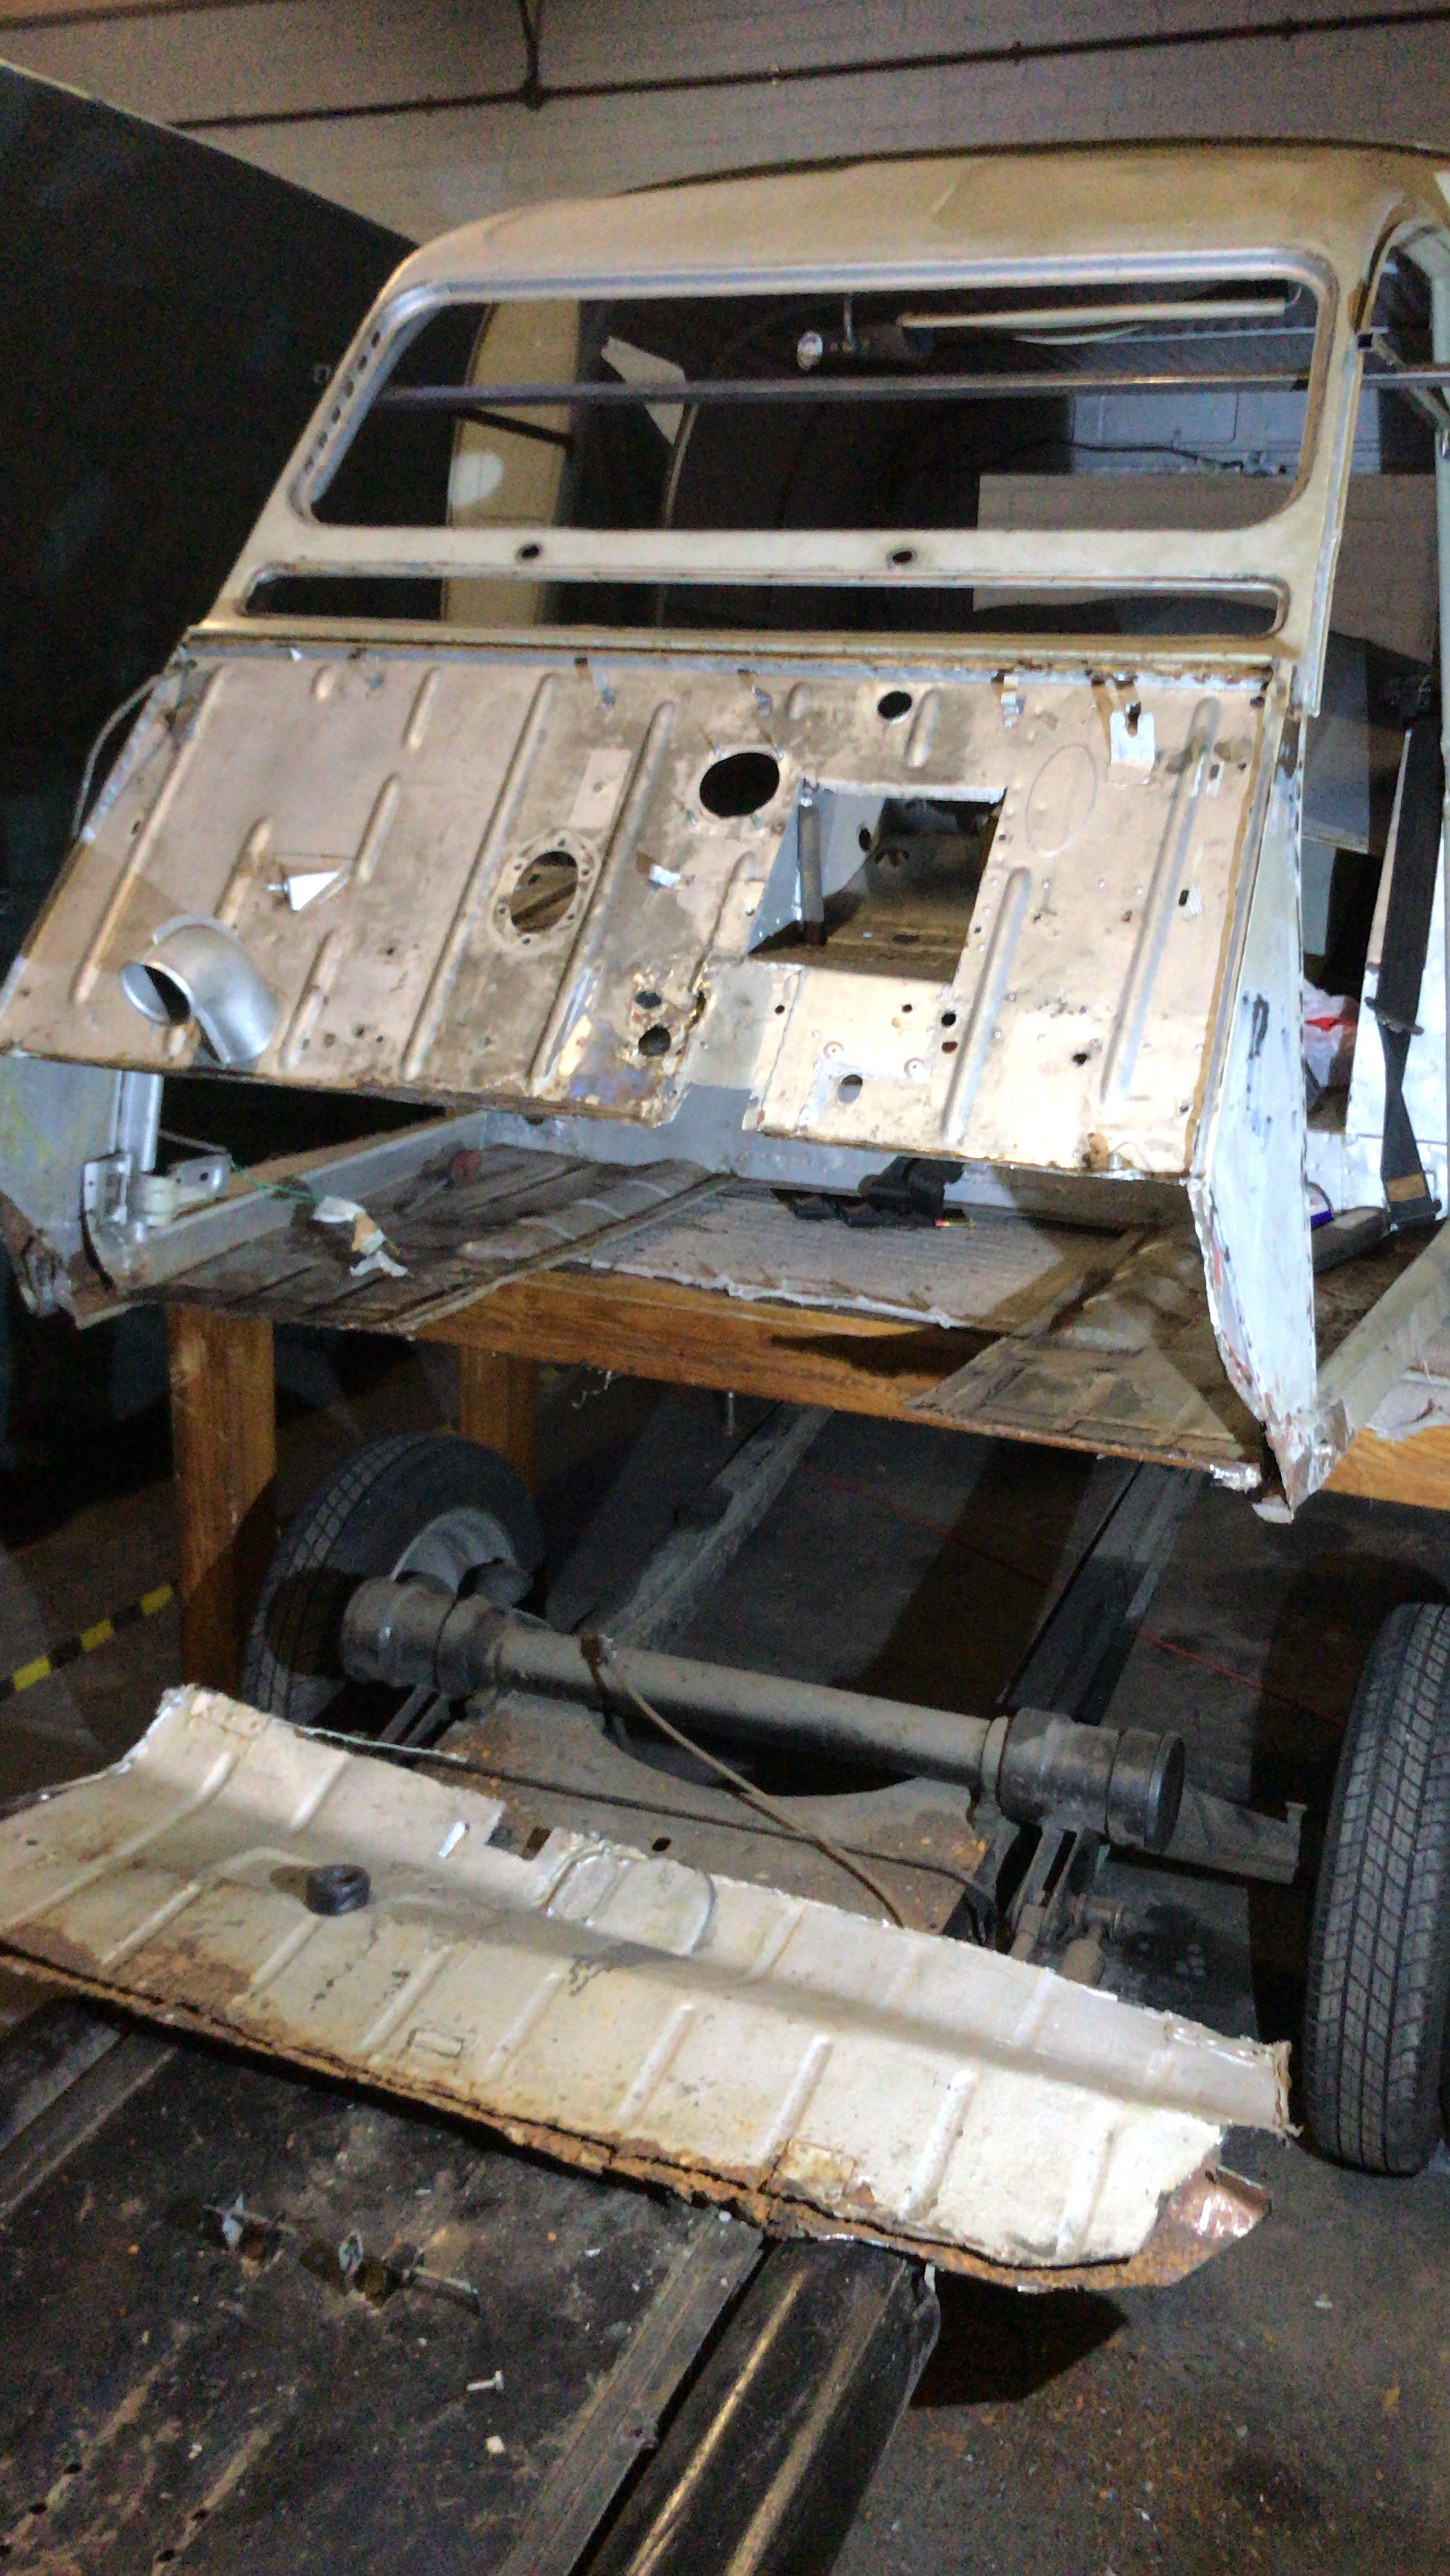
This is the bare shell lifted off the chassis Luckily it’s not very heavy and with the help of friends Pete and Steve (who I’d invited down to the workshop to see how I’m getting on) peeled the body off the chassis and sat it on a couple of tables. This enabled me to wheel the chassis, complete with engine, gearbox and wheels out from underneath the body so we could get a better look at it. ‘It’s not too bad’ declared Pete. Steve’s silence was palpable. I began to question my own sanity, wondering how on earth I was going to fix it all. Having restored a Triumph Spitfire a few years ago, I knew that there were horrors lurking underneath the benign exterior. Like most cars, the 2CV rusts along the seams and from the inside out, so by the time you see the signs of rust showing, its already well established and the damage can be quite extensive. All the old rust really has to be cut out and replaced with good metal. It’s no good just covering it up.
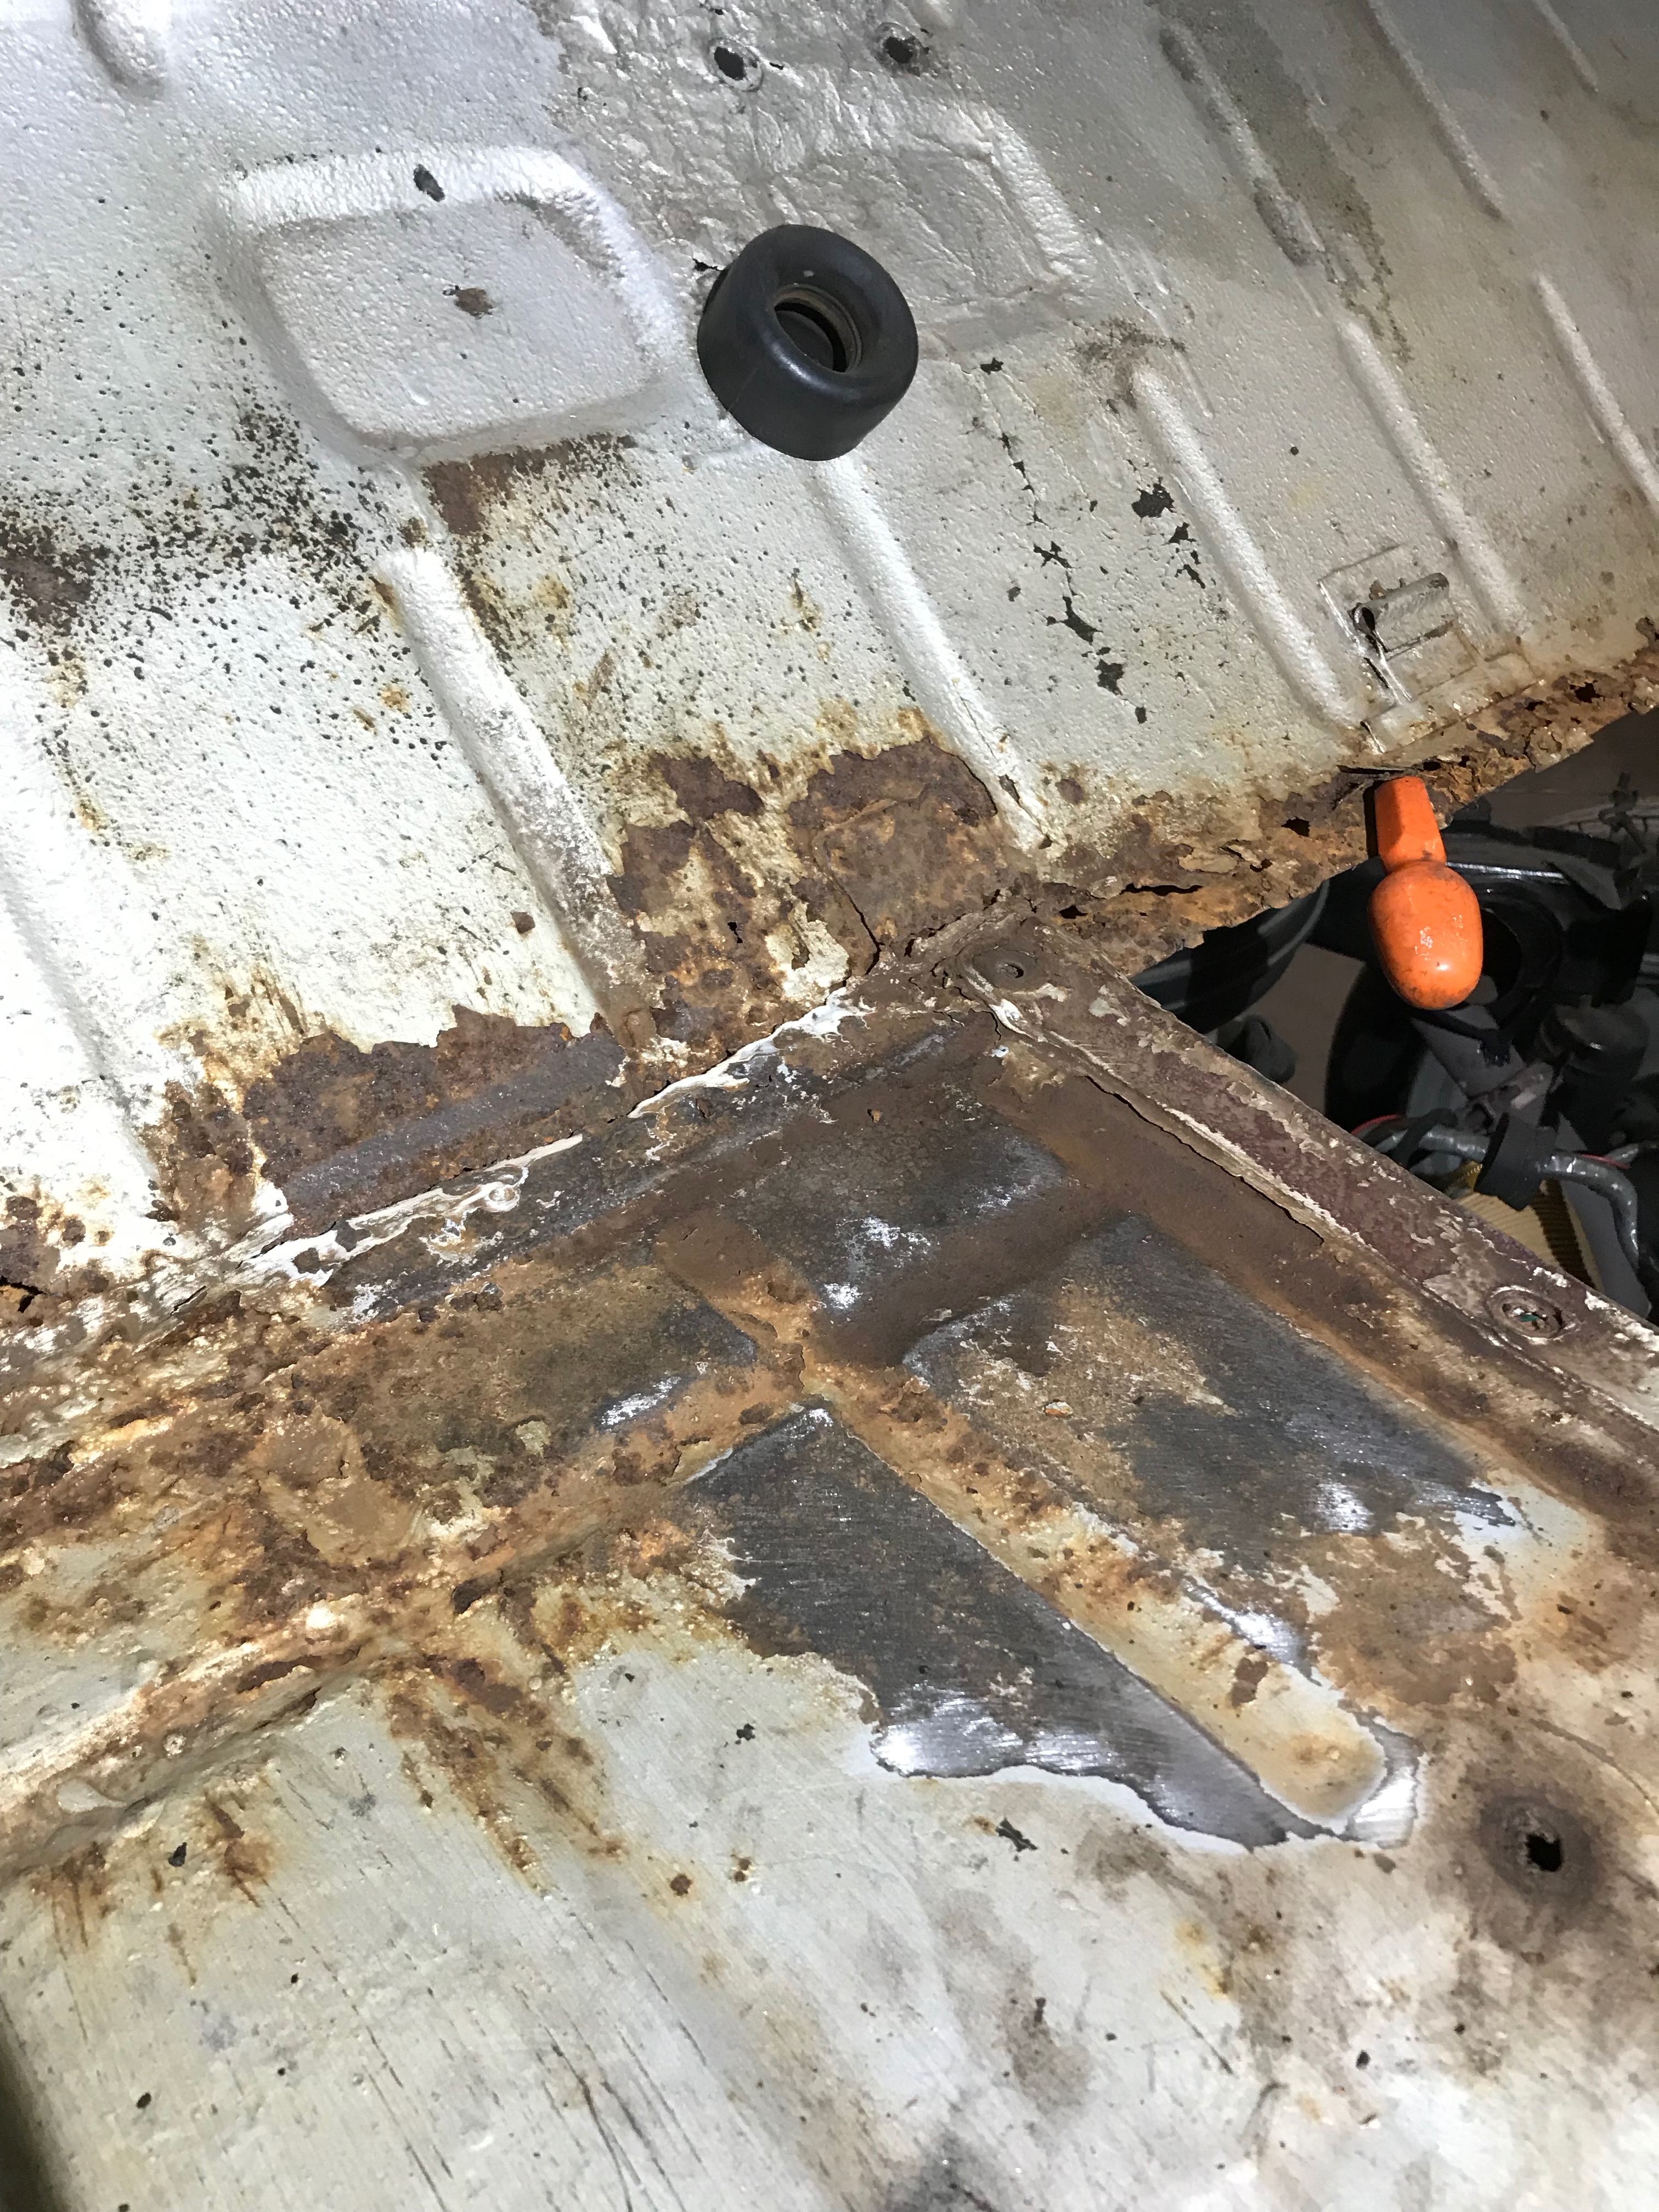
Cutting out the rusty bits
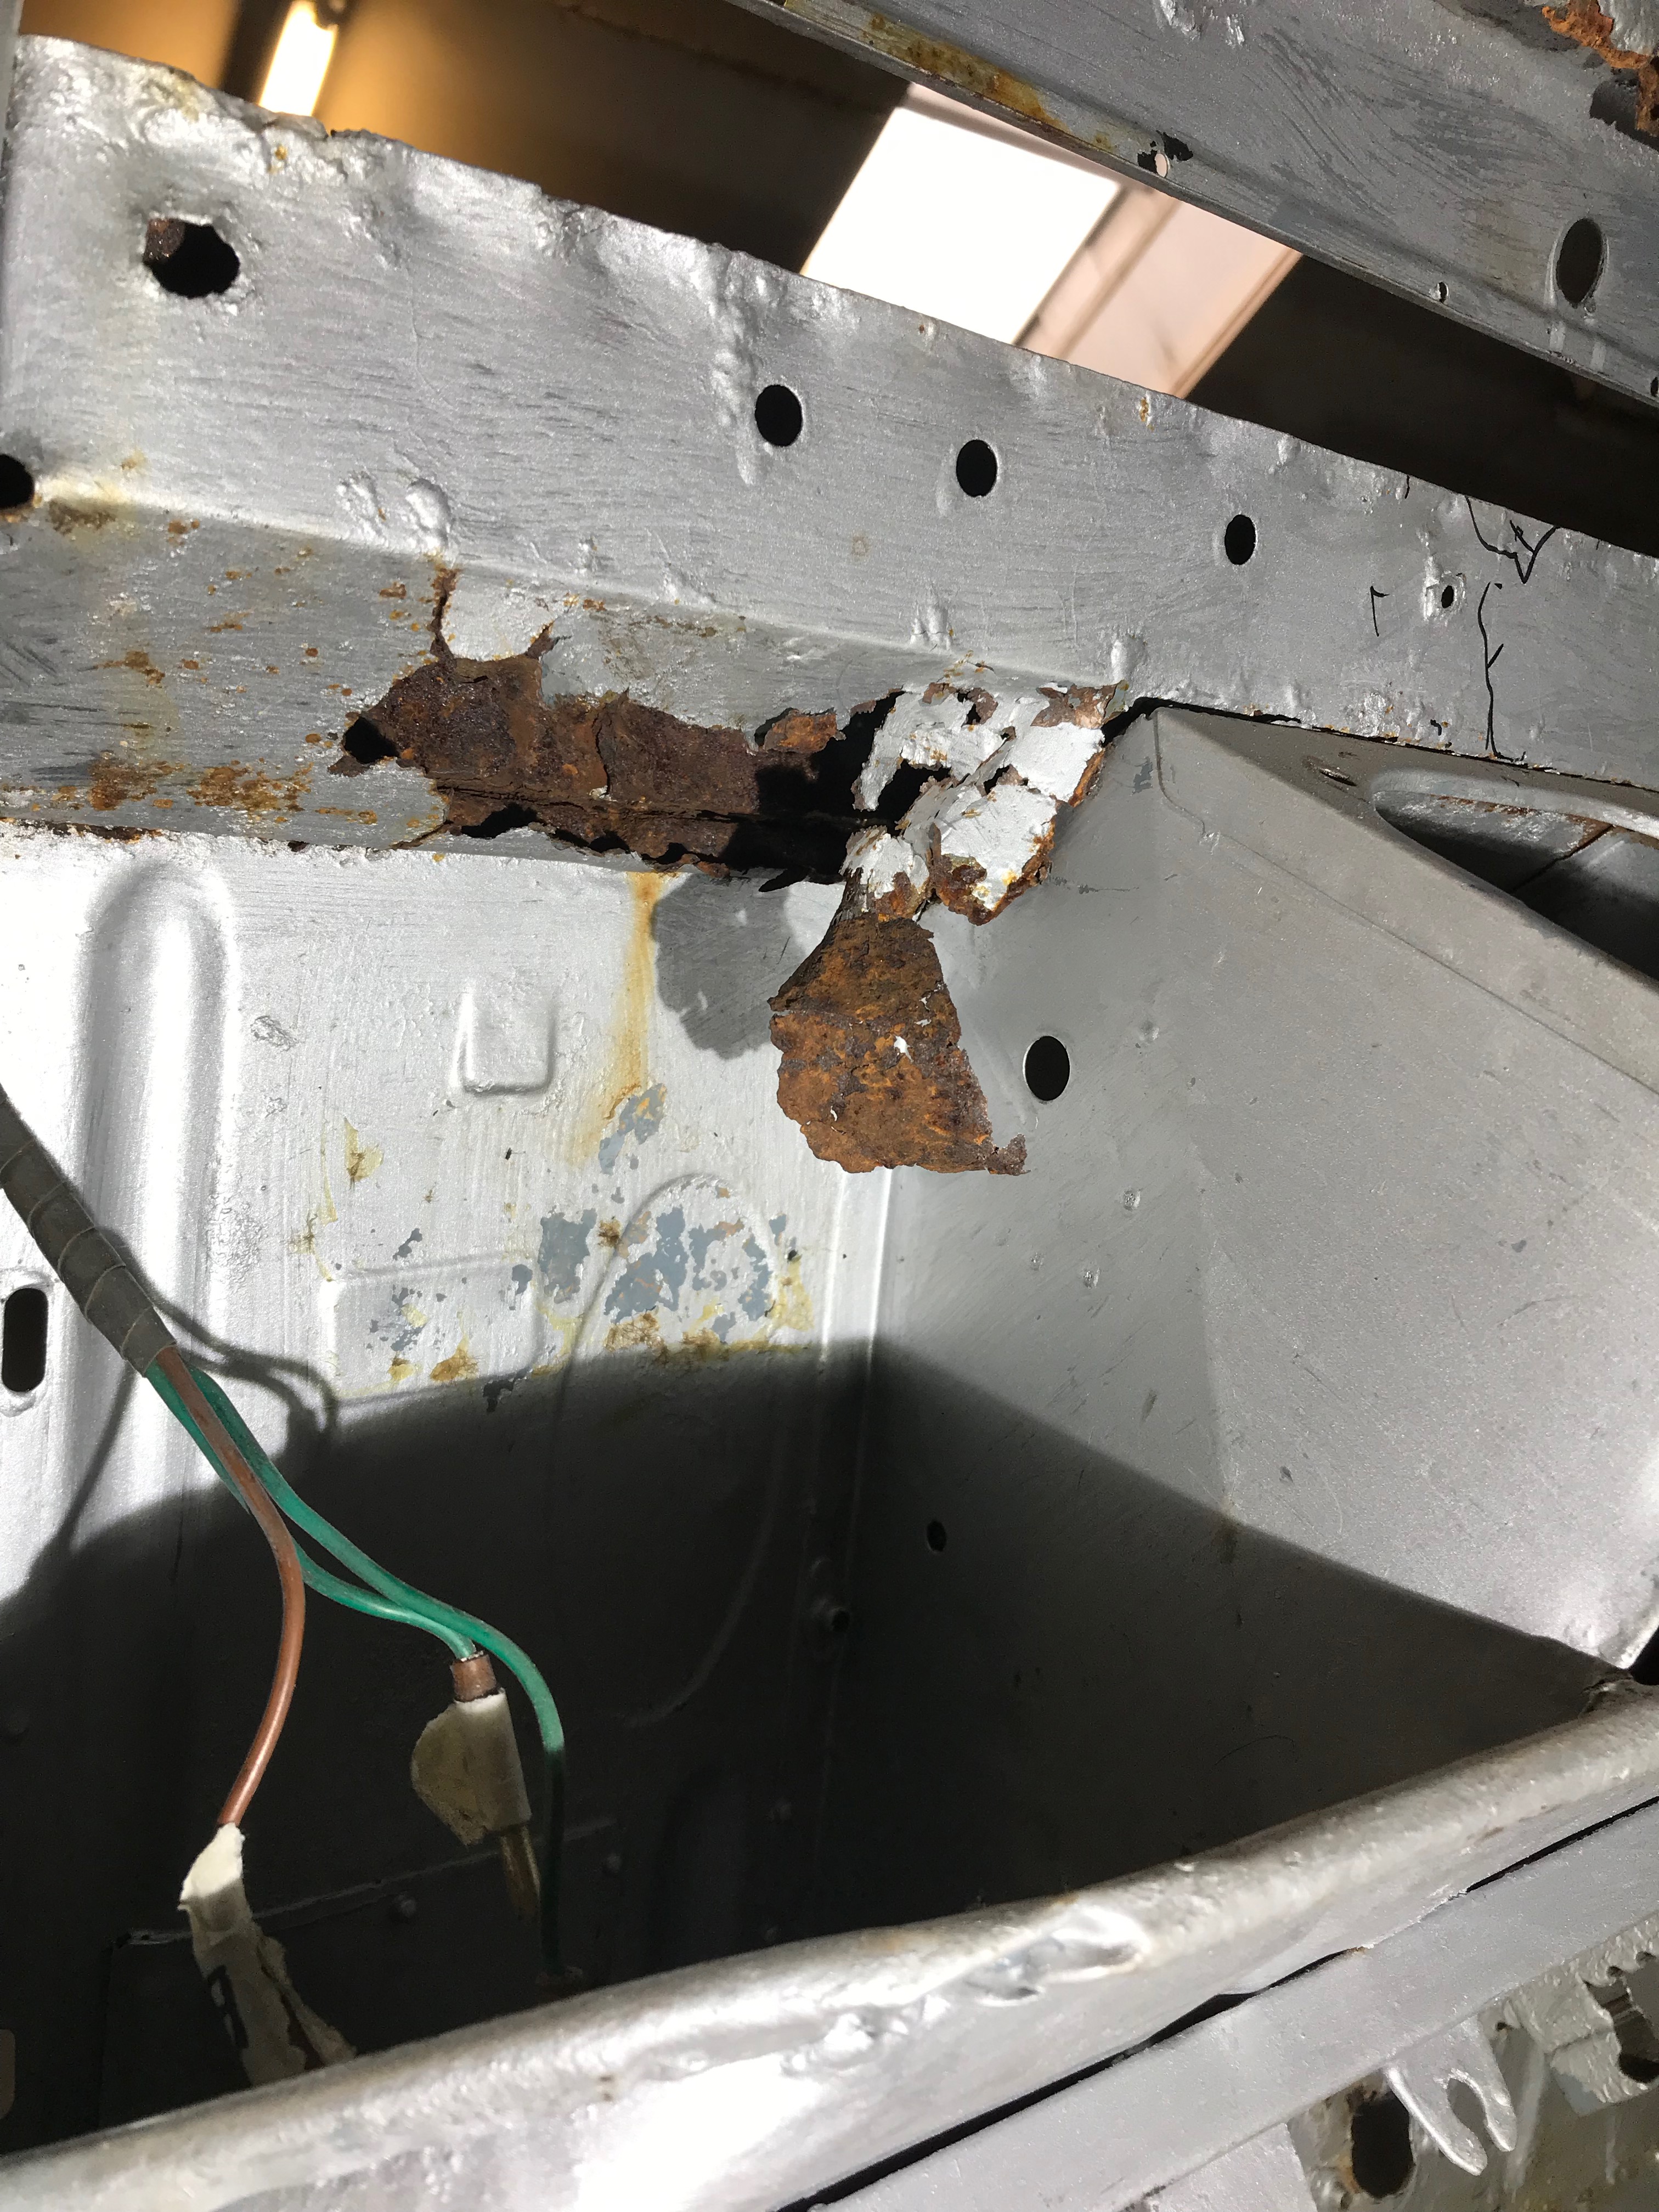
Here’s a good example of what happens when water seeps into a seam where 3 bits of sheet metal are spot welded together. It looks ok, feels a bit crunchy and can’t possibly need anything more than a good wire brush and a coat of hammerite. Well, if it was a garden gate or wheelbarrow I’d be inclined to agree. When it’s the only thing between you and getting acquainted with the engine and gearbox in the event of a front end shunt, it doesn’t really cut the mustard if there’s even a hint of corrosion on show.
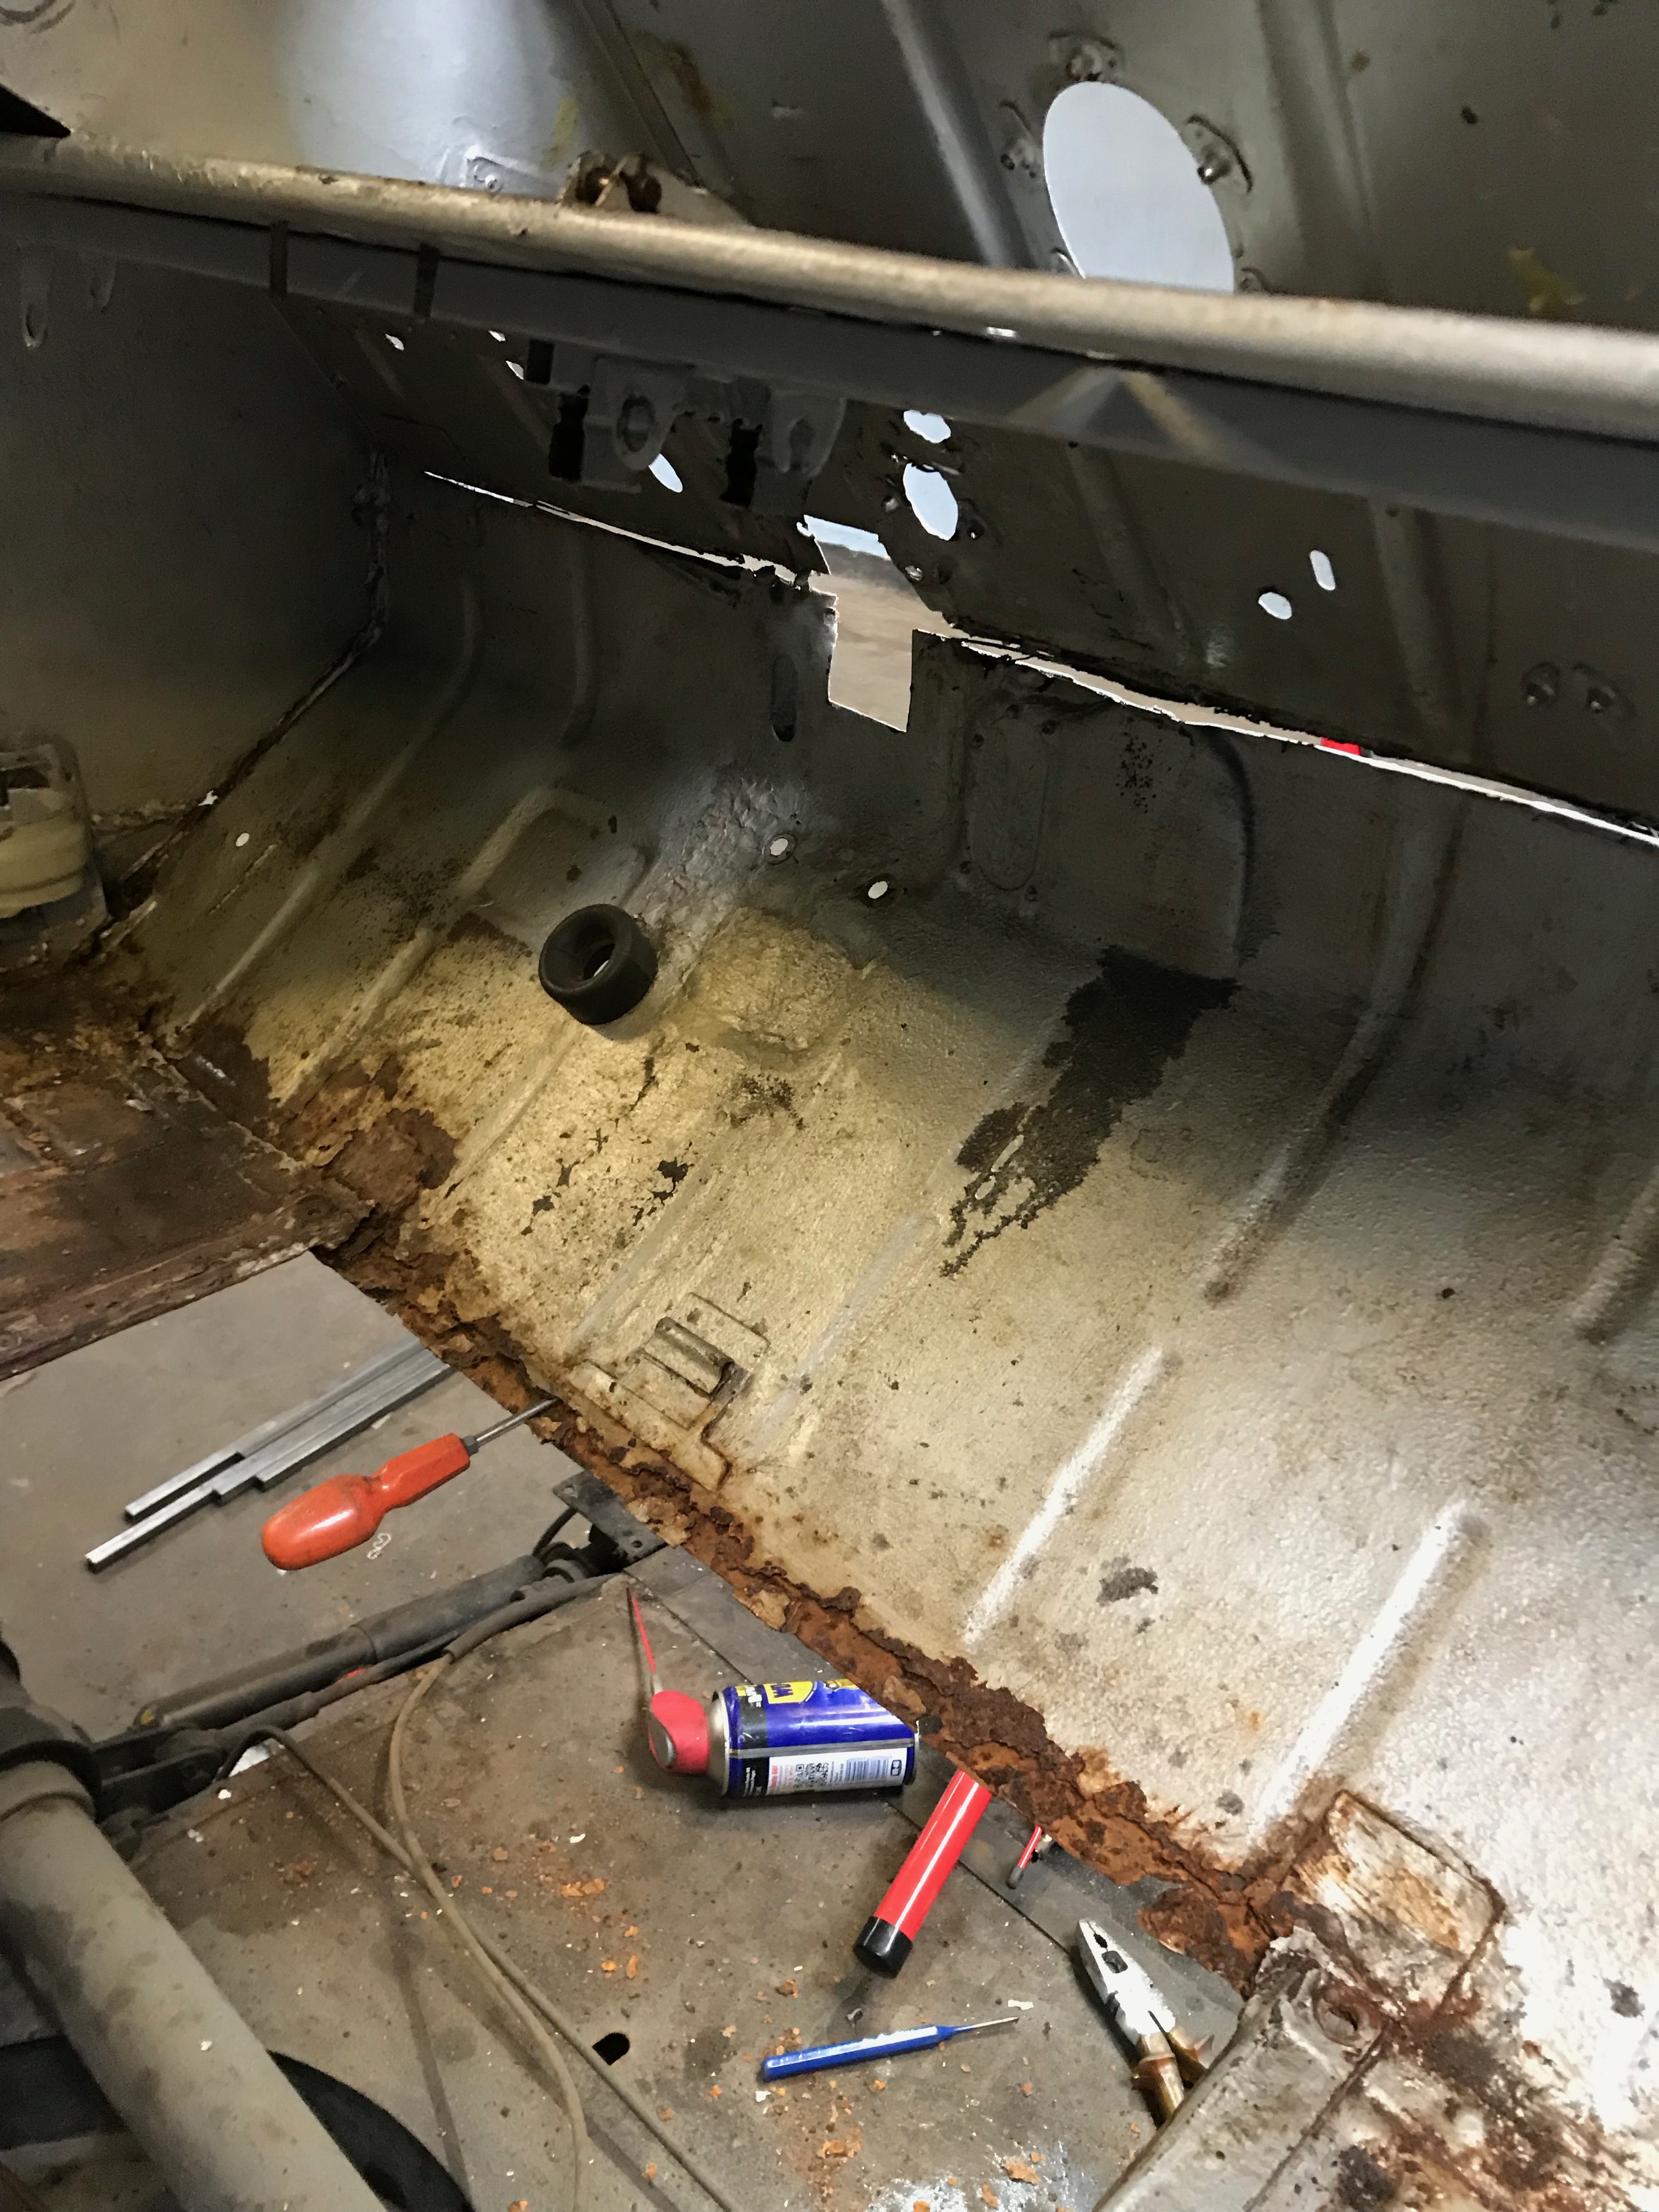
This bulkhead assembly is a double skinned panel which is spot welded every inch or so along each seam – top, bottom, each side and inside. That’s an awful lot of spot welds to drill out. As I’m going to replace the entire panel, I decided to cut it out with the angle grinder, except for where it joins the A panels (left and right sides). For the sides, I drilled and unpicked the spot welds, because I was pretty convinced that the A panels were ok – they certainly looked ok…
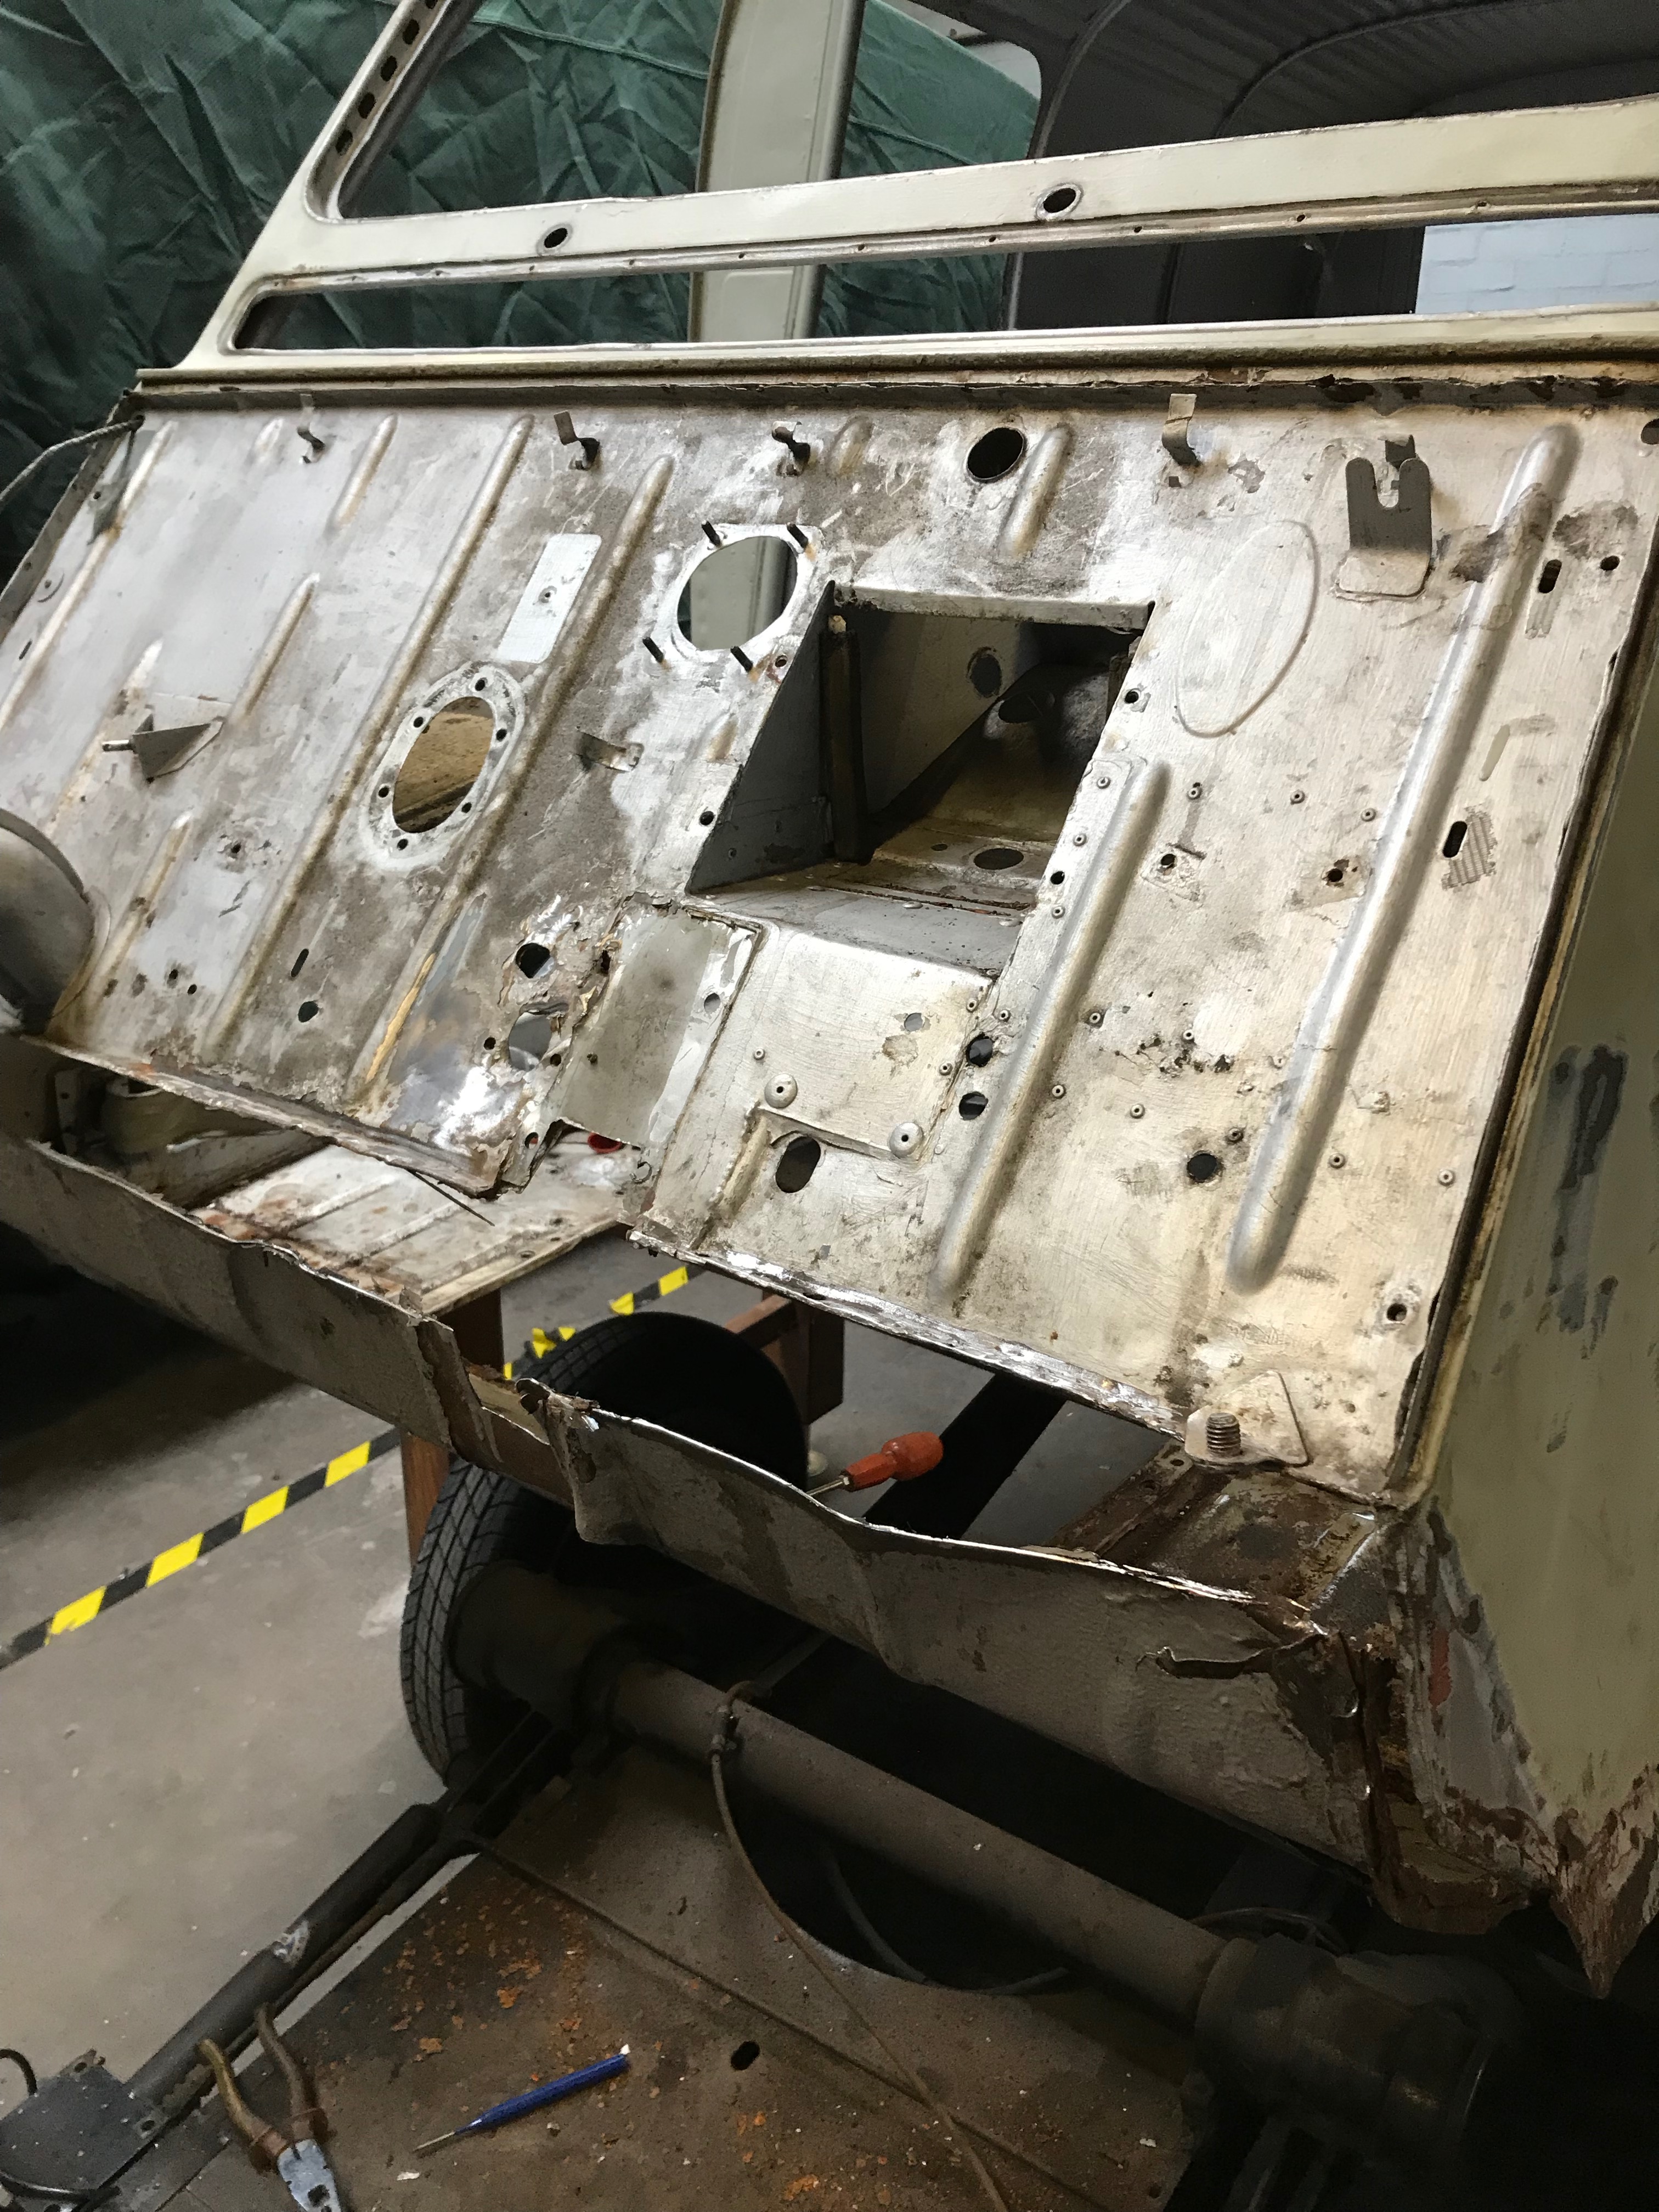
A batch of new panels arrived today. New complete bulkhead, floor repair panels, windscreen and ventilation flap panel and a few other bits and bobs. I’d been convinced I didn’t need to replace the A panels, but when I took the bulkhead out and looked inside, I could see that the for the sake of more time and bit of extra money it would be stupid not to chop out and replace the A panels as well. So there we are, a lesson learned.
Putting the new bulkhead in will be first. I’m not convinced I can save the firewall – the leading edge where the windscreen joins it is extremely thin and I think it will be difficult to weld to. There’s a bit more metal to weld the bulkhead to. Maybe I can make up a new flange. That metal folder would be really handy right now
